Are you thinking of bringing the elegance of calla lilies into your outdoor space? With their striking white blooms and sleek, trumpet-shaped flowers, it’s no wonder why these beauties are a popular choice for gardeners. But before you plant them outside, have you wondered if they’ll thrive in your yard? Can calla lilies be planted outside, or do they need to stay indoors where it’s warm and cozy? In this article, we’ll explore the best practices for planting and caring for calla lilies outside, including choosing the perfect location, preparing the soil, and protecting against pests and diseases. By following our tips and tricks, you can enjoy these stunning flowers in your garden all year round.
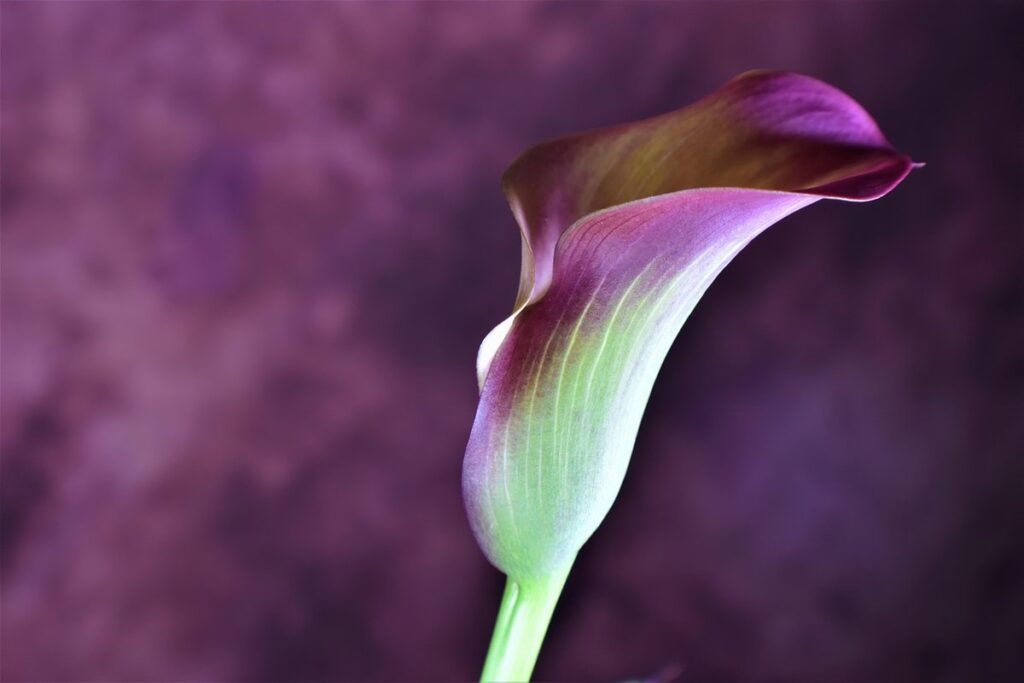
Understanding Calla Lilies: A Brief Overview
Before we dive into whether calla lilies can thrive outside, let’s take a brief look at what makes these elegant flowers tick.
Characteristics of Calla Lilies
Calla lilies are native to southern Africa and Australia, where they thrive in well-drained soil and full sun. In their natural habitat, these plants grow from 2-6 feet tall, depending on the variety, with elegant white or bi-colored blooms that can reach up to 10 inches in diameter. When planted outdoors, calla lilies prefer a slightly acidic to neutral soil pH, ranging from 5.5 to 7.0.
If you’re planning to plant a calla lily outside, it’s essential to consider its hardiness zone. Calla lilies are typically hardy in zones 9-11, although some varieties can tolerate cooler temperatures down to zone 8. In areas with frost, it’s recommended to dig up the bulbs and store them indoors during winter or protect them with a thick layer of mulch.
Keep in mind that outdoor-grown calla lilies may not produce as many blooms as those grown indoors, where conditions are more controlled. However, with proper care and attention, they can still provide beautiful flowers and add a touch of elegance to your garden or patio.
Types of Calla Lilies Suitable for Outdoor Planting
When it comes to planting calla lilies outdoors, some varieties are more suitable than others. ‘Conca d’Or’, for instance, is a popular choice for outdoor gardens due to its vibrant orange blooms that thrive in full sun. This variety is relatively low maintenance and can tolerate extreme temperatures, making it perfect for gardeners who want to add a pop of color to their yard.
Another variety worth considering is ‘Snow King’, which boasts beautiful white blooms with delicate yellow tips. This calla lily is known to be more tolerant of wet conditions than some other varieties, making it an excellent choice for gardens with high rainfall or those that tend to stay moist.
Lastly, ‘Royal Velvet’ offers deep red blooms with a velvety texture, adding a dramatic touch to any outdoor space. It prefers well-draining soil and full sun to partial shade, but its rich color will make it stand out in even the most shaded areas. When choosing a calla lily for outdoor planting, be sure to select a variety that matches your specific climate and garden conditions to ensure optimal growth and blooming.
Preparing the Soil for Outdoor Planting
Before planting your calla lily outside, it’s essential to prepare the soil by loosening and aerating it to a depth of at least 12 inches. This simple step can make all the difference in your plant’s success.
Choosing the Right Location
When choosing a location for planting calla lilies outside, it’s essential to consider two critical factors: sunlight and soil conditions. These bulbs need full sun to partial shade, depending on the variety, but generally prefer at least six hours of direct sunlight per day. If you’re planning to plant in a shaded area, choose a spot that receives indirect sunlight or dappled shade.
Soil conditions are equally crucial for calla lilies’ growth and well-being. These plants thrive in slightly acidic soil with good drainage, which means avoiding areas with standing water or heavy clay soils. Test your soil pH level before planting to ensure it’s between 6.0 and 7.0. If necessary, amend the soil by adding organic matter like compost or perlite.
Consider the mature size of the plant when selecting a location. Calla lilies can grow up to 2-3 feet tall, so choose a spot that provides enough space for the plant’s growth without overcrowding nearby plants or structures.
Preparing the Soil: pH Levels and Nutrient Requirements
Calla lilies thrive in well-draining soil with a slightly acidic to neutral pH level. Ideally, the pH should range between 6.0 and 7.0, which is close to the natural acidity of most outdoor soils. To ensure optimal growth, it’s essential to check your soil’s pH level before planting.
If your soil tests above 7.5 or below 6.0, you’ll need to amend it. Adding sulfur or elemental sulfur will lower the pH, while dolomitic limestone or calcitic limestone will raise it. Be cautious not to over-correct, as this can lead to nutrient deficiencies. For example, if your soil is too alkaline, adding excessive lime can cause manganese and iron deficiencies.
Calla lilies require a balanced fertilizer with equal parts nitrogen (N), phosphorus (P), and potassium (K) for optimal growth. A slow-release fertilizer will provide nutrients throughout the growing season without burning the roots. You can also mix in compost or well-rotted manure to enrich the soil with beneficial microbes and organic matter.
It’s also crucial to consider micronutrients, such as magnesium and sulfur, which are essential for calla lily growth. A balanced fertilizer will provide these micronutrients, but you may need to supplement with additional products if your soil is lacking.
Planting Calla Lilies Outside
To successfully plant calla lilies outside, you’ll need to choose a spot with full sun and well-draining soil that’s protected from harsh winds. Let’s dive into the specifics of outdoor planting.
Planting at the Right Time
When planting calla lilies outside, timing is everything. You’ll want to choose a time that allows the plant to establish itself before the heat of summer sets in. In most regions, this means planting in early spring or fall, when temperatures are mild and rainfall is more consistent.
In areas with frost, it’s essential to wait until after the last frost date has passed before planting calla lilies outside. This typically occurs around late April or early May in USDA zones 8-10, and can be as late as June in colder climates. On the other hand, if you live in a region with hot summers, consider planting in the fall when temperatures are cooler.
Before planting, check the soil temperature to ensure it’s not too cold for calla lily roots to grow. Aim for a soil temperature between 60°F and 70°F (15°C-21°C). If your area has a long growing season, you can also consider planting in late winter or early summer, but be aware that this may require more frequent watering.
Remember to check the specific climate and frost dates for your region before planting. This will ensure your calla lily gets off to a strong start and thrives in its outdoor environment.
Planting Techniques: Depth and Spacing
When planting calla lilies outside, it’s essential to get the technique right to ensure they thrive. The ideal depth and spacing will significantly impact their growth and overall appearance.
For optimal growth, plant calla lily bulbs 2-3 inches deep in well-draining soil. This allows for sufficient moisture retention while preventing waterlogged soil conditions that can lead to rot. When planting multiple bulbs, space them 12-18 inches apart to give each bulb room to grow without competing for resources.
Keep in mind that over-crowding can reduce blooming and increase the risk of disease transmission between plants. On the other hand, under-spaced calla lilies may require more frequent watering due to increased soil evaporation. Consider planting in a location with partial shade to moderate sunlight exposure, as this will also contribute to healthy growth.
When digging the planting site, gently firm the surrounding soil to prevent settling and erosion. Finally, water thoroughly after planting and keep the area consistently moist during the first growing season. With proper care and attention, your calla lilies should flourish in their outdoor environment.
Caring for Calla Lilies Outside
To enjoy your calla lily outdoors year-round, you’ll need to give it some extra care to thrive in different seasons and weather conditions. This section will walk you through what that entails.
Watering Requirements
When planting calla lilies outside, it’s essential to understand their watering requirements. These plants are native to tropical regions and prefer well-draining soil, making them susceptible to root rot if the soil is too moist.
Water your calla lily when the top 1-2 inches of soil feels dry to the touch. This can be daily during hot summer months, but reduce frequency in cooler weather. Water thoroughly, allowing excess water to drain from the pot or garden bed. A good rule of thumb is to provide about 1 gallon of water per plant.
However, overwatering can lead to root rot, a common issue when growing calla lilies outside. To avoid this, ensure good air circulation around the plants and inspect the soil regularly. If you notice yellowing leaves or soft stems, it may be a sign that the roots are rotting due to excess moisture.
Keep an eye on weather forecasts and adjust your watering schedule accordingly. In areas with high rainfall, consider elevating your calla lilies to prevent waterlogged soil. By striking the right balance between water supply and drainage, you can enjoy thriving calla lily plants outside.
Fertilization and Mulching Tips
When it comes to fertilizing and mulching calla lilies outside, timing is everything. Fertilize your calla lily in early spring, just as new growth begins to emerge from the tuber. Use a balanced, water-soluble fertilizer (20-20-20) according to the manufacturer’s instructions. This will provide essential nutrients for healthy growth and flowering.
For mulching, choose a thick layer of organic material like bark chips or pine straw. Apply it around 3-4 inches deep and keep it several inches away from the base of the plant. Mulch helps retain moisture, suppress weeds, and regulate soil temperature. It’s also an excellent way to prevent pests like slugs and snails.
Additionally, make sure not to over-fertilize or use high-nitrogen fertilizers, as this can lead to weak, floppy growth and an increased risk of pests and diseases. Monitor your calla lily regularly for signs of nutrient deficiencies, such as yellowing leaves or stunted growth. Adjust your fertilization schedule accordingly.
Remember, mulching is not a one-time task. Replenish the mulch layer annually to maintain its effectiveness. By following these simple tips, you’ll be well on your way to growing healthy and thriving calla lilies in your outdoor garden.
Common Challenges and Solutions
When planting a calla lily outside, you may encounter some common challenges that can make it difficult to keep your plant thriving. Let’s explore these issues together and find solutions to overcome them successfully.
Pests and Diseases: Identification and Control
As you explore planting calla lilies outside, it’s essential to be aware of the common pests and diseases that can affect these beautiful flowers. Outdoors, calla lilies are more vulnerable to pests like aphids, whiteflies, and slugs, which can cause damage to leaves and blooms. Aphids, for instance, are small, soft-bodied insects that feed on sap, leaving behind a sticky substance called honeydew.
To identify an infestation, look for curled or distorted leaves, yellowing stems, or actual aphid colonies. For control, use neem oil or insecticidal soap to spray the affected areas, making sure to follow the product’s instructions. Slugs, on the other hand, are nocturnal pests that can eat through calla lily leaves and flowers overnight.
Common diseases include powdery mildew, which appears as a white powder on leaves, and root rot caused by overwatering or poor drainage. To prevent these issues, maintain good air circulation around your plants, water carefully, and avoid overhead watering to minimize the risk of fungal diseases like powdery mildew. Regularly inspect your calla lilies for signs of pests or disease, and take action promptly if you notice any problems.
Weather-Related Issues: Heat Stress and Frost Damage
When planting calla lilies outside, you’ll inevitably face weather-related challenges like heat stress and frost damage. To mitigate these issues, it’s essential to understand the plant’s needs and take proactive measures.
Heat stress is a common problem during scorching summers when temperatures soar above 90°F (32°C). Calla lily leaves may turn yellow or brown due to dehydration, while flowers may wilt prematurely. To combat heat stress, provide your calla lilies with some afternoon shade, especially in areas with intense sunlight. Mulching around the plants can also help retain moisture and regulate soil temperature.
On the other hand, frost damage is a concern during winter months when temperatures drop below freezing. Young or newly planted calla lilies are more susceptible to frost damage. To protect your calla lilies from frost, cover them with a thick layer of organic mulch or apply anti-desiccant sprays to their leaves. Keep in mind that these plants can tolerate some frost, but prolonged exposure will cause irreparable damage.
In areas with extreme weather conditions, it’s crucial to choose calla lily varieties that are more resistant to heat and cold. Some popular varieties like ‘Snowtop’ and ‘Frosted Velvet’ show excellent tolerance to both high temperatures and frost.
Tips for Seasonal Care
To ensure your calla lily thrives outside year-round, follow these simple tips for seasonal care to maximize its health and longevity. This includes adjusting watering and fertilization schedules according to the season.
Summer Care: Deadheading and Fertilization
As summer sets in, it’s essential to continue providing your calla lilies with proper care to promote continued blooming. One of the most crucial tasks during this season is deadheading – removing spent flowers from the plant.
Deadheading not only maintains the plant’s appearance but also encourages new blooms. To do this effectively, gently grasp the flower stem just above a leaf node and twist it counterclockwise until it comes off. This will prevent seed production and direct energy towards developing fresh flowers.
Another critical aspect of summer care is fertilization. Calla lilies benefit from regular feeding with a balanced fertilizer during the growing season (spring-fall). Use a water-soluble, 20-20-20 NPK formula every two weeks to provide essential nutrients for continued growth and blooming.
Some examples of excellent fertilizers suitable for calla lilies include Miracle-Gro or Scotts Osmocote. Follow the manufacturer’s instructions for the correct application rates to avoid over-fertilizing, which can cause more harm than good.
Regular deadheading and fertilization will ensure your calla lily continues to thrive and bloom throughout the summer months.
Fall and Winter Care: Dormancy and Protection
As we transition from summer to fall and winter, it’s essential to prepare your calla lilies for dormancy. This process will help protect the plants from frost damage and ensure their survival until the next growing season.
In regions with frost, bring potted calla lilies indoors or move them to a protected area such as a garage or sunroom. If this isn’t possible, consider using a frost blanket to cover the plant and prevent damage. In milder climates, you can dig up the tubers and store them in a cool, dry place.
Cut back any dead or dying foliage to about 2-3 inches from the base of the plant. This will help conserve energy and reduce the risk of rot. Apply a layer of mulch around the base of the plant to retain moisture and regulate soil temperature. Finally, water sparingly during this period, allowing the tubers to dry slightly between waterings.
By following these steps, you’ll be able to protect your calla lilies from frost damage and help them thrive when the weather warms up again in spring.
Frequently Asked Questions
Can calla lilies be grown in containers outside?
Yes, calla lilies can thrive in containers outside as long as they receive the right amount of sunlight, water, and nutrients. Choose a container with good drainage and use a well-draining potting mix to prevent root rot.
What if I live in an area with freezing winters? Can I still plant calla lilies outside?
Yes, you can still plant calla lilies outside in areas with cold winters, but you’ll need to take extra precautions. Choose varieties that are hardy down to your local frost zone and bring the plants indoors or provide protection from harsh winds and extreme temperatures during winter months.
How often should I water my outdoor calla lily?
Water your outdoor calla lily when the top 1-2 inches of soil feel dry to the touch. Avoid overwatering, which can lead to root rot and other problems. Water at the base of the plant to prevent washing away nutrients from the soil.
Can I plant calla lilies in areas with poor drainage?
While calla lilies prefer well-draining soil, you can still grow them in areas with poor drainage by using raised beds or containers with good drainage. Add organic matter like compost to improve soil structure and increase water retention.
How do I protect my outdoor calla lily from pests and diseases?
Regularly inspect your plant for signs of pests or diseases, such as aphids, spider mites, or fungal infections. Use neem oil or insecticidal soap to control pest infestations, and remove any infected leaves or stems to prevent the spread of disease.