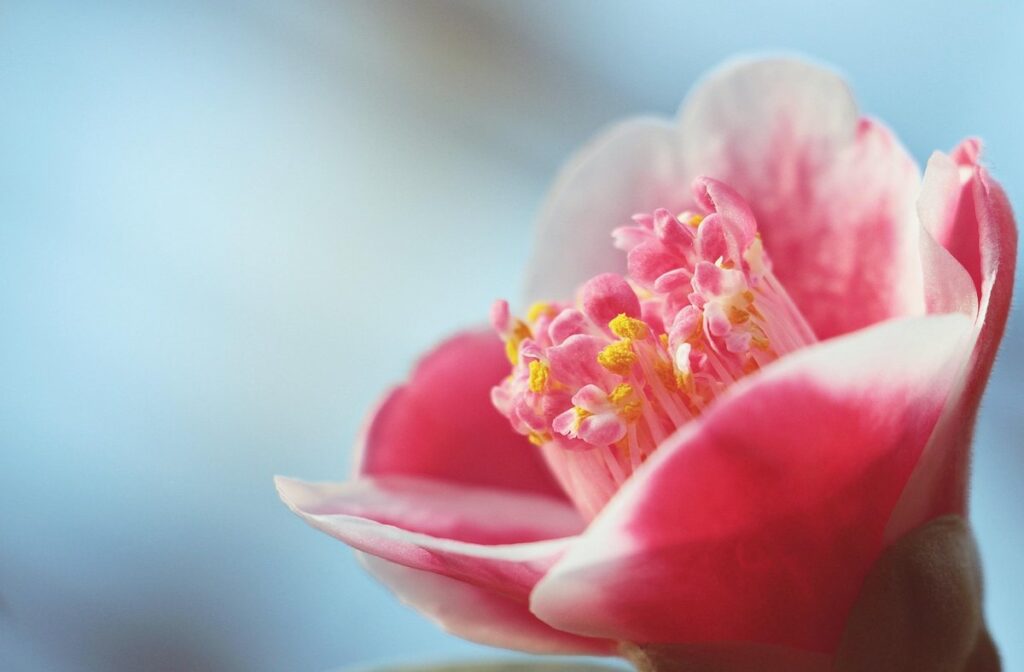
As we welcome the chilliest months of the year, many of us are surprised to see vibrant flowers poking through the frost. Camellias, often overlooked in favor of showier blooms, burst into vibrant color during the winter season, filling gardens with an enchanting display of petals. But have you ever wondered why these stunning flowers bloom in the dead of winter? Not only do camellias bring much-needed beauty to our cold-weather landscapes, but they also require special care to thrive. In this article, we’ll delve into the unique characteristics that make camellias bloom in winter, provide expert tips on care and pruning, and offer advice on pest management to help you enjoy these gorgeous flowers all season long and beyond.
What is Camellia and Why Does it Bloom in Winter?
Let’s dive into what makes camellias so unique, and explore the fascinating reasons behind their winter bloom, which sets them apart from other flowering plants.
Brief History of Camellia Cultivation
Camellias have been a staple in Asian cultures for centuries, with records of their cultivation dating back to ancient China. According to legend, camellia was first cultivated during the Qin Dynasty (221-206 BCE), where it was prized for its beauty and medicinal properties. The plant quickly spread throughout Asia, becoming an integral part of traditional Chinese medicine.
As trade routes expanded, camellias were introduced to Japan in the 16th century, where they became a popular motif in art and literature. From there, they made their way to Europe through the Dutch East India Company, who brought back exotic plants from their Asian colonies. Camellia soon gained popularity among European gardeners, who prized its hardiness and stunning winter blooms.
Today, camellias are grown worldwide, with various species adapted to different climates and regions. Whether you’re a seasoned gardener or just starting out, incorporating camellias into your landscape can add a touch of elegance and history to your outdoor space. When selecting a camellia variety, consider factors like soil type, sunlight exposure, and hardiness zone to ensure optimal growth and flowering performance.
Camellia’s Evergreen Habit: A Key Factor in Winter Blooming
One of the most distinctive and beneficial characteristics of camellias is their evergreen habit. Unlike many other flowering plants that shed their leaves during winter, camellias retain their foliage year-round, thanks to a unique combination of factors. This remarkable trait plays a crucial role in their ability to bloom in the dead of winter.
Camellias’ evergreen nature allows them to conserve energy and resources throughout the year, enabling them to produce flowers when other plants are dormant. In regions with mild winters, camellias can even continue to grow new leaves during this time, setting them apart from deciduous plants that go into hibernation. This adaptability not only makes camellias more resilient but also allows them to provide a lush, vibrant display of color in the midst of winter’s chill.
To encourage your camellia to retain its foliage and bloom abundantly, ensure it receives consistent moisture and protection from extreme temperatures. Mulching around the base will help regulate soil temperature and prevent root damage, while providing regular water will keep the plant healthy and active throughout the year. By mimicking nature’s cues and creating a nurturing environment, you can coax your camellia to bloom in winter with unparalleled beauty and resilience.
Types of Camellias that Bloom in Winter
If you’re looking for a splash of color during the cold winter months, look no further than these stunning camellia varieties that bloom from December to February. We’ll explore some of our favorite types together!
Evergreen Camellias (Camellia sasanqua)
Evergreen Camellias (Camellia sasanqua) are a popular variety known for their vibrant blooms that add color to gardens during winter. These evergreen shrubs have an upright growth habit, typically reaching 6-10 feet tall and 4-8 feet wide. They prefer well-draining acidic soil and partial shade to full sun, making them adaptable to various garden conditions.
When it comes to growing Evergreen Camellias, choose a location with consistent moisture but not standing water. These plants are relatively low-maintenance and can thrive in USDA zones 6-10. In areas with harsh winters, protect the plant from extreme cold by providing mulch or covering the roots during frost periods.
One of the key benefits of Evergreen Camellias is their long blooming period, which starts as early as September and continues through winter until February. This extended flowering season provides a welcome contrast to the barren landscape of winter, adding visual interest and attracting pollinators like bees and hummingbirds to your garden.
In terms of care, prune your Evergreen Camellia after it finishes blooming to maintain shape and promote new growth. Regular fertilization with an acidic fertilizer will also help ensure the plant’s health and continue to produce vibrant blooms throughout winter.
Japanese Camellias (Camellia japonica) – A Popular Variety
Japanese Camellias (Camellia japonica) are one of the most popular and widely cultivated varieties among winter-blooming camellias. These stunning plants produce large, showy flowers with five petals that come in a range of colors including pink, white, red, and bi-colored. One of their unique features is the ability to bloom throughout the winter months, providing a much-needed splash of color during this time.
When it comes to blooming periods, Japanese Camellias typically produce their first blooms in late fall or early winter, around November or December, and continue to produce flowers until March or April. The exact timing depends on factors such as weather conditions and geographic location.
To care for your Japanese Camellia, make sure to provide it with well-draining acidic soil and a spot that receives partial shade to full sun. Water regularly, but avoid overwatering, which can lead to root rot. Prune your camellia after it finishes blooming to maintain its shape and encourage new growth. By following these care requirements, you’ll be rewarded with beautiful blooms throughout the winter months.
Climate and Soil Requirements for Winter Blooming Camellias
To ensure your winter blooming camellias thrive, it’s essential to understand their specific climate and soil requirements. This can be found in a few key environmental factors.
Understanding Hardiness Zones for Camellia Planting
When planting camellias for their winter blooms, understanding hardiness zones is crucial to ensure these beautiful plants thrive in your area. Hardiness zones are a measure of the average annual extreme minimum temperature in a specific region. This temperature range can significantly impact how well your camellia grows and produces flowers.
To determine which hardiness zone you’re in, consult a reliable plant hardiness zone map for your location. In the United States, the USDA Plant Hardiness Zone Map is a commonly used resource. Your zone number will indicate the lowest temperature your area typically experiences during winter. For camellias, it’s essential to choose varieties that are suitable for your zone.
If you’re in zones 6 or above, you’ll find many camellia species and cultivars that thrive in these warmer climates. However, if you live in a colder zone (4-5), select dwarf or compact varieties, which can tolerate some frost but still provide stunning winter blooms. Keep in mind that even within your zone, microclimates can exist, influencing the overall hardiness of your area.
Optimizing Soil pH and Nutrition for Healthy Growth
Maintaining the right soil pH and nutrient levels is crucial for healthy growth and blooming of winter camellias. When it comes to camellia cultivation, most varieties prefer a slightly acidic to neutral soil pH, ranging from 5.5 to 6.5. However, some species like Camellia sasanqua can tolerate more alkaline soils.
To check your soil pH, you can purchase a DIY testing kit or send a sample to a lab for analysis. Once you know your soil’s pH level, you can take steps to adjust it if necessary. For example, adding elemental sulfur to acidic soils or dolomitic limestone to alkaline soils can help balance the pH.
In addition to maintaining the right pH, providing essential nutrients is vital for healthy growth and blooming. Camellias require a balanced diet of nitrogen (N), phosphorus (P), and potassium (K). You can use a slow-release fertilizer in the spring or fall, following the manufacturer’s instructions. Mulching around the base of your camellia plant also helps retain moisture, suppress weeds, and regulate soil temperature.
To ensure optimal blooming, it’s essential to provide your winter camellias with consistent moisture, especially during the first year after planting. Water them regularly, but avoid overwatering, which can lead to root rot and other problems. By paying attention to these factors, you’ll be rewarded with beautiful blooms in the dead of winter.
Winter Care and Pruning for Optimal Blooms
To get the most out of your camellia’s winter blooms, let’s dive into essential care tips to ensure they stay healthy and vibrant throughout the season. Proper pruning is key!
Pre-Winter Preparation: Mulching and Watering Tips
As we transition into winter, it’s essential to prepare your camellias for the colder months ahead. Mulching and watering are two crucial aspects of pre-winter preparation that will help protect your plants from harsh weather conditions.
Mulching is a simple yet effective way to shield your camellias from frost damage. Apply a 2-3 inch layer of organic mulch, such as wood chips or bark, around the base of each plant. This helps retain moisture in the soil, prevents root rot, and reduces soil temperature fluctuations. For example, if you live in an area with mild winters, a single application of mulch in autumn should suffice. However, if you experience harsher winters, consider applying a second layer after the first frost.
When it comes to watering, camellias require less moisture during winter months. Overwatering can lead to root rot and make your plants more susceptible to disease. Water your camellias sparingly, allowing the soil to dry slightly between waterings. This will help them conserve energy and focus on producing buds for next year’s blooms.
Additionally, consider applying a 2-4 inch layer of evergreen boughs or pine straw around the base of each plant. These materials not only provide insulation but also attract beneficial pollinators during the off-season.
Post-Bloom Pruning Techniques to Encourage Future Blooms
Pruning your camellia plant after blooming is crucial to encourage future blooms. This technique helps promote healthy growth by removing spent flowers, which can help redirect the plant’s energy towards producing new buds.
To begin post-bloom pruning, start by inspecting your camellia for any dead or damaged leaves or branches. Remove these immediately using a pair of clean and sharp secateurs. Next, cut back the flower stalks to about an inch above a leaf node. This will help encourage lateral growth, leading to more blooms in subsequent seasons.
Another technique is called “tip pruning,” where you remove the growing tips of stems to encourage branching. Simply snip off the top 6-8 inches of new growth using your secateurs. This helps control the plant’s height and encourages bushy growth, resulting in a more compact and robust camellia shrub.
By following these simple post-bloom pruning techniques, you’ll be able to promote healthy growth and encourage future blooms on your camellia plant. Regular maintenance like this will also help prevent pests and diseases from taking hold, keeping your plant thriving throughout the seasons.
Common Challenges and Pests Affecting Camellia Blooms
As you enjoy your camellia blooms, there are some common challenges to watch out for that might affect their beauty, from pests to environmental stressors. Let’s explore these issues together.
Pest Control Measures: Aphids, Scale, and Other Common Pests
Aphids, scale, and whiteflies are some of the most common pests that can infest camellia blooms. These tiny insects feed on sap, causing curled or distorted leaves, stunted growth, and a decrease in flower production. To control these pests naturally, you can try introducing beneficial insects such as ladybugs or lacewings to your garden. These natural predators will feed on the aphids and other pests, helping to maintain a balance.
If you prefer chemical methods, use insecticidal soap or neem oil to spray directly on the affected areas. However, be cautious not to over-spray, as this can harm the camellia plant. Another method is to use horticultural oil, which can help smother the pests and prevent them from reproducing.
To prevent infestations in the first place, keep your garden clean by removing weeds and debris that may harbor pests. Also, inspect your plants regularly for signs of infestation, such as sticky honeydew droplets or curled leaves. By taking these preventive measures and using targeted control methods, you can protect your camellia blooms from common pests and enjoy a healthy, thriving plant.
Winter Diseases: Prevention and Management Tips
As winter sets in and camellia blooms begin to flourish, it’s essential to be aware of common diseases that can affect these stunning flowers. Root rot, leaf spot, and petal blight are just a few of the problems you might encounter.
To prevent root rot, ensure your camellias receive excellent drainage. Avoid overwatering, which can lead to waterlogged soil. Check for signs like yellowing leaves or blackened roots – if you catch it early, prune affected areas, and repot the plant in well-draining mix. For leaf spot, treat with fungicides as soon as symptoms appear, typically as small brown spots on leaves.
Keep your camellias healthy by maintaining good air circulation around them. Remove any dead or diseased foliage to prevent the spread of disease. Mulch around the base can also help retain moisture and suppress weeds that might harbor pathogens.
Regular inspections will allow you to identify potential issues before they become major problems. If you notice symptoms, act promptly – timely intervention is crucial in managing these diseases effectively.
Conclusion: Enjoying Your Camellia’s Winter Blooms
Now that your camellia is blooming beautifully, let’s talk about how to make the most of this lovely winter display and enjoy its fleeting beauty. Here are a few tips.
Appreciating the Beauty of Camellia Blooms in Winter
As we’ve explored throughout this section, camellias are truly one of the most unique and beautiful flowering plants to bloom during the winter months. Their vibrant colors and delicate petals provide a stunning contrast to the barren landscapes that often accompany the cold weather. Whether you’re a seasoned gardener or simply looking for ways to brighten up your outdoor space, appreciating the beauty of camellia blooms is a wonderful way to make the most of this season.
To fully appreciate these beautiful flowers, take some time to really look at them – notice their intricate details and the way the light catches their petals. Try to capture their image on camera or draw inspiration from them in your own art projects. And don’t be afraid to get up close and personal with the blooms by gently touching their delicate petals (just be sure not to damage the plant). By slowing down and truly appreciating these winter wonders, you’ll find that they bring even more joy and beauty into your life.
Future Planning: Sourcing New Camellia Varieties or Planting More
As you bask in the beauty of your camellia’s winter blooms, it’s natural to start thinking about what’s next for this stunning plant. Perhaps you’ve been enjoying a particular variety and want to explore more options for future bloom cycles? Or maybe you’re eager to expand your collection by planting new camellias?
Consider seeking out nurseries or online retailers that specialize in camellia varieties, as they often carry an impressive selection of cultivars to choose from. Some popular options include ‘Anticipation’, a white variety with a delicate fragrance, and ‘Yuletide’, which boasts bright red blooms.
When selecting new varieties, think about factors like climate tolerance, soil preferences, and maintenance needs. Researching these details will help ensure that your new camellias thrive alongside their existing counterparts. For example, some camellia varieties are more susceptible to frost damage, so be sure to choose ones that can withstand the local temperature fluctuations.
By planning ahead and exploring new options, you’ll not only expand your camellia collection but also keep your garden fresh and dynamic year-round.
Frequently Asked Questions
Can I grow camellias indoors during the winter months if I don’t have a garden?
Yes, with proper care and conditions, you can successfully grow camellias indoors. Choose a bright, south-facing location with temperatures between 40°F to 70°F (4°C to 21°C) and maintain high humidity by misting regularly.
How do I prevent winter diseases like root rot from affecting my camellia?
To prevent winter diseases, ensure your camellia is planted in well-draining soil, avoid overwatering during the dormant season, and inspect for signs of disease regularly. If you notice any issues, treat promptly with fungicides and adjust your watering schedule accordingly.
Can I plant multiple types of camellias together to create a winter-blooming display?
Yes, planting different varieties of camellias can create a stunning winter display. Consider combining early- and late-blooming types for an extended blooming season. Just ensure you provide each plant with its specific growing requirements.
How often should I prune my camellia after the blooming period to encourage future growth?
After blooming, prune your camellia in late winter or early spring when new growth begins. Cut back dead and damaged branches, then shape the plant as desired. Prune at a 45-degree angle just above a bud eye, and avoid over-pruning, which can stress the plant.
Can I propagate my camellia through leaf cuttings, or do I need to use other methods?
Camellias are typically propagated using stem cuttings, seed, or layering. Leaf cuttings may not be as successful due to the plant’s sensitive nature. Consult with a local nursery or gardening expert for guidance on the best propagation method in your area and climate.