Are you ready to get started on your DIY project and bring some greenery into your life? Building a polycarbonate greenhouse can be an exciting and rewarding experience, allowing you to grow your favorite plants year-round while saving money on energy costs. However, it can also be intimidating if you’re new to DIY projects or haven’t worked with polycarbonate materials before.
In this comprehensive guide, we’ll walk you through every step of the process, from planning and designing your greenhouse to selecting the right materials and features. We’ll cover advanced topics like insulation, ventilation, and lighting, ensuring that your greenhouse is not only functional but also energy-efficient. Whether you’re a seasoned gardener or a beginner, this article will provide you with all the information you need to create a successful polycarbonate greenhouse from scratch.
Planning Your Polycarbonate Greenhouse Project
Before you start building your polycarbonate greenhouse, it’s essential to plan carefully and consider a few key factors to ensure success. Let’s walk through the planning process together.
Choosing the Right Location and Climate
When it comes to building a polycarbonate greenhouse, choosing the right location is crucial for its success. The location you select will determine the climate and sunlight exposure of your greenhouse, which are essential factors for plant growth.
Consider the amount of direct sunlight your greenhouse will receive. Most plants require at least six hours of direct sunlight per day. If your area experiences extreme temperatures or heavy rainfall, choose a spot that provides some shade to protect your plants from damage. Also, consider the wind direction and speed in your area to ensure that strong gusts don’t cause damage to your greenhouse.
Another important factor is accessibility. Choose a location with easy access for maintenance and harvesting. Avoid areas with poor drainage, as this can lead to waterlogged soil and root rot. A flat surface is also essential, so make sure the ground is level before building your greenhouse.
In terms of climate, consider the temperature range in your area. If you live in an extremely cold region, choose a location that receives some protection from harsh winds or extreme temperatures.
Measuring and Designing Your Greenhouse
When planning your polycarbonate greenhouse project, it’s essential to measure and design your space carefully. Start by measuring the area where you plan to install your greenhouse, taking note of any obstacles such as power lines, trees, or neighboring structures.
Next, calculate the size of your greenhouse based on its purpose. A smaller greenhouse (around 8×10 feet) is ideal for starting seeds, while a larger one (12×20 feet) can accommodate more mature plants and even provide additional storage space.
Consider the design options available to you, including:
• A lean-to design, which attaches to an existing wall or structure
• A freestanding design, which stands alone on your property
• An attached design, where the greenhouse is integrated into your home’s architecture
When choosing a design, think about the space and light requirements for the plants you’ll be growing. Also, consider factors like climate, budget, and local building codes to ensure your greenhouse meets all necessary regulations.
Materials Needed for a Polycarbonate Greenhouse DIY Project
To build your polycarbonate greenhouse, you’ll need to gather the right materials, and we’ve got you covered – check out our comprehensive list below.
Polycarbonate Panels and Glazing Options
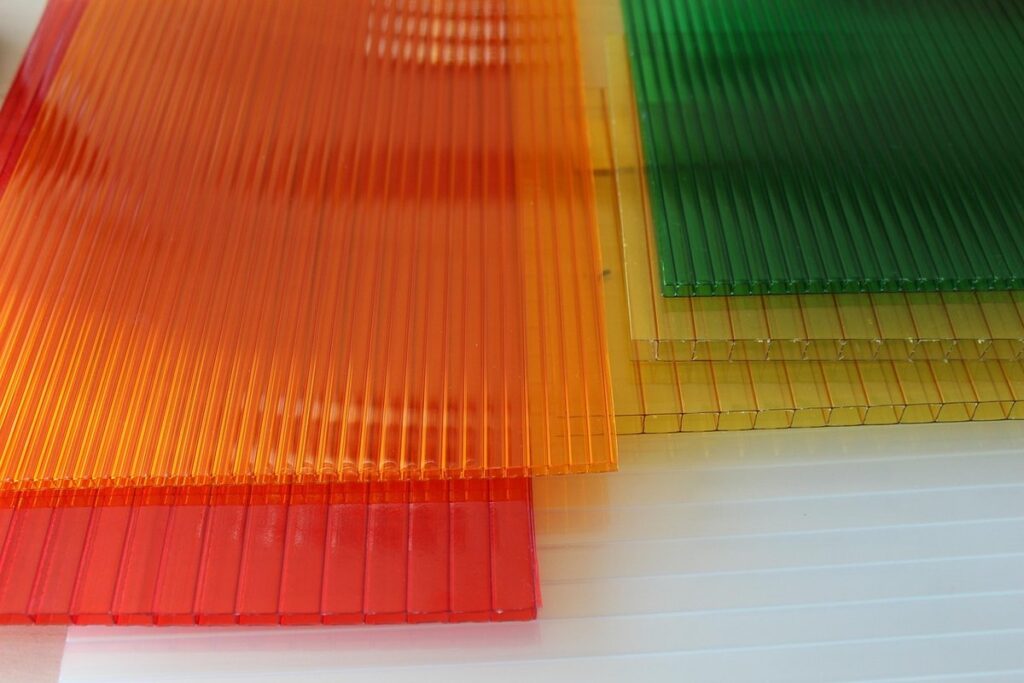
When it comes to building a polycarbonate greenhouse, the type of panel you choose can make all the difference. Polycarbonate panels are available in various types, each with its own set of advantages and disadvantages.
Double-Walled Polycarbonate Panels are highly regarded for their excellent insulation properties and durability. They consist of two layers of polycarbonate material separated by a gap, which provides additional strength and resistance to impact. This type is ideal for areas prone to harsh weather conditions or high wind speeds.
Single-Walled Polycarbonate Panels, on the other hand, are thinner and more flexible than their double-walled counterparts. They offer better transparency and can be more cost-effective, making them suitable for smaller greenhouses or DIY projects on a budget.
Triple-Walled Polycarbonate Panels provide even greater insulation benefits than double-walled panels but are often more expensive. When choosing the right panel for your project, consider factors such as climate, budget, and desired level of transparency. It’s essential to weigh the pros and cons of each type to ensure you select the most suitable option for your polycarbonate greenhouse DIY project.
Ultimately, it’s crucial to assess your specific needs and choose a panel that balances performance with affordability. Be sure to research local suppliers or manufacturers that offer high-quality polycarbonate panels specifically designed for greenhouses. This will help you make an informed decision and complete your project successfully.
Frame and Structural Components
When it comes to building a polycarbonate greenhouse, the frame and structural components play a crucial role in providing support and stability to the structure. The materials you choose for this part of the project will not only affect the overall look but also the durability and functionality of the greenhouse.
For the frame, you can opt for aluminum, PVC, or wooden components, each with its own set of benefits and requirements. Aluminum frames are lightweight yet strong, making them an excellent choice for large greenhouses. However, they may require additional support to prevent bowing under heavy loads.
PVC frames, on the other hand, are more versatile and can be easily customized to fit different shapes and sizes. They’re also relatively inexpensive but may not offer the same level of durability as aluminum or wood.
Wooden components, such as wooden beams or columns, provide a natural and rustic look to the greenhouse. However, they require regular maintenance to prevent rotting and insect infestation.
To install these frame components, ensure proper measurements are taken to avoid any misalignments. Use screws or brackets specifically designed for polycarbonate panels to secure them in place. Additionally, consider using reinforced corners to provide extra support and prevent panel bowing under wind loads.
Building Your Polycarbonate Greenhouse: Step-by-Step Instructions
Now that you’ve prepared your site for a polycarbonate greenhouse, let’s move on to building it – follow these step-by-step instructions to create your DIY project.
Preparing the Site and Laying the Foundation
Before you start building your polycarbonate greenhouse, it’s essential to prepare the site where it will sit. This involves clearing the land, ensuring a level surface, and laying a strong foundation. Start by measuring out the area where your greenhouse will be placed, taking into account any obstacles or slopes that may affect its stability.
Clear the land by removing any debris, grass, or weeds using a shovel, rake, or lawn mower. Next, lay down a layer of compacted gravel or sand to provide drainage and prevent water from accumulating around the foundation. It’s crucial to ensure the surface is level, as an uneven base can cause your greenhouse to lean or even collapse.
To create a stable foundation, consider using concrete footings or a slab of reinforced concrete that extends beyond the perimeter of the greenhouse by at least 12 inches on all sides. This will prevent moisture from seeping into the soil and causing damage to the structure over time.
Assembling the Frame and Installing Glazing
Assembling the frame and installing glazing are crucial steps in building your polycarbonate greenhouse. Start by laying out all the frame components according to the manufacturer’s instructions. Typically, a polycarbonate greenhouse frame consists of aluminum or PVC channels that hold the panels in place.
When assembling the frame, make sure to secure it with screws or clips provided by the manufacturer. Ensure that the corners are tight and the frame is level before proceeding to install the glazing. This step may be more challenging than assembling the frame, but with patience and the right tools, you can achieve professional-looking results.
To install the polycarbonate panels or glazing, start at the bottom of the frame and work your way up. Begin by securing each panel with screws or clips to the corresponding channel on the frame. Ensure that each panel is properly seated and secure before moving on to the next one.
Tips and Tricks for a Successful Polycarbonate Greenhouse DIY Project
Now that you’ve built your polycarbonate greenhouse, let’s talk tips on how to ensure it serves you well through the seasons. Here are some expert-approved tricks for a successful project.
Common Challenges and Solutions
When tackling a DIY polycarbonate greenhouse project, you’re likely to encounter some common challenges that can stump even the most experienced builders. One of the main issues is ensuring proper ventilation and temperature control within the greenhouse. This is crucial for maintaining optimal growing conditions and preventing damage to your plants.
To address this challenge, consider installing automatic vents or louvers that can be programmed to open and close at specific times of the day. This will help regulate temperatures and prevent overheating during the summer months. You can also incorporate shading solutions, such as screens or shade cloth, to filter direct sunlight and reduce heat gain.
Another common issue is dealing with moisture buildup within the greenhouse. This can lead to mold, mildew, and other problems that compromise plant health. To combat this, make sure to include adequate drainage systems and consider using a dehumidifier to maintain optimal humidity levels. By being aware of these potential challenges and taking proactive steps to address them, you’ll be better equipped to build a successful polycarbonate greenhouse that meets your needs and provides a healthy environment for your plants to thrive in.
Maintenance and Upkeep
Maintaining your polycarbonate greenhouse is crucial to ensure it continues to provide optimal growing conditions for your plants. Cleaning is a vital part of upkeep, and you should aim to do this regularly, ideally every week during peak growing seasons. Start by removing any debris or dirt from the exterior using a soft-bristled brush and mild soap solution. For more stubborn stains, mix baking soda and water to create a paste, and apply it to the affected area before rinsing off with warm water.
Regular inspections will also help you identify any damage or wear and tear on components such as glazing panels, clips, and screws. If you notice any issues, address them promptly to prevent further damage. Replace damaged components with new ones, making sure to follow the manufacturer’s instructions for installation.
In addition to regular cleaning and repairs, consider implementing a routine maintenance schedule to ensure your greenhouse remains in top condition. This may include tasks such as lubricating hinges, tightening screws, and checking for signs of pests or diseases. By staying on top of these tasks, you’ll be able to enjoy healthy plants and a long-lasting polycarbonate greenhouse.
Advanced Features for Your Polycarbonate Greenhouse
Now that you’ve built your polycarbonate greenhouse, it’s time to take your project to the next level with advanced features like automatic ventilation and irrigation systems.
Ventilation Systems and Shading Options
When designing and building your polycarbonate greenhouse, it’s essential to consider advanced features that enhance functionality and efficiency. A well-designed ventilation system can make a significant difference in maintaining optimal growing conditions for your plants.
Proper ventilation helps regulate temperature, prevents overheating, and reduces the risk of fungal diseases caused by excessive moisture. You can install automatic openers on vents or windows, which can be set to open at specific times of the day based on weather forecasts. For manual control, you can add easy-to-use latches or hinges that make it simple to open and close vents.
In addition to ventilation systems, incorporating shading options is also crucial for protecting your plants from intense sunlight. You can install retractable shade cloth or louvers above your greenhouse’s roof or walls. Shade cloths come in various mesh densities, so choose one that filters out 50-70% of direct sunlight while still allowing sufficient light penetration.
Remember to balance ventilation and shading according to the specific needs of your plants and climate.
Automation and Monitoring Systems
As you continue to enhance your DIY polycarbonate greenhouse, integrating automation and monitoring systems can take your growing experience to the next level. These advanced features not only improve climate control but also promote healthy crop growth.
Start by choosing a suitable automation system that fits your budget and meets your specific needs. You can opt for Wi-Fi enabled sensors or smart plugs to monitor temperature, humidity, light levels, and soil moisture. Some popular brands include Eve, Netatmo, and Phidgets. Once you’ve selected the necessary components, follow these steps to set up your system:
* Connect sensors to the main hub via cable or wirelessly using Bluetooth or Wi-Fi
* Install smart plugs for lighting, irrigation, or ventilation systems
* Download a mobile app or software to track data and receive notifications
For example, let’s say you’ve installed temperature and humidity sensors. The app will alert you if either parameter falls outside the optimal range for your plants. You can then take corrective action by adjusting the HVAC system or providing supplemental lighting.
Regular monitoring of these parameters ensures optimal growing conditions, which can lead to increased crop yields and reduced waste.
Conclusion and Next Steps
Now that you’ve completed your DIY polycarbonate greenhouse, let’s summarize what we’ve covered and explore next steps for maintaining your new garden oasis.
Reviewing Your Project and Identifying Areas for Improvement
As you’ve successfully completed your DIY polycarbonate greenhouse project, it’s essential to take a step back and assess what went well and where there’s room for improvement. This review process will help you refine your skills and create an even more efficient and effective building experience.
Let’s start with the key takeaways from this comprehensive guide. You now have a solid understanding of how to select and prepare the site, choose the right polycarbonate panels, design and build the frame, install glazing and flashing, and finish the interior and exterior of your greenhouse. These fundamental skills will serve as a strong foundation for any future projects.
However, every DIY project presents opportunities for growth and improvement. Take note of the areas where you felt overwhelmed or struggled with specific tasks. Perhaps you needed more guidance on determining the optimal site selection or had trouble finding suitable replacement parts for your polycarbonate panels. Identifying these challenges will help you better prepare yourself for future projects.
In terms of upgrades, consider the following suggestions: add shading devices to control light intensity, install automated irrigation and climate control systems, and incorporate trellises or other supports for climbing plants. By integrating these features, you’ll not only enhance your greenhouse’s functionality but also increase its overall performance and extend its lifespan.
By reviewing your project, identifying areas for improvement, and incorporating upgrades, you’ll be well-prepared to tackle more complex and ambitious projects in the future. Your DIY polycarbonate greenhouse will serve as a testament to your skills and ingenuity, while also providing a space for you to nurture your plants and pursue your passion for gardening.
Frequently Asked Questions
What are the best practices for insulating a polycarbonate greenhouse to minimize heat loss during cold winter months?
When insulating your polycarbonate greenhouse, it’s essential to consider the R-value of the insulation material and ensure that it is compatible with the polycarbonate panels. You can use foam board insulation or fiberglass batts, but make sure to seal all gaps and edges thoroughly. Additionally, consider adding a layer of plastic sheeting or bubble wrap on the exterior for extra protection.
How do I handle condensation issues within my polycarbonate greenhouse, especially during humid weather conditions?
Condensation is a common issue in greenhouses, particularly with polycarbonate panels. To mitigate this, ensure proper ventilation and airflow within your greenhouse. You can install vents or windows to allow moisture to escape, or use a dehumidifier to control humidity levels. Additionally, make sure to clean the polycarbonate panels regularly to maintain visibility and prevent fungal growth.
Can I use polycarbonate panels in areas with extreme weather conditions, such as high winds or heavy snowfall?
While polycarbonate panels are durable, they may not be suitable for areas with extreme weather conditions. In cases of high winds, consider using reinforced frames or additional bracing to secure the structure. For heavy snowfall, ensure that your greenhouse is designed with a sloping roof to allow snow to slide off easily.
How do I maintain and clean my polycarbonate greenhouse to extend its lifespan?
Regular maintenance is crucial for extending the lifespan of your polycarbonate greenhouse. Clean the panels regularly using mild soap and water, and inspect the frame and components for any signs of wear or damage. Additionally, ensure that all connections and joints are secure and tight.
Can I use automated systems to control temperature, humidity, and lighting within my polycarbonate greenhouse?
Yes, you can incorporate automation and monitoring systems into your polycarbonate greenhouse to optimize growing conditions. Consider installing sensors to track temperature, humidity, and light levels, and integrate these with automated systems that can adjust ventilation, heating, or cooling accordingly. This will help create a stable environment for optimal plant growth.