Building healthy garden soil is often considered the backbone of a thriving garden. But let’s face it, most of us don’t really know how to get started or what we’re doing when it comes to creating that perfect blend. Understanding your soil’s pH level and texture can be a mystery in itself, not to mention figuring out how to improve it with composting, cover crops, and regular care.
The good news is that creating healthy garden soil doesn’t have to be complicated. With the right knowledge and a few simple tips, you can turn even the most barren of plots into a lush oasis. In this article, we’ll explore the ins and outs of building healthy garden soil, covering everything from understanding pH levels and textures to using composting and cover crops to take your garden to the next level.
Understanding Your Soil Type
To create a thriving garden, it’s essential to understand your soil type and its characteristics, which will help you choose the right amendments and techniques for improvement. This involves identifying your soil’s texture, pH level, and nutrient profile.
Identifying Your Soil’s pH Level
Knowing your soil’s pH level is crucial for building healthy garden soil from scratch. The pH level measures how acidic or alkaline your soil is, and it directly affects the availability of essential nutrients for plant growth. Most plants prefer a slightly acidic to neutral soil pH between 6.0 and 7.0.
To test your soil’s pH level, you can use a pH meter, which gives you an instant reading. These meters are available at most gardening stores or online. Alternatively, you can send a sample of your soil to a lab for analysis. This method provides more detailed information about your soil’s nutrient content and pH level.
It’s essential to note that using lime to raise the pH or sulfur to lower it is not a precise method. These products only provide temporary adjustments and may not address underlying issues. Instead, focus on creating a balanced garden ecosystem by incorporating organic matter, such as compost, into your soil. This will help regulate pH levels over time.
If you’re unsure about your soil’s pH level or how to proceed with testing, consult with a local nursery or gardening expert for guidance.
Understanding Your Soil Texture
Understanding the texture of your soil is crucial to building healthy garden soil. This is because different textures have distinct characteristics that affect plant growth and nutrient availability. There are three main types of soil textures: clay, silt, and sand.
Clay soils are dense and heavy, with a high water-holding capacity. They can become waterlogged if not properly drained, which can lead to root rot and other issues. On the other hand, they tend to dry out quickly, making them prone to erosion. Plants growing in clay soils often require more nutrients due to their slower growth rate.
Silt soils, on the other hand, are medium-sized particles that drain well but can be prone to compaction. They retain moisture but also allow for aeration, making them suitable for plants with moderate water needs. Silt soils tend to warm up faster than clay or sand soils in spring, which is beneficial for early-spring crops.
Sand soils have large particle sizes and excellent drainage properties. However, they can dry out quickly, requiring frequent watering. Plants growing in sandy soils often require more fertilization due to their rapid growth rate.
Preparing the Soil for Planting
To start building healthy garden soil, it’s essential to prepare your soil properly before planting by loosening and aerating it to create a fertile base. This process sets the foundation for a thriving garden ecosystem.
Removing Debris and Weeds
Clearing the garden bed of debris, weeds, and other obstacles is an essential step in building healthy soil from scratch. Before planting, it’s crucial to create a clean slate by removing anything that can hinder plant growth or compete with your desired vegetation.
To start, inspect your garden bed for any debris such as dead plants, branches, or rocks. Clear out these items, and consider composting them to turn waste into nutrient-rich soil amendments. For weeds, manually pulling them up is often the most effective method, making sure to remove the entire root system to prevent regrowth.
If you’re dealing with a large area or have particularly stubborn weeds, consider using a tool like a hoe or weeding fork to make the process easier and more efficient. Regularly removing debris and weeds will not only create an optimal environment for plant growth but also help maintain soil health in the long run.
Tilling or Loosening the Soil
Tilling or loosening the soil is an essential step in preparing it for planting. By breaking up compacted soil, you’ll improve drainage, aeration, and root growth – all critical factors for healthy plant development.
Using a garden fork or tiller to loosen the top 8-10 inches of soil is a good starting point. For smaller gardens, a manual fork can be an effective tool. Larger areas may require a powered tiller or rototiller, which will speed up the process but require more effort and maintenance. As you work the soil, remove any debris, rocks, and weeds that could hinder seed germination.
Regular tilling or loosening also helps to:
• Reduce soil compaction: Prevents roots from growing deep into the earth
• Improve soil structure: Enhances water penetration and aeration
• Encourage beneficial microorganisms: Supports nutrient cycling and plant health
In addition to regular tilling, consider incorporating organic matter like compost or manure to further improve soil fertility and structure. As you work with your garden soil, pay attention to its texture and consistency – it should crumble easily between your fingers when loosened correctly. By investing time in this initial step, you’ll set the foundation for a thriving garden ecosystem.
Adding Organic Matter to Enhance Soil Health
When it comes to building healthy garden soil from scratch, incorporating organic matter is a crucial step that can make all the difference in your garden’s success. Let’s explore how to add nutrients and beneficial microbes to your soil.
Composting 101: Creating Your Own Compost
Creating your own compost is an essential step in building healthy garden soil from scratch. Composting allows you to turn kitchen scraps and yard waste into a nutrient-rich fertilizer that will give your plants the boost they need to thrive.
So, what can be used for composting? The answer is quite broad – you can use fruit and vegetable scraps, coffee grounds, eggshells, tea bags, and even hair! As long as it’s organic, it can go into the compost pile. Some things to avoid include meat, dairy products, oils, and pet waste.
To create a compost pile or bin, start by choosing a location that’s well-ventilated and accessible. You’ll need a mix of “green” materials (high in nitrogen) like kitchen scraps and grass clippings, and “brown” materials (high in carbon) like leaves and twigs. Aim for a mix of 2/3 brown materials and 1/3 green materials.
To set up your compost pile, start by adding a layer of brown materials at the bottom. Then add a layer of green materials, followed by another layer of brown materials, and so on. Keep adding to the pile until it’s about three-quarters full, then leave it alone for a few weeks to allow the composting process to begin.
Using Manure and Other Organic Amendments
When building healthy garden soil from scratch, incorporating organic amendments is essential for improving fertility and structure. One of the most effective ways to do this is by using manure. Composted manure adds a boost of nutrients, including nitrogen, phosphorus, and potassium, which are vital for plant growth. It also improves soil’s water-holding capacity, making it easier for plants to access moisture.
Composting your own manure is relatively simple: collect animal waste from your pets or purchase it in bulk, mix with ‘green’ materials like food scraps or grass clippings, and let it decompose over several months. Alternatively, you can use pre-composted bagged products available at most garden centers. Other beneficial organic amendments include worm castings, which have a high nutrient content and are rich in microorganisms that help break down toxins in the soil.
To incorporate these into your gardening routine, add 1-2 inches of compost or manure to the top layer of your beds before planting, or mix it into the soil as you dig. For smaller gardens, consider making your own compost tea by steeping a bucketful of compost in water – this liquid fertilizer is rich in beneficial microbes that help promote healthy soil biota.
Building Soil Fertility with Cover Crops
Cover crops are a simple yet powerful way to build soil fertility, and we’ll show you how to use them as a natural fertilizer booster in your garden. By incorporating cover crops into your rotation, you can increase nutrient levels and reduce waste.
Choosing the Right Cover Crops for Your Garden
When it comes to building healthy garden soil from scratch, incorporating cover crops into your rotation is one of the most effective strategies. These plants work behind the scenes to restore fertility, reduce erosion, and create a thriving ecosystem. By choosing the right cover crops for your garden, you’ll be rewarded with improved soil structure, increased nutrient availability, and reduced soil-borne diseases.
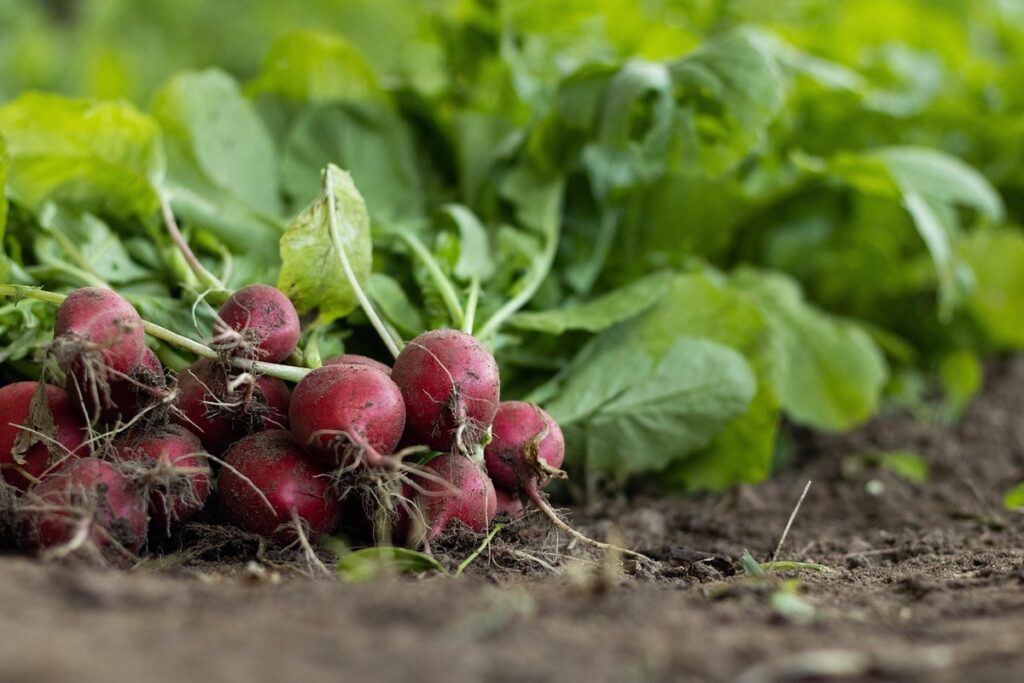
To select suitable cover crops for your climate and garden type, consider the following factors: moisture levels, temperature fluctuations, and growing season length. For example, if you live in a region prone to drought, choose cover crops like oats or clover that require minimal water. Similarly, in cooler climates, opt for hardy annuals like radish or mustards that germinate quickly.
Some popular cover crop options for gardeners include:
• Legumes (clover, beans, and peas) which fix nitrogen, a critical nutrient for plant growth
• Brassicas (broccoli, kale, and cabbage) which repel pests and attract beneficial insects
• Grains (oats and rye) which stabilize soil and reduce erosion
By carefully selecting cover crops tailored to your garden’s specific needs, you’ll be well on your way to building a robust and resilient soil ecosystem.
Planting and Managing Cover Crops
When it comes to building healthy garden soil from scratch, cover crops play a crucial role. They help improve soil structure, increase fertility, and suppress weeds – all while minimizing the need for synthetic fertilizers and pesticides. To get started with planting cover crops, choose varieties that are suitable for your climate and growing season. In temperate climates, it’s common to plant cover crops in the fall or early spring, about 6-8 weeks before the main crop.
For example, winter rye is an excellent choice for building soil health during the winter months. It grows quickly, producing a dense mat of foliage that suppresses weeds and prevents erosion. In contrast, legumes like clover and hairy vetch are ideal for spring planting, as they fix nitrogen in the soil, creating a nutrient-rich environment for your main crops.
To manage cover crops effectively, be sure to incorporate them into your rotation plan. This may involve mowing or incorporating them into the soil before your main crop is planted. By doing so, you’ll not only create a healthier growing environment but also build long-term fertility in your garden – without breaking the bank on synthetic fertilizers!
Maintaining Healthy Soil Through Regular Care
Now that you have a solid foundation of healthy soil, let’s talk about how to maintain it through regular care and habits that will keep your garden thriving all season long.
Watering Wisely: Avoiding Overwatering and Underwatering
Proper watering techniques are crucial for maintaining healthy garden soil. Overwatering can lead to erosion and underwatering can result in poor root growth. To avoid these issues, it’s essential to determine when your plants need water.
Observe the color and texture of your soil to gauge its moisture levels. Stick your finger into the soil up to the knuckle; if the soil feels dry, it’s time for watering. Check the plant’s leaves as well – droopy or wilted leaves indicate that the plant needs more water.
Watering should be done early in the morning or late in the evening to minimize evaporation and prevent shallow root growth. Use a drip irrigation system or soaker hose to deliver water directly to the roots, reducing runoff and erosion. Aim for about 1-2 inches of water per week, either from rain or irrigation. By adopting these strategies, you’ll promote healthy root growth and maintain balanced soil moisture levels.
Monitoring and Adjusting Your Garden’s pH Levels
As you work on building healthy garden soil, it’s essential to keep an eye on its pH levels. The ideal pH range for most vegetables and fruits is between 6.0 and 7.0. However, different plants have specific preferences, so it’s crucial to understand your garden’s unique needs.
To monitor your garden’s pH levels, you can use a DIY testing kit or send a sample to a lab for analysis. Some popular methods include the pH paper test strips, which are easy to use but less accurate, and the soil testing kits that provide more precise results. You can also purchase a digital pH meter for more frequent monitoring.
Once you know your garden’s pH levels, it’s time to make adjustments as needed. If your soil is too acidic (low pH), add lime to raise the levels. For alkaline soils (high pH), use elemental sulfur or peat moss to lower the pH. Aim for gradual changes of 1-2 points at a time, and retest after each adjustment to avoid over-correction. Regular monitoring will ensure your garden’s optimal growing conditions and prevent potential nutrient deficiencies.
Case Studies: Successful Gardening Projects with Healthy Soil
Let’s take a closer look at real-life examples of gardens that started from scratch and transformed into thriving ecosystems thanks to careful attention to soil health. We’ll explore their successes and lessons learned.
Real-Life Examples of Soil Restoration
In many parts of the world, gardeners have successfully used soil restoration techniques to revitalize degraded soils and create thriving gardens. One notable example is a community gardening project in Detroit, Michigan, where volunteers worked together to transform a former industrial site into a lush oasis.
The initial challenge was addressing the high levels of heavy metals and pollutants present in the soil. Gardeners used phytoremediation techniques, planting native grasses and wildflowers that could absorb toxins from the soil. Over time, these plants helped break down pollutants, creating a safer environment for more sensitive crops to be planted.
The project’s success was also attributed to the use of cover cropping and composting. Volunteers added organic matter to the soil through regular composting, which improved its structure and fertility. They also implemented a diverse crop rotation system, ensuring that no single crop dominated the soil ecosystem.
As a result, the garden now boasts an incredible variety of fruits, vegetables, and flowers, all grown without the need for chemical fertilizers or pesticides. This project demonstrates that with careful planning, hard work, and patience, even degraded soils can be restored to support healthy plant growth.
Lessons Learned from Failed Attempts at Building Healthy Soil
When building healthy garden soil from scratch, it’s essential to learn from others’ mistakes. Many gardeners have attempted to create fertile soil but ended up with disappointing results. What went wrong and what could they have done differently?
One common mistake is over-focusing on adding organic matter without considering the soil’s pH level. Rachel, a beginner gardener, added countless bags of compost to her acidic clay soil, only to find that it became even more imbalanced. A simple pH test would have revealed her soil’s issues and allowed her to adjust her amendments accordingly.
Another mistake is neglecting the role of microorganisms in soil health. John, an experienced gardener, applied high amounts of synthetic fertilizers, which suppressed his soil’s beneficial microbes. He could have achieved better results by using natural, microbial-friendly practices like cover cropping or adding compost tea.
By understanding these common pitfalls and taking a more informed approach to building healthy garden soil, you can avoid the mistakes of others and create a thriving ecosystem for your plants.
Conclusion: Why Building Healthy Garden Soil Matters
Now that you’ve learned how to build healthy garden soil from scratch, let’s discuss why it matters and what a well-crafted soil ecosystem can do for your garden.
Recap of Key Takeaways
As we conclude our journey of building healthy garden soil from scratch, it’s essential to recap the key takeaways that will help you achieve a thriving and sustainable gardening experience. By following these crucial steps, you’ll be well on your way to creating a rich, fertile environment for your plants to grow.
We discussed the importance of starting with a clean slate by removing any debris, rocks, or weeds from your garden bed. This allows you to assess the existing soil composition and make informed decisions about amendments. We also explored the role of organic matter in enriching soil structure and promoting healthy microbial activity.
Some key takeaways include:
• Regularly adding compost or well-rotted manure to increase nutrient availability
• Incorporating green cover crops to improve soil structure and prevent erosion
• Avoiding over-tilling, which can damage soil’s delicate ecosystem
By implementing these strategies and prioritizing the health of your garden soil, you’ll be amazed at how a thriving, vibrant garden comes to life. Remember, building healthy garden soil is an ongoing process that requires patience, dedication, and attention to detail.
Encouragement to Start Building Your Own Healthy Garden Soil Today
You’ve made it to the end of this journey into building healthy garden soil from scratch. It’s time to put what you’ve learned into action and start nurturing a thriving garden ecosystem. You now have a solid understanding of the importance of diverse microorganisms, optimal pH levels, and well-balanced nutrient profiles in your soil.
As you begin working on improving your garden’s soil health, remember that every small step counts. Start by observing your soil’s current condition and taking note of its texture, structure, and any areas where it may be lacking. You can then begin implementing the tips and techniques we’ve covered, such as adding compost or worm castings, introducing beneficial microorganisms, or incorporating cover crops.
Don’t be discouraged if you encounter setbacks or challenges along the way – building healthy garden soil is a process that requires patience, persistence, and flexibility. Every effort you make to improve your soil’s health will have a positive impact on your plants’ growth and overall ecosystem balance.
Frequently Asked Questions
What if I don’t have a pH meter to test my soil’s pH level?
You can purchase a DIY soil testing kit or send a sample to a lab for analysis. These options provide an accurate measurement of your soil’s pH level and nutrient profile, helping you make informed decisions about amendments and care.
How often should I add compost to maintain healthy garden soil?
Aim to add 2-3 inches of compost per year, either as a top dressing or mixed into the soil. This regular addition will improve soil structure, fertility, and overall health over time. Be sure to balance your inputs with outputs through crop rotation and harvesting.
Can I use any type of manure for my garden?
While some types of animal manure (like chicken or cow) can be beneficial additions, others may not be suitable due to high salt content or potential contaminants. Research the specific needs of your plants and choose a manure that’s nutrient-rich but low in pathogens.
What if I have poor drainage issues in my garden?
To address poor drainage, consider incorporating organic matter like peat moss or coconut coir into your soil. These amendments improve water retention and structure while reducing compaction. You can also use raised beds or install a French drain system for improved results.
How do I handle weeds and debris without damaging my healthy garden soil?
Remove weeds by hand or with a tool that doesn’t damage the surrounding soil, like a hoe. For larger debris, use a mulching mower or chop them into small pieces to return nutrients back into the soil. Regular maintenance helps prevent damage and preserves your soil’s health.