If you’re looking to add some rustic charm to your garden, create a visually stunning feature that blends seamlessly with nature, or simply want to reduce your environmental footprint, then dry stone walls are an excellent choice. Not only do they provide a natural and beautiful way to define boundaries and spaces within your outdoor area, but they also offer numerous benefits for the environment. With their unique ability to blend in with their surroundings and require little to no maintenance, dry stone walls have become increasingly popular among garden enthusiasts and sustainability advocates alike. In this article, we’ll delve into the world of dry stone walling, exploring its techniques, benefits, and creative applications in gardens. Whether you’re a seasoned gardener or just starting out, you’ll learn how to create stunning dry stone walls that enhance your home’s aesthetic appeal while providing environmental sustainability.
History and Significance
Dry stone walls have been a staple in garden design for centuries, not only providing structural support but also adding a touch of rustic charm to outdoor spaces. Let’s explore their rich history and significance.
The Origins of Dry Stone Walling
Dry stone walling has a rich and diverse history that spans thousands of years, with evidence of its use found on every continent. The ancient civilizations of the Mediterranean, such as the Greeks and Romans, employed dry stone walls to mark boundaries, protect crops, and create terracing systems for agriculture.
In the UK, dry stone walling was a crucial part of traditional farming practices, particularly in rural areas where materials like wood were scarce. Local communities would gather stones from nearby fields and use them to build walls that served multiple purposes – from containing livestock to creating sheltered spaces for crops.
The techniques used by these ancient cultures varied depending on the region and available materials. For example, the Inca civilization built extensive networks of dry stone walls in South America using carefully fitted stones without mortar. These structures not only showcased exceptional engineering skills but also helped to maintain fertile soil and create stable agricultural systems.
Today, dry stone walling is recognized as a UNESCO-protected craft, with many communities around the world continuing to preserve this ancient technique. By incorporating dry stone walls into your garden design, you can tap into this rich history while also creating functional and visually striking features that add character to your outdoor space.
Benefits and Advantages
Incorporating dry stone walls into your garden design can have numerous benefits that extend beyond its visual appeal. From an environmental perspective, dry stone walls are a sustainable and eco-friendly option for gardeners who want to minimize their carbon footprint. Unlike traditional walls made from concrete or brick, dry stone walls don’t require any mortar or cement, which significantly reduces greenhouse gas emissions during production.
Moreover, dry stone walls also provide excellent insulation and can help regulate soil temperature, reducing the need for heating and cooling systems in your garden. This is particularly beneficial for plants that thrive in specific temperature ranges. For instance, if you’re growing Mediterranean herbs like rosemary or thyme, a dry stone wall can create a microclimate that maintains their preferred temperatures.
In addition to its environmental benefits, dry stone walls also offer unparalleled aesthetic appeal. By carefully selecting the type and size of stones, you can create a visually striking feature that adds depth and texture to your garden design.
Cultural Significance
Dry stone walls have been an integral part of various cultures around the world for centuries. In regions like Scotland and Ireland, these structures are not only a testament to traditional craftsmanship but also serve as a symbol of community and heritage. The construction of dry stone walls was often a communal effort, with entire villages coming together to build and maintain these boundaries.
In many parts of Europe, dry stone walls have been recognized as cultural treasures, with some designated as historical monuments. For instance, in the Yorkshire Dales National Park in England, dry stone walls are an essential part of the landscape, with many dating back to the 18th century. Preserving this traditional craftsmanship not only helps to maintain these structures but also provides a link to the past.
To incorporate cultural significance into your garden design, consider working with local stonemasons or learning about traditional building techniques from experts in your region. This can help you create a dry stone wall that not only serves its functional purpose but also becomes a meaningful addition to your garden’s history and character.
Design Considerations
When building a dry stone wall, several design considerations come into play to ensure your structure is both functional and visually appealing. Let’s explore these key factors together!
Choosing the Right Materials
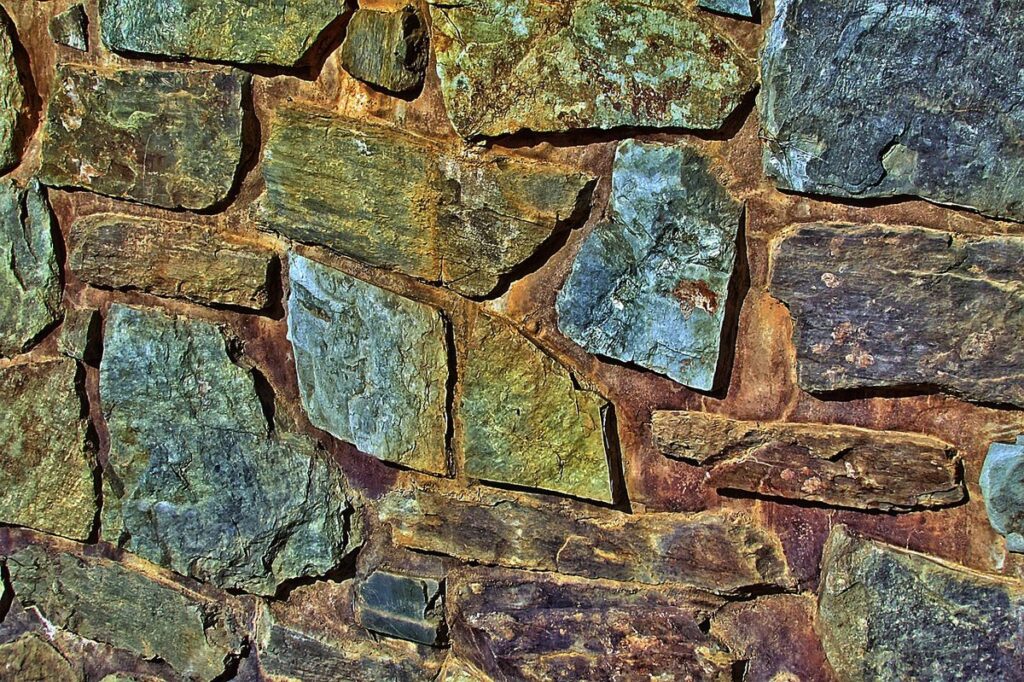
When it comes to building a dry stone wall, choosing the right materials is crucial for its durability and aesthetic appeal. The type of stones you select will not only determine the overall look of your wall but also impact its stability and longevity.
Start by considering the environment where your wall will be built. For example, if you live in an area prone to heavy rainfall or harsh weather conditions, you’ll want to choose stones that are resistant to erosion and can withstand water pressure. Granite, limestone, and sandstone are excellent options for dry stone walls as they are durable and less prone to damage.
Another factor to consider is the size of your stones. Larger stones (typically 10-20 inches in diameter) are best suited for the base course, while smaller stones (around 5-10 inches in diameter) can be used for the upper courses. Aim for a mix of stone sizes and textures to create visual interest and ensure stability.
Finally, think about the color palette you want to achieve with your wall. You can choose stones that complement or contrast with the surrounding landscape, depending on your design preferences. Remember to also consider the availability and cost of the materials when making your selection.
Wall Height and Style
When it comes to designing a dry stone wall for your garden, one of the most important considerations is the height. A good rule of thumb is to keep the wall below 3 feet tall, as this will make it easier to construct and maintain. However, if you’re looking to create a more dramatic effect or need to contain a large area, taller walls can be built up to 5 feet high.
The style of your dry stone wall is also crucial in determining its overall aesthetic appeal. Consider a rubble-core wall for a more rustic, natural look, or a gravity wall for a sleeker, more modern appearance. The width of the wall will also impact its visual presence – wider walls can create a sense of grandeur, while narrower ones blend seamlessly into the surrounding landscape.
Ultimately, the choice of height, style, and width will depend on your garden’s specific needs and design goals. Take inspiration from nature by observing how stones are arranged in the wild, or experiment with different configurations to create a unique look that suits your personal taste.
Integration with Garden Features
When designing a garden with a dry stone wall, it’s essential to consider how this striking feature will integrate with other elements. By carefully planning the relationship between the wall and surrounding features, you can create a cohesive and visually appealing space.
Start by thinking about the path leading up to the wall. Consider using stepping stones or small gravel pathways to create a sense of flow and connect the different areas of the garden. This not only makes it easier to navigate but also adds visual interest to the design. For example, you could use a mix of large and small stones to create a meandering path that weaves through the garden.
Incorporating planters and water features can also enhance the overall look of your dry stone wall. Add some trailing plants or ivy to spill over the top of the wall, creating a lush and inviting atmosphere. Alternatively, consider installing a small pond or fountain nearby, allowing the gentle sound of running water to complement the sturdiness of the wall.
To create a harmonious balance between these elements, remember that less is often more. Avoid overcrowding the space with too many features – instead, choose one or two statement pieces and let them shine. This will allow each element to have its own moment in the spotlight while creating a sense of cohesion throughout the garden.
Construction Techniques
Now that we’ve covered the basics of designing a dry stone wall, let’s dive into the practical side: various construction techniques to help you bring your vision to life.
Basic Principles of Dry Stone Walling
When it comes to building a dry stone wall, there are some basic principles that you need to follow to ensure its stability and longevity. One of the most crucial aspects is alignment. It’s essential to start with a level base course, as this will determine the overall height and straightness of your wall.
To achieve proper alignment, it’s helpful to use a spirit level or a string line to guide your stonework. As you add each course, make sure that the stones are aligned with those below them, using shims or small rocks to adjust their position if necessary.
Drainage is another critical factor in dry stone wall construction. You want to ensure that water can flow freely through the wall without causing erosion or damage. To achieve this, you should leave a gap of about 1-2 inches between each course of stones and use a layer of smaller rocks or gravel at the base to allow excess moisture to escape.
As a general rule of thumb, the lower courses of your dry stone wall should be slightly wider than the upper ones to account for settling over time.
Building a Dry Stone Wall from Scratch
Building a dry stone wall from scratch requires patience, skill, and attention to detail. Before you start, gather the necessary tools and materials. You’ll need a selection of flat stones, some rounded stones for the base layer, and a trowel or shovel for spreading and compacting the soil.
Begin by marking out the desired length of your wall using stakes and twine. This will give you a clear idea of where to place each stone. Start building from one end, placing the largest, flattest stones at the base. Use a level to ensure the foundation is even, then continue adding layers of stone, alternating the direction of each course.
As you build, use a gentle tapping motion with your trowel or shovel to settle the stones into place. This will help prevent settling issues later on. Don’t worry too much about perfection – dry stone walls are all about rustic charm and imperfections. With practice, you’ll develop an eye for what works and what doesn’t.
When building a dry stone wall from scratch, it’s essential to work slowly and methodically, checking the stability of each layer as you go. This will prevent costly mistakes down the line. By following these simple steps and using the right techniques, you can create a beautiful, long-lasting dry stone wall that adds character to your garden for years to come.
Advanced Techniques and Tips
When creating more complex and intricate dry stone wall designs, it’s essential to have a few advanced techniques up your sleeve. One technique is the use of “raking out” – a process where you carefully remove excess mortar from between stones after construction. This creates a seamless look, but requires patience and attention to detail.
Another advanced technique is the incorporation of “dead men” – horizontal stones placed at regular intervals to add stability and help maintain the wall’s shape over time. When building curved or irregularly-shaped walls, it’s crucial to use these dead men strategically to prevent sagging or collapse.
To achieve a smooth, cohesive look in more intricate designs, consider using a combination of stone types with varying textures and colors. For example, incorporating dark-colored stones for visual contrast can create a striking focal point within the garden. By experimenting with different techniques and materials, you’ll be able to bring your most ambitious dry stone wall designs to life.
Maintenance and Repair
To keep your dry stone walls looking their best, regular maintenance is essential, including checking for loose stones and repairing any damage as soon as it occurs.
Understanding the Importance of Maintenance
When it comes to dry stone walls in gardens, regular maintenance is crucial for their longevity. A well-maintained wall not only looks stunning but also serves as a durable and long-lasting feature that enhances the overall aesthetic of your outdoor space.
One of the primary reasons why dry stone walls require regular upkeep is to prevent erosion and shifting of stones over time. As plants grow, roots can dig into the joints between stones, causing them to shift or even collapse if left unchecked. Regular inspections and cleaning can help identify areas that need attention before they become major issues.
To maintain your dry stone wall, start by inspecting it at least twice a year. Look for any signs of damage, such as loose stones, cracks, or water seepage between the stones. Clean out any debris, leaves, or weeds from the joints and fill with new mortar if necessary. Additionally, trim back nearby plants to prevent roots from damaging the wall in the future.
By committing to regular maintenance, you’ll be able to enjoy your dry stone wall for years to come. Remember, a little upkeep now can save you from costly repairs down the road.
Common Issues and Repairs
As you care for your dry stone wall, it’s essential to be aware of potential issues that may arise. One common problem is the erosion of the mortarless joint between stones, which can lead to structural damage and instability. To repair this issue, gently sweep away any debris or weeds from the affected area, then apply a small amount of lime-based mortar to the gap. Use a pointed trowel to fill the space, ensuring it’s level with the surrounding stones.
Another common problem is loose or displaced stones, which can be caused by settling soil or nearby vegetation growth. To repair this issue, assess the wall’s overall stability and identify any weak points. For smaller gaps (less than 1 inch), apply a small amount of mortar to the back of the stone and gently press it back into place. If the gap is larger, you may need to re-lay or replace the stone entirely.
Regular inspections and timely repairs can help prevent more extensive damage from occurring in the future.
Upkeep and Preservation Techniques
Maintaining an existing dry stone wall is crucial to its longevity and aesthetic appeal. Over time, walls can become worn out due to weathering, erosion, or neglect. Regular upkeep will not only ensure the wall remains stable but also prevent costly repairs.
To start, inspect the wall for any signs of damage, such as crumbling stones, loose joints, or gaps in the structure. Clear debris and vegetation that may be accumulating on top of the wall. Using a brush or broom, gently sweep away dirt and leaves to maintain visibility and allow sunlight to penetrate.
Another crucial aspect is ensuring good drainage around the wall. Ensure water can flow freely without causing erosion or damage. Remove any nearby plants that might obstruct the natural flow of water or create damp conditions.
Regularly inspecting your dry stone wall and addressing issues promptly will help prevent costly repairs and extend its lifespan. Make it a part of your garden maintenance routine, and with proper care, your dry stone wall can remain beautiful for years to come.
Case Studies and Examples
Take a look at how these unique structures have been successfully integrated into real gardens, offering valuable lessons for your own project. From small patios to entire estate boundaries.
Real-Life Examples of Dry Stone Walls
Let’s take a look at some real-life examples of dry stone walls in gardens from around the world. The beautiful garden of Sissinghurst Castle in Kent, England, is a great example of how a dry stone wall can be used to create a stunning focal point and divide different areas of the garden. The wall was built using local limestone and features a mix of straight and curved sections that complement the garden’s meandering paths.
Another inspiring example is the garden of the Chateau de Chenonceau in France, where a series of dry stone walls are used to create separate spaces for different plant species and provide structure to the garden. The use of natural stone adds warmth and texture to the space, while the gentle curves of the wall follow the contours of the landscape.
In Australia’s Blue Mountains, the gardens at Leura House feature beautifully constructed dry stone walls that blend seamlessly into the surrounding landscape. These examples show how a well-designed dry stone wall can add visual interest, provide structure, and create a sense of separation in a garden, while also complementing its natural surroundings.
Successful Integrations with Different Garden Styles
When it comes to incorporating dry stone walls into various garden styles, there’s no one-size-fits-all approach. However, with a little creativity, you can successfully integrate these beautiful structures into modern, traditional, and even cottage-style gardens.
For instance, in modern gardens, dry stone walls can be used as a sleek backdrop for contemporary plantings, such as succulents or grasses. By using clean lines and minimalist design, the wall becomes an extension of the garden’s modern aesthetic. Consider incorporating large boulders or angular stones to add visual interest.
In traditional gardens, dry stone walls are often paired with heritage plants like roses, lavender, and boxwood. To achieve a more rustic look, use irregularly-shaped stones and allow the wall to blend seamlessly into its surroundings. You can also incorporate ornate ironwork or carved stone details for added elegance.
Meanwhile, in cottage-style gardens, dry stone walls provide an idyllic backdrop for whimsical plantings like roses, clematis, or even edible flowers. To achieve a charming look, opt for irregularly-shaped stones and soft curves, then adorn the wall with climbing plants or delicate ironwork.
Lessons Learned and Best Practices
When working with dry stone walls in garden design, it’s essential to consider several key takeaways and best practices. From our analysis of successful projects, one crucial lesson is the importance of understanding local building regulations and obtaining necessary permits before commencing work on a dry stone wall. This may seem straightforward, but it can be a costly oversight if not addressed.
Another critical aspect is selecting suitable materials. While natural stone is often preferred for its aesthetic appeal, other options such as reclaimed or recycled stone can also be effective. The key is to choose stones that complement the surrounding landscape and maintain structural integrity. Regular maintenance is equally vital; regular inspections can help identify potential issues before they become major problems.
In terms of design considerations, incorporating dry stone walls into garden layout often requires a thoughtful approach to balance aesthetics with functionality. For instance, using these structures as retaining walls or seating areas can add visual interest while also serving practical purposes.
Frequently Asked Questions
Can I build a dry stone wall on uneven ground?
Yes, building a dry stone wall on uneven ground requires careful planning and execution to ensure stability and safety. Start by leveling the area as much as possible and then use additional stones or shims to create a stable foundation. This will help prevent the wall from tilting or toppling over.
How often do I need to inspect my dry stone wall for maintenance?
Regular inspections are crucial to maintaining the integrity of your dry stone wall. Check your wall at least twice a year, after winter and during peak growth seasons, to ensure that stones haven’t shifted or damaged the structure.
What’s the ideal height for a dry stone wall in a garden setting?
The ideal height of a dry stone wall depends on its intended purpose and the surrounding landscape. Typically, walls are built between 1-3 feet high to create boundaries without overwhelming the space. However, taller walls can be used as feature walls or to define different areas within your garden.
Can I use recycled materials for my dry stone wall?
Yes, using recycled materials like reclaimed stones is a fantastic way to reduce waste and enhance the environmental sustainability of your project. Just ensure that the materials are suitable for outdoor use and won’t compromise the structural integrity of the wall.
How can I integrate a dry stone wall with other garden features, such as plants or water features?
Dry stone walls can be beautifully integrated with various garden features by choosing stones that complement the colors and textures of surrounding plants. Consider adding stepping stones or paths made from natural materials to create a cohesive look and facilitate access to different areas within your garden.
Are there specific tools I need to get started with building a dry stone wall?
While you can start with basic gardening tools, specialized equipment like trowels, levelers, and shovels specifically designed for stoneworking will make the process smoother and more efficient. Additionally, invest in gloves and safety goggles to protect yourself from potential hazards during construction.