If you’re like many backyard gardeners, you might be wondering how to raise chickens on a tight budget. A low-cost DIY chicken coop is not only achievable but also essential for small garden spaces where space and resources are limited. Not only will it save you money, but it’ll also provide your flock with a safe and healthy environment to thrive in.
In this article, we’ll show you how to plan, build, and maintain a low-cost DIY chicken coop that meets the needs of both you and your birds. We’ll cover expert tips on choosing the right materials, designing for space efficiency, and creating a safe haven from predators. By the end of it, you’ll be well-equipped to provide your flock with a happy and healthy home without breaking the bank.
Planning and Designing Your Backyard Chicken Coop
When designing your backyard chicken coop, a well-planned layout is crucial to ensure both the health of your chickens and the overall aesthetic of your garden. Let’s dive into the key considerations for planning and designing your coop.
Choosing the Right Location for Your Coop
When it comes to building a low-cost DIY chicken coop for your small garden, choosing the right location is crucial. The spot you select will not only impact the comfort and happiness of your chickens but also determine their health and safety.
First and foremost, consider the amount of sunlight the area receives. Chickens need about 12-14 hours of daylight to stay healthy, so a spot that gets plenty of morning sun is ideal. However, be mindful of extreme temperatures – direct sunlight can get too hot in summer or cold in winter. A south-facing location with partial shade is often the best compromise.
Wind direction is another essential factor to consider. Chickens can get stressed by strong winds, which can also cause drafts and make it difficult for them to regulate their body temperature. Try to place your coop in a spot that shields your chickens from harsh winds, such as near a fence or a group of trees.
Lastly, proximity to a water source is vital. You’ll want to be able to easily connect a hose to the coop for cleaning and watering purposes. Avoid placing your coop too close to the garden itself, as this can lead to contamination and attract pests. A spot with easy access to a nearby well or rainwater harvesting system would be perfect.
Measuring and Calculating Space Needs for Your Flock
When determining the ideal size of your backyard chicken coop, there are several factors to consider. The first is breed-specific space requirements. Different breeds have unique needs when it comes to space, with some requiring more room than others. For example, larger breeds like Orpingtons and Brahma need about 4-5 square feet per bird, while smaller breeds like Leghorns and Bantams can get by with around 2-3 square feet.
Another important factor is the number of chickens you plan to keep. A good rule of thumb is to provide at least 10 square feet of coop space per chicken. This will give your birds enough room to move around comfortably, as well as store their bedding and feed without feeling overcrowded.
It’s also essential to think about future expansion plans. Will you want to add more chickens to your flock in the future? If so, make sure to build a coop that can accommodate an increase in numbers. A good way to do this is by designing a coop with modular sections or a removable wall, allowing you to easily expand as needed.
Remember, it’s always better to err on the side of caution and provide more space than necessary. Underestimating your chickens’ needs can lead to stress, disease, and even escape attempts. By planning ahead and building a spacious coop, you’ll create a happy and healthy home for your feathered friends.
Creating a Budget and Sourcing Materials
Creating a budget for your DIY chicken coop is essential to ensure you stay on track and don’t break the bank. To start, estimate your costs by researching the materials you’ll need and their prices. Consider the size of your coop, the number of chickens it will house, and any local building codes or regulations.
When it comes to sourcing materials, think outside the box (or hardware store). Reclaimed wood from an old pallet or fence can add character to your coop while saving you money. Repurposed containers like plastic tubs or metal drums can also make for great nesting boxes or feeding troughs. You can even repurpose old windows, doors, and shutters to create a unique and functional coop.
Some other creative options include using straw bales or hay as insulation, which can be sourced from local farms or stables. Don’t forget to scour online marketplaces like Craigslist or Facebook Marketplace for free or low-cost materials, such as old fencing or decking. By thinking creatively and repurposing materials, you can build a high-quality chicken coop without breaking the bank.
Building Your Low-Cost Chicken Coop
Now that you’ve chosen a perfect spot for your chicken coop, let’s get started on building it without breaking the bank. We’ll walk through the simple steps to create a functional and safe enclosure for your feathered friends.
Frame Construction: Using Lumber and Plywood Effectively
When it comes to constructing the frame of your low-cost chicken coop, using budget-friendly lumber and plywood is crucial. To get started, you’ll need to select suitable materials for the job. Opt for 2x4s or 2x6s for the frame’s vertical supports, and 3/4-inch plywood for the walls and floor. These materials are not only affordable but also durable enough to withstand the elements.
When cutting your lumber, use a circular saw or a miter saw to ensure accurate cuts. For larger pieces of plywood, consider using a jigsaw or a handsaw for more control. Assemble the frame by screwing the vertical supports into place, making sure to secure them with 3-inch screws. Don’t forget to add diagonal bracing to prevent the structure from collapsing under wind or snow loads.
To secure the walls and floor in place, use 2-inch wood screws and a drill press. Make sure to space your screws about 12 inches apart for maximum stability. If you’re using plywood sheets, consider applying a waterproof sealant to protect them from moisture damage.
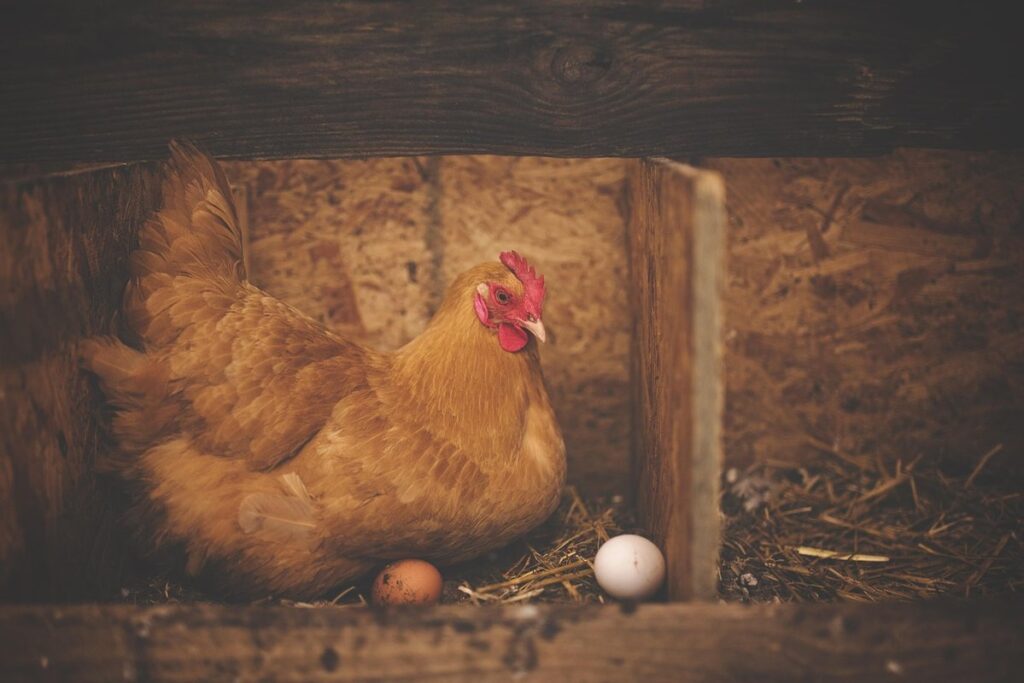
Roosts, Nests, and Perches: Essential Features for Happy Chickens
When designing and building a low-cost chicken coop for your small garden, it’s essential to prioritize the comfort and well-being of your feathered friends. Happy chickens are more likely to produce high-quality eggs, lay them regularly, and enjoy their time outdoors. To create a safe and healthy environment, you’ll need to include three crucial features: roosts, nests, and perches.
A sturdy roost is where your chickens will rest at night, so make sure it’s comfortable and secure. You can use wooden dowels or a large branch for the roost, placing it about 3-4 feet off the ground. The nest is where your hens will lay their eggs, so provide a safe and cozy spot with soft bedding like straw or wood shavings. Hang the nest at around 2-3 feet high to prevent predators from reaching in.
Remember to install perches near the roost for your chickens to roost on during the day. You can use small branches or wooden dowels, spacing them about 12 inches apart to accommodate all your hens comfortably.
Ventilation, Lighting, and Insulation: Prioritizing Chicken Health
When designing your low-cost chicken coop, it’s essential to prioritize the health and well-being of your flock by incorporating adequate ventilation, lighting, and insulation. A well-ventilated coop is crucial to prevent ammonia buildup from droppings, which can cause respiratory issues in chickens.
To achieve proper ventilation, ensure that your coop has at least 2-3 square feet of window space per bird, with windows positioned on opposite sides of the coop for cross-ventilation. You can also install vents or use mesh panels to allow airflow while keeping predators out. A good rule of thumb is to provide a minimum of 1 inch of ventilation per square foot of floor space.
When it comes to lighting, chickens need adequate natural light to produce vitamin D and regulate their circadian rhythms. Consider installing windows that receive direct sunlight for at least 6 hours a day. If you live in an area with limited daylight, use LED or fluorescent lights specifically designed for chicken coops to supplement the natural light.
Insulation is also vital to maintain a comfortable temperature range of 40-80°F (4-27°C) inside the coop. Use materials like straw, hay, or recycled denim to line your coop walls and floor, keeping them warm in winter and cool in summer. A well-insulated coop will help reduce heat stress and prevent disease in your flock.
Tips and Tricks for Keeping Your Coop Clean and Organized
Keeping your coop clean and organized is crucial for happy, healthy hens. In this section, we’ll share our top tips for maintaining a tidy and efficient coop on a budget.
Sanitation Systems: Dealing with Waste and Odors
When it comes to managing chicken waste and maintaining a clean coop environment, sanitation systems play a crucial role. After all, no one wants a smelly coop that attracts pests and creates health hazards for both humans and animals.
To start with, you’ll want to consider installing a deep litter system in your coop. This involves adding a thick layer of bedding material, such as straw or pine shavings, which will absorb waste and odors. As the litter gets dirty, simply scoop out the top layer and replace it with fresh material. This method is low-maintenance and eliminates the need for daily cleaning.
For odor control, try using natural remedies like baking soda, diatomaceous earth, or activated charcoal. Sprinkle these substances around the coop to absorb moisture and neutralize odors. You can also use essential oils like tea tree oil or lavender to create a pleasant scent. Remember to always follow safety guidelines when using any new products in your coop.
By implementing these simple yet effective sanitation systems and odor control methods, you’ll be able to keep your coop clean, odor-free, and healthy for your flock.
Predator Protection: Safeguarding Your Flock from External Threats
As you work towards creating a low-cost and efficient chicken coop for your small garden, it’s essential to consider the safety of your flock from external threats. Predators like foxes, raccoons, and hawks can be a significant concern, but there are ways to secure your coop effectively without breaking the bank.
One effective method is using fencing around the perimeter of your coop and run. Hardware cloth with openings as small as 1 inch can keep out most predators, while also allowing for airflow and visibility. For smaller gardens, you can opt for a shorter fence that’s at least 3 feet high to prevent raccoons and other climbing animals from jumping in.
Another deterrent is netting, which can be hung over the top of your coop or run to catch birds of prey like hawks. You can also use motion-activated sprinklers or ultrasonic repellent devices to scare away predators. For example, a fox is less likely to approach a coop with loud noises or sudden movements.
To further protect your flock, ensure that any gaps in the fencing or netting are sealed and consider using roof reinforcement to prevent hawks from swooping down.
Maintenance and Upgrades: Keeping Your Coop in Good Condition
To keep your DIY chicken coop running smoothly, you’ll need to stay on top of regular maintenance tasks, from cleaning out the coop to upgrading its features over time. We’ll walk you through it all.
Regular Cleaning and Inspection Schedules
Regular cleaning and inspection schedules are crucial to maintaining the health and safety of both your flock and coop. A clean environment reduces the risk of disease transmission and keeps your chickens happy and healthy.
Daily inspections should become a habit, taking no more than 10-15 minutes of your time. Look out for signs of illness, injury or stress in your birds, such as changes in droppings, labored breathing or lethargy. Clean up any messes promptly to prevent the spread of disease and make sure feeders, waterers, nesting boxes and roosts are clean.
Weekly cleaning involves disinfecting all surfaces with a solution of 1 part white vinegar to 9 parts water. Don’t forget the coop’s windows and doors – these often get overlooked but can harbor germs. Also, scrub the feeding troughs and replace any droppings from the nesting boxes.
Monthly inspections are also vital in monitoring your coop’s condition. Check for signs of wear on doors, hinges, and other moving parts, as well as for any damage to wires or other electrical components. Make a note of anything that needs attention so you can address it promptly.
Making Repairs and Updates as Needed
Regular inspections are crucial to identifying potential issues before they become major problems. Check for signs of wear and tear, such as cracks in the walls or roof, loose hinges, and gaps around doors and windows. Make sure all latches and locks are functioning properly to prevent predators from getting inside.
Pay attention to your chickens’ behavior and adjust the coop accordingly. If you notice they’re having trouble accessing food or water due to a design flaw or maintenance issue, address it promptly. Keep an eye out for pest infestations like mites, lice, and rodents, which can spread diseases among your flock.
To make updates as needed, start by prioritizing repairs based on their importance and urgency. Consider the following:
* Fixing broken perches to prevent injuries
* Replacing worn-out nesting boxes to maintain cleanliness
* Sealing gaps around windows and doors to keep drafts out
Use eco-friendly materials like reclaimed wood or bamboo for any repairs or upgrades. These options not only reduce waste but also promote a healthier environment for your chickens.
By staying on top of maintenance tasks, you’ll be able to identify issues early on and address them before they cause more extensive problems or harm to your flock.
Frequently Asked Questions
What if I already have a small garden, but it’s not suitable for a coop? Are there any alternative options?
If you already have a small garden, don’t worry – there are still ways to accommodate your chickens. Consider building a coop on a balcony or patio with a trellis system, using vertical space effectively to save ground area. You can also explore coop designs specifically designed for tiny spaces.
How often should I clean and inspect my coop, especially during peak chicken health seasons?
Yes, cleaning and inspection schedules are crucial, especially during peak chicken health seasons like winter or spring when parasites and diseases thrive. Aim to clean your coop every 2-3 months, inspecting regularly in between for signs of wear and tear.
What if I have a large flock – how do I ensure each bird has enough space inside the coop?
When it comes to calculating space needs for your flock, a general rule of thumb is 4 square feet per chicken. For larger flocks, you may need to create a multi-level design or use vertical space more efficiently by adding shelves or roosts.
Can I reuse materials from my old coop, or should I always start fresh with new lumber and materials?
Yes, reusing materials can be a cost-effective option when building your low-cost DIY chicken coop. However, ensure any reused materials are clean, dry, and free of pests before repurposing them for your new coop.
How do I balance predator protection with proper ventilation in my coop design?
Balancing predator protection with adequate ventilation is key to keeping your chickens healthy and safe. Consider using hardware cloth or chicken wire with openings no larger than 1 inch around windows and vents, ensuring airflow while protecting against predators like raccoons and hawks.