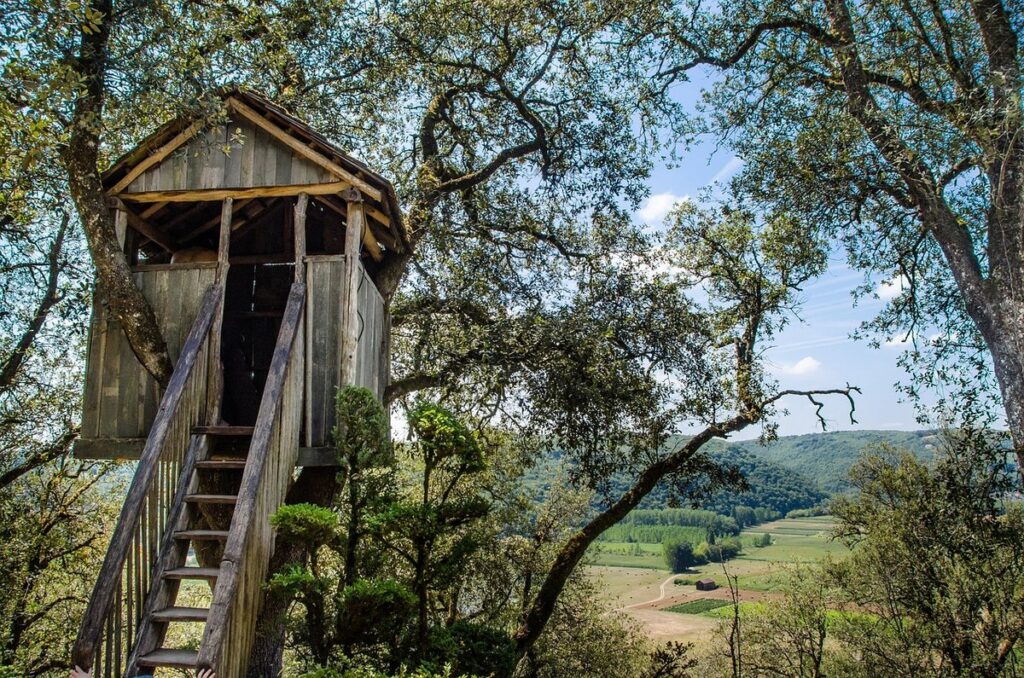
Building a treehouse is often associated with climbing high above the ground, but what if you don’t have the perfect tree or prefer to keep your feet firmly planted on solid ground? Don’t worry, you can still bring the magic of a treehouse into your backyard without sacrificing safety or style. A treehouse on the ground is essentially a freestanding structure designed to mimic the charm and whimsy of its elevated counterpart.
In this article, we’ll walk you through planning, designing, and constructing a treehouse that’s perfect for your family or as a creative play space for kids. From choosing the right materials to ensuring stability and durability, our comprehensive guide will cover every aspect of building a treehouse on the ground.
Planning and Designing Your Treehouse
Before you start hammering nails, let’s plan out your treehouse design, considering factors like size, shape, and materials to ensure a safe and fun retreat. This section covers key decisions to make now.
Choosing the Perfect Location
When selecting a location for your treehouse on the ground, there are several factors to consider. First and foremost, think about sunlight – where does the sun shine brightest? You’ll want to choose a spot that receives plenty of natural light, especially if you plan to use solar panels or have plants inside.
Another crucial consideration is accessibility. How will people get to your treehouse? Make sure it’s easily accessible by placing it near a path or walkway. This will also make maintenance and repairs easier in the long run.
Additionally, don’t forget about neighborhood regulations. Check with local authorities to see if there are any rules governing treehouses on the ground. You might need to obtain a permit or follow specific guidelines for size and design.
It’s also essential to consider drainage and water flow around your treehouse. Avoid areas where water tends to collect, as this can lead to mold and rot issues. Look for spots with good airflow to ensure your treehouse remains dry and cozy.
Measuring and Mapping Your Site
Before you start building your treehouse, it’s essential to accurately measure and map out the area where it will sit. This step might seem simple, but it can save you a lot of time and headaches down the road. Start by clearing the area of any debris or obstacles that could interfere with your measurements.
Use a tape measure to record the dimensions of the space, taking note of any slopes or uneven terrain. You’ll also want to identify any nearby power lines, trees, or other features that could impact your treehouse’s placement. Consider drawing a simple sketch or using graph paper to create a top-down view of the area. This will help you visualize the space and make informed decisions about where to place your treehouse.
As you map out the area, think about any potential challenges that may arise. Are there any underground pipes or wires that could be damaged during construction? Are there any nearby neighbors who might have concerns about noise or property values? By carefully measuring and mapping out the area, you’ll be better equipped to tackle these challenges head-on and create a treehouse that’s both safe and enjoyable.
Designing Your Treehouse Layout
When designing your treehouse layout, it’s essential to consider various factors that will not only make the space functional but also safe for occupants. One crucial aspect is size – a treehouse on the ground can be as large or small as you desire, depending on the purpose and functionality needed.
To create an efficient and inviting design, think about how you’ll use the space. If it’s meant for kids’ playtime, consider including ample room for toys, books, and creative activities. Conversely, if it’s intended for relaxation, opt for a cozier layout with plush seating areas.
Consider the shape of your treehouse as well – an L-shaped or U-shaped design can provide more interior space while maintaining an open feel. Orientation is also vital; positioning the entrance at an angle to the prevailing wind direction will help minimize potential damage from weather conditions.
Additionally, be mindful of clearances around the structure. Ensure there’s enough space for a comfortable approach path and consider incorporating natural elements like plants or a small patio area for outdoor enjoyment.
Preparing the Site
Before you start building, make sure to prepare your site by clearing the area of any debris and leveling the ground to ensure a stable foundation for your treehouse.
Clearing the Land
Before you can start building your treehouse on the ground, it’s essential to clear the land of any debris, trees, and other obstacles that could interfere with construction. This step is often overlooked, but it’s crucial for a safe and successful build.
Start by removing any loose debris such as branches, rocks, and twigs from the area where your treehouse will sit. You can use a rake or broom to collect this material, and then dispose of it properly. Next, assess the trees on the property and determine which ones need to be removed. Consider hiring a professional arborist if you’re unsure about how to safely remove any large trees.
Check for any underground utilities such as electric, gas, and water lines that may be in the way. Mark these areas with paint or flags so they don’t get disturbed during construction. Finally, inspect the land for any other obstacles like rocks, stumps, or uneven terrain. Clearing the land will give you a solid foundation to build on and ensure your treehouse is safe and secure.
Marking Out Your Treehouse Footprint
Before you start digging and building, it’s essential to mark out the area where your treehouse will sit. This step might seem simple, but it’s crucial to ensure that your structure is safe, stable, and visually appealing.
To begin, gather a few stakes and some sturdy string or twine. Drive the stakes into the ground around the perimeter of your designated building site, making sure they’re evenly spaced and level with each other. Tie the string between the stakes, using them as guides to define the boundaries of your project.
As you mark out the area, consider the size and shape of your treehouse, as well as any obstacles or challenges that may arise during construction. Take note of any overhead obstructions, such as power lines or branches, and plan accordingly. Remember to also leave space for pathways, stairs, and any other features you want to incorporate into your design.
When marking out the area, it’s better to err on the side of caution and create a slightly larger footprint than you think you’ll need. This will give you room for error and allow for future modifications or additions to your treehouse.
Testing for Underground Utilities
Before breaking ground for your treehouse, it’s crucial to test for underground utilities like electric lines, gas pipes, and septic systems. This might seem like a hassle, but trust us, it’s a necessary step to avoid costly damages and potential safety risks. Imagine digging into an unmarked electrical line or inadvertently disturbing a septic system – the consequences can be severe.
To identify these hidden hazards, you’ll need to contact your local utility companies to schedule a detection survey. This service typically includes marking the location of underground cables and pipes with colored flags or paint. It’s also essential to check for any easements or restrictions on your property that may limit where you can build your treehouse.
Take it from us – a few hours of upfront investigation can save you thousands in potential repairs and headaches down the line. Be proactive, and don’t start building until you’ve confirmed there are no underground utilities in the way. Your wallet (and your peace of mind) will thank you!
Building the Foundation
Before you start framing and assembling, it’s essential to lay a solid foundation that will support your treehouse’s weight and ensure stability. We’ll guide you through the process of preparing the site and building a sturdy base.
Choosing the Right Materials
When it comes to building a treehouse on the ground, choosing the right materials for the foundation is crucial. The type of material you select will not only determine the stability and durability of your treehouse but also its overall aesthetic appeal.
One popular option is a wooden platform, which can be built using pressure-treated lumber or naturally rot-resistant woods like cedar or cypress. This approach allows for flexibility in design and can be especially suitable for smaller treehouses or those with a more rustic charm. For example, you could opt for a simple deck-style platform or create a more complex design with multiple levels.
Another option is a concrete slab, which provides a solid, level base that can support heavy loads. This is often the best choice for larger treehouses or those with multiple stories. You’ll need to consider factors like drainage and waterproofing when working with concrete, but the results are well worth it. A pier-and-beam system is also an option, especially in areas with poor soil quality or uneven terrain. This involves driving pilings deep into the ground to create a stable base for your treehouse.
Ultimately, the material you choose will depend on your specific needs and preferences. Consider factors like budget, climate, and local building codes when making your decision.
Constructing the Platform
When constructing the platform for your treehouse on the ground, it’s essential to prioritize stability and durability. Start by selecting a level area with good drainage to ensure that your platform remains dry and safe. Mark out a rectangular shape using stakes and twine, taking into account the size of your treehouse and any obstacles.
Next, lay down a layer of compacted gravel or sand to provide a solid base for your platform. This will help prevent moisture from accumulating and causing rot or damage to the structure. Build the platform using pressure-treated lumber or naturally rot-resistant wood, such as cedar or cypress.
Add four corner posts to create a sturdy support system, ensuring that they’re securely attached to the main frame of the platform. Consider adding additional supports, such as beams or joists, depending on the size and design of your treehouse. Regularly check the platform’s foundation for any signs of wear or damage to ensure it remains stable throughout the seasons.
Installing Supports and Beams
When it comes to building a treehouse on the ground, installing support beams and joists is one of the most critical steps. A sturdy foundation is essential for withstanding various weather conditions, weight loads, and ensuring the safety of occupants. To start, lay down pressure-treated lumber for the support beams, spaced about 16-18 inches apart. These beams will provide a solid base for your treehouse’s frame.
Next, install joists between the support beams, also made from pressure-treated lumber. The joist spacing depends on the design and size of your treehouse, but as a general rule, use 16-inch centers for small structures and 24-inch centers for larger ones. Secure each joist to the support beam using galvanized lag screws or nails. Make sure to leave space between the joists for insulation and future repairs.
As you’re building on the ground, it’s essential to remember that your treehouse will be elevated in the future, so consider adding extra support beams or joists as needed to ensure stability. Additionally, check local building codes and regulations regarding foundation requirements before proceeding with your project.
Framing and Structure
When building a treehouse on the ground, framing and structure are crucial elements that require careful planning to ensure your playhouse is sturdy and safe for years to come. We’ll walk you through the key considerations here.
Building the Frame
When it comes to building a treehouse on the ground, constructing the frame is one of the most critical steps. This is where you’ll establish the foundation and structure of your treehouse, so choose materials and techniques wisely.
For the frame itself, you can use pressure-treated lumber or naturally rot-resistant woods like cedar or cypress. Ensure that all pieces are properly cut to size using a miter saw or circular saw. When assembling the frame, consider using galvanized lag screws for maximum stability. Don’t forget to include diagonal bracing between posts and beams for added support.
Remember to keep your design in mind as you build the frame. For example, if you’re creating a multi-level treehouse, make sure to reinforce the corners with additional support. Use this opportunity to add windows, doors, or other features that will enhance the overall functionality of your treehouse.
In terms of techniques, consider using a combination of post-and-beam framing and platform framing for added strength and stability. With careful planning and execution, your frame will provide a sturdy foundation for the rest of your treehouse project.
Adding Roof Trusses and Rafters
When building a treehouse on the ground, adding roof trusses and rafters is a crucial step to ensure a sturdy and weather-tight structure. Before you start, make sure you have all the necessary materials and tools at hand.
To begin with, decide on the type of roof design that suits your treehouse best. A simple gable or shed roof is ideal for beginners. Once you’ve made your decision, create a detailed plan of how to space out the trusses and rafters evenly across the structure.
For roof trusses, use 2×6 or 2×8 lumber depending on the size of your treehouse and the load it will bear. Cut them to the required length using a miter saw or circular saw, making sure to mark the top chord and bottom chord clearly. For rafters, space them about 16-20 inches apart, starting from the lowest point on the roof and working upwards.
Secure the trusses by nailing them to the floor beams with three-inch galvanized nails or screws. Make sure they are level and plumb before moving on to the next step.
Installing Exterior Finishing Touches
Now that you’ve completed the framing and structure of your treehouse on the ground, it’s time to give it a face-lift with exterior finishing touches. Siding is a crucial component as it not only adds visual appeal but also protects the wood from harsh weather conditions.
Choose from various siding options such as cedar shakes, vinyl panels, or reclaimed wood planks. Consider factors like maintenance requirements, durability, and budget when making your decision. For instance, if you live in an area prone to extreme temperatures, a durable option like metal siding might be more suitable than natural stone.
Install the chosen siding material according to manufacturer instructions, ensuring proper spacing for ventilation and drainage. Next, add trim around doors and windows using matching materials to create a cohesive look. This is where your treehouse starts to resemble a cozy retreat.
Electrical, Plumbing, and Finishing Work
Now that the foundation is set, it’s time to focus on the electrical, plumbing, and finishing work that will bring your treehouse to life with power, running water, and comfortable finishes. This includes installing essential systems and features to make your treehouse a cozy retreat.
Running Electricity and Lighting
When it comes to creating a functional and cozy treehouse on the ground, installing electricity and lighting is an essential step. But before you begin, ensure that you have consulted with local authorities regarding any necessary permits or regulations.
Start by determining where you’ll need electrical outlets and lighting fixtures in your treehouse. Consider placing outlets near the entrance and in areas where children will be spending most of their time, such as a reading nook or play area. For lighting, install wall-mounted sconces or pendant lights above tables or countertops to provide ample illumination.
When running electricity, remember that it’s crucial to keep cables secure and hidden from view for safety reasons. Use cable ties and conduit pipes to manage cords and wires. Also, make sure to test your electrical system thoroughly before using any outlets or fixtures. A GFCI outlet is a must-have in the treehouse, especially near water sources like sinks or toilets.
Finally, install energy-efficient lighting options such as LED bulbs to minimize electricity consumption and reduce your carbon footprint. With these simple steps, you can create a warm and inviting space for children to play and relax while staying safe and compliant with local regulations.
Installing Plumbing Systems (If Applicable)
Installing plumbing systems is a crucial aspect of building a treehouse with running water or a bathroom. If you plan to include these features in your ground-based treehouse, you’ll need to follow a specific process to ensure safe and functional installation.
First, determine the type of plumbing system needed for your treehouse. This may involve connecting to an existing municipal water supply or installing a well and septic system. For smaller treehouses, consider using a rainwater harvesting system or a self-contained portable toilet. Research local building codes and regulations regarding plumbing systems, as these can vary depending on your location.
To install the plumbing system, you’ll need to hire a licensed plumber with experience in outdoor installations. They will assess your site conditions, determine the optimal pipe layout, and ensure that all connections are secure and meet code requirements. Additionally, consider incorporating eco-friendly features, such as greywater reuse systems or composting toilets, to minimize environmental impact.
Some popular options for plumbing system installation include using PEX (cross-linked polyethylene) tubing for flexibility and durability, and installing a pressure-reducing valve to prevent water damage from excessive pressure.
Final Touches: Flooring, Walls, and Ceilings
Now that you’ve completed the electrical and plumbing work, it’s time to focus on the interior of your treehouse. When it comes to flooring, walls, and ceilings, it’s essential to choose materials that are not only visually appealing but also functional and safe. For flooring, consider using durable and water-resistant options such as cedar planks or composite decking. These materials will withstand the wear and tear of daily use and can be easily cleaned.
When selecting wall finishes, think about the style and atmosphere you want to create in your treehouse. You could opt for traditional wooden paneling or go for a more modern look with drywall. Make sure to choose materials that are resistant to moisture and can withstand exposure to the outdoors. For ceilings, consider using translucent panels or skylights to bring in natural light and create a sense of openness.
Remember to always follow safety guidelines when working with power tools and building materials. Use proper ventilation when installing flooring and walls to prevent inhalation of dust and fumes. Additionally, ensure that all electrical components are safely secured and out of reach of children. With careful planning and execution, you’ll be able to create a safe and inviting space for relaxation and play.
Safety Considerations and Maintenance
Before you start building, let’s cover some essential safety considerations and maintenance tips to ensure your treehouse remains stable and secure over time. Regular upkeep will also extend its lifespan.
Ensuring Safe Access and Egress
When building a treehouse on the ground, it’s easy to focus on the fun aspects of design and construction. However, ensuring safe access and egress is crucial for both adults and children who will be using the treehouse. A well-designed entrance and exit can make all the difference in preventing accidents and injuries.
Start by considering the treehouse’s location and orientation on your property. Ideally, it should be placed near a fence or a clear path to prevent wandering off or getting lost. The entrance should also be at a comfortable height, around 2-3 feet above ground level, making it easy for young children to climb in and out.
Use wide, sturdy stairs or a ramp to connect the treehouse to the surrounding area. Make sure these are securely attached to the treehouse and are slip-resistant to prevent falls. You can also add handrails for added stability and support. By prioritizing safe access and egress, you’ll create a welcoming and secure space for everyone to enjoy.
Installing Safety Features (e.g., Railings, Netting)
Installing safety features is an essential part of building a treehouse on the ground. Railings and netting are two critical components that can prevent falls and injuries. When installing railings, choose sturdy materials like wood or metal and secure them firmly to the surrounding structure. Consider adding a railing height of at least 3 feet to ensure adequate protection.
Netting is another effective safety feature that can catch children or pets who accidentally fall off the treehouse platform. Install netting with openings no larger than 2 inches to prevent fingers from getting stuck. Secure it tightly around the perimeter, ensuring that it’s anchored firmly to the ground and surrounding structures. You can also add a layer of padding underneath the netting for extra cushioning.
Remember to check local building codes and regulations regarding safety features before starting your project. With proper installation, railings and netting can provide peace of mind for you and your loved ones while enjoying your treehouse on the ground. Regular inspections will also help ensure that all safety features remain in good condition.
Regular Maintenance Tips
Regular maintenance is crucial to ensure your treehouse remains safe and structurally sound. Set aside time each season for a thorough inspection. Begin by checking for signs of rot, such as soft or spongy wood, warping, or cracking. Inspect the foundation, beams, and support posts for any damage.
Don’t forget to check for pest infestations like termites or carpenter ants, which can cause significant structural damage if left unchecked. Use a bright flashlight to peer into dark areas, and gently tap on surfaces with your knuckles to listen for hollow sounds that might indicate rot or insect activity.
In addition to these tasks, perform seasonal upkeep by cleaning leaves from the roof and gutters, applying weatherproofing sealants as needed, and checking the doors and windows for proper alignment. Regular maintenance will help extend the life of your treehouse and keep it a safe haven for years to come. Remember to schedule annual or bi-annual inspections with a professional if you’re unsure about any aspect of maintenance.
Frequently Asked Questions
What if I’m short on space, can I still build a treehouse on the ground?
You don’t need acres of land to have a treehouse. Even small backyards or balconies can accommodate a compact design that’s specifically tailored for your available space. Consider using wall-mounted supports or corner-based designs to maximize space efficiency.
How do I ensure my treehouse is stable and safe for frequent use?
Ensuring stability is crucial for a treehouse on the ground. Consult with local building codes and consider factors like wind resistance, weight distribution, and soil type when designing your foundation. You may also want to incorporate adjustable feet or a leveling system for added security.
Can I build a treehouse on the ground if my yard has uneven terrain?
Yes. While uneven terrain can present challenges, it’s not an insurmountable obstacle. Consider using specialized foundation systems designed for sloping sites or incorporating ramps and stairs to navigate changes in elevation.
How do I choose materials that will withstand outdoor weather conditions?
Select materials suitable for outdoor use, such as pressure-treated wood, durable plastics, or sustainably sourced hardwoods. Ensure you apply a protective coating to extend the lifespan of your treehouse’s exterior finishings. Regular maintenance is key to maintaining the integrity of your structure.
What if I want to add electricity and plumbing to my treehouse – what are some key considerations?
When planning electrical and plumbing installations, be mindful of local building codes and regulations. Ensure you hire professionals for these tasks to ensure safety and compliance with applicable standards. Don’t forget to plan for a backup power source, like solar panels or a generator, in case of emergencies.