Growing Brussels sprouts can be a rewarding experience, but understanding their growth stages is crucial for a bountiful harvest. As a gardener or vegetable enthusiast, you’re likely eager to know when and how your Brussels sprouts will mature, but did you know that this process involves several distinct stages? From the initial germination phase to maturation, each stage plays a vital role in the overall success of your crop. In this article, we’ll delve into the key growth stages of Brussels sprouts, providing expert tips on cultivation, optimal harvest times, and essential crop care techniques. By the end of this guide, you’ll have a clear understanding of what to expect from your Brussels sprouts at every stage, empowering you to nurture a healthy, thriving plant with maximum yields.
Introduction to Brussels Sprouts
Let’s start by learning about the basics of Brussels sprouts, including their history and unique characteristics that make them a popular crop among gardeners. This foundation will serve as the basis for our exploration of their growing stages.
What are Brussels Sprouts?
Brussels sprouts are a cool-season crop that belongs to the Brassica family, which also includes broccoli, cauliflower, and kale. They are small, green buds that grow on a tall stem, resembling tiny cabbages. These versatile vegetables can be cooked in various ways, from steaming and roasting to sautéing and boiling.
From a nutritional standpoint, Brussels sprouts are a powerhouse of goodness. They are an excellent source of vitamins C and K, as well as folate and fiber. One serving of cooked Brussels sprouts contains about 4 grams of protein, making them a great option for vegetarians and vegans. The antioxidants present in Brussels sprouts have been linked to several health benefits, including reducing inflammation and fighting cancer cells.
Incorporating Brussels sprouts into your diet can be as simple as adding them to your favorite stir-fry or roasting them with olive oil and salt. They pair well with a variety of seasonings, such as garlic, lemon juice, and chili flakes, making them a versatile addition to any meal. Whether you’re a seasoned gardener or just starting out, growing Brussels sprouts is a great way to have access to these nutritious vegetables year-round.
Importance of Understanding Growth Stages
Understanding the growth stages of Brussels sprouts is crucial for successful cultivation. It’s what sets apart a seasoned gardener from a beginner. When you grasp the different developmental phases that your plants go through, you’ll be better equipped to identify potential problems early on and take corrective action.
By understanding these growth stages, you can provide your Brussels sprouts with the right care at the right time. For instance, knowing when to fertilize or prune will help maximize yields and prevent diseases from taking hold. It’s also a matter of timing – if you know that your plants are about to bolt (go to seed), you’ll be able to harvest them before they waste energy on producing flowers.
This knowledge can make all the difference between a mediocre crop and one that thrives. So take some time to familiarize yourself with the different growth stages: seed germination, rosette formation, stem elongation, and finally, harvesting. With each stage, you’ll gain insight into what your plants need to grow strong and healthy – it’s an investment in a bountiful harvest.
Stage 1: Germination (0-7 Days)
The first stage of your Brussels sprouts journey is all about germination, where seeds start to sprout and grow their first set of leaves. This crucial phase typically lasts between 0-7 days, but timing may vary depending on conditions.
Sowing Seeds Correctly
When sowing Brussels sprouts seeds, it’s essential to get it right from the start. This ensures optimal germination and sets the stage for a healthy crop.
First, consider the timing of sowing. In most regions, it’s best to sow Brussels sprouts in late winter or early spring, about 8-10 weeks before the last frost date. This allows the seedlings to establish themselves before the heat of summer. If you’re starting seeds indoors, sow them 1/4 inch deep in seed trays filled with a good quality potting mix. Keep the soil consistently moist but not waterlogged.
For direct sowing, plant the seeds 2-3 inches apart and 1/4 inch deep in well-draining soil. Make sure the soil is cool, around 40°F to 50°F (4°C to 10°C), as Brussels sprouts germinate poorly in warm temperatures. Use a seed starter or a small container with drainage holes to sow seeds indoors for an earlier start.
Avoid over-handling the seeds and disturb the soil as little as possible after sowing, as this can lead to reduced germination rates. Keep the area around the seedlings weed-free and water them regularly to ensure consistent moisture levels.
Providing Ideal Conditions
During germination, Brussels sprouts seeds require ideal conditions to break dormancy and initiate growth. Temperature plays a crucial role, with optimal temperatures ranging between 65°F to 75°F (18°C to 24°C). If the temperature is too high or too low, it can hinder germination or even kill the seedling.
Lighting is also essential during this stage. Brussels sprouts seeds typically require darkness to germinate, so a dark location with consistent moisture levels is ideal. Avoid placing seeds near direct sunlight or under grow lights, as this can inhibit germination.
Maintaining proper moisture levels is vital for successful germination. The seed should be kept moist but not waterlogged, as excess water can lead to fungal growth and root rot. Check the soil daily and gently water when it feels dry to the touch. A general rule of thumb is to maintain a consistent moisture level throughout the first week after sowing.
Stage 2: Seedling Development (7-14 Days)
Now that your Brussels sprouts seeds have germinated, it’s time to help them develop into healthy seedlings. This stage is crucial for establishing a strong foundation for future growth and development.
Emerging Leaves and Stem Elongation
At around 7-14 days after sowing, Brussels sprouts seedlings enter the stage of emerging leaves and stem elongation. During this period, the first true leaves begin to unfurl, typically in a rosette pattern. These early leaves are usually a lighter green color compared to the deeper green foliage that will follow.
As the seedling grows, the stem starts to elongate, eventually reaching around 2-3 inches (5-7.5 cm) in length. It’s essential to ensure good air circulation and adequate light during this stage to promote healthy growth and prevent fungal diseases.
To encourage optimal development, keep the soil consistently moist but not waterlogged. Avoid over-fertilizing at this stage, as it can cause weak and leggy growth. Instead, focus on providing a balanced diet of nutrients through a starter fertilizer or compost tea.
Keep an eye out for any signs of pests or diseases, such as aphids, whiteflies, or powdery mildew. Regular monitoring will help you catch potential issues early on, allowing for timely intervention and reducing the risk of severe damage.
Root System Establishment
During this critical stage of seedling development (7-14 days), the roots of your Brussels sprouts plants are establishing themselves in the soil. This process is essential for healthy growth and ultimately, a bountiful harvest.
As soon as the seeds germinate, tiny root hairs begin to emerge from the seed’s radicle, breaking through the surface tension of the water or soil. These initial roots are responsible for anchoring the seedling and absorbing nutrients and moisture. The radicle grows downward, gradually increasing in diameter, while finer lateral roots branch off, developing into a more extensive root system.
As the seedling develops, its roots grow deeper and wider, establishing a network of fine hairs to maximize water and nutrient uptake. It’s essential to maintain optimal growing conditions during this period to encourage robust root development. Water your seedlings with lukewarm water (around 18-20°C or 64-68°F) to promote healthy root growth. Avoid overwatering, which can lead to weak and leggy stems.
To ensure a strong root system, provide your Brussels sprouts plants with adequate light and maintain soil temperature between 15-20°C (59-68°F). A well-draining potting mix will also help prevent waterlogged soil and promote healthy root development.
Stage 3: Leaf Formation (1-2 Weeks)
As we enter the third stage of Brussels sprouts growth, tiny leaves begin to emerge from the buds, signaling a crucial period for photosynthesis and development. This is where your plants really start to take off!
First Set of True Leaves
As you continue to care for your Brussels sprouts seedlings, you’ll soon notice the emergence of the first set of true leaves. These leaves are a significant milestone in the growth process and indicate that your seedlings are adapting to their environment.
True leaves differ from cotyledons (seed leaves) in shape, size, and color. They’re typically larger and more robust, with a deeper green hue. The edges of true leaves may be wavy or lobed, depending on the variety of Brussels sprouts you’re growing.
During this stage, it’s essential to provide your seedlings with optimal growing conditions. Ensure they receive sufficient light, water them carefully, and maintain a consistent temperature between 65°F to 75°F (18°C to 24°C). Avoid overwatering, as this can lead to root rot and hinder the development of subsequent leaves.
Keep in mind that not all seedlings will exhibit true leaves simultaneously. Some may show signs of emerging true leaves before others. Be patient and observe your plants closely, taking note of any variations in growth patterns.
Cell Division and Expansion
As Brussels sprouts continue to grow, they enter a stage of rapid cell division and expansion. This period, which lasts around 1-2 weeks, is crucial for the development of new leaves. During this time, the cells in the plant’s meristem begin to divide rapidly, producing new tissue that will eventually form the leaves.
As the cells expand, the leaves start to take shape, and you’ll notice a significant increase in size. It’s essential to provide your Brussels sprouts with optimal growing conditions during this period, including adequate light, water, and nutrients. Make sure the soil is consistently moist but not waterlogged, as this can lead to root rot.
To encourage healthy cell division and expansion, keep the temperature between 60-75°F (15-24°C). Avoid exposing your plants to extreme temperatures or drafts, which can slow down growth. By providing the right environment, you’ll be able to enjoy a bountiful harvest of tender, delicious Brussels sprouts. Monitor your plant’s progress closely and adjust your care routine as needed to ensure optimal growth.
Stage 4: Bolting and Flowering (3-6 Weeks)
As your Brussels sprouts plants approach full maturity, it’s essential to recognize the signs of bolting and flowering, which typically occurs between 3 to 6 weeks before harvest.
What is Bolting?
Bolting is a critical phase in the Brussels sprouts growing stages that can significantly impact your harvest. It’s essential to understand what bolting means and why it happens. Bolting occurs when the plant focuses its energy on producing a tall stem, often accompanied by small or no buds forming along the stalk. This phenomenon can happen due to various factors such as excessive heat, stress, nutrient deficiencies, or an imbalance in the day-night temperature.
When a Brussels sprouts plant bolts, it typically begins to produce flowers and seeds, rather than developing its valuable buds. This shift in energy allocation can lead to reduced yields, smaller buds, and poor quality sprouts. For instance, if you’re growing ‘Long Island Improved’ or ‘Jade Cross’, these varieties are more susceptible to bolting due to their compact growth habit.
To minimize the risk of bolting, ensure your plants receive optimal temperatures between 60°F and 70°F (15°C and 21°C) during the day and around 10°F (5.6°C) lower at night. Provide consistent moisture levels, maintain a balanced fertilizer schedule, and provide enough space for air circulation to prevent stress and promote healthy growth. By understanding and addressing the factors that contribute to bolting, you can take proactive steps to ensure your Brussels sprouts plants reach their full potential.
Preparing for Harvest
As your Brussels sprouts plants begin to bolt, it’s essential to prepare them for harvest. Bolting is a natural process where the plant focuses its energy on producing seeds rather than developing the buds. This can lead to a decrease in bud size and flavor. To ensure you get the best possible harvest, follow these tips:
Monitor the weather: Check the forecast and plan your harvest accordingly. If a heatwave or frost is predicted, consider harvesting earlier to avoid damage.
Reduce watering: As the plants bolt, they require less water. Overwatering can lead to rot and other issues, so be sure to cut back on irrigation.
Stop fertilizing: Fertilizers promote leaf growth, which can compete with bud development. Stopping fertilizer application will help direct energy towards the buds.
Inspect for pests: Pests like aphids and caterpillars thrive in stressed plants. Regularly inspect your crop and take action if you notice any issues.
Timing is everything: Keep a close eye on your plant’s progress, and harvest when the buds are firm and compact, about 1-2 inches in diameter.
Stage 5: Sprout Formation (6-8 Weeks)
As we approach six to eight weeks into your Brussels sprouts journey, you’ll start to notice tiny buds forming on the stalks, signaling the beginning of a new phase in their development. These little sprouts will soon become the delicious veggies you’ve been growing for!
Developing Buds and Sprouts
As you reach the 6-8 week mark, the buds on your Brussels sprouts plants will start to form and grow into edible sprouts. This is an exciting stage, as it marks the beginning of the end of the plant’s growth cycle. The buds, which are small, compact, and tightly wrapped in leaves, will begin to swell and increase in size.
As they mature, the buds will eventually break through the outer layer of leaves, revealing a tiny, immature sprout inside. This process is called “bolting,” where the sprout grows rapidly, eventually reaching full size within 1-2 weeks. During this time, it’s essential to continue providing your plants with optimal growing conditions, including plenty of light, water, and nutrients.
To encourage healthy growth and development, make sure to remove any weak or deformed buds, as they can compete with the stronger sprouts for resources. Also, keep an eye out for pests like aphids and slugs, which can damage the developing sprouts. By monitoring your plants closely and providing the right conditions, you’ll be rewarded with a bountiful harvest of delicious, crunchy Brussels sprouts in no time.
Monitoring for Pest and Disease Issues
During the sprout formation stage (6-8 weeks), Brussels sprouts are susceptible to various pests and diseases that can significantly impact their growth and yield. One of the most common issues is aphid infestation, which can be identified by the presence of small, soft-bodied insects on the plants’ leaves and stems. To control aphids, use neem oil or insecticidal soap spray at a concentration of 2-3%. Regularly inspect your plants for signs of pest activity and take action promptly to prevent damage.
Another common issue is powdery mildew, a fungal disease that causes white, powdery patches on the leaves. To manage powdery mildew, maintain good air circulation around your plants, ensure adequate watering, and use fungicides containing sulfur or copper at the first sign of symptoms. Regularly inspect your plants for signs of disease, and remove any affected areas to prevent the spread of infection.
Additionally, slugs and snails can also damage Brussels sprouts during this stage. Use copper tape or crushed eggshells around the base of the plants to deter these pests. Monitor your plants closely and take action promptly if you notice any damage.
Stage 6: Maturation and Harvest (8+ Weeks)
Now that your Brussels sprouts are growing robustly, it’s time to focus on their final stages of development, from maturation to harvest, typically around 8 weeks or more after planting.
Checking for Maturity
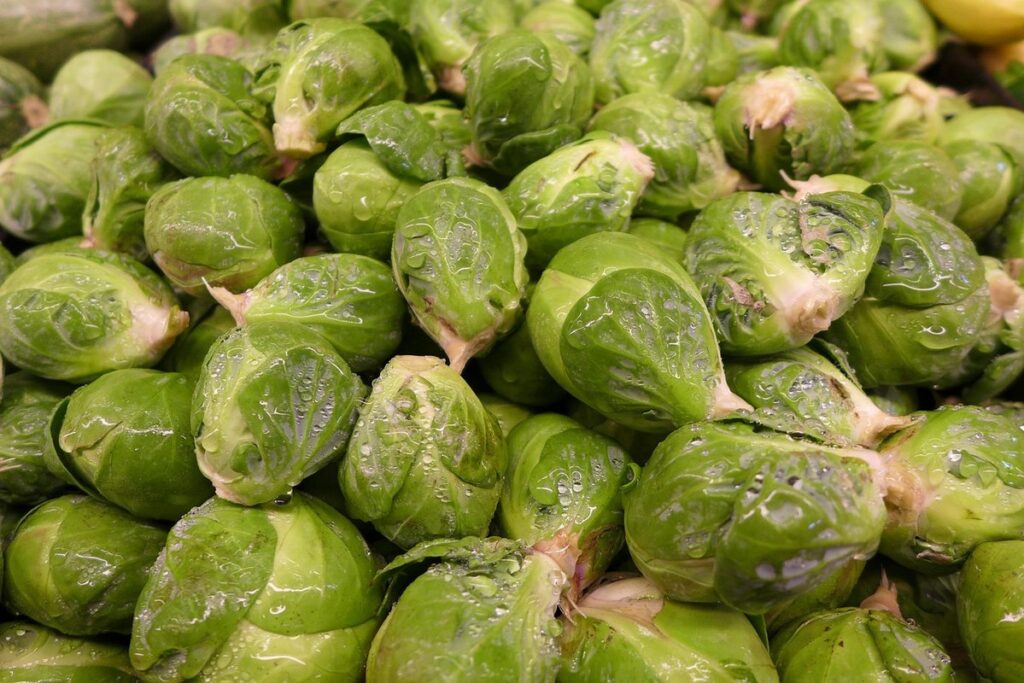
As you approach the 8-week mark, it’s essential to check for maturity and plan the harvest accordingly. The key indicators of mature Brussels sprouts are a deep green color, compact buds that feel firm but not hard, and a slightly sweet aroma.
To determine if your crop is ready for harvest, gently squeeze one of the buds. If it resists pressure and feels dense, it’s likely mature. Also, inspect the buds for any signs of yellowing or browning, which can indicate over-maturity.
Another way to check for maturity is by observing the color change on the stalk. As Brussels sprouts mature, the lower leaves turn a light greenish-yellow hue. This color shift can be a good indicator that the crop is nearing readiness.
When harvesting, cut the stalk near the base of the plant, just above the soil line. This will help prevent damage to the remaining buds and encourage further growth. Handle the sprouts gently to avoid bruising or damaging them during handling. With proper care, your mature Brussels sprouts are ready for a delicious harvest!
Proper Handling and Storage
When you’ve finally reached the maturation stage and are ready to harvest your Brussels sprouts, it’s essential to handle them with care to preserve their quality. Avoid washing the sprouts before storing them, as excess moisture can lead to spoilage. Instead, gently remove any loose leaves or debris from the stalk.
To store harvested Brussels sprouts, place them in a breathable container, such as a paper bag or mesh bag. Keep the container cool and dry, away from direct sunlight. You can also store them in a sealed container with some air circulation to maintain humidity levels.
For long-term storage, consider refrigerating your Brussels sprouts at 32°F (0°C) or below. They’ll keep for up to three weeks in ideal conditions. When you’re ready to use them, remove the desired number of sprouts from storage and rinse them gently before cooking.
Remember to always check on your stored Brussels sprouts regularly to ensure they remain fresh. A simple way to test their quality is by squeezing one gently – if it’s firm and feels slightly sweet, it’s ready to eat!
Conclusion and Tips for Success
Now that you’ve reached the end of our comprehensive guide, let’s summarize key takeaways and provide actionable tips to ensure your Brussels sprouts crop reaches its full potential.
Recap of Key Takeaways
As we conclude our comprehensive guide to Brussels sprouts growing stages, let’s recap the key takeaways from our discussion. You now have a thorough understanding of the process involved in cultivating these nutritious vegetables. From germination to harvesting, each stage is crucial for a successful Brussels sprouts crop.
You’ve learned how to identify the optimal time for planting and how to care for your seedlings during the early stages. We discussed the importance of providing adequate water, nutrients, and protection from pests and diseases. You’re also aware of the transition from head formation to maturation, including the signs that indicate when your sprouts are ready to be harvested.
Remember to keep a consistent schedule for watering and fertilizing your plants to promote healthy growth. Make sure to monitor for any signs of disease or pest infestation, and take action promptly if you notice anything out of the ordinary. By following these guidelines, you’ll be well on your way to growing delicious and nutritious Brussels sprouts in no time.
Additional Advice for Growers
As you’ve made it through the growing stages of Brussels sprouts, you’re likely eager to reap the rewards of your labor. To ensure a bountiful harvest and optimal flavor, keep in mind these final tips for successful cultivation.
Monitor temperature fluctuations closely, as extreme temperatures can impact bud formation and overall yield. Maintain soil health by avoiding overwatering, which can lead to nutrient deficiencies and root rot. Regularly inspect your plants for signs of pests or diseases, such as aphids, slugs, or powdery mildew.
When harvesting, twist the sprouts from their stalks, rather than cutting them off with scissors or a knife. This will help prevent damage to the plant and encourage continued growth. Consider succession planting to extend your harvest season – simply sow new seeds every few weeks for a continuous supply of fresh Brussels sprouts.
Lastly, don’t be afraid to experiment and try new things! Brussels sprouts are a versatile crop, and with a little creativity, you can develop unique recipes and presentation styles that showcase their tender flavor. Happy growing!
Frequently Asked Questions
What if I accidentally planted Brussels sprouts too early or late for my climate?
This can be a critical mistake, but it’s not a disaster. If you notice that your seedlings are being affected by extreme temperatures, adjust your cultivation plan to accommodate the local growing season. For areas with mild winters, consider planting in autumn or early spring for optimal growth.
Can I grow Brussels sprouts in containers or do they require a lot of space?
Brussels sprouts can thrive in large containers (at least 12 inches deep) as long as you provide them with adequate support and nutrients. Make sure to choose a container that’s at least 6-8 hours from direct sunlight to ensure even growth.
How do I prevent pests like aphids, slugs, or caterpillars from damaging my Brussels sprouts?
Regularly inspect your plants for signs of infestation and use natural pest control methods whenever possible. For example, neem oil can be effective against aphids and whiteflies, while hand-picking is a good solution for caterpillars.
Can I reuse soil from last year’s crop or do I need to start fresh?
It’s not recommended to reuse the same soil from previous crops due to potential disease buildup. Instead, mix in fresh compost or well-rotted manure to create a healthy growing environment for your Brussels sprouts.
What are some common mistakes that can lead to weak or deformed sprouts?
Some gardeners might experience weak or deformed sprouts if they don’t provide enough support during the growth process. Make sure to stake your plants when necessary and ensure proper air circulation to prevent disease issues.