As we transition from warm weather to cooler months, many of us struggle with finding ways to keep our beloved outdoor plants alive. But bringing them inside can be just as challenging, especially if you’re not sure where to start. Choosing the right plants for indoor spaces is crucial, and it’s essential to prepare them for the change in environment to prevent shock and potential damage. In this comprehensive guide, we’ll walk you through everything you need to know about transitioning your outdoor plants to indoor spaces. From selecting the perfect plants to preparing and maintaining them in their new home, we’ll cover all the necessary steps to ensure a smooth transition. Whether you’re a seasoned plant parent or just starting out, our tips will help you bring the beauty of nature inside all year round.
Understanding the Challenges of Bringing Outdoor Plants Indoors
Transitioning outside plants to indoor spaces can be tricky, and it’s essential to understand the unique challenges that come with bringing the outdoors in. Let’s dive into what you need to know.
Assessing Plant Health for Indoor Migration
When bringing outside plants indoors, it’s essential to assess their health before making the transition. This step is crucial to prevent potential problems and ensure a smooth adaptation to indoor conditions. One key factor to consider is pest infestations. Outdoor plants can harbor pests like spider mites, mealybugs, or scale insects that thrive in warm temperatures but may struggle with the cooler temperatures indoors.
To evaluate your plant’s health, inspect it thoroughly for signs of pests or diseases. Check the undersides of leaves and stems, as well as any crevices or joints where pests might hide. You can also gently shake branches over a white sheet to dislodge any unwanted critters.
Another critical factor is sensitivity to indoor conditions. Outdoor plants are often exposed to full sun, wind, and extreme temperatures, which may not be replicated indoors. Some plants may require additional light sources or specialized care to thrive in low-light environments. By assessing your plant’s health before bringing it inside, you can identify potential issues early on and take corrective action to ensure a successful transition. This may involve repotting, pruning, or providing supplemental lighting or fertilization as needed.
Preparing Plants for the Transition Process
Before bringing your outdoor plants indoors, it’s essential to prepare them for their new environment. This involves making adjustments to their size, shape, and root structure to ensure a smooth transition. One way to do this is through pruning. Prune your plants to maintain a manageable size, remove any dead or diseased branches, and promote healthy growth.
Pruning also helps prevent pests and diseases from spreading indoors. For example, if you have a plant with fungal infections like powdery mildew or root rot, it’s best to prune the affected areas before bringing them inside. Repotting is another crucial step in preparing your plants for indoor life. Use a well-draining potting mix and a container that’s slightly larger than the original one to give the roots room to grow.
It’s also important to acclimate your plants to indoor conditions by gradually reducing direct sunlight exposure over a period of 7-10 days. This will prevent shock when they’re exposed to lower light levels indoors. Regularly inspect your plants for any signs of pests or diseases, and take corrective action promptly to prevent infestations from spreading. By following these steps, you can ensure a successful transition process for your outdoor plants.
Choosing the Right Plants for Indoor Environments
When it comes to transitioning your outdoor plants indoors, selecting the right species is crucial for their survival and your satisfaction. Let’s explore what makes a plant suitable for indoor spaces.
Selecting Plants Suitable for Low-Light Conditions
When transitioning outside plants to indoor spaces, it’s essential to consider the lighting conditions within your home. Not all plants can thrive in low-light environments, but there are many species that adapt well to these conditions. If you have a room with limited natural light, look for plants like Chinese Evergreen and Pothos. These low-maintenance options can tolerate indirect sunlight and make great additions to indoor spaces.
Other suitable options include Snake Plant, Peace Lily, and Dracaena. These plants have adapted to grow in shaded environments and can survive with minimal direct sunlight. When selecting plants for low-light conditions, consider factors like the plant’s native habitat and growth habits.
Before bringing a new plant into your home, assess its lighting requirements and compare them to your indoor space. This will help you choose plants that are more likely to thrive. For example, if you have a north-facing room with limited sunlight, choose plants that prefer partial shade or indirect light. By selecting the right plants for your indoor environment, you can enjoy beautiful greenery year-round, even in low-light spaces.
Understanding Plant Size Requirements for Indoor Spaces
When choosing plants for indoor spaces, it’s essential to consider their mature size and growth habits to ensure they fit comfortably within the available room dimensions. This is particularly crucial when transitioning outside plants indoors, as many varieties can grow much larger than expected.
Take, for instance, a popular indoor plant like the Fiddle Leaf Fig (Ficus lyrata). While it may start small, it can quickly outgrow its container and reach heights of 10-18 feet or more in ideal conditions. In contrast, compact varieties like the Dwarf Chinese Evergreen (Aglaonema modestum) are perfect for small spaces and typically top out at around 1-2 feet tall.
When selecting plants for indoor spaces, consider the room’s dimensions, as well as the amount of sunlight available. Make sure to research the mature size of your chosen plant and choose varieties that fit within your space constraints. This will prevent overcrowding, promote healthy growth, and ensure your plants thrive in their new indoor environment.
Essential Steps for Bringing Plants Indoors
To successfully transition outside plants into your home, you’ll need to take a few key steps to ensure they thrive in their new environment. Let’s dive into the essential steps for bringing plants indoors safely and effectively.
Cleaning and Inspecting Outdoor Plants Before Moving Indoors
Before bringing your outdoor plants indoors, it’s crucial to give them a good cleaning and inspection. Outdoor plants are exposed to various elements like dust, dirt, and debris that can harbor pests and diseases. If you don’t clean them off properly, these unwanted guests can easily infest your indoor space.
Start by gently washing the leaves with a soft-bristled brush or a mild soap solution to remove any visible debris. For more stubborn stains, mix 1 tablespoon of mild dish soap with 1 quart of water and use a soft cloth to wipe down the leaves. Be sure to rinse the plants thoroughly to prevent any soap residue from harming the plant.
Inspect your plants for pests like aphids, whiteflies, or spider mites by gently examining their undersides and crevices. Look out for signs of diseases such as yellowing leaves, black spots, or powdery mildew. If you spot any issues, treat the plants with organic pest control methods before bringing them indoors. A clean and healthy plant will thrive in its new indoor environment and provide years of enjoyment.
Acclimating Plants to Indoor Conditions
When bringing outside plants indoors, it’s essential to acclimate them to the new environment gradually. This process can be a bit tricky, but with patience and attention to detail, you’ll ensure a smooth transition for both your plants and yourself.
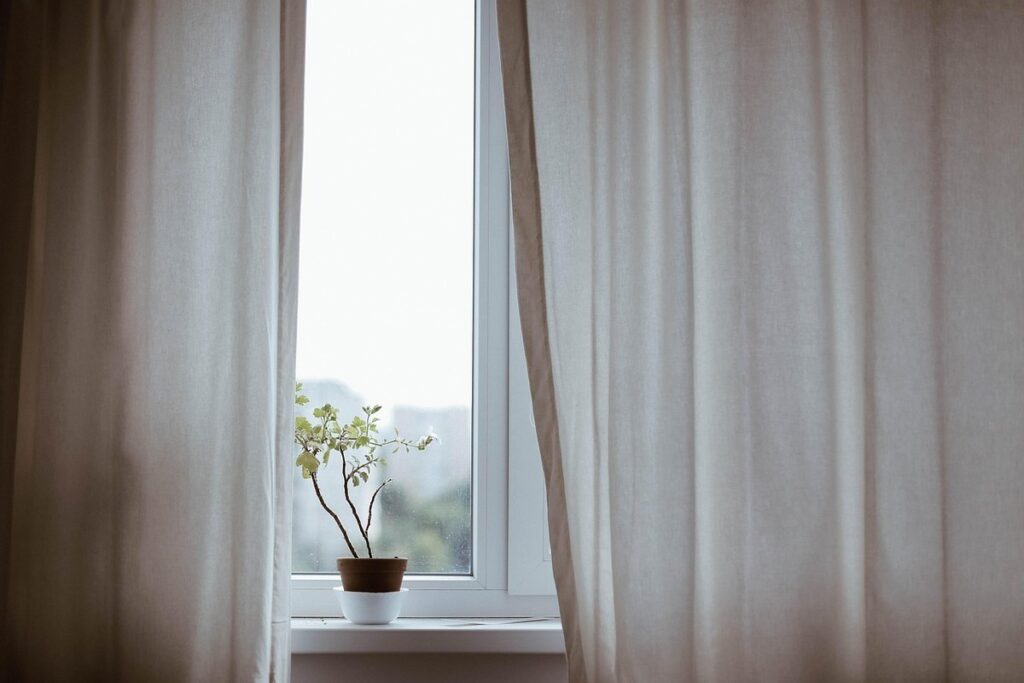
Start by introducing your outdoor plants to a shaded area or a room with filtered light. This will help reduce the shock of direct sunlight, which can cause scorching or bolting in some sensitive species. Keep an eye on your plant’s response, and if it appears stressed, consider using sheer curtains or shades to filter the light further.
Next, adjust your plant’s watering schedule to accommodate indoor conditions. Indoor air tends to be more humid than outdoor environments, which means you may need to reduce watering frequency. Monitor your plant’s moisture levels closely, as overwatering can lead to root rot and other issues.
Temperature fluctuations indoors can also be challenging for plants. Typically, indoor temperatures range between 65-75°F (18-24°C), while some plants prefer warmer or cooler conditions. If possible, provide a temperature-stable environment for your plant, especially if it’s sensitive to cold snaps or heatwaves.
Creating a Suitable Environment for Your Transplanted Plants
Now that you’ve successfully transitioned your plants indoors, it’s time to set up their new home, which means creating an environment that mimics their outdoor surroundings as closely as possible. This will help them thrive in their indoor space.
Lighting: The Key to Success for Indoor Plant Survival
When transitioning outside plants to indoor spaces, one of the most critical factors to consider is lighting. While outdoor plants bask in direct sunlight, their indoor counterparts require a more nuanced approach to light. Indoor spaces often have limited natural light, making it essential to supplement with artificial lighting.
To ensure your indoor plants thrive, it’s crucial to understand their specific lighting requirements. Some plants, like succulents and cacti, can tolerate bright, indirect light, while others, such as ferns and peace lilies, prefer low-light conditions. Research the specific needs of your plant to select suitable lighting options.
Consider using LED grow lights or full-spectrum bulbs to mimic natural sunlight. Place them 6-8 inches above your plants to prevent overheating. Monitor your plants’ response to light and adjust as needed. You can also rotate your plants to ensure even growth. For example, if you have a west-facing window, place plants with high light requirements in that area. By providing the right lighting conditions, you’ll be well on your way to successfully transitioning your outside plants to indoor spaces.
Humidity and Temperature Control for Optimal Plant Health
Maintaining optimal humidity and temperature levels is crucial for your plants’ health when transitioning from outdoors to indoors. Outside environments often have natural fluctuations that don’t exist within a home. High temperatures can cause plants to dry out, while low temperatures can lead to root rot.
To monitor these conditions, invest in a hygrometer (for measuring humidity) and a thermometer. These tools will provide you with accurate readings of your indoor environment. Place them near your plants, ensuring they’re not obstructed by foliage or other obstacles.
Typically, most houseplants thrive in humid environments between 40-60% relative humidity. However, some plants like orchids require higher levels. Research the specific needs of your plants to ensure you provide optimal conditions. Avoid placing plants too close to heating vents or radiators, as this can cause sudden temperature fluctuations.
Check on your plants regularly and adjust their environment accordingly. With a bit of observation and attention to detail, you’ll be able to create a suitable indoor climate for your plants to flourish.
Maintaining Your Transplanted Plants for Long-Term Success
Once you’ve successfully transitioned your outdoor plants indoors, it’s essential to focus on their long-term care to ensure they thrive and continue to bring life to your indoor space. This section covers key strategies for maintaining your transplanted plants.
Watering and Fertilization Strategies for Indoor Plants
When it comes to caring for transplanted plants indoors, adjusting their watering and fertilization schedules is crucial. Unlike outdoor plants, indoor plants don’t benefit from rainfall and may dry out faster due to central heating systems. Start by monitoring your plant’s water intake closely, checking the soil moisture daily, especially in the first few weeks after transplanting.
When selecting a fertilizer for your indoor plants, choose a balanced one that contains nitrogen (N), phosphorus (P), and potassium (K) – typically listed as 20-20-20. However, some houseplants require more specific nutrients, such as African Violets which benefit from high-phosphorus fertilizers to promote blooming.
Some essential factors to consider when adjusting your plant’s water schedule include the pot size, soil type, and humidity level in your indoor space. For instance, if you’re caring for a succulent or cactus, it may require watering only once a week due to its low water storage capacity. Conversely, tropical plants like ferns will benefit from more frequent watering as they thrive in humid environments. Adjusting the frequency of fertilization accordingly is also key – typically applying a fertilizer during the growing season and sparingly during dormancy.
Pest Control and Disease Prevention in Indoor Environments
When bringing outside plants indoors, it’s essential to be aware of potential pests and diseases that can affect their health. Common indoor pests like spider mites, mealybugs, and scale insects can thrive in the warmer temperatures and humidity levels found in most homes.
Inspect your plants carefully for signs of infestation, such as fine webbing, sticky substance, or white cottony patches. If you suspect an issue, isolate the plant to prevent the problem from spreading to others. Organic control methods include introducing beneficial insects like ladybugs or lacewings, which prey on pests, and using neem oil to repel them.
For fungal diseases like root rot or leaf spot, adjust your watering schedule to ensure the soil isn’t waterlogged. Remove any infected leaves or stems, and treat with a fungicide specifically labeled for indoor use. Chemical control methods should be used as a last resort and always follow the manufacturer’s instructions.
Troubleshooting Common Issues with Transplanted Plants
If you’re experiencing problems with your transplanted plants, such as leaf drop or root rot, don’t worry, we’ve got some solutions to get them thriving indoors again.
Identifying and Addressing Nutrient Deficiencies
When transitioning outside plants indoors, it’s not uncommon for them to exhibit nutrient deficiencies due to the significant change in environment. One of the most telling signs is yellowing leaves, but other indicators include stunted growth, weak stems, and a lackluster appearance.
Common nutrient deficiencies in indoor plants include nitrogen, iron, magnesium, and potassium. Nitrogen deficiency often presents itself as yellowing or pale leaves, while iron deficiency can cause interveinal chlorosis – a condition characterized by yellowing between leaf veins.
To address these issues, start by adjusting the fertilization schedule. If you’ve been fertilizing your plants regularly outdoors, it’s likely that they require less fertilizer indoors due to the lower light intensity and cooler temperatures. Begin with a half-strength dose of balanced fertilizer (10-10-10) or a fertilizer specifically formulated for indoor plants. Monitor your plant’s response over the next few weeks, adjusting as needed.
In addition to adjusting fertilization schedules, consider repotting your plant in a well-draining potting mix and pruning away any severely affected areas. With proper care and attention, most nutrient deficiencies can be corrected, allowing your indoor plants to thrive and flourish.
Handling Pests and Diseases That Thrive in Indoor Environments
When transitioning outside plants to indoor spaces, it’s not uncommon for pests and diseases to thrive in these new environments. Indoor conditions can be particularly conducive to the growth of unwanted critters, such as spider mites, mealybugs, and scale insects. These tiny pests feed on plant sap, causing curled or distorted leaves, and can even spread disease.
To combat infestations, inspect your plants regularly for signs of pests. Look for fine webbing, eggs, or actual insects on the undersides of leaves and in crevices. Isolate infected plants to prevent the problem from spreading, and treat them with neem oil or insecticidal soap according to the product’s instructions.
Root rot is another common issue that can arise when outside plants are brought indoors. This fungal disease thrives in moist environments and can quickly spread through a plant’s roots, leading to yellowing leaves and a soft, mushy stem. To prevent root rot, make sure your pot has good drainage holes, and water sparingly, allowing the soil to dry slightly between waterings.
Regular repotting can also help prevent root bound conditions that contribute to root rot. When repotting, gently loosen the roots with a soft brush or your fingers before placing them in fresh potting mix.
Frequently Asked Questions
What are the most common mistakes to avoid when transitioning outdoor plants indoors?
When bringing outside plants indoors, it’s easy to overlook critical steps that can lead to plant stress or even death. One common mistake is not acclimating plants gradually to indoor conditions, which can cause shock and weaken their immune systems.
To avoid this, introduce your plants to a shaded area for 1-2 weeks before moving them into direct sunlight indoors. Monitor temperature fluctuations and ensure you’re providing the right humidity levels for your plant species. By doing so, you’ll be able to ease the transition process and minimize potential damage.
How often should I inspect my indoor plants for pests after bringing them inside?
Inspecting your indoor plants regularly is crucial in detecting pest infestations early on. For the first few weeks after transitioning your outdoor plants indoors, check your plants every 3-4 days for signs of pests like spider mites, mealybugs, or scale insects.
Use a magnifying glass to inspect leaves and stems closely, focusing on areas around leaf nodes, soil surfaces, and plant bases. If you notice any unusual growth patterns, white powdery patches, or sticky substances, take immediate action by pruning infested areas and treating your plants with organic pest control methods.
Can I use the same fertilization schedule for indoor as for outdoor plants?
While fertilizing indoor plants is essential to maintain their health, using the same schedule as outdoor plants may not be effective. Indoor plants typically require more frequent watering due to lower light conditions, but this doesn’t necessarily translate to higher fertilizer needs.
Instead of following a specific fertilizer schedule, observe your plant’s response to indoor conditions and adjust accordingly. If you notice signs of nutrient deficiencies (e.g., yellowing leaves or stunted growth), increase fertilizer applications every 2-3 weeks during the growing season.
How can I maintain the humidity levels required by my plants indoors?
Maintaining optimal humidity levels for your plants is crucial, especially in dry indoor environments. To achieve this, use a humidifier specifically designed for plant care. You can also place the pot on a tray filled with water and pebbles to increase the surrounding moisture.
Monitor temperature and humidity levels closely using a hygrometer, making adjustments as necessary to prevent under- or over-humidification. For most indoor plants, aim for a relative humidity of 40-60%.
What’s the best way to repot my outdoor plant after transitioning it indoors?
Repotting your outdoor plant after bringing it inside can be a delicate process. To minimize transplant shock and ensure healthy growth, choose a pot with proper drainage holes (at least 1 inch deep) and use a well-draining indoor potting mix.
Water the plant thoroughly before repotting to make the soil more manageable, then gently remove the plant from its container and inspect the roots for any damage. Trim back any overgrown roots and prune nearby foliage to prevent waterlogged conditions and promote air circulation.