Harvesting honey at the right time is crucial for beekeepers, as it determines the quality and quantity of nectar collected by your bees. But with so many variables to consider – climate, region, life cycle, and seasonal fluctuations – when do you know it’s the perfect moment to extract that sweet golden liquid? It’s not just a matter of waiting for the flowers to bloom; the optimal harvest time depends on various factors that impact nectar flow, ripeness assessment, and post-harvest care. In this article, we’ll delve into expert tips and tricks to help you navigate these complexities and optimize your honey production, ensuring a bountiful harvest every year. By considering climate, bees’ life cycle, and seasonal considerations, you can maximize your honey yield while promoting the health of your colony.
Understanding Beekeeping Basics
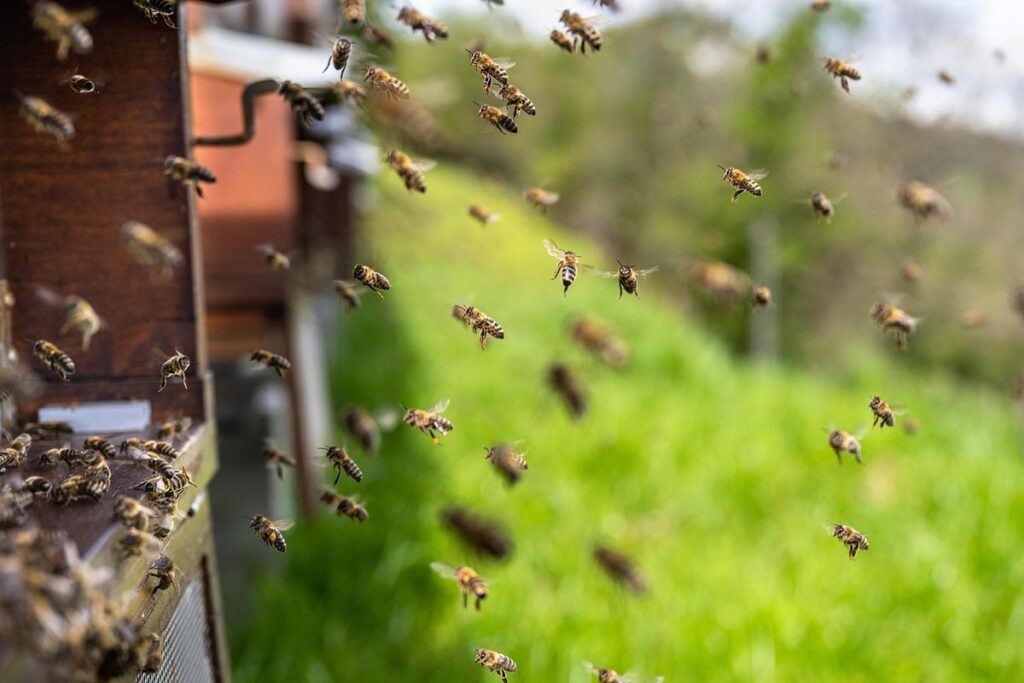
To get started with harvesting honey, it’s essential to have a solid foundation in beekeeping basics. This section will cover the fundamental principles of managing a beehive and preparing for harvest time effectively.
Climate and Region Considerations
When it comes to honey production, climate and region play a significant role in determining the best time to harvest. Temperature fluctuations, rainfall, and sun exposure all impact the nectar flow, which directly affects the amount of honey available for harvesting.
In warmer regions with mild winters and long summers, bees tend to produce more honey due to an extended nectar flow. For example, areas like Florida or California in the United States typically have a longer harvest season compared to cooler climates. In contrast, regions with cold winters and short summers, such as those found in northern Europe or Canada, may only have a few weeks of optimal nectar collection.
To determine the best time for harvesting in your region, observe the local climate patterns and note the following:
* Monitor temperature fluctuations: Bees tend to collect more nectar during warm periods.
* Observe rainfall: Adequate moisture is essential for plant growth, which in turn affects nectar flow.
* Assess sun exposure: Areas with ample sunlight tend to have longer harvest seasons.
By understanding your region’s climate and noting these factors, you can make informed decisions about when to harvest your honey. This will ensure a bountiful harvest and the highest quality product possible.
Bees’ Life Cycle and Nectar Flow
As you plan to harvest honey from your beehives, it’s essential to understand the bees’ life cycle and nectar flow patterns. The life cycle of a bee colony typically consists of three stages: brood development, population growth, and maturity.
During the brood development stage, usually in spring or early summer, new bees emerge and start working together to build up the hive’s strength. This is a crucial period for honey production as bees begin collecting nectar from nearby flowers. However, during this time, their focus is more on building up food stores rather than producing excess honey.
Understanding nectar flow patterns is also vital in determining when to harvest honey. Nectar flows occur when nectar-rich flowers are blooming abundantly, and the resulting honey production is at its peak. Typically, nectar flow patterns follow a predictable cycle: strong nectar flows in spring, followed by a slower period during summer, and then another surge in fall.
By monitoring these cycles, you can identify the optimal time for harvesting honey from your beehives. Bees generally produce more honey when flowers are abundant and their energy is focused on building up food stores. Harvesting at this stage ensures that your honey is of high quality and has a better flavor profile.
Identifying Honey Ripeness and Readiness
To ensure you harvest your honey at its peak quality, it’s essential to identify when it’s fully ripe and ready for extraction. Let’s explore the signs that indicate honey is perfectly ripened.
Visual Cues for Maturity
When it comes to determining if your honey is ripe and ready for harvest, visual cues play a significant role. One of the most obvious indicators is the color of the honey. Ripe honey tends to darken with age, taking on a richer, more golden hue. However, this can vary depending on the nectar source, climate, and other environmental factors.
Clarity is another key indicator of maturity. As honey ripens, it naturally becomes clearer due to the settling of particles and the maturation of flavors. Over time, you’ll notice that the honey’s appearance shifts from cloudy to crystal clear.
Crystal formation, also known as “honey settling,” is a natural process where glucose molecules in the honey form crystals as they age. This can take anywhere from several weeks to several months, depending on storage conditions and temperature fluctuations. Don’t be alarmed if you notice your honey starting to crystallize – it’s actually a sign of its maturity.
In general, look for honey that has reached an optimal balance between clarity and crystal formation.
Taste and Smell Assessments
When it comes to determining if honey is ready for harvest, taste and smell assessments play a crucial role. By paying attention to these sensory cues, beekeepers can ensure they’re harvesting at the optimal time, when the nectar’s natural enzymes have fully converted into complex sugars.
Taste is perhaps the most straightforward method for assessing honey ripeness. Look for a rich, full-bodied flavor with hints of floral notes or fruit undertones, depending on the specific nectar source. Bees produce more than 100 different compounds in their honey, so each batch will have its unique character. However, some common indicators include:
* A smooth, velvety texture that coats the tongue
* A subtle sweetness without cloying or overpowering notes
* Hints of vanilla, caramel, or butterscotch from Maillard reactions
Smell is just as important, with ripe honey often exhibiting a pungent aroma. Note any strong, unpleasant odors, which may indicate fermentation or spoilage. Conversely, a subtle, sweet scent can be an indicator of proper ripeness.
When conducting these assessments, it’s essential to approach the task objectively and without bias, considering multiple samples from different frames. This ensures that you’re getting an accurate representation of the honey’s overall quality and readiness for harvest.
Harvesting Techniques and Equipment
When it comes time to harvest honey, you’ll need the right equipment and techniques to do it efficiently. In this next section, we’ll explore the tools and methods that will help you get the job done successfully.
Extraction Methods: Crude vs. Modern
When it comes to extracting honey from beehives, beekeepers have traditionally relied on manual methods that involve smearing hot honeycombs with a knife and scraping out the honey. This labor-intensive process is often referred to as “crude extraction.” While it’s still used by some beekeepers today, modern techniques offer significant advantages in terms of efficiency and honey quality.
Crude extraction methods can lead to the introduction of air pockets into the honey, which affects its texture and flavor. Moreover, this method requires a lot of manual labor, making it time-consuming and tiring for the beekeeper. In contrast, modern extraction methods use centrifugal extractors or other machinery that allow for a faster and more efficient process.
Modern extraction techniques also enable beekeepers to harvest honey at a higher quality and with less waste. By using centrifuges, beekeepers can spin off the liquid honey from the wax cappings, minimizing the risk of contamination and air exposure. Additionally, modern equipment often comes equipped with features like temperature control, which helps preserve the natural enzymes in the honey.
Ultimately, while traditional methods may have their charm, modern extraction techniques offer a more streamlined and effective way to harvest high-quality honey.
Essential Tools for a Smooth Harvest
When it comes to harvesting honey, having the right tools can make all the difference. A centrifuge is a must-have for spinning the frames and extracting the honey from them efficiently. Look for one that’s designed specifically for honey production, as they usually have features such as adjustable speed control and a built-in strainer.
A good filter is also essential for removing any debris or impurities from the honey before it’s stored. Consider using a 200-micron filter to get the best results. It’s worth noting that some beekeepers swear by using a series of filters, starting with a coarse one and working their way up to finer ones.
Storage containers are another critical consideration when harvesting honey. Choose ones that are food-grade, clean, and dry. You’ll also want to make sure they’re designed for storing honey specifically, as this will prevent any contamination or fermentation issues. Consider using glass jars or plastic containers with tight-fitting lids to keep the honey fresh.
Seasonal Considerations and Timing Strategies
When it comes to harvesting honey, timing is everything. This next part will delve into seasonal considerations that’ll help you optimize your harvest for maximum flavor and quality.
Spring Bloom and Nectar Flow Peaks
As spring awakens, nectar flow peaks and blossoms burst forth with an explosion of color and sweetness. This is the ideal time to capitalize on the bounty, optimizing harvest timing for maximum yields. To make the most of this fleeting period, keep a close eye on local weather forecasts and bloom reports.
When nectar flow is in full swing, bees are busily collecting nectar from flowers, storing it in their hives. The resulting honey is some of the finest you’ll taste all year. Timing your harvest to coincide with peak nectar flow ensures that your honey is as rich and flavorful as possible.
In regions like California’s almond groves or Washington’s apple orchards, spring bloom times are well-documented. Familiarize yourself with these schedules to ensure you’re harvesting at the optimal moment. Typically, this occurs when 70-80% of blossoms have opened, signaling a surge in nectar production.
Keep your bees healthy and strong leading up to peak nectar flow by providing them with an abundance of nutritious food and water. This will allow them to capitalize on the bounty, storing it away for you to harvest and enjoy later.
Summer Droughts and Heat Management
Summer droughts and heatwaves can significantly impact honey production. During these periods, bees often struggle to gather nectar and pollen due to reduced flower bloom and increased water evaporation. As a result, honey production may slow down or even stop altogether.
To manage honey production during summer droughts, beekeepers must be proactive in providing their colonies with adequate resources. This includes ensuring they have access to fresh water sources, often by installing misting systems or sprinklers near the apiary. Additionally, beekeepers can supplement nectar flows by planting drought-tolerant plants that continue to bloom throughout the season.
Beekeepers should also inspect their colonies regularly for signs of stress, such as weakened brood patterns and reduced population numbers. This allows them to take corrective action early on, such as providing shade or relocating the hive to a more favorable location. By taking these steps, beekeepers can help their bees weather the heat and continue to produce honey throughout the summer months.
Post-Harvest Care and Handling
Proper handling after harvesting is crucial to maintaining the quality and flavor of your honey, so let’s dive into the best practices for post-harvest care.
Storage Conditions and Humidity Control
Proper storage conditions play a crucial role in preserving honey’s quality and shelf life. Temperature control is essential to slow down enzymatic reactions that can cause honey to darken or develop off-flavors. It’s recommended to store honey in a cool, dry place with a consistent temperature between 10°C to 15°C (50°F to 59°F). Avoid direct sunlight, as it can cause the honey to degrade quickly.
Humidity management is also vital to prevent moisture absorption, which can lead to fermentation or mold growth. The ideal humidity level for storing honey is between 30% to 60%. You can achieve this by using desiccants or storing the honey in airtight containers with silica gel packets.
Remember, even small temperature fluctuations can affect honey’s quality. For example, storing honey near a heating vent or in an area prone to sudden temperature changes can lead to spoilage. To ensure optimal storage conditions, consider investing in a temperature-controlled environment or using a thermometer to monitor the temperature regularly. By maintaining proper storage conditions, you can enjoy your harvested honey for years to come and preserve its unique flavor profile.
Labeling and Certification Requirements
When it comes to labeling and certifying honey, there are several requirements you should be aware of. The most obvious is accurate labeling. This includes listing the type of honey (e.g., clover, wildflower), its country of origin, and the net weight. You must also include any relevant allergen information.
In terms of certifications, USDA Organic is a popular choice for many beekeepers. To be labeled as USDA Organic, your honey must meet specific standards. This includes being produced without synthetic pesticides or fertilizers, and without genetically modified organisms (GMOs). If you’re planning to market your honey as USDA Organic, make sure you’re meeting these requirements.
Other certifications worth considering include Fair Trade and Non-GMO Project Verified. These labels can give consumers peace of mind and help differentiate your product in a crowded market. To ensure compliance with labeling regulations, familiarize yourself with the guidelines set by the FDA and your state’s department of agriculture. This will not only protect you from potential fines but also maintain trust with your customers.
Frequently Asked Questions
What are the best practices for maintaining hive health during extreme weather conditions?
Maintaining hive health is crucial, especially during extreme weather conditions. Ensure your bees have enough water by providing a reliable source near the hive entrance. Monitor temperature fluctuations and take necessary precautions to prevent heat stress or chilling injuries. Regularly inspect your bees for signs of disease or pests, and consider using protective measures like mesh screens to shield them from harsh weather.
How can I accurately assess honey ripeness without relying solely on visual cues?
While visual cues are helpful, they’re not always reliable. To ensure optimal harvest timing, use a combination of methods: taste, smell, and moisture content assessments. Check the honey’s viscosity by dripping it slowly from a spoon; it should form a thin thread that breaks easily. Also, inspect the honeycomb for signs of granulation or crystallization, which can indicate over-ripeness.
What are some common mistakes to avoid when extracting honey?
Common mistakes include crushing comb, over-extracting, and not filtering properly. Avoid crushing comb as it releases enzymes that degrade honey quality; instead, carefully cut frames near the base. Don’t over-extract, leaving enough honey for the bees’ needs during winter. Filter honey through a fine-mesh filter to remove wax particles and improve clarity.
Can I use automation tools or apps to streamline my beekeeping tasks?
Yes, many automation tools and apps can help with tasks like monitoring temperature, tracking nectar flow, and scheduling treatments. Consider using specialized software for managing your beehive’s life cycle, weather forecasts, or integrated pest management strategies. However, always maintain a hands-on approach to ensure accurate observations and direct intervention when needed.
How do I handle storage conditions to preserve honey quality?
To store honey effectively, control temperature (between 50°F to 60°F) and humidity levels (<65%). Store in clean, dry containers with minimal headspace, away from direct sunlight. Consider using airtight containers or glass jars to prevent moisture absorption and spoilage. Regularly inspect stored honey for signs of granulation, mold, or contamination, and discard if necessary.