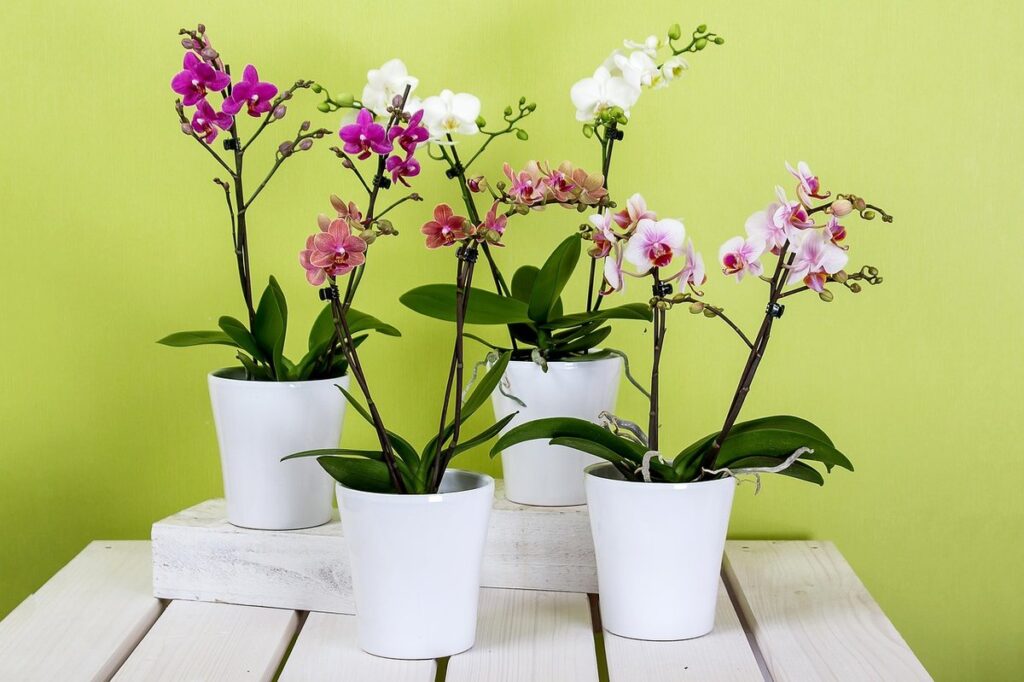
Are you tired of struggling to keep your orchids thriving? You’re not alone! One of the most common mistakes orchid enthusiasts make is using the wrong potting soil. But choosing the right mix can be overwhelming, especially with so many options on the market.
That’s why I’m excited to share my expert guide on creating the perfect potting soil mix for your beloved orchids. In this article, you’ll discover DIY recipes and expert tips on selecting the best ingredients and preparing your mix like a pro. We’ll dive into the importance of using a well-balanced mix that mimics the plant’s natural environment, and provide you with actionable advice on how to create a potting soil mix that will take your orchid game to the next level. Whether you’re a beginner or an experienced grower, this guide is for anyone looking to unlock the secrets of growing healthy, vibrant orchids.
Choosing the Right Ingredients
When it comes to growing beautiful orchids, selecting the right potting soil is crucial. We’ll walk you through the key factors to consider when choosing the perfect ingredients for your orchid’s home.
Understanding the Importance of Organic Matter
Organic matter is a vital component of orchid potting soil, and its importance cannot be overstated. When it comes to nourishing your orchids, organic matter plays a dual role: providing essential nutrients and improving the overall structure of the soil.
In nature, decaying plant material acts as a nutrient-rich fertilizer that replenishes the soil. Similarly, incorporating organic matter into your orchid potting mix mimics this natural process. It releases slow-release nutrients, including nitrogen, phosphorus, and potassium, which are absorbed by the roots over time. This ensures that your orchids receive a steady supply of vital micronutrients, promoting healthy growth and blooming.
Beyond nutrient provision, organic matter also enhances soil structure, allowing for better water retention and root penetration. Mixes with high organic content tend to be more porous, reducing the likelihood of waterlogged roots and associated diseases. By incorporating 20-30% organic matter into your potting mix, you can create an environment that fosters robust root development, improved air circulation, and increased nutrient uptake – all key factors in achieving optimal orchid health.
Selecting the Right Type of Peat Moss
When it comes to creating an optimal potting mix for orchids, one of the most popular and effective components is peat moss. This type of soil additive has been widely used for decades due to its incredible ability to retain moisture and provide acidity.
One of the primary benefits of using peat moss in your potting mix is its exceptional water-holding capacity. Peat moss can hold up to 20 times its weight in water, making it an excellent choice for orchids that require consistent moisture levels. For example, Phalaenopsis orchids thrive in moist but not soggy conditions, and peat moss helps to achieve this delicate balance.
However, there are some drawbacks to using peat moss as well. Some gardeners have raised concerns about its environmental impact, as peat bogs are a non-renewable resource that takes centuries to form. Additionally, over-reliance on peat moss can make the soil too acidic for certain orchid species.
To mitigate these effects, consider mixing peat moss with other ingredients like perlite or vermiculite to improve drainage and reduce acidity levels.
Preparing Your Potting Mix
To grow healthy orchids, it’s essential to prepare your potting mix correctly. This includes choosing the right materials and blending them together to achieve an ideal pH level for your plants.
Mixing with Sphagnum Moss or Coconut Coir
When it comes to creating a well-balanced orchid potting mix, incorporating sphagnum moss or coconut coir can be a game-changer. These two components are designed to work together in harmony, providing unparalleled benefits for your orchids.
One of the standout advantages of using sphagnum moss or coconut coir is their impressive water-holding capacity. Sphagnum moss, for example, has the ability to retain up to 20 times its dry weight in water, making it an excellent choice for orchid enthusiasts who want to minimize watering frequency. This means that your orchids will have a steady supply of moisture, even when you forget to water them (although we don’t recommend relying on this too heavily!).
Coconut coir also boasts impressive water-holding abilities, with some varieties retaining up to 9 times their dry weight in water. However, it’s worth noting that coconut coir is slightly more prone to rot than sphagnum moss due to its higher organic content. To mitigate this risk, be sure to pasteurize your coconut coir before mixing it into your potting blend.
Both components are also resistant to rot and decay, making them ideal for orchid growers who live in humid climates or struggle with fungus issues.
Adding Perlite or Vermiculite for Improved Drainage
When creating an orchid potting mix, one crucial factor to consider is drainage. Orchids don’t like wet feet, and excess moisture can lead to root rot and other problems. To improve drainage, you can add perlite or vermiculite to your potting mix.
Perlite is a volcanic glass that is heated until it pops into lightweight, porous particles. When added to the potting mix, perlite increases its ability to drain water quickly, reducing the risk of waterlogged conditions. This is especially beneficial for orchids, which prefer well-draining media.
Vermiculite, on the other hand, is a mineral that expands when heated, creating a lightweight, spongy material. It improves drainage and aeration in the potting mix, allowing roots to breathe and grow more easily.
To use perlite or vermiculite effectively, start by adding a small amount (about 10-20%) to your potting mix. You can then adjust the ratio based on your specific orchid’s needs. Remember that too much perlite or vermiculite can cause the media to become too dry and prone to drying out quickly.
Incorporating these materials into your potting mix will not only promote healthy root growth but also help prevent waterlogged conditions, ensuring a happy and thriving orchid plant.
Repurposed Materials for Unique Potting Mixes
Beyond traditional potting mixes, let’s explore some creative and eco-friendly alternatives that can add a personal touch to your orchid care routine. We’ll delve into unconventional materials you can repurpose for unique blends.
Using Pine Bark Mulch as a Component
When it comes to creating the perfect potting mix for orchids, incorporating repurposed materials can be a game-changer. One such material that deserves consideration is pine bark mulch. Not only is it an eco-friendly alternative to traditional peat moss, but it also brings numerous benefits to the table.
One of the primary advantages of using pine bark mulch in your potting mix is its ability to retain moisture. Unlike some other materials, pine bark mulch doesn’t break down quickly, which means it won’t release excess water into the soil as it degrades. This helps prevent overwatering, a common mistake that can be detrimental to orchids. Additionally, pine bark mulch has a natural acidity regulator effect, helping to maintain an optimal pH balance for your plants.
To incorporate pine bark mulch into your potting mix, aim to use about 20-30% of the total mix composition. You can combine it with other ingredients like perlite or vermiculite for added drainage and aeration properties. By doing so, you’ll create a well-balanced potting mix that will provide your orchids with everything they need to thrive.
Utilizing Composted Manure as an Organic Fertilizer
When it comes to creating an ideal potting mix for orchids, utilizing composted manure as an organic fertilizer is a game-changer. Composted manure is teeming with nutrients that promote healthy growth and blooming in orchids.
The benefits of using composted manure in your orchid potting mix are numerous. Firstly, it provides essential macronutrients such as nitrogen (N), phosphorus (P), and potassium (K) that plants need to thrive. Composted manure also contains micronutrients like magnesium and sulfur that support healthy photosynthesis and root development.
To incorporate composted manure into your potting mix, you can mix 1-2 cups of it with a well-draining potting media like sphagnum moss or perlite. This combination will provide the necessary moisture retention while also allowing excess water to drain freely. By using composted manure as an organic fertilizer, you’ll create a nutrient-rich environment that encourages your orchid to produce vibrant blooms and strong, healthy roots.
Tips for Repotting Your Orchids
When repotting your orchid, it’s essential to consider a few key tips to ensure a successful transplant and prevent shocking your plant. This includes choosing the right time and handling the roots with care.
When to Repot: Signs of Needing Fresh Soil
As an orchid enthusiast, you want to ensure that your beloved plants are thriving. However, over time, even with proper care, orchids may start to decline due to depleted potting soil. Recognizing the signs of needing fresh soil is crucial for maintaining the health and beauty of your orchids.
One common indication is a declining growth rate. If you notice your orchid’s new leaves or roots are not growing as quickly as they used to, it might be time to repot with fresh soil. Reduced flowering performance is another sign that your orchid needs a change of scenery – literally. If your orchid’s blooms have decreased in frequency or quality, it could be due to nutrient depletion in the potting mix.
To identify if these issues are caused by depleted potting soil, inspect the roots and crown (where the stem meets the roots) for any signs of rot or mold. These can be clear indicators that your orchid has outgrown its current potting soil’s capacity to provide necessary nutrients. If you observe any of these symptoms, it’s time to repot with fresh, well-draining soil designed specifically for orchids.
Handling the Plant with Care During Repotting
When handling an orchid during repotting, it’s essential to exercise extreme care to avoid causing damage to its delicate roots. Start by gently removing the plant from its pot, taking care not to disturb the surrounding soil or roots. Place a firm but gentle grip on the base of the plant and slowly lift it out of the container.
Once the plant is free, examine its root system for any visible signs of circling or tangling. If you find that the roots have become twisted, take a moment to gently tease them apart with your fingers, being careful not to cause further damage. Be particularly mindful when handling the crown of the plant (where the leaves meet the stem), as this area is prone to bruising and can be vulnerable to disease.
To minimize root shock, avoid exposing the roots to direct sunlight or extreme temperatures during repotting. Instead, place the plant in a shaded area or cover it with a clear plastic bag to maintain humidity and prevent moisture loss. With patience and care, you’ll be able to successfully repot your orchid without causing damage to its fragile root system.
DIY Potting Soil Recipes for Beginners
Creating your own potting soil from scratch is easier than you think, and we’ll walk you through simple recipes perfect for beginners. No more worrying about what’s in store-bought mixes!
Simple Peat Moss-Based Mix Recipe
If you’re looking for a simple and effective potting mix recipe to get started with growing orchids, this peat moss-based mix is an excellent choice. To make this mix, you’ll need the following ingredients:
* 4 parts peat moss (this will provide the necessary acidity and moisture retention)
* 1 part perlite or vermiculite (this will help with drainage and aeration)
* 1/2 part compost or well-rotted manure (this will add nutrients and improve soil structure)
When mixing these ingredients, aim for a ratio of about 4:1:0.5. To do this, simply combine the peat moss, perlite or vermiculite, and compost in a large bucket. Mix everything together until it’s well combined and uniform.
Remember to use high-quality ingredients that are specifically designed for orchid potting mixes. Avoid using regular garden soil, as it can be too dense and may not provide the right balance of nutrients for your orchids.
By following this simple recipe, you’ll have a basic potting mix that will support healthy growth and blooming in your orchids.
More Complex Recipes Incorporating Sphagnum Moss or Coconut Coir
When you’re ready to take your orchid potting soil game to the next level, it’s time to try more complex recipes that incorporate sphagnum moss or coconut coir. These ingredients add unique benefits and help you tailor your potting mix to meet specific orchid needs.
Sphagnum Moss Recipe: “Hybrid” Mix
Combine 30% peat moss, 20% perlite, 20% vermiculite, 15% sphagnum moss, 10% worm castings, and 5% crushed oyster shells. This recipe is ideal for orchids that require a slightly acidic pH level (around 4.5-6.0). The sphagnum moss absorbs excess water, reducing the risk of root rot.
Coconut Coir Recipe: “Well-Rounded” Mix
Blend 25% coconut coir, 20% peat moss, 20% perlite, 15% vermiculite, 10% composted bark chips, and 10% crushed eggshells. This recipe is perfect for orchids that thrive in slightly alkaline to neutral pH levels (around 6.0-7.5). The coconut coir improves drainage while retaining moisture.
Remember to adjust the pH level of your potting mix according to the specific requirements of your orchid species.
Frequently Asked Questions
What if I already have orchids planted in regular potting soil, how can I transition them to a custom mix without shocking the roots?
Transitioning your orchids from regular potting soil to a custom mix requires patience and careful planning. Start by repotting your orchid into a separate container with some of its original potting soil left intact. Gradually add small amounts of the new mix over time, allowing the roots to adjust before making further changes. This process can take several weeks to months, depending on the individual plant’s needs.
Can I use recycled materials like composted coffee grounds or tea bags in my orchid potting mix?
Yes! Using recycled materials like composted coffee grounds or tea bags can be a great way to add organic matter and nutrients to your orchid potting mix. However, it’s essential to ensure the materials are fully broken down and free of any potential contaminants. A general rule of thumb is to limit these additions to no more than 10-20% of the total mix to avoid over-fertilizing your orchids.
How do I know if my orchid potting mix is too dense or too light?
Check your mix by gently squeezing a small amount between your fingers. A well-balanced mix should hold its shape but still crumble easily when released. If it’s too dense, add some perlite or vermiculite to improve drainage. Conversely, if it’s too light, you may need to add more peat moss or other organic matter.
What are some common signs that my orchid is experiencing root rot due to poor potting mix?
Common symptoms of root rot in orchids include yellowing leaves, soft or mushy stems, and a sour smell emanating from the pot. If you suspect your orchid has root rot, carefully inspect its roots for any signs of decay or damage. In most cases, repotting with a fresh, well-draining mix can help rescue the plant.
How often should I re-pot my orchids, and what are some general guidelines to follow?
Re-pot your orchids every 1-3 years, depending on their growth rate and pot size. A good rule of thumb is to repot when you notice the plant has outgrown its container or is showing signs of nutrient deficiency. Avoid over-repotting, as this can cause unnecessary stress to your orchid.