As the temperatures drop, many gardeners think their seed-sowing days are behind them. But what if you could start growing your favorite flowers months ahead of schedule? Winter sowing is a game-changer for gardening enthusiasts who want to get a head start on their blooms without sacrificing space or warmth. By winter sowing seeds in containers outdoors, you can give delicate seedlings the light and cold they need to thrive before transplanting them into larger beds come springtime.
In this comprehensive guide, we’ll explore the best flowers to winter sow for a stunning summer display. You’ll learn how to prepare your seeds for success, set up an efficient winter sowing station, and transplant your young seedlings with confidence. Whether you’re a seasoned gardener or just starting out, our expert tips will help you make the most of this low-maintenance technique.
Choosing the Right Seeds
When it comes to winter sowing, selecting the right seeds is crucial for a successful harvest. We’ll walk you through how to choose the perfect seeds for your flowers.
Understanding the Basics of Winter Sowing
Winter sowing is a game-changer for gardeners who want to get a head start on the growing season. Essentially, it’s a technique where you sow seeds directly in pots or containers outdoors during the winter months, allowing them to germinate and grow before being transplanted into their final positions in the spring.
This method offers numerous benefits. By extending the growing season, you can give your seedlings a jumpstart on the warmth and light they need to thrive. This is especially crucial for plants that are sensitive to frost or have specific temperature requirements. Winter sowing also helps improve seedling health by allowing them to develop strong roots and establish themselves before being exposed to external stressors.
To get started with winter sowing, choose a location that provides some protection from extreme weather conditions, such as a cold frame or an unheated garage. Fill your containers with a good quality potting mix, sow the seeds according to the package instructions, and provide adequate moisture. Check on them regularly to ensure they’re getting enough light and aren’t developing any issues. By adopting this simple yet effective technique, you’ll be well on your way to enjoying a bounty of beautiful blooms come springtime.
Selecting Suitable Flowers for Winter Sowing
When selecting flowers for winter sowing, it’s essential to consider several factors to ensure they thrive and establish themselves well. First and foremost, think about the hardiness zone of the flower variety. If you live in a region with harsh winters (USDA zones 3-5), choose flowers that are specifically bred for cold tolerance or can withstand light frosts.
Next, take into account the mature size of the plant. Winter sowing often requires transplanting seedlings to larger containers or directly into the garden when they’re around 4-6 inches tall. Select varieties that won’t grow too large or leggy during this process. For instance, consider compact or dwarf cultivars of perennials like coneflower (Echinacea) or black-eyed Susan (Rudbeckia).
Lastly, consider the growth habits of the flowers you’re selecting. Some plants, such as vining peas or pole beans, require support to climb and can be more challenging to winter sow successfully. Others, like lettuce and spinach, have shallow roots and prefer well-draining mixes to prevent waterlogged soil.
Some popular flower varieties suitable for winter sowing in various zones include pansies (violas), calendulas, and violas – these hardy annuals thrive in cooler temperatures and can be direct-sown into the garden or containers.
Understanding Seed Requirements
To successfully winter sow, it’s crucial to understand the specific seed requirements of each flower variety. Let’s dive into what those needs are and how you can provide them.
Seed Germination and Dormancy
When you’re planning to winter sow flowers, it’s essential to understand the process of seed germination and dormancy. Seed germination is the process by which a seed begins to grow into a plant, while dormancy refers to the period when seeds are dormant or inactive.
During the winter months, many seeds naturally go through a state of dormancy as a survival mechanism. This allows them to conserve energy and protect themselves from harsh weather conditions. However, this can also affect how well they germinate when sown in cold weather. Some seeds, like those of certain native wildflowers or spring-blooming perennials, are adapted to winter sowing and will require a period of cold stratification before germinating.
When selecting flowers for winter sowing, consider their specific seed requirements. For example, some seeds may need to be chilled for 30-60 days before germination, while others may be able to sprout immediately in the ground. Understanding these needs can help you choose the right varieties and prepare them correctly for successful winter sowing.
Temperature and Moisture Needs
When winter sowing seeds, it’s essential to pay attention to their temperature and moisture needs for optimal germination rates. Different types of flowers have unique requirements, so it’s crucial to research the specific needs of each variety.
For example, some annuals like marigolds and zinnias prefer warmer temperatures between 70°F to 85°F (21°C to 30°C) to germinate quickly. On the other hand, biennials like foxgloves and hollyhocks require a period of cold stratification before they can germinate, typically at around 40°F to 50°F (4°C to 10°C). Perennials like coneflowers and black-eyed susans often prefer cooler temperatures between 60°F to 70°F (15°C to 21°C).
In terms of moisture, most seeds prefer consistent moisture but not overwatering. A general rule of thumb is to keep the soil moist but not waterlogged. You can also use a clear plastic bag or cloche to create a mini-greenhouse effect and maintain humidity around the seeds.
It’s also important to note that some seeds are more sensitive to temperature fluctuations than others. For example, delicate flowers like pansies and violas may require even cooler temperatures, around 50°F to 60°F (10°C to 15°C), to germinate successfully. By understanding these requirements, you can provide the optimal conditions for your winter sown seeds to thrive.
Preparing the Seeds for Winter Sowing
Before you start sowing those seeds, make sure you’ve properly prepared them by following a few simple steps to ensure successful germination and growth. This is where things can go wrong if not done correctly.
Seed Stratification and Scarification
Some seeds require a bit of extra TLC before they’re ready to be winter sown. This is where seed stratification and scarification come into play.
Seed stratification involves giving certain seeds a period of cold temperatures, mimicking the natural process that occurs outside during winter. This helps break down the seed’s dormancy and prepares it for germination. Techniques include storing seeds in moist peat moss or vermiculite at around 35-45°F (2-7°C) for several weeks or months. For example, delphiniums, hellebores, and some species of cyclamen require a period of stratification before they can be winter sown.
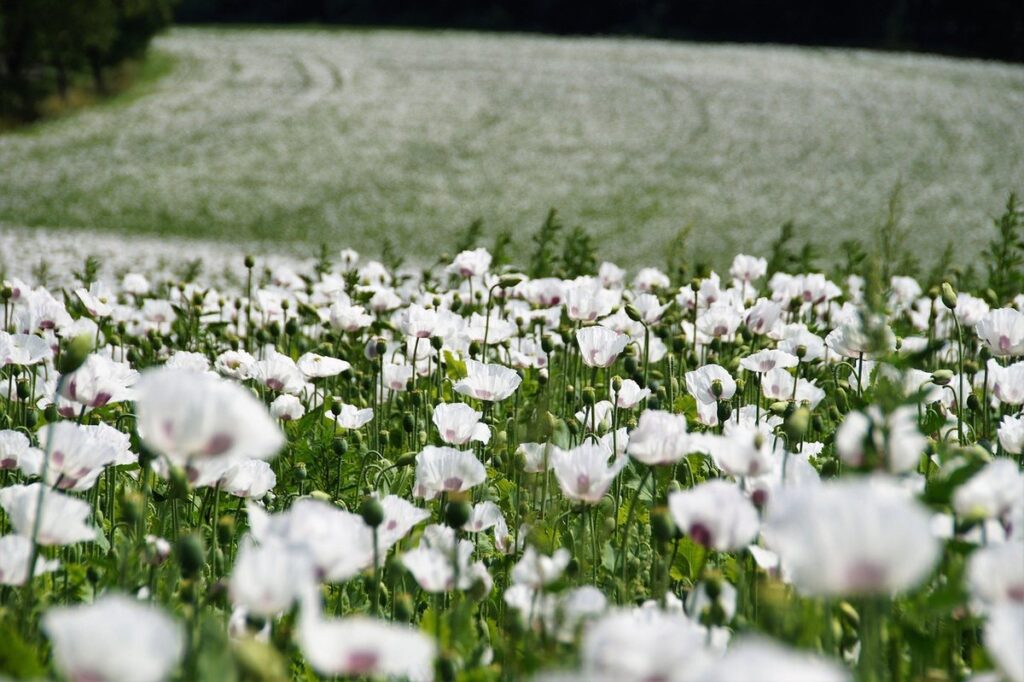
Scarification involves scratching the surface of seeds to help water penetrate more easily, allowing them to germinate. This is necessary for seeds with hard outer coats that prevent water from reaching the embryo inside. You can use sandpaper or a nail file to gently scratch the seed coat. Alternatively, you can soak the seeds in warm water overnight before winter sowing. Some examples of seeds that require scarification include poppies, larkspur, and foxgloves.
When performing either stratification or scarification, be gentle with your seeds to avoid damaging them. Also, keep in mind that some seeds may require a combination of both techniques for optimal germination.
Labeling and Storing Seeds
When it comes to winter sowing, proper labeling and storage of seeds are crucial steps that often get overlooked. This can lead to confusion, wasted time, and ultimately, reduced germination rates. To avoid these issues, start by creating a label for each seed packet or envelope with the following information: the type of flower, date stored, and any special instructions.
Next, store your labeled seeds in a cool, dry place away from direct sunlight. A drawer or cupboard in an unheated basement or garage is ideal. Make sure to keep them in sealed containers or envelopes to maintain humidity levels and prevent moisture from entering. For small collections, consider using a seed storage box with individual compartments.
Another option is to store seeds in the refrigerator. This method works well for larger quantities. Place the labeled seeds in airtight containers or plastic bags and store them in the crisper drawer of your fridge. The cooler temperatures will help preserve the seeds’ viability. Remember, seeds can be sensitive to temperature fluctuations, so it’s essential to keep them consistent.
Finally, consider keeping track of which seeds are being stored for future reference. This can be done by maintaining a seed inventory or using an app specifically designed for seed tracking. By following these simple steps, you’ll ensure that your seeds remain organized and viable until spring arrives.
Creating a Winter Sowing Setup
Before you start sowing, it’s essential to create a dedicated winter sowing setup that will protect your seeds from extreme temperatures and provide optimal growing conditions. Let’s walk through setting up this specialized equipment together!
Essential Equipment for Winter Sowing
When setting up a winter sowing station, it’s essential to have the right equipment to provide optimal conditions for seed germination and growth. To get started, you’ll need a few key pieces of equipment.
First and foremost, you’ll need some kind of mini-greenhouse or cold frame to protect your seeds from harsh weather conditions and extend the growing season. These can range in size from small, single-cell mini-greenhouses to larger, multi-cell units that can accommodate multiple trays. Consider investing in a high-quality mini-greenhouse with good ventilation to ensure healthy seedling growth.
In addition to your mini-greenhouse or cold frame, you’ll also need some basic gardening tools, such as a tray or flat for sowing seeds, a watering can or spray bottle, and a thermometer to monitor temperature fluctuations. A sunny location with good air circulation is also crucial for successful winter sowing. Make sure the area receives direct sunlight for at least 4-6 hours per day.
Some popular options for mini-greenhouses include the Jiffy Mini Greenhouse and the Gardener’s Supply Company Cold Frame. When selecting a mini-greenhouse, consider factors such as durability, ease of assembly, and ventilation. With the right equipment in place, you’ll be well on your way to successfully winter sowing a variety of flowers and extending your growing season.
Setting Up a Cold Frame or Mini-Greenhouse
Setting up a cold frame or mini-greenhouse is an essential step in creating a successful winter sowing setup. These structures allow you to extend the growing season and provide protection from harsh weather conditions, giving your seedlings a head start on the growing season.
To set up a cold frame, choose a location with good sunlight exposure and ensure it’s easily accessible for maintenance. You can purchase or build a cold frame using materials such as wood or polycarbonate panels. If building one from scratch, consider factors like drainage, ventilation, and insulation to maintain optimal temperatures between 35°F-45°F (2°C-7°C).
When setting up your mini-greenhouse, ensure it’s positioned in an area that receives sufficient sunlight and is protected from strong winds. You can use a small greenhouse kit or repurpose an old frame to create a mini-grow space. Make sure to provide adequate ventilation by installing windows or vents to prevent overheating.
Regular maintenance is crucial for the health of your seedlings. Check temperature levels daily, ensure proper watering, and monitor for pests and diseases. With proper care, your cold frame or mini-greenhouse will provide a healthy environment for your winter-sown seeds to thrive.
Monitoring and Maintaining Winter Sown Seeds
Now that you’ve got your winter sown seeds germinating, it’s time to ensure they continue to thrive – let’s dive into monitoring and maintaining them for success. Regular checks will help prevent common problems.
Providing Optimal Conditions
When winter sowing seeds, it’s essential to provide optimal conditions for germination. This is because seeds are at their most vulnerable during this stage, and even slight variations in temperature, moisture, and light can impact success rates.
First and foremost, maintain a consistent temperature range between 65°F to 75°F (18°C to 24°C). While some seeds may tolerate lower or higher temperatures, most flower varieties require this optimal range for germination. For example, sweet alyssum prefers a warmer temperature around 70°F (21°C), while violas thrive at cooler temperatures near 65°F (18°C).
Keep the soil consistently moist but not waterlogged. Seeds need adequate moisture to break dormancy and start growing, but overwatering can lead to rot and poor germination rates. Aim for an inch of water per week, either through rainfall or irrigation.
Lastly, provide seeds with sufficient light, but avoid direct sunlight, which can cause overheating. East- or west-facing windows are ideal for winter sowing, or consider using grow lights specifically designed for seed starting. By maintaining these optimal conditions, you’ll increase the chances of successful germination and a healthy start to your winter-sown flowers.
Common Issues and Troubleshooting
One of the most significant challenges gardeners face when winter sowing seeds is dealing with pests and diseases. These can be particularly problematic for tender seedlings that are more vulnerable to damage during their early stages of growth. Some common issues you may encounter include aphids, whiteflies, and spider mites, which can spread quickly if left unchecked.
To prevent infestations, make sure your winter sowing containers have adequate drainage holes to reduce the risk of waterlogged soil conditions that can attract pests. Regularly inspect your seedlings for signs of damage or stress, such as curled or distorted leaves.
In addition to pests, seeds can also be susceptible to fungal diseases like powdery mildew and root rot. These often arise from overwatering, poor air circulation, or using contaminated soil. To mitigate this risk, ensure that the soil mix is well-draining and has a balanced pH level.
Monitor your seedlings’ response to environmental factors like temperature fluctuations and extreme weather conditions, which can cause them to become stressed or even die back completely.
Transplanting Winter Sown Seedlings
Now that your winter-sown seedlings have matured, it’s time to transplant them into larger containers or directly into the garden for a vibrant display of color. Learn how to do it successfully in the next steps!
Timing for Transplantation
When to transplant your winter-sown seedlings depends on several factors, including the weather, growth stage, and maturity date of the specific flower variety. Generally, it’s essential to wait until the danger of frost has passed in your area before transplanting seedlings outdoors.
Check the average last frost date for your region and plan accordingly. For example, if you live in an area with a last frost date of May 15th, it’s best to wait until around that time to transplant warm-season flowers like marigolds and zinnias.
For cooler-season flowers, such as pansies and violas, the process is a bit different. These plants can tolerate light frosts and can be transplanted outdoors when they have 2-3 sets of leaves. This is usually around 4-6 weeks after sowing.
Keep in mind that seedlings grown indoors under grow lights may require more time to harden off before transplanting outside. Be sure to gradually introduce them to outdoor conditions over the course of 7-10 days to prevent shock and ensure healthy establishment.
Acclimating Seedlings to Outdoor Conditions
When transplanting winter sown seedlings outdoors, it’s essential to acclimate them to harsher conditions gradually. Seedlings grown indoors under warm lights and misty conditions can be fragile and susceptible to shock when exposed to direct sunlight, wind, and temperature fluctuations.
To harden off your seedlings, start by moving them to a shaded area outdoors for 1-2 hours a day. Gradually increase the duration over the next week or two, ensuring they receive at least 4-6 hours of indirect sunlight daily. Monitor their response and adjust accordingly – if you notice signs of stress, such as wilting or yellowing leaves, slow down the process.
As seedlings become more resilient, introduce them to full sun in short increments (e.g., 1 hour, then back indoors for 2-3 hours). This will help prevent scorching from intense sunlight. Water thoroughly before moving outdoors and continue to provide adequate moisture during the acclimation period. Observe your seedlings closely and adjust their outdoor time based on weather conditions, ensuring they’re not exposed to extreme temperatures or wind speeds.
Frequently Asked Questions
Can I winter sow seeds for flowers that require a long period of cold stratification?
Yes, you can still winter sow seeds that need cold stratification by using the “cold frame” or “mini-greenhouse” setup to provide an extended period of cold temperatures. This will allow the seeds to satisfy their dormancy requirements before being transplanted in the spring.
How do I handle seedlings that are too large for direct sowing but not yet ready for transplanting?
You can prune the seedlings slightly to control their size and prevent overgrowth while they’re still indoors. Use scissors or pinch off the tips of the stems to encourage bushy growth, making them more manageable for later transplantation.
What is the ideal temperature range for winter sowing seeds in a cold frame or mini-greenhouse?
The ideal temperature range varies depending on the specific flower species being sown. Generally, most flowers prefer temperatures between 35°F (2°C) and 50°F (10°C). However, some delicate species might require even cooler temperatures to germinate successfully.
How can I prevent seedlings from becoming leggy or weak due to prolonged indoor growth?
To prevent seedling weakness, ensure they receive adequate light indoors. If necessary, supplement with grow lights to provide the required amount of photosynthesis. Additionally, maintain a consistent watering schedule and avoid overwatering, which can lead to weakened roots.
Can I mix different types of flowers in the same winter sowing container or setup?
Yes, you can mix different flower species together in the same container or setup as long as their specific needs are compatible. However, be mindful of potential competition for resources like light and water. Research each variety’s requirements beforehand to ensure harmonious coexistence.