As a gardener, you’re likely aware of the importance of pollinators like bees in your garden. However, many local bee populations are facing threats due to habitat loss and environmental changes. A simple yet effective solution is to create a bee-friendly haven with a bee revival kit specifically designed for gardens. These kits usually include essential components such as nesting boxes, food sources, and other supportive elements that encourage healthy bee populations.
In this article, we’ll explore how bee revival kits can support local bee populations and enhance pollination in your garden. We’ll cover the key aspects of choosing the right kit, setting it up, maintaining its optimal performance, and troubleshooting common issues. By the end of this guide, you’ll have a better understanding of what a bee revival kit entails and how to create a thriving ecosystem that supports these vital insects.
Understanding the Need for Bee Revival Kits
As you consider bringing bees back into your garden, let’s explore why having a bee revival kit is essential for their survival and success in your outdoor space.
The Importance of Bees in Pollination
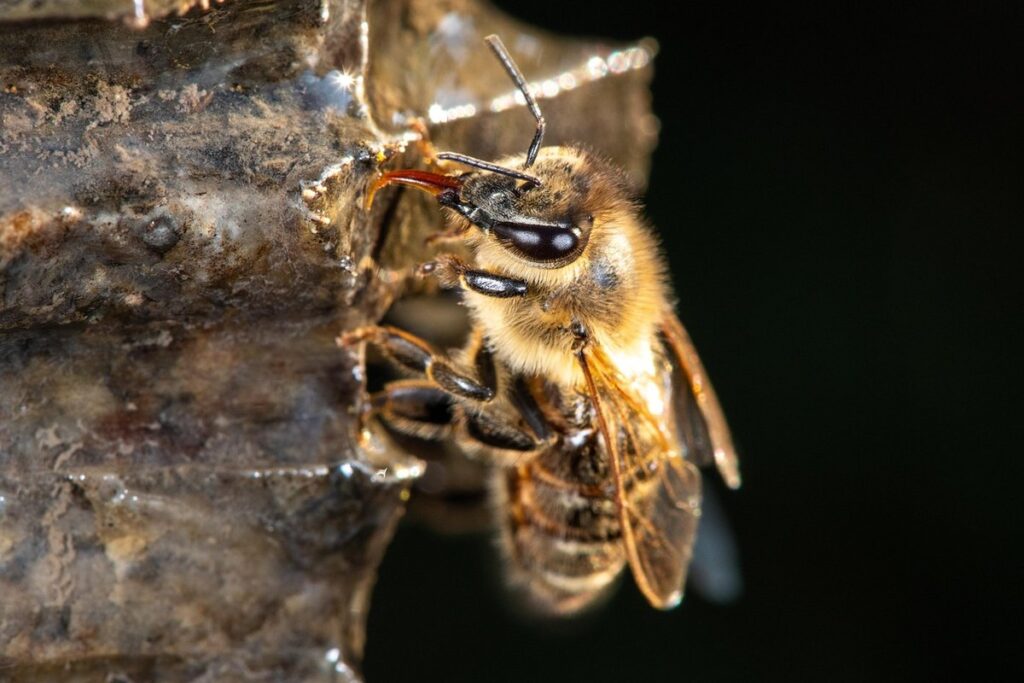
Bees are one of the most critical components of our ecosystem, and their role in pollination cannot be overstated. Without bees, many plants would be unable to reproduce, leading to a significant decline in crop yields and food diversity. In fact, it’s estimated that one-third of all crops globally rely on bee pollination, including staples like apples, blueberries, and almonds.
The alarming rate at which bee populations are declining due to habitat loss, pesticide use, and climate change has serious consequences for ecosystems worldwide. As bees disappear, the impact is felt not just in gardens but also in forests, meadows, and even urban areas. This has a ripple effect on the entire food chain, with many species relying on bees for pollination.
This is where bee revival kits come into play. By providing a safe haven for local bee populations to thrive, these kits can make a tangible difference. They typically include a beehive or nectar-rich flowers that attract and support native bee species. By incorporating a bee revival kit in your garden, you’ll not only contribute to the local ecosystem’s health but also enjoy a bountiful harvest of delicious fruits and veggies.
Identifying the Causes of Bee Decline
The decline of bee populations is a pressing concern that has far-reaching implications for our ecosystem. As we explore ways to revive bee populations in our gardens, it’s essential to understand the root causes of this decline.
One significant contributor to bee decline is habitat loss. With the destruction of natural habitats and the urbanization of areas, bees are left without the resources they need to survive. This includes a lack of nectar-rich flowers, which are crucial for their nutrition. To combat this, you can create a bee-friendly garden by planting a variety of flowers that provide a constant source of nectar throughout the growing season.
Another major factor is pesticide use. The widespread use of pesticides has led to the poisoning of bees and other beneficial insects, further exacerbating the decline. This is why it’s essential to opt for organic gardening methods or integrated pest management (IPM) techniques that minimize harm to pollinators.
Climate change also plays a significant role in bee decline. Changes in temperature and precipitation patterns disrupt the delicate balance of ecosystems, making it challenging for bees to adapt and survive. To mitigate this, you can choose plants that are resilient to changing conditions and provide shelter from extreme weather events.
Lastly, varroa mite infestations have become a major concern for beekeepers worldwide. These parasites weaken bees’ immune systems, making them more susceptible to disease and environmental stressors. To combat this, beekeepers must implement integrated pest management strategies that include regular monitoring, medication, and other measures to control the mite population.
By understanding these causes of bee decline, we can take targeted steps to create a welcoming environment for these vital pollinators in our gardens.
Choosing the Right Bee Revival Kit for Your Garden
When it comes to selecting a bee revival kit, there are several factors to consider to ensure you’re making the right choice for your garden and its local pollinators. Let’s break down what to look for.
Types of Bee Revival Kits Available
When it comes to choosing the right bee revival kit for your garden, you’ll find that there are various types available. Each type has its unique features and benefits, making them suitable for different garden sizes and types.
Hive boxes are a popular choice among bee enthusiasts, as they provide a simple and cost-effective way to create a bee habitat. These kits usually include a wooden box with pre-drilled holes for the bees to enter and exit. Hive boxes are ideal for small to medium-sized gardens, but may not be suitable for larger spaces.
Observation hives, on the other hand, allow you to monitor the bees’ activity and health from a safe distance. These kits often come with glass or acrylic panels that enable you to observe the hive without disturbing the bees. Observation hives are perfect for gardeners who want to learn more about bee behavior and are ideal for small gardens.
Starter kits are designed for beginners, providing everything needed to get started with beekeeping. These kits usually include a hive box, observation window, and other essential equipment. Starter kits are an excellent choice for those new to beekeeping or with limited space in their garden.
Factors to Consider When Selecting a Kit
When selecting a bee revival kit for your garden, there are several key factors to consider. First and foremost, think about your budget. Bee revival kits can range from affordable DIY options to more expensive comprehensive systems. While it’s tempting to opt for the cheapest option, consider what you’re getting in return – a basic kit may require more maintenance or effort, while a pricier one might provide long-term benefits.
Another crucial factor is ease of use. If you’re new to beekeeping or have limited time for gardening, look for kits with clear instructions and simple setup processes. This will save you frustration and ensure the health and safety of both your bees and yourself. Maintenance requirements are also essential to consider – some kits require regular cleaning, inspections, or treatments that can be a significant commitment.
Ultimately, choose a kit that aligns with your specific needs and gardening goals. If you’re looking for a low-maintenance option, focus on automated systems or self-sustaining units. For more experienced gardeners, consider customizing your kit to accommodate unique features like pollinator-friendly plants or integrated monitoring systems.
Setting Up and Maintaining Your Bee Revival Kit
Before diving into your bee revival kit, let’s cover the essential steps for setting it up and keeping it thriving throughout the seasons. We’ll walk through each task together to ensure a successful outcome.
Step-by-Step Setup Instructions
To set up and assemble your Bee Revival Kit, follow these step-by-step instructions:
First, carefully unpack all the components of your kit from their boxes. This should include the nectar feeder, the hive stand, the bee hotel, and any other accessories. Next, place the hive stand in a location that receives full sun and is protected from strong winds. Then, attach the nectar feeder to the top of the hive stand using the provided screws.
Now it’s time to assemble the bee hotel. Simply attach the individual nesting compartments to the hotel frame using the screws provided. Make sure they are securely fastened to prevent them from coming loose in windy conditions.
To prepare your kit for its new inhabitants, place a small amount of sugar water or honey in the nectar feeder. This will provide a sweet treat for the bees when they first arrive.
Finally, locate a suitable spot for your Bee Revival Kit within your garden. Ensure it is close to a source of fresh water and sheltered from harsh weather conditions.
Ongoing Maintenance and Care
Regular maintenance and care are crucial for the long-term success of your bee revival kit. It’s essential to inspect the hive regularly for signs of pests, such as mites, small hive beetles, or wax moths. Look for eggs, larvae, or adult insects in the brood nest, and take action promptly if you spot any infestations.
Monitor the bees’ health by checking for diseases like American Foulbrood, Nosema, or Varroa mite-related problems. Keep an eye out for unusual behavior, such as bees clustering at the entrance of the hive or abandoning their comb. Regularly inspect the queen’s performance, as her health and productivity are crucial to the colony’s success.
Ensure the bees have access to a reliable source of nutrition by regularly checking the nectar flow and pollen stores. Add supplements or sugar water as needed to keep them fed during times of scarcity. A well-maintained bee revival kit will reward you with healthy, thriving colonies that pollinate your garden for years to come. By dedicating time to regular maintenance, you’ll be well on your way to becoming a skilled beekeeper.
Benefits of Bee Revival Kits in Gardens
If you’re considering using a bee revival kit in your garden, you’ll want to know how these kits can provide numerous benefits for both you and your local pollinator population. Here’s what you need to know.
Increased Pollination and Crop Yield
When you introduce a bee revival kit to your garden, one of the most significant benefits is increased pollination. This has a direct impact on crop yield, leading to healthier and more abundant harvests. For instance, tomatoes that are manually pollinated by bees can produce up to 20% more fruit than those that aren’t.
In fact, studies have shown that areas with high bee populations experience an average increase of 30-40% in overall crop yields. This is because bees are highly efficient at transferring pollen between flowers, allowing for optimal fertilization and growth. As a result, gardeners can expect to see a significant boost in their harvests.
The economic benefits of increased pollination and crop yield cannot be overstated. By using a bee revival kit, you’re not only ensuring a bountiful harvest but also contributing to food security. With more crops being grown locally, gardeners are able to save money on transportation costs and have fresh produce available year-round. This can lead to improved financial stability for small-scale farmers and gardeners, making it an essential tool in sustainable gardening practices.
Improved Biodiversity and Ecosystem Health
When you invest in a bee revival kit for your garden, you’re not just supporting local bees – you’re also contributing to improved biodiversity and ecosystem health. By providing a safe haven for these essential pollinators, you’re creating a ripple effect that benefits the entire environment.
Here’s how it works: as bees thrive in your garden, they transfer pollen between plants, facilitating the reproduction of flowers, fruits, and vegetables. This process not only increases crop yields but also encourages the growth of diverse plant species. As a result, other pollinators like butterflies, hummingbirds, and even bats are attracted to your garden, further enriching the ecosystem.
To maximize the biodiversity benefits of your bee revival kit, focus on creating a mix of nectar-rich flowers that bloom at different times. This will ensure a steady supply of food for bees throughout the growing season. Consider planting native species specific to your region, as they’re more likely to support local pollinator populations. By doing so, you’ll be supporting the delicate balance of nature and fostering a healthier ecosystem in your garden.
Common Challenges and Solutions
When it comes to setting up a bee revival kit, you might encounter some bumps along the way. Let’s dive into some common challenges and solutions that’ll get your garden buzzing in no time.
Dealing with Pests and Diseases
When it comes to bee revival kits, one of the biggest challenges gardeners face is dealing with pests and diseases that can harm their bees. Pests like varroa mites, small hive beetons (SHB), and wax moths can weaken the colony and even kill the queen. Diseases such as American Foulbrood (AFB) and Nosema can also devastate a colony.
Integrated Pest Management (IPM) techniques are essential for managing these pests and diseases. This involves using a combination of methods to control infestations, including chemical controls, biological controls, cultural controls, and monitoring. For example, you can use essential oils like menthol or lemongrass oil to repel varroa mites, while also maintaining good hygiene practices in the apiary.
Regular inspections are crucial for detecting pests and diseases early on. Look for signs of infestation such as dead bees, reduced honey production, or abnormal brood patterns. If you do find an infestation, act quickly by isolating the affected colony and treating it with a suitable control method. Remember to always follow proper safety protocols when handling chemicals or medications.
By implementing IPM techniques and monitoring your colonies regularly, you can effectively manage pests and diseases in your bee revival kit garden and keep your bees healthy and thriving.
Overcoming Initial Hesitations or Failures
When introducing a bee revival kit to your garden, it’s normal to encounter initial hesitations or failures. Perhaps you’ve noticed that the bees aren’t showing up as expected, or maybe you’re struggling to maintain a healthy colony. Whatever the issue, don’t be discouraged – with some troubleshooting and patience, you can overcome these challenges and enjoy the rewards of having a thriving bee population in your garden.
Firstly, ensure that you’ve chosen the right location for your bee revival kit. Bees need warmth, shelter, and access to nectar-rich flowers to thrive, so consider factors like sunlight exposure, proximity to water sources, and nearby food sources. If you’ve already set up your kit, try relocating it to a more suitable spot.
Another common issue is inadequate maintenance. Regularly inspect the kit for signs of pests or diseases, and ensure that the bees have enough resources – including sugar water and pollen substitutes. Don’t be afraid to seek advice from local beekeepers or online forums if you’re unsure about any aspect of caring for your colony.
Conclusion and Next Steps
Now that you’ve successfully set up a bee-friendly garden, it’s time to take your new habitat to the next level. Let’s explore what comes next for you and your buzzing friends.
Recap of Key Takeaways
As we conclude our discussion on bee revival kits in gardens, it’s essential to recap the key takeaways that can make a significant impact on supporting local bee populations and promoting pollination. By incorporating a bee revival kit into your garden, you’re not only contributing to the preservation of these vital pollinators but also enhancing the overall health and biodiversity of your outdoor space.
Some of the most crucial points we’ve covered include: selecting the right plant species that provide a rich source of nectar and pollen; creating a welcoming habitat for solitary bees with features like bee hotels and nesting boxes; and using natural pest control methods to minimize harm to these beneficial insects. Additionally, implementing a rotation schedule for your plants can help ensure a constant supply of food for the bees throughout the growing season.
To put these concepts into action, consider starting small by identifying areas in your garden that could benefit from bee-friendly additions. Then, begin incorporating native plant species and creating habitats that cater to solitary bees’ unique needs. With time and practice, you’ll be well on your way to becoming a certified “Bee Champion” in your community!
Final Tips and Recommendations
As you embark on creating a bee-friendly haven with your revival kit, remember that consistency is key. Regularly inspect your garden to ensure the health and vitality of your bee hotel and flowers. Encourage local bees by planting a diverse range of nectar-rich blooms that are specific to their preferences.
Consider enlisting the help of family members or friends to create a community-driven bee conservation project. This not only increases engagement but also fosters knowledge sharing and skill development. Don’t forget to record your progress, note the types of visitors you attract, and monitor any changes in local bee populations.
If you’re eager for further learning, explore online resources like the Xerces Society or BeeLife Europe. These organizations offer a wealth of information on native plant species, pollinator-friendly gardening practices, and regional bee conservation initiatives. By sharing your experiences with fellow gardeners, you’ll contribute to a collective effort in supporting these vital pollinators and preserving biodiversity.
Frequently Asked Questions
Can I use a bee revival kit in a small garden or balcony?
Yes, bee revival kits are designed for gardens of all sizes, including small spaces like balconies. When selecting a kit, consider the specific needs of your space and choose a compact or vertical option to maximize efficiency.
How often should I clean and maintain my bee revival kit?
Regular maintenance is crucial to ensure the health and success of your bees. Clean and inspect your kit every 2-3 weeks during peak season, removing debris, old pollen, and dead bees. Replace any worn-out components promptly to prevent damage.
Can I use a single bee revival kit for multiple gardens or locations?
While it’s technically possible, using a single kit for multiple gardens can be challenging due to the unique needs of each location. Consider investing in separate kits tailored to specific environments, such as urban vs. rural areas, to ensure optimal performance and prevent disease transmission.
How long does it take for bees to colonize a new bee revival kit?
The time it takes for bees to colonize your kit varies depending on factors like the kit’s quality, location, and surrounding environment. Typically, you can expect 1-3 weeks for initial colonization, with peak activity occurring within 6-8 weeks.
Are there any specific plants that I should include in my garden to complement my bee revival kit?
Yes, incorporating a variety of native flowers, herbs, and crops rich in nectar and pollen will provide a constant food source for your bees. Include a mix of annuals and perennials, such as sunflowers, lavender, and coneflowers, to ensure year-round pollination support.