If you’re looking to create a haven for beneficial pollinators in your garden, consider building a bee box. These simple structures provide a vital habitat for bees and other insects, allowing them to thrive and multiply. By attracting more pollinators, you can significantly boost biodiversity and enhance the overall health of your garden ecosystem.
In this article, we’ll guide you through creating your own bee box plans, from selecting the right materials to choosing the ideal location in your garden. We’ll also cover essential maintenance tips to ensure your bee boxes remain a thriving sanctuary for pollinators throughout the seasons. By following our easy-to-implement plans and expert advice, you can create a welcoming environment that attracts bees and other beneficial insects, ultimately leading to increased garden productivity and improved biodiversity.
Benefits of Bee Boxes in Gardening
Adding bee boxes to your garden is a simple yet effective way to attract beneficial pollinators, which can lead to healthier plants and improved crop yields. Let’s explore these benefits further!
Attracting Pollinators to Your Garden
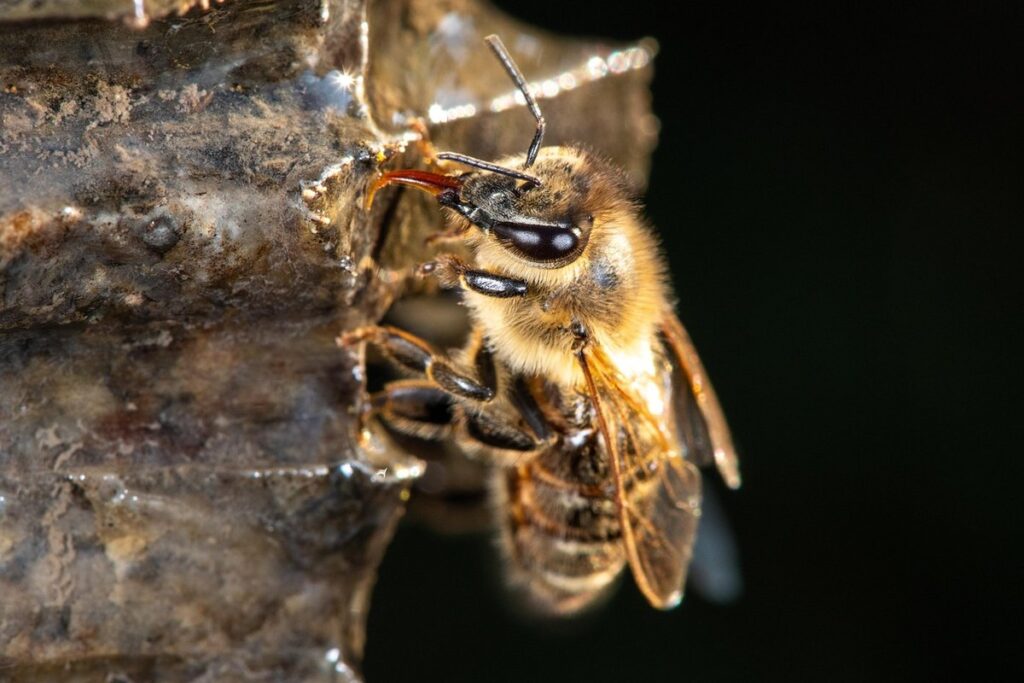
Pollinators like bees and butterflies play a vital role in garden ecosystems. Without them, many plants would be unable to reproduce, and our food supply would suffer significantly. In fact, it’s estimated that one-third of the food we eat is directly or indirectly dependent on bee pollination.
To attract these crucial pollinators to your garden, consider incorporating a mix of flowers that are rich in nectar and pollen into your landscape design. Planting native species like coneflower, black-eyed Susan, and milkweed can be especially beneficial. These plants not only provide sustenance for pollinators but also create habitats for them.
Bee boxes can also play a vital role in attracting pollinators to your garden. By providing a safe haven for solitary bees to nest and lay their eggs, bee boxes give these important insects a chance to thrive. In addition to installing a bee box or two, remember to avoid using pesticides in your garden, as they can harm pollinators. Instead, adopt more natural methods of pest control to maintain a balanced ecosystem.
When selecting plants for your garden, choose varieties that are specifically labeled as “bee-friendly” to ensure you’re supporting these vital creatures.
Designing for Native Species
When it comes to designing a bee box for your garden, choosing plants that are native to your region is crucial. These plants have evolved alongside local pollinators and provide the perfect source of nectar and pollen. By incorporating native species into your garden, you’re making it more likely for these essential pollinators to visit your bee box.
Start by researching the types of flowers and plants native to your area. You can consult with a local nursery or gardening expert to get recommendations. For example, in the southeastern United States, milkweed is an excellent choice for attracting monarch butterflies. In contrast, lavender and coneflower are ideal choices for gardens in dry climates.
To ensure that you’re creating a welcoming environment for native pollinators, consider planting a variety of species with different bloom times. This will provide a constant source of nectar and pollen throughout the growing season. Some plants to include are:
• Wild indigo
• Blazing star
• Black-eyed Susan
Remember, it’s not just about quantity – focus on choosing high-quality native plants that will thrive in your specific climate and soil conditions. By doing so, you’ll be creating a haven for local pollinators and maximizing the effectiveness of your bee box.
Choosing the Right Location
When choosing a location for your bee boxes, consider the sunlight and wind patterns in your garden to ensure optimal pollination conditions. This is crucial for attracting and supporting a healthy bee population.
Identifying Sunlight Requirements
When it comes to choosing the perfect location for your bee box, sunlight is one of the most critical factors to consider. Bees rely on sunlight to navigate, regulate their body temperature, and even communicate with each other through complex dance patterns. Without adequate sunlight, your bees may struggle to thrive.
To ensure you’re providing your bees with sufficient sun exposure, look for a location that receives direct sunlight for at least 6 hours a day. This can be a spot on the south or west side of your garden, where the sun’s rays are strongest during peak hours.
When assessing potential locations, consider factors like tree cover, nearby buildings, and other obstructions that might block sunlight. Be mindful of any areas with dense foliage or overhanging branches, which can create dappled shade and hinder pollination.
If possible, place your bee box near a warm wall or in an open area that captures gentle breezes to help regulate temperature fluctuations. This will not only provide optimal sun exposure but also reduce the risk of overheating during summer months.
Avoiding Windy Areas
When it comes to choosing a location for your bee box, shielding it from harsh winds is crucial. Winds can cause significant stress and damage to the bees, which can negatively impact their health and productivity.
Bee boxes are typically made of wood or plastic, which can be easily damaged by strong gusts of wind. Not only can this lead to costly repairs or replacements, but it can also compromise the overall safety of your beekeeping operation. Additionally, excessive winds can make it difficult for bees to fly in and out of their hives, reducing the efficiency of your pollination efforts.
To avoid these issues, consider placing your bee box in a location that provides some natural protection from wind. This could be near a fence or a cluster of trees, which can act as a buffer against strong gusts. Alternatively, you can also use windbreaks such as burlap screens or row covers to shield the area around the bee box.
When selecting a location, take note of the prevailing winds in your area and choose a spot that is slightly downwind from any potential sources of turbulence. By doing so, you can create a safe and stable environment for your bees to thrive, ultimately improving their overall health and productivity.
DIY vs. Pre-Made Bee Box Plans: Weighing Your Options
When deciding on a bee box plan, you’re faced with two main choices: creating your own from scratch or using pre-made designs. Which one is right for your garden?
Pros and Cons of Custom-Built Boxes
When it comes to building a bee box for your garden, you’re faced with two main options: custom-built boxes versus pre-made ones. While both have their advantages and disadvantages, understanding the pros and cons of each will help you make an informed decision.
Custom-built boxes offer several benefits. For one, they can be tailored to fit your specific needs and space constraints. If you have a unique hive design in mind or want to incorporate features like built-in ventilation or insulation, a custom box is the way to go. Additionally, a well-made custom box can last for years with minimal maintenance. However, the cost of materials and labor can be prohibitively expensive for some beekeepers.
On the other hand, pre-made boxes are often less expensive upfront but may not offer the same level of customization or durability as a custom-built box. They also tend to require more frequent replacement due to wear and tear. Ultimately, the choice between custom-built and pre-made boxes comes down to your budget, DIY skills, and long-term goals for your beekeeping operation.
Features to Consider in Pre-Made Boxes
When evaluating pre-made bee box plans, it’s essential to consider the features that will create a comfortable and thriving environment for your bees. One crucial aspect is ventilation systems. A good bee box should have adequate airflow to prevent moisture buildup, which can lead to disease and pests. Look for boxes with built-in vents or adjustable windows that allow you to control airflow.
Adjustable shelves are another vital feature to consider. This will enable you to customize the space to fit your specific needs. Some pre-made boxes come with removable trays or dividers that make it easy to rearrange the configuration as your bees grow. Consider a box with interchangeable inserts, allowing you to switch between different layouts depending on the season.
Some pre-made bee boxes may also feature other useful features such as built-in escape hives, which provide an emergency exit for swarming bees, or integrated pest management systems that help control pests like small hive beetles. When selecting a pre-made box, weigh these features against your specific needs and preferences to ensure you’re providing the best environment possible for your bees.
Materials Needed for Building a Bee Box
To build a bee box, you’ll need to gather some essential materials and tools that are both cost-effective and readily available at your local hardware store or online. Let’s start with the basics!
Wood Types Suitable for Bee Boxes
When it comes to building a bee box, choosing the right type of wood is crucial for maintaining healthy bees. This may seem like a minor detail, but trust us – certain types of wood can actually harm your bees’ well-being.
Specifically, you’ll want to opt for woods that are naturally resistant to rot and pests, which can be detrimental to bee health. Cedar and cypress are excellent choices because they contain oils that repel insects and fungi. These oils also help prevent moisture buildup, reducing the risk of mold and mildew growth – a major concern in humid environments.
For example, Western red cedar is an ideal choice due to its unique oil composition. This natural resistance means you can use it for both the exterior and interior components of your bee box without worrying about contamination.
In contrast, woods like pine or fir are not recommended as they tend to harbor insects and pests that can harm bees. When selecting wood for your bee box, remember: durability and resistance go hand-in-hand with healthy bee colonies.
Additional Components and Accessories
When it comes to building a bee box, having the right additional components and accessories can make all the difference in its functionality. One of the essential components is the roof slats, which not only provide ventilation but also protect the bees from harsh weather conditions. You’ll want to choose slats that are durable, water-resistant, and easy to clean.
Another crucial feature is the entryways, which allow the bees to enter and exit the box safely. Consider installing a removable panel or a sliding door to facilitate inspection and maintenance without disrupting the colony. Additional features like a built-in ladder, a nectar feeder, or even a small observation window can enhance the overall bee box experience.
It’s also essential to think about the hardware you’ll need for assembly, such as screws, nails, or hinges. Consider using rust-resistant materials to ensure longevity and ease of maintenance. By including these components and accessories in your build, you’ll create a safe, efficient, and enjoyable space for your bees to thrive.
Step-by-Step Instructions for Building a Basic Bee Box
Now that you have your bee box plans, it’s time to start building! This section will walk you through each step of constructing a basic bee box, from foundation to finish.
Measuring and Cutting the Frame
To ensure a precise fit for your bee box, it’s essential to measure and cut the frame accurately. Start by measuring the width of the body board, which is typically 1 inch thick and 7 inches wide. Cut two pieces from this material using a circular saw or hand saw, making sure they are exactly 17.5 inches long.
Next, measure and cut the depth boards, usually 3/4 inch thick and 7 inches wide. These should be cut to length at 15.5 inches each. You’ll need these for the sides of your bee box frame. For added stability, it’s a good idea to use a miter saw or a compound miter saw for precise angled cuts.
Assemble the frame by attaching the depth boards to the body board pieces using wood glue and 2-inch nails. Make sure the corners are secure and flush with each other. This is an essential step in building your bee box, as it will provide the structural foundation for your hive.
Adding Shelves and Dividers
When building a basic bee box, it’s essential to consider the internal layout and organization of the box. To separate different bee colonies and maintain optimal conditions for each, you can install shelves or dividers within the box. These will provide a clear distinction between each colony, making it easier to manage and monitor their health.
To add shelves, start by measuring and marking the location where you want them to be installed. Use a drill press or a hand saw to make precise cuts in the wood. Then, attach the shelves using screws or nails, ensuring they’re level and secure. You can also use dividers to separate each colony, which can be made from wood or plastic.
Consider the size of your box and the number of colonies you’ll be housing when deciding on shelf spacing. A general rule is to leave about 1-2 inches of space between each colony for easy access and maintenance. Additionally, keep in mind that dividers should not obstruct airflow within the box, which is crucial for bee health.
When choosing materials for your shelves or dividers, opt for durable and non-toxic options that won’t harm the bees. Cedar wood, for example, is a popular choice due to its natural resistance to pests and decay.
Tips for Maintaining and Monitoring Your Bee Box
Now that you’ve built your bee box, keeping it thriving is just as important as installing it. Here’s how to maintain and monitor your new home for your pollinator friends.
Regular Cleaning Schedule
As you care for your bee box, it’s essential to establish a regular cleaning schedule to prevent debris and diseases from affecting the health of your bees. Set aside time each week to inspect and clean your bee box. Start by gently removing any debris or excess honey that may have accumulated on the frames.
Use a soft-bristled brush or a specialized hive tool to sweep away any dead bees, propolis, or wax cappings. Be cautious not to damage the frames or disturb the bees. Remove any damaged or infested frames and replace them with healthy ones. This is also an opportunity to inspect for signs of pests like mites, small hive beetles, or wax moths.
Make sure to clean your hive tool and other equipment regularly to prevent cross-contamination. Regular cleaning will help maintain a healthy environment for your bees and promote optimal pollination in your garden. Remember to also check for any signs of disease, such as fungal growth or mold, and take action promptly if you notice any issues. By sticking to this regular cleaning schedule, you’ll be able to enjoy the benefits of a thriving bee box all season long.
Observing Bee Health and Activity
Monitoring bee health is crucial to maintaining a thriving beehive. Start by observing population growth over time. This can be done by regularly checking the number of adult bees and brood present in the hive. A steady increase in population typically indicates a healthy colony, while a decline may signal issues such as pests or disease.
Changes in behavior are also an important indicator of bee health. For instance, if you notice bees becoming more aggressive or hesitant to enter the hive, it could be a sign that they’re stressed or hungry. On the other hand, if bees appear lethargic or cluster at the entrance of the hive, it may indicate illness.
To monitor these changes effectively, establish a regular observation schedule. Choose a specific time each week to inspect the hive, taking note of any deviations from expected behavior. This proactive approach will help you identify potential issues early on and inform your maintenance decisions.
When observing bee health, keep an eye out for signs of disease, pests, or nutrient deficiencies, which can have significant impacts on colony health.
Common Challenges and Solutions for Bee Box Owners
As a bee box owner, you’re likely to encounter some common challenges that can impact your garden’s pollination efforts – let’s tackle them together. We’ll explore solutions to get your bees buzzing happily and efficiently.
Dealing with Pests and Diseases
As a bee box owner, you’ll inevitably encounter common challenges like pests and diseases that can impact the health and productivity of your bees. Let’s start with some pesky critters: mice are notorious for infiltrating beehives, stealing honey and pollen, and even introducing diseases to the colony. Keep an eye out for signs of mouse activity, such as gnaw marks on the hive or discarded debris.
To deter mice, use hardware cloth or fine-mesh screen to cover the bottom entrance of your hive. Bury the mesh at least 12 inches underground to prevent mice from burrowing underneath. Another solution is to place a shallow tray filled with water near the hive, which can help drown any mice that venture too close.
As for diseases, American Foulbrood (AFB) is one of the most feared afflictions in beekeeping. This bacterial disease can decimate an entire colony if left untreated. Be proactive by monitoring your bees regularly and keeping a clean environment around the hive. Regular inspections will help you catch any signs of AFB early on, allowing for prompt treatment with antibiotics or other remedies.
Some beekeepers swear by introducing beneficial insects like ladybugs or lacewings to control pests naturally. These natural predators can be an effective solution for minor infestations. Always do thorough research and follow local regulations before introducing new species to your ecosystem.
Regular hive inspections are crucial in detecting problems early on, so keep a keen eye out for changes in bee behavior, brood patterns, or signs of disease.
Adapting to Local Regulations and Zoning Laws
Before setting up your bee box, it’s essential to familiarize yourself with local regulations regarding beekeeping. These laws and zoning restrictions can vary significantly from one area to another, so it’s crucial to do your research before introducing bees into your garden.
In some municipalities, there may be specific rules governing the placement of bee boxes, such as minimum distance requirements between the box and neighboring properties or sensitive areas like schools or hospitals. You might also find that certain neighborhoods have bylaws prohibiting backyard beekeeping altogether.
To adapt to local regulations, start by visiting your city’s government website or contacting your local authorities directly. Look for information on zoning laws, permits required for beekeeping, and any specific guidelines for backyard beehives. This research will help you determine whether your planned bee box setup complies with local regulations. If necessary, work with a beekeeper’s association or local gardening community to advocate for more lenient rules or better support for urban beekeepers.
In many cases, simply being aware of and compliant with local regulations can alleviate concerns and create a harmonious relationship between bee enthusiasts and their neighbors.
Frequently Asked Questions
Can I use recycled materials for my bee box plans?
You can definitely repurpose or reuse materials for your bee boxes, such as old pallets, wood planks, or plastic containers. However, ensure the materials are clean, dry, and free of chemicals to avoid harming the pollinators. Get creative with what you have on hand to reduce waste and make your project more sustainable.
How often should I clean my bee box?
Regular cleaning is crucial for maintaining a healthy environment within your bee boxes. Clean your bee boxes at least once a month during peak pollinator season (spring-fall) by gently removing any debris, dead insects, or honeycomb. Use a soft brush and mild soap solution to avoid harming the bees or damaging the structure.
What if I live in an area with extreme weather conditions?
Bee boxes can be adapted for various climate zones. Consider using durable materials that can withstand harsh temperatures, high winds, or heavy rainfall. For example, you might add extra roofing, anchor the box firmly to the ground, or choose a design that allows for easy disassembly during severe weather events.
How do I ensure my bee boxes are accessible for maintenance?
Consider designing your bee boxes with removable panels or hinged roofs for easy access during cleaning and maintenance. This will allow you to inspect the interior without disturbing the pollinators or compromising the structure’s integrity. Also, position your bee boxes in a location that’s easily accessible, such as near a garden path or along a fence line.
Can I use bee boxes for other beneficial insects like butterflies?
While bee boxes are specifically designed for solitary bees and bumblebees, you can modify them to attract other beneficial pollinators like butterflies. Add features like open mesh panels or a separate compartment with host plants that cater to the needs of specific butterfly species. This will create a diverse habitat that supports multiple pollinator groups in your garden ecosystem.