Are you looking to add a pop of color and fragrance to your garden, while also supporting local pollinators? Look no further than bee balm! This versatile herb is a favorite among bees, butterflies, and hummingbirds alike. But growing bee balm can be a bit tricky, which is why we’ve put together this comprehensive guide to help you succeed.
In this article, we’ll walk you through the essential steps of growing bee balm, from selecting the right variety for your climate and space constraints, to harvesting and preserving its fragrant leaves and flowers. We’ll cover everything from preparing the soil to pruning and caring for your plants, so you can enjoy a thriving garden filled with this beautiful herb. Whether you’re a seasoned gardener or just starting out, our bee balm growing guide has got you covered!
Choosing the Right Variety
When it comes to growing bee balm, selecting the right variety is crucial for a thriving garden. Consider factors like bloom color and size to pick the perfect one.
Selecting from Monarda Species
When it comes to selecting from Monarda species, you’ll find that each has its unique characteristics and growing requirements. Let’s take a closer look at three popular varieties: Monarda didyma (red), Monarda fistulosa (pink), and Monarda citriodora (lemon).
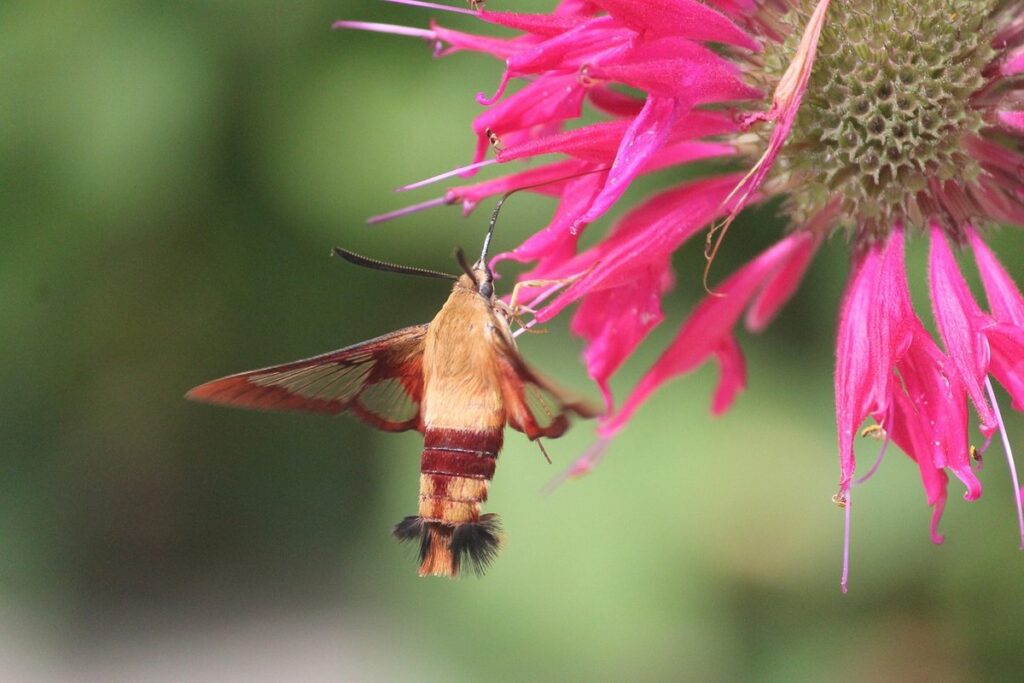
Monarda didyma is one of the most common bee balm species, with vibrant red flowers that attract pollinators from far and wide. This variety prefers moist soils and partial shade, making it an excellent choice for woodland gardens or areas with high humidity.
On the other hand, Monarda fistulosa boasts delicate pink flowers that are a favorite among butterflies and hummingbirds. This variety is more adaptable to dry conditions and can thrive in full sun, making it perfect for xeriscaping or Mediterranean-style gardens.
Monarda citriodora takes the prize for its unique lemon-scented foliage and vibrant yellow flowers. This variety requires well-draining soils and partial shade, but its distinctive aroma makes it a standout choice for herb gardens or fragrant plant arrangements.
When selecting from these species, consider your garden’s specific conditions, including soil type, sunlight exposure, and moisture levels. By choosing the right Monarda species, you’ll be rewarded with a thriving bee balm patch that attracts pollinators and adds visual interest to your garden.
Factors to Consider When Choosing a Bee Balm Variety
When choosing a bee balm variety, there are several key factors to consider that will ensure your plants thrive in their environment. First and foremost, think about the climate you’re growing in. Bee balm prefers cooler temperatures and can be sensitive to extreme heat, so if you live in a hot and dry region, look for varieties like ‘Dark Ivory’ or ‘Prairie Bells’ that are bred for warmer climates.
Consider your soil type as well – bee balm prefers well-draining soil with a pH between 6.0 and 7.0. If your soil is heavy clay or prone to waterlogging, choose a variety like ‘Ruby Slippers’ or ‘Oettinger’s Pink’, which are more tolerant of wet conditions.
Sunlight requirements are also essential – bee balm needs at least six hours of direct sunlight per day to produce plenty of blooms. Finally, think about the color you want in your garden – with over 20 different varieties to choose from, there’s a bee balm for every bloom color and pattern preference.
Planting and Soil Preparation
Before planting your bee balm, it’s essential to prepare a healthy soil environment that will support its growth. This includes loosening the soil and adding organic matter as needed.
Preparing the Perfect Soil Mix
When it comes to growing bee balm, one of the most crucial factors is having well-draining soil. This perennial herb doesn’t tolerate waterlogged conditions and can be susceptible to root rot if the soil doesn’t drain properly. To create a mix suitable for bee balm growth, you’ll want to focus on incorporating ingredients that improve drainage while also retaining moisture.
A good starting point is to use a combination of compost, perlite or vermiculite, and sand. The compost will add organic matter and nutrients, while the perlite or vermiculite will help break up clay soils and improve drainage. Sand will further enhance drainage by allowing excess water to pass through quickly. Aim for a mix that’s about 20% compost, 30% perlite or vermiculite, and 50% sand.
In terms of specific ingredients, you can also consider adding in some peat moss or coconut coir to help retain moisture while still allowing for good drainage. The key is to find a balance between retaining water and preventing the soil from becoming too soggy. By creating a well-draining mix, you’ll set your bee balm plants up for success and encourage healthy growth throughout the season.
When and How to Plant Bee Balm
When it comes to planting bee balm, timing is everything. In regions with a mild climate, such as USDA zones 3-6, you can plant bee balm in early spring, about 4-6 weeks before the last frost date. This allows the plants to establish themselves before the heat of summer sets in.
In warmer climates (USDA zones 7-9), it’s best to wait until late spring or early summer when the soil has warmed up and there is adequate moisture. Planting too early in these regions can lead to weak and spindly growth.
Regardless of when you plant, make sure to space seedlings or established plants at least 12-18 inches apart to allow for proper air circulation and growth. Water them thoroughly after planting and keep the soil consistently moist during their first year of growth. Aim for about 1 inch of water per week, either from rainfall or irrigation.
Keep in mind that bee balm can be invasive in some areas, so be sure to contain it by providing a physical barrier or dividing the plant every few years to prevent its spread.
Growing Conditions and Care
To ensure your bee balm plants thrive, it’s essential to provide them with the right growing conditions and proper care, which we’ll cover in detail below. Let’s dive into what you need to know!
Sunlight and Water Requirements
When it comes to growing bee balm, one of the most critical aspects is providing the right amount of sunlight and maintaining consistent moisture levels. Bee balm thrives in a range of lighting conditions, from partial shade to full sun. In general, it prefers at least four hours of direct sunlight per day, but can tolerate up to six hours or more. This adaptability makes bee balm an excellent choice for gardeners with varying amounts of sunlight.
In terms of watering needs, bee balm requires consistent moisture throughout its growing season. It’s essential to water your bee balm plants regularly, especially during periods of drought or high heat. Aim to provide about 1-2 inches of water per week, either through rainfall or irrigation. Be careful not to overwater, as this can lead to root rot and other issues. To gauge the moisture levels in the soil, stick your finger into it up to the first knuckle – if it feels dry, it’s time for watering. By striking a balance between sunlight and water, you’ll be well on your way to growing robust and healthy bee balm plants.
Fertilization and Pruning Techniques
When it comes to growing bee balm, fertilization and pruning are crucial techniques that can make all the difference. Fertilizing bee balm during its active growing season (spring and summer) will promote healthy growth, increase blooming, and enhance its natural resistance to pests and diseases.
A balanced fertilizer that contains nitrogen, phosphorus, and potassium (NPK) is ideal for fertilizing bee balm. You can apply a 5-10-10 NPK fertilizer once a month during the growing season. However, be cautious not to over-fertilize, as this can lead to weak growth and reduced blooming.
Pruning is also essential for maintaining plant health and promoting blooming. Remove any dead or damaged leaves or flowers to prevent disease from spreading. Cut back the stems by one-third to one-half after the first bloom cycle to encourage a second flush of flowers. This will not only promote blooming but also help maintain the plant’s shape.
By fertilizing your bee balm regularly and pruning it properly, you’ll be rewarded with vibrant blooms and a healthy, thriving garden. Remember to water your plants consistently, as this will help them absorb nutrients from the fertilizer more efficiently. With proper care, your bee balm plants will provide years of beauty and enjoyment in your garden.
Common Pests and Diseases
As you tend to your bee balm plants, be aware of common pests and diseases that can affect their health, such as aphids and powdery mildew. We’ll outline what to watch for and how to address these issues.
Identifying and Managing Pest Issues
When growing bee balm in your garden, you may encounter common pests that target this fragrant herb. One of the most notorious culprits is the aphid. These tiny, soft-bodied insects feed on plant sap, causing curled or distorted leaves and stunted growth. Whiteflies are another problem pest, laying eggs on the underside of leaves and sucking out plant juices.
Spider mites are also known to attack bee balm, particularly in hot, dry weather conditions. These microscopic arachnids spin fine webs on leaves, causing yellowing or bronzing.
To manage these pests organically, try introducing natural predators such as ladybugs or lacewings into your garden. You can also spray neem oil or insecticidal soap directly onto infested areas. For aphid control, use a strong jet of water to dislodge them from the plant. Regularly inspecting your bee balm plants and catching problems early will help prevent pest populations from getting out of hand.
Remember that integrated pest management involves using multiple methods simultaneously. This may include cultural controls such as removing weeds or debris around the planting area, which can harbor pests.
Recognizing and Treating Fungal Diseases
As you nurture your bee balm plants, it’s essential to keep an eye out for fungal diseases that can quickly spread and cause damage. Powdery mildew is a common issue that affects many herb gardens, including bee balm. This disease appears as a white, powdery coating on leaves and stems, often starting at the tips of the plant. To prevent powdery mildew, ensure good air circulation around your plants by providing enough space between them and avoiding overhead watering.
Another fungal disease that can affect bee balm is root rot. Caused by overwatering or poor drainage, root rot leads to soft, mushy stems and a decline in plant health. To prevent this issue, check the soil moisture regularly and avoid getting water on the leaves or crown of the plant. If you notice any signs of fungal disease, remove affected areas immediately and treat with a fungicide specifically designed for herbs.
Keep an eye out for these diseases during periods of high humidity or wet weather. Regularly inspect your plants, and address any issues promptly to prevent them from spreading.
Propagation and Division
To multiply your bee balm plants and share them with friends, you’ll want to learn how to propagate and divide these beautiful perennials with ease. We’ll walk you through both methods step by step.
Methods for Propagating Bee Balm
When it’s time to multiply your bee balm plants, you have several methods at your disposal. One of the most common and effective ways is through division, a process that involves separating established roots into multiple sections.
To divide an existing bee balm plant, start by digging up the entire root system in the spring or fall when the plant is dormant. Gently wash away any excess soil to reveal the individual roots. Using a sharp tool like a knife or pruning saw, separate the main root into smaller sections, each with at least one growing stem. Replant these divisions immediately, making sure the crown (where the roots meet the stem) is level with the soil surface.
Stem cuttings are another way to propagate bee balm. Take 4-6 inch stem tips in late spring or early summer when new growth begins. Remove lower leaves and plant them in a propagation tray filled with moist potting mix. Keep the soil consistently damp but not waterlogged until roots develop, usually within 2-3 weeks.
Layering can also be used to propagate bee balm by bending a long stem over a pot or tray and covering it with soil. Roots should form within a few weeks. Once established, these new plants can be transplanted into their permanent locations in the garden.
Tips for Successful Plant Division
When it’s time to divide your bee balm plants, make sure you’re doing so at the right moment for optimal success. Spring and fall are ideal times for division, as the plant is not actively growing and can recover quickly from transplant shock. Avoid dividing during the heat of summer or when the plant is under stress.
Before dividing, prepare the soil by loosening it to a depth of about 8-10 inches. This will give the newly divided roots room to grow and help prevent waterlogging. Add some compost or well-rotted manure to enrich the soil and provide essential nutrients for the new growth.
After division, water the plants thoroughly to settle the soil and provide enough moisture to support establishment. Keep the soil consistently moist but not waterlogged during the first few weeks after division. Prune back the stems by about one-third to encourage bushy growth and prevent legginess. With proper care and attention, your divided bee balm plants should establish themselves quickly and thrive in their new locations.
Harvesting and Preserving
Now that you’ve cultivated a thriving bee balm garden, it’s time to reap your rewards: learn how to harvest and preserve these fragrant flowers for enjoyment throughout the year.
Timing and Techniques for Harvesting Bee Balm Flowers
When it comes to harvesting bee balm flowers, timing is everything. The optimal time to harvest these beautiful blooms depends on their intended use. If you plan to dry them for potpourri or crafts, wait until the flowers are fully open and the petals have dropped slightly. This usually occurs in mid-to-late summer, when the plant has reached its peak foliage.
For fresh flower arrangements, snip off the blooms when they’re still in bud form, as this will encourage more to grow. In contrast, if you want to use the flowers for teas or infusions, harvest them during the morning after the dew has evaporated but before the heat of the day causes the oils to dissipate.
To ensure a bountiful harvest, consider harvesting your bee balm flowers in stages. Remove any weak or damaged blooms to promote healthy growth and encourage more flowers to develop. By doing so, you’ll not only have an abundance of fresh flowers for arrangements but also a steady supply for teas and other crafts throughout the growing season.
Methods for Drying and Storing Bee Balm Leaves and Flowers
When it’s time to preserve your bee balm leaves and flowers, you have several methods at your disposal. Air-drying is a popular choice for delicate herbs like bee balm. To air-dry, tie the stems of the plant in small bunches and hang them upside down in a warm, dry, dark place with good airflow. This method can take anywhere from 1-3 weeks, depending on the humidity level.
Oven-drying is another option for preserving bee balm. Preheat your oven to its lowest temperature setting (usually around 150-200°F). Place the leaves and flowers in a single layer on a baking sheet lined with paper towels. Leave the oven door slightly ajar to allow moisture to escape. Check on them every few hours, shaking the pan gently to ensure even drying.
If you’re looking for a quicker method, freezing is a great option. Simply place the leaves and flowers in an airtight container or freezer bag, making sure to press out as much air as possible before sealing. Frozen bee balm will retain its flavor and aroma, and can be used in teas and potpourri throughout the year.
Regardless of which method you choose, make sure to clean and dry your bee balm thoroughly before preserving it to prevent mold and bacterial growth.
Frequently Asked Questions
Can I grow bee balm in containers?
Yes, you can definitely grow bee balm in containers. In fact, this is a great option if you have limited space or want to move the plants around your garden to maximize sunlight exposure. Just make sure the container is at least 6-8 inches deep and has good drainage holes.
How often should I water my bee balm plants?
Bee balm prefers moist soil, but it’s essential to avoid overwatering. Water your plants when the top inch of soil feels dry to the touch, and reduce watering in winter months when the plant is dormant. Be cautious not to get water on the leaves or flowers to prevent fungal diseases.
Can I propagate bee balm through division in spring?
Yes, you can propagate bee balm through division in early spring, when new growth begins. Choose a healthy stem with plenty of roots and gently separate it from the mother plant. Replant the divided section in well-draining soil, water thoroughly, and keep the soil consistently moist until established.
Will my bee balm plants spread too quickly?
Bee balm can be invasive in some areas, spreading aggressively through underground rhizomes. If you’re concerned about its growth habits, consider growing compact or dwarf varieties that are less likely to self-seed and spread quickly.
Can I harvest bee balm leaves and flowers all season long?
Yes, you can harvest bee balm leaves and flowers regularly throughout the growing season. Pinch off flower buds as they form to encourage leaf growth, and trim back stems after blooming to promote new growth. Harvest individual leaves or stems as needed for fresh use, or dry them for later use in teas, potpourri, or crafts.