Are you one of the many gardeners who have welcomed bees into their backyard with a beautiful bee house? If so, you’re probably eager to learn how to maintain this vital habitat for your buzzing friends. But did you know that proper maintenance is crucial for ensuring the health and happiness of your resident bees? Without regular upkeep, your bee house can become a haven for pests, diseases, and even predators, ultimately harming the very creatures it’s meant to protect.
In this article, we’ll guide you through the essential steps to maintain your bee house in your garden. From selecting the perfect location to choosing the right type of bee house, we’ll cover everything you need to know to create a thriving ecosystem for these incredible pollinators. Whether you’re a seasoned beekeeper or just starting out, our comprehensive guide will provide you with expert advice and practical tips to keep your bees happy and healthy all year round.
Choosing the Right Location and Type of Bee House
When setting up a bee house, choosing the right location is crucial to attract the desired species and ensure their survival. Consider the type of bees you want to attract and plan accordingly.
Selecting a Sunny Spot for Your Bee House
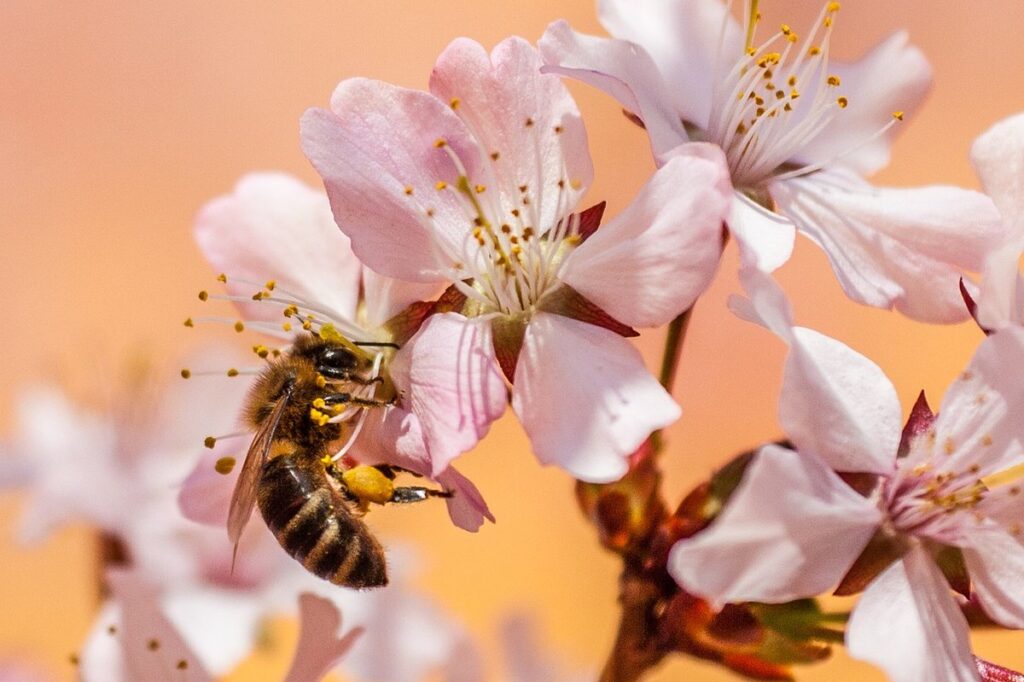
When it comes to choosing the perfect spot for your bee house, sunlight is one of the most crucial factors to consider. Bees rely heavily on sunlight to regulate their body temperature, navigate, and even communicate with each other. In fact, studies have shown that bees are more likely to thrive in areas with direct sunlight, where temperatures can reach a warm 15-20°C (59-68°F) during the day.
To identify the best location for your bee house, look for spots that receive at least 6 hours of direct sunlight per day. Avoid placing it under trees or near buildings, as these can cast shadows and reduce the amount of sunlight available to your bees. A south-facing wall or a spot with an open view is ideal.
To ensure your bee house receives adequate sunlight throughout the day, consider the following tips: position it on a slight incline to prevent water from collecting around the entrance, and trim back any nearby vegetation that may block direct sunlight. By placing your bee house in a sunny spot, you’ll be providing your bees with the perfect conditions for health and happiness.
Types of Bee Houses: Log Hives, Masonry Nests, and More
When it comes to bee houses, you’ll find that there are various types available, each with its own unique characteristics. Let’s take a closer look at some of the most popular options: Log Hives, Masonry Nests, and Solitary Bee Boxes.
Log Hives are an excellent choice for beginners, as they’re easy to build or purchase, and can be mounted on a tree trunk or fence post. They provide ample space for solitary bees to nest and lay eggs. However, they may require more maintenance than other options, as the logs need to be cleaned out periodically.
Masonry Nests are another popular option, made from materials like brick or stone. These are ideal for experienced beekeepers who want a long-term solution. They’re durable, low-maintenance, and can withstand harsh weather conditions. However, they may be more expensive than other options.
Solitary Bee Boxes, on the other hand, offer a unique combination of space and protection. These boxes usually have individual cells or compartments that provide a safe haven for solitary bees to nest. They’re perfect for small gardens or spaces with limited room for bee houses.
When choosing the right type of bee house, consider factors like your experience level, available space, and maintenance preferences. By selecting the right type of bee house, you’ll be well on your way to creating a thriving ecosystem in your garden.
Preparing Your Bee House for Occupancy
Now that you’ve set up your bee house, it’s time to make sure it’s ready for its new residents. This means adding a few essential features to keep them safe and happy.
Cleaning and Disinfecting the Bee House
When it comes to preparing your bee house for occupancy, cleaning and disinfecting is an essential step that’s often overlooked. However, this crucial process ensures a safe and healthy environment for the bees from day one.
To begin, remove any debris, old wax, or honeycomb fragments from the hive cells using a soft-bristled brush or a small vacuum cleaner. Be gentle to avoid damaging the internal surfaces. Next, disinfect all exposed surfaces with a solution of 1 part white vinegar to 9 parts water. You can also use a dedicated bee house cleaning product if you prefer.
To eliminate pests like mites and small insects, gently dust the entire interior with diatomaceous earth or neem powder using a fine-mesh sieve. These natural powders are non-toxic to bees but deadly to unwanted critters. Finally, inspect your bee house carefully for any signs of damage, wear, or pest infestation before introducing the new occupants.
Remember, a clean and disinfected bee house is key to preventing the spread of diseases and ensuring the health of your bees.
Installing Nest Boxes and Entrance Reducers
Installing nest boxes and entrance reducers is a crucial step in preparing your bee house for occupancy. These components play a vital role in controlling population growth and preventing swarming. Nest boxes provide a safe space for bees to lay their eggs and store honey, while entrance reducers limit the number of bees entering the hive, which helps regulate the colony’s size.
When installing nest boxes, choose a location that receives sufficient sunlight and is protected from harsh winds. Mount the boxes at a 30-degree angle to ensure rainwater doesn’t accumulate inside. Typically, you’ll want two or three boxes per bee house, depending on the species of bees inhabiting it.
Entrance reducers come in different sizes and materials, such as wood, plastic, or metal. They’re usually inserted into the entrance tunnel of the nest box, reducing the diameter to about 4-5 inches (10-13 cm). This narrowing affects the number of bees that can enter, allowing for more controlled growth.
When selecting an entrance reducer, consider the species you’re housing and their specific needs. Some beekeepers swear by plastic reducers due to their ease of installation and durability. Others opt for wood or metal alternatives for aesthetic reasons or concerns about longevity.
Proper installation is key; ensure the reducer fits snugly into place and doesn’t obstruct the entrance completely. By balancing the colony’s growth with these essential components, you can promote a healthy and thriving bee population in your garden.
Attracting Native Bees with the Right Materials
To attract native bees to your bee house, you’ll need to choose materials that provide a safe and welcoming habitat for these beneficial pollinators. Consider using natural materials like bamboo, hollow reeds, or untreated wood.
Using Natural Materials: Logs, Bamboo, and Eucalyptus
When it comes to building or maintaining bee houses in your garden, using natural materials is an excellent choice. Not only do they provide a welcoming habitat for native bees, but they also blend seamlessly into the surrounding environment. Let’s take a closer look at three popular options: logs, bamboo, and eucalyptus.
Logs offer a cozy home for solitary bees, providing protection from harsh weather conditions and predators. Simply hollow out a section of a mature log to create a bee house, making sure it’s not too large or too small for the bees’ comfort. Just be aware that logs can dry out quickly, which may require periodic maintenance.
Bamboo, on the other hand, is an incredibly durable option. Its unique structure provides ample space for bees to nest and lay eggs, while its lightweight nature makes it easy to install and transport. When choosing bamboo, opt for untreated sections to ensure no chemicals harm the bees.
Eucalyptus wood is another popular choice due to its natural resistance to rot and pests. It’s an ideal option if you live in a region with high humidity or heavy rainfall. However, be mindful of eucalyptus’ strong scent, which can repel some bee species. Always leave some gaps between the individual nesting holes to allow for airflow and maintain proper ventilation.
When incorporating these natural materials into your garden, remember to place them in a sunny spot, protected from extreme weather conditions. By choosing the right material and location, you’ll be well on your way to creating a thriving bee habitat that will attract native bees all season long.
Avoiding Chemical-Treated Wood and Other Hazards
When it comes to building and maintaining bee houses, it’s essential to choose materials that are safe for our native bees. Using chemical-treated wood or other hazardous materials can have devastating consequences on the health of these vital pollinators.
Chemical-treated wood, often used in construction projects, contains preservatives like arsenic, borate, and chromated copper arsenate (CCA). These chemicals can leach into the soil and waterways, posing a significant risk to bees and other wildlife. In fact, studies have shown that even small amounts of CCA can kill bees within hours.
To avoid these hazards, opt for untreated woods like cedar, cypress, or reclaimed wood instead. You can also consider using recycled materials like old pallets or cardboard boxes. When working with any new materials, make sure to wear protective gear and follow proper safety precautions.
Remember, it’s not just the bee house itself that needs attention – the surrounding environment matters too. Avoid placing your bee house near pesticides, herbicides, or other chemicals that can harm bees. By choosing safe materials and creating a chemical-free zone, you’ll be supporting the health and well-being of these incredible pollinators in your garden.
Monitoring and Maintaining Your Bee House
Regular checks will help ensure your bee house remains safe and healthy for its inhabitants, so let’s dive into the monitoring and maintenance essentials. This includes tasks to perform daily, weekly, and seasonally.
Regular Inspections: Checking for Pests and Disease
Regular inspections are crucial to maintaining a healthy bee population and preventing damage to your beehive. By regularly checking on your bees, you can detect signs of pests and diseases early on, allowing for swift action to prevent the issue from spreading.
When inspecting your bee house, keep an eye out for unusual behaviors such as increased aggression towards visitors or a decrease in hive activity. Check for physical signs like excessive propolis, a sticky resinous mixture used by bees to seal their hive, which can be a sign of disease. Look for pests like small wasp nests, hornet nests, or ants crawling around the hive.
If you notice any issues, take action immediately. For example, if you spot a mouse infestation, consider using mouse guards or relocating your bee house to a rodent-free area. If you suspect a pest or disease issue, research and apply targeted treatments, such as introducing natural predators or changing the pheromone profile of the hive.
Some common pests that can affect beehives include small wasps, hornets, ants, and rodents. Disease signs may include excessive white specks on bees (fungal infections), or darkening of the hive’s exterior due to bacterial growth.
Swarming Prevention and Management Strategies
Preventing swarming is crucial to maintaining the health and productivity of your bee house. To identify potential swarms, look for signs such as increased activity around the entrance, a strong pheromone smell, or a buildup of bees on nearby surfaces. These indicators signal that your colony has reached its capacity and may soon split.
To manage bee populations effectively, maintain a clean and well-ventilated bee house to promote healthy growth. Regularly inspect for signs of disease, pests, or damage to the hive structure. Remove any dead bees or debris to prevent the spread of diseases.
If you notice these warning signs, take swift action to relocate the swarm humanely. This can be done by smoke-cleaning a new location with a smoker and then encouraging the swarming bees to settle in their new home using pheromone-releasing devices or other attractants. Keep in mind that not all swarms will respond well to relocation, so consider consulting a local beekeeper for guidance.
Consider culling your stronger colonies by splitting them into multiple boxes to prevent over-crowding and reduce the risk of swarming.
Troubleshooting Common Issues with Your Bee House
Sometimes, even with regular maintenance, issues can arise with your bee house. This section will walk you through common problems and their solutions to get your bee home back on track.
Pests and Diseases: Identifying Causes and Solutions
When it comes to maintaining your bee house, one of the most critical aspects is identifying and managing pests and diseases. These unwanted visitors can decimate your bee population and even harm humans if not addressed properly. So, how do you spot these issues before they spread?
Start by regularly inspecting your bee house for signs of infestation. Look for yellow or white powdery patches on the wood, which could indicate a fungal infection. Foul odors and excessive propolis buildup can also be indicative of disease. As for pests, keep an eye out for mites, small dark specks attached to the bees’ bodies.
Common pests include wax moths, whose larvae burrow into honeycomb, and small hive beetles, which damage wood and destroy brood cells. Regularly cleaning your bee house with a solution of soap and water can help prevent infestations. To manage existing problems, use targeted treatments like essential oils (e.g., lavender) or insecticidal soap specifically labeled for bees. For severe cases, consider consulting a local apiarist for guidance on managing pests and diseases in your specific region.
Repairing or Replacing Damaged Components
As you inspect your bee house, it’s not uncommon to find damaged components that need repair or replacement. This can be a straightforward process if you’re familiar with the design and materials used in your bee house. First, assess the damage: is it minor (e.g., scratches on a panel) or more severe (e.g., a broken frame)?
If the issue is minor, you may be able to repair the component using basic DIY skills. For example, if a panel has developed cracks due to weathering, you can seal them with a waterproof sealant. However, if the damage is more extensive, it’s often best to replace the affected part entirely.
When replacing damaged components, ensure that any new parts match the original in terms of material and design. This will maintain the integrity of your bee house and prevent attracting pests or introducing diseases to the colony.
Conclusion: Nurturing a Healthy Bee Population in Your Garden
As you continue to maintain your bee house, remember that the ultimate goal is to create a thriving environment for these incredible pollinators. To achieve this, ensure that your garden is rich in nectar and pollen sources, allowing bees to forage and store food for themselves. Plant a variety of flowers that bloom at different times, like lavender in spring and sunflowers in summer, to provide a constant supply of nutrients. This will not only support the local bee population but also attract other beneficial insects.
Regularly inspect your bee house and replace any worn-out or damaged components to keep it safe and functional for the bees. Keep your garden free from pesticides and herbicides, as these can harm bees and even kill them. By creating a bee-friendly environment, you’ll be rewarded with the buzzing sounds of happy bees flitting between flowers, collecting nectar and pollen with ease.
Frequently Asked Questions
How Often Should I Clean and Disinfect My Bee House?
It’s recommended to clean and disinfect your bee house every 2-3 months, especially during peak pollination seasons. Regular cleaning will help prevent the buildup of debris, pests, and diseases that can harm your bees.
Can I Use Chemical-Treated Wood for My Bee House?
No, it’s essential to avoid using chemical-treated wood for your bee house as it can be toxic to bees and other beneficial insects. Instead, opt for natural materials like logs, bamboo, or eucalyptus, which are safe and suitable for bee habitats.
What if I Notice Pests or Diseases in My Bee House?
If you notice pests or diseases in your bee house, don’t hesitate to take action. Regularly inspect your bee house, and address any issues promptly by cleaning, disinfecting, or repairing damaged components. If the problem persists, consider consulting a local beekeeping expert for guidance.
Can I Use a Single Type of Bee House for All Native Bees?
While it’s tempting to use a single type of bee house, different native bee species have unique requirements and preferences. Consider installing multiple types of bee houses or using entrance reducers to accommodate various species, ensuring that your garden attracts a diverse range of beneficial pollinators.
How Do I Monitor the Health of My Bees Without Disturbing Them?
Monitoring the health of your bees is crucial without disturbing them. Look for signs of activity like bee traffic, nest box occupancy rates, and observe any unusual behavior or nesting patterns. You can also install a camera or monitoring system to keep an eye on your bees without disrupting their habitat.