As a gardener, you know that bees are some of your best friends when it comes to healthy plants. They pollinate flowers and vegetables with ease, but did you know that their home environment plays a huge role in their ability to do their job? Assembling beehive frames is an essential part of creating a happy and productive bee colony. Not only will this ensure they’re able to thrive, but also boost the health and productivity of your garden. In this article, we’ll take you through a step-by-step guide on how to assemble beehive frames like a pro. From choosing the right materials to setting up the perfect setup for optimal pollination, we’ll cover everything you need to know to create a thriving bee environment that will take your plant care results to the next level.
Understanding the Importance of Beehive Frames
When it comes to assembling beehive frames, understanding their importance is crucial for creating a thriving environment for your plants. This is where things get really interesting.
What Are Beehive Frames and Why Are They Essential?
Beehive frames are a crucial component of any beehive setup. These rectangular or hexagonal structures serve as the foundation for honeycombs within the hive, providing bees with a space to build their intricate nests and store food. Each frame is typically designed to hold multiple combs and allows beekeepers to easily inspect and maintain the colony’s health.
In beekeeping, frames are essential because they enable beekeepers to manage the flow of nectar, pollen, and brood within the hive. By installing frames with a thin layer of foundation (beeswax or plastic), bees can start building their comb from scratch, ensuring a smooth transition for the colony as it grows.
The importance of beehive frames cannot be overstated. Without proper frame installation, bees may struggle to construct their combs, leading to issues like overcrowding, disease transmission, and even colony collapse. By choosing high-quality frames that meet the needs of your specific bee species, you can create a thriving environment for your colony to grow and thrive.
Common Types of Beehive Frames and Their Uses
When it comes to assembling beehive frames for plant care, understanding the different types and their specific uses is crucial. There are three main types of beehive frames: Langstroth, Top-bar, and Warre.
Langstroth frames are one of the most widely used and versatile options. They consist of a rectangular frame with movable comb that allows for easy inspection and maintenance. This type of frame is ideal for commercial beekeepers due to its simplicity and ease of use. However, they can be more expensive than other types and may not be suitable for small-scale or backyard beekeeping.
Top-bar hives (TBHs) are another popular option, often preferred by hobbyists and small-scale beekeepers. TBHs feature horizontal bars that the bees build their comb onto, eliminating the need for frames. This design allows for more natural behavior and can reduce pests and diseases. However, they may require more maintenance and can be more challenging to inspect.
Warre hives are a vertical hive design that mimics the way bees naturally nest in hollow tree trunks. They consist of stacked boxes with frames that allow for easy expansion and are often preferred by experienced beekeepers due to their simplicity and durability. Warre hives promote healthy bee behavior, reduce pests and diseases, but they can be more challenging to inspect and may require specialized equipment.
Choosing the Right Materials for Assembly
When assembling beehive frames, selecting the right materials is crucial for a strong and durable structure that will support your plants’ growth. Let’s explore the essential components you’ll need to get started.
Selecting High-Quality Wood for Your Frames
When it comes to assembling beehive frames for plant care, selecting high-quality wood is crucial for durability and longevity. You want a material that can withstand the elements, heavy use, and potential pests. The right wood choice will ensure your beehive frames remain safe and effective.
Consider durability as your top priority when choosing wood. Opt for hardwoods like oak or maple, which are denser and more resistant to decay than softwoods. Avoid using pressure-treated woods, as they can leach chemicals that harm bees. You can also explore reclaimed or sustainably sourced woods, which not only reduce waste but also have a lower environmental impact.
Don’t compromise on cost either; invest in good-quality wood upfront to save time and resources later. A small increase in initial investment will be offset by the reduced need for repairs or replacements down the line. For example, if you use a low-cost softwood, it may last only a few seasons before showing signs of wear, whereas high-quality hardwoods can easily withstand 5-7 years or more.
Make sure to inspect your wood thoroughly before purchase. Look for cracks, knots, or any other imperfections that could weaken the structure. It’s also essential to work with fresh, dry lumber to prevent warping or rotting. Always follow proper storage and handling techniques to maintain the quality of your wood materials.
Additional Components Needed for Assembly
In addition to the wooden frame components, several other essential elements are necessary for assembling beehive frames. Wire mesh or hardware cloth is required to provide support and protection for the plant roots, ensuring they remain healthy and strong during the growing season. Nails specifically designed for woodworking should also be on hand, as they will secure the wire mesh in place while preventing damage to the frame.
When choosing a type of glue, opt for one that is safe for use with plants, such as a plant-based adhesive or a food-grade epoxy resin. This ensures that any excess residue won’t harm the growing roots or attract pests.
Finally, consider investing in a few specialized tools like wire cutters, pliers, and a drill with screwdriver attachment to facilitate assembly. These can significantly reduce the time and effort required for the process, allowing you to focus on other tasks related to plant care.
Remember to read through the manufacturer’s instructions for any specific components or materials before commencing assembly, as this will help prevent potential issues down the line.
Step-by-Step Assembly Instructions
Now that you have all the necessary parts, let’s walk through how to assemble your beehive frames step by step. Follow these instructions carefully for a sturdy and secure setup.
Frame Body Construction: A Detailed Guide
When it comes to constructing the frame body of your beehive, precision and attention to detail are crucial. The process involves cutting, joining, and shaping wood pieces to create a sturdy yet adjustable framework.
To begin, ensure you have all the necessary tools, including a table saw or circular saw for precise cuts, a drill press for drilling holes, and a miter saw or hand saw for angled cuts. Start by measuring and marking your wood pieces according to your beehive design specifications.
Cut the frame’s side rails to length using your saw of choice, taking care to keep edges square and corners clean. Next, cut the end caps and center beam to size. For joining the frame body components together, use 1-1/4″ or 1-1/2″ wood screws for added stability.
When assembling the frame, apply a thin layer of beeswax or silicone-based lubricant to all moving parts to ensure smooth movement and prevent jamming. Use clamps to secure the pieces in place while you drill pilot holes for the joining screws.
Assemble the frame body slowly and deliberately, double-checking each step to guarantee accuracy and alignment.
Installing the Hive Stand and Super Attachment
Now that you have assembled the frame body, it’s time to attach the hive stand and super. This is a crucial step in completing your beehive setup, as it will provide a stable foundation for your bees and allow for easy access to the frames.
Begin by carefully placing the hive stand over the assembled frame body, ensuring proper alignment with the legs of the stand extending evenly from each corner. Make sure the stand is centered on top of the frame body and secure it using the provided screws or bolts. This will provide a solid base for your beehive and prevent any wobbling or instability.
Next, attach the super to the hive stand using the pre-drilled holes and matching hardware provided. Align the super with the hive stand carefully, ensuring that the frames fit snugly into place. Double-check that all connections are secure before moving on to the next step. This will give you a solid foundation for your beehive setup, allowing you to focus on adding the final touches.
Tips for Optimizing Assembly Efficiency
To maximize your assembly time, follow these essential tips that’ll help you optimize efficiency and get back to nurturing those happy beehives in no time. Let’s streamline the process together!
Time-Saving Techniques for Frame Construction
Assembling beehive frames requires precision and efficiency to ensure healthy growth for your plants. To streamline this process, let’s focus on time-saving techniques for cutting wood and using specialized tools.
When it comes to cutting wood, a miter saw is an essential tool that can save you time and effort. This power tool allows for precise angled cuts, reducing waste and minimizing the need for re-cutting. For straight cuts, consider investing in a table saw or circular saw. These tools are also versatile and can be used for various woodworking projects.
To minimize errors, double-check your measurements before making any cut. A simple mistake can lead to wasted time and material. Additionally, using a story stick or marking gauge can help you maintain consistency throughout the assembly process. By incorporating these tools and techniques into your workflow, you’ll be able to complete the assembly of your beehive frames more quickly and accurately.
To further enhance efficiency, consider pre-cutting certain components ahead of time, such as the frame’s sides or support bars. This allows for a smooth assembly process and reduces the likelihood of errors.
Common Mistakes to Avoid During Assembly
When assembling beehive frames for plant care, it’s easy to fall into common pitfalls that can lead to wasted time and potentially damaged equipment. One of the most critical mistakes is taking incorrect measurements, which can result in poorly fitting parts or even a misaligned frame.
To avoid this mistake, make sure to double-check your measurements before cutting any wood. It’s also essential to use a calibrated ruler or measuring tape to ensure accuracy. A 1/4-inch difference may seem insignificant, but it can lead to significant issues down the line.
Another common error is poor joinery techniques. Weak joints can cause frames to come apart during use, compromising the structural integrity of your beehive. To avoid this, invest in a good quality table saw or miter saw and take the time to learn proper joinery techniques. Practice makes perfect, so don’t be afraid to test out new skills on scrap wood before tackling actual project components.
Finally, rushing through the assembly process can lead to sloppy workmanship and costly mistakes. Take your time, follow instructions carefully, and consider enlisting a helper or two for larger projects. By avoiding these common mistakes, you’ll save time, effort, and stress in the long run.
Post-Assembly Maintenance and Inspection
Now that you’ve assembled your beehive frames, it’s essential to maintain and inspect them regularly to ensure a healthy environment for your plants. This step is crucial for their longevity and optimal performance.
Regular Checks for Proper Hive Function
Regular checks for proper hive function are crucial to ensure the health and productivity of your bees. As you’ve completed assembling the beehive frames, it’s essential to establish a routine inspection schedule to monitor their progress.
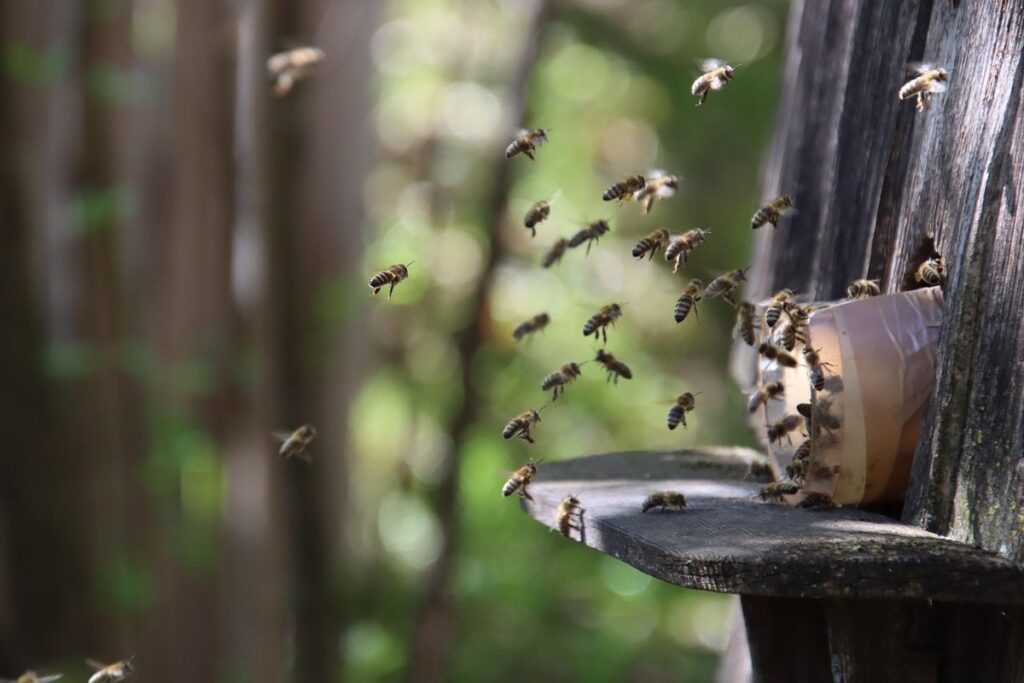
Start by observing bee activity around the hive. A healthy colony will have a constant stream of bees entering and leaving the hive throughout the day. If you notice a decline in activity or see signs of aggression, such as swarming or guarding behavior, take note and investigate further.
Honeycomb formation is another critical aspect to monitor. A thriving colony will produce honeycomb cells at an even rate, filling them with nectar and pollen. Look for areas where comb is damaged or absent, which could indicate pests, diseases, or inadequate resources. Regularly inspect the hive’s entrance and exit points for any debris or blockages that may impact air flow.
During inspections, also check for signs of pests like mites, small hive beetles, or wax moths. Ensure the hive is well-ventilated to prevent moisture buildup and disease proliferation. Make it a habit to perform these checks at least once a week during peak seasons to catch any issues before they become severe problems.
Troubleshooting Common Issues After Assembly
When assembling beehive frames for plant care, it’s not uncommon to encounter some issues after completion. Structural problems can arise due to faulty connections between the frame components or insufficient tightening of screws and bolts. These problems can lead to a weakened structure that may collapse under the weight of the plants.
Pest infestations are another common issue following assembly. Bees, wasps, and other insects can quickly make themselves at home in your newly assembled frames if not properly secured. This is especially true for beehives with open cells or gaps in the frame design.
To address structural issues, check that all screws and bolts are tightened securely and that connections between components are solid. You can also inspect the frame’s overall balance to ensure it remains stable even when fully loaded.
In case of pest infestations, remove any debris or dead insects from the frames as soon as possible to prevent attracting more pests. Apply a suitable insecticide according to the manufacturer’s instructions and take preventive measures by regularly inspecting your beehives for signs of unwanted visitors. Regular cleaning and disinfecting will also go a long way in keeping your beehive pest-free.
Conclusion: Maximizing Your Beehive’s Potential
Now that you’ve successfully assembled your beehive frames, it’s time to ensure they’re working at their best. In this final section, we’ll cover essential tips for maximizing their potential.
Recap of Key Takeaways from the Article
As we conclude our discussion on assembling beehive frames for plant care, it’s essential to recap the key takeaways that will help you maximize your beehive’s potential. Proper frame assembly is crucial for creating a healthy and thriving environment for your bees, which in turn benefits your plants.
Firstly, we emphasized the importance of selecting the right materials and tools for assembling the frames. This includes using high-quality wood, properly sized nails, and a suitable frame wire. We also discussed the significance of ensuring proper spacing between frames to allow for efficient nectar flow and easy access for maintenance.
Additionally, we highlighted the need for precise measurement and calculation when building or adjusting the frames. This attention to detail is vital in creating a stable and balanced structure that can support the weight of honeycombs and withstand external factors like wind and pests.
By following these guidelines and practicing patience and persistence, you’ll be well on your way to assembling beehive frames that will yield healthy, productive results for years to come.
Final Tips for Long-Term Hive Health
As you continue to tend to your beehive, it’s essential to stay vigilant and adapt to changing conditions. Regularly monitoring bee populations is crucial for maintaining long-term hive health. Look out for signs of swarming or disease, such as a sudden drop in population or an unusual number of dead bees.
To address diseases, keep an eye on the hive’s temperature and humidity levels. Ensure proper ventilation by ensuring gaps between frames and regular inspections can help prevent fungal growth. If you notice any issues, take prompt action to treat affected areas with medication specifically designed for bee health.
Additionally, be prepared to adapt your management strategies as environmental conditions change. Bees may need more food during prolonged droughts or increased protection from extreme temperatures. By staying attuned to the needs of your bees and making adjustments accordingly, you can help ensure a healthy and thriving hive for years to come. Keep a record of your observations and note any changes in bee behavior or population size to inform future management decisions.
Frequently Asked Questions
What if I’m not sure which type of beehive frame is best for my garden’s specific needs?
Choosing the right beehive frames can be overwhelming, especially with various options available. Consider factors like climate, plant species, and bee population when selecting frames. For example, a hexagonal frame might be ideal for warm climates or large gardens, while a rectangular frame could work better in cooler areas or smaller spaces.
Can I use recycled materials to assemble my beehive frames?
Using eco-friendly materials is an excellent approach for sustainable gardening practices. However, consider the durability and longevity of your frames when using recycled materials. Ensure that they can withstand outdoor conditions and won’t compromise the structural integrity of your hive. Consult with experienced beekeepers or experts to determine the best options for your setup.
How often should I inspect my beehive frames after assembly?
Regular inspections are crucial for maintaining a healthy colony. Check your frames every 7-10 days during peak pollen season, and at least once a month during off-seasons. Monitor for signs of disease, pests, or damage to the honeycombs. This will help you address any issues promptly and ensure optimal pollination results.
What if I notice uneven gaps between my beehive frames?
Gaps can compromise the structural integrity of your hive and affect bee behavior. Check your frame assembly for any loose joints or misaligned combs. Tighten screws, replace damaged parts, or adjust the setup to achieve a snug fit. Consult with experienced beekeepers or suppliers if needed.
How do I properly store my beehive frames during winter months?
Proper storage is essential for protecting your investment and maintaining the health of your colony. Ensure that your frames are completely dry before storing them in a cool, well-ventilated area. Consider using airtight containers or bags to prevent moisture buildup and pest infestations. Store the frames with combs facing downwards to prevent water from collecting within the honeycombs.