If you’re one of the many plant enthusiasts who’ve fallen in love with the unique beauty of alocasias, you’re probably wondering how to give these stunning plants the care they deserve. But, let’s face it – even with their striking foliage, alocasias can be a bit finicky. They require the right balance of soil, lighting, and watering to thrive, and one wrong move could lead to root rot or leaf drop. That’s why we’ve put together this expert guide on how to care for your alocasia. From creating the perfect potting mix to mastering pruning techniques and pest management, we’ll cover everything you need to know to grow healthy, happy alocasias in your home. Whether you’re just starting out or already have some experience with these plants, our insider tips will help take your alocasia game to the next level.
Understanding Alocasia and its Needs
To truly master alocasia care, you need to understand the plant’s unique needs and requirements, which can vary greatly from other tropical plants. Let’s dive into what makes alocasia special.
Introduction to Alocasia
The Alocasia plant is a tropical treasure that has been gaining popularity among indoor gardeners and houseplant enthusiasts. Native to the tropical regions of Asia, Australia, and the Pacific Islands, this stunning plant has been cultivated for centuries, prized for its unique foliage and adaptability.
One of the most distinctive characteristics of Alocasia is its incredible diversity of shapes, sizes, and colors. With over 70 species to choose from, you’re spoiled for choice when it comes to selecting the perfect Alocasia for your home or garden. From the small, delicate ‘Lantern’ variety to the majestic, large-leaved ‘Regal Shield’, there’s an Alocasia out there to suit every style and space.
But what makes Alocasia truly special is its ability to thrive in low-light conditions, making it a perfect choice for indoor spaces where natural light can be scarce. Its unique leaf patterns and colors also add a touch of tropical magic to any room, transforming your home into a lush oasis. Whether you’re a seasoned plant enthusiast or just starting out, Alocasia is an incredible addition to any collection – and with proper care, it will reward you with years of beauty and joy.
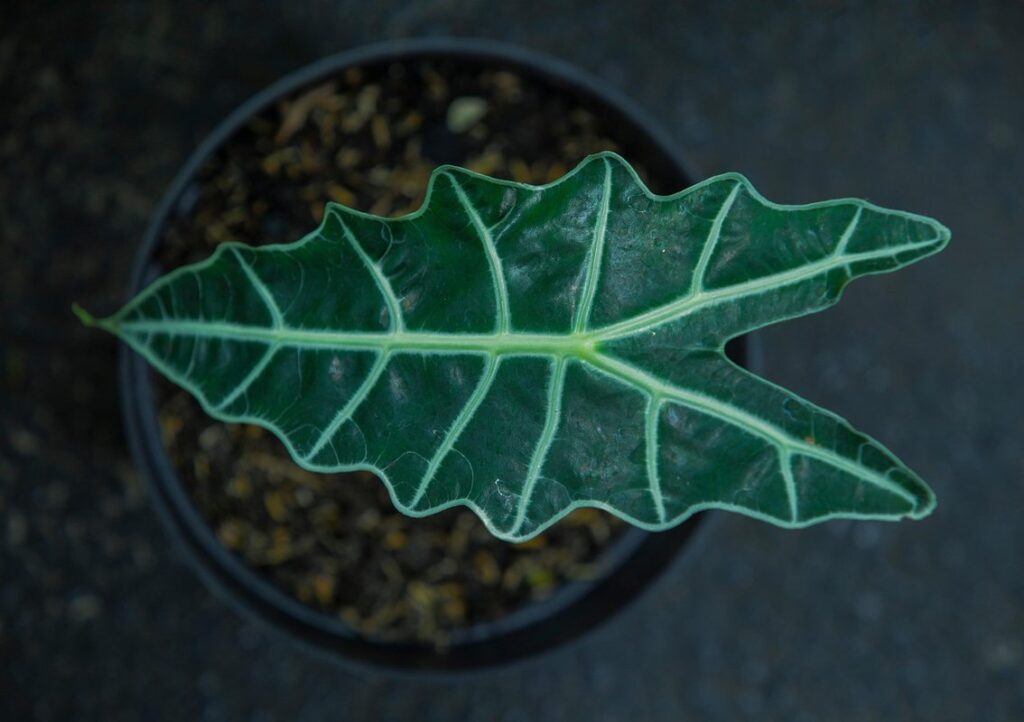
Recognizing the Different Types of Alocasia
When it comes to growing healthy Alocasia plants, understanding their unique characteristics and requirements is essential. As you begin your journey with these stunning plants, you’ll soon realize that there are many types of Alocasia to choose from. Each type boasts its own distinctive features, growth habits, and care needs.
Some popular varieties include the ‘Frydek’ Alocasia, known for its striking blue-green leaves with silver undertones. This variety prefers well-draining soil and partial shade to prevent scorching. In contrast, the ‘Lutea’ Alocasia thrives in bright, indirect light and requires more frequent watering due to its larger leaf size.
To recognize the different types of Alocasia, look for specific characteristics such as leaf shape, size, color, and growth habit. For example, the ‘Purple Tiger’ Alocasia boasts dark green leaves with vibrant purple undertones, while the ‘Silver Dragon’ features silvery-gray leaves with a unique mottling pattern.
When selecting an Alocasia variety, consider factors like climate, lighting conditions, and available care time. This will help you choose a plant that suits your lifestyle and environment. With proper research and understanding of each type’s needs, you’ll be well on your way to growing healthy, thriving Alocasia plants.
Soil and Potting Requirements
To grow healthy alocasia plants, it’s essential to understand their specific soil and potting requirements. Choosing the right mix will make all the difference in keeping your plant thriving.
The Importance of Well-Draining Soil
When it comes to growing healthy Alocasias, providing them with well-draining soil is crucial. These plants are native to tropical regions and have adapted to thrive in areas with high humidity and rainfall. However, this doesn’t mean they can tolerate soggy or waterlogged conditions.
If your Alocasia’s roots sit in water for too long, it can lead to root rot – a common issue that can be devastating for these plants. Root rot occurs when the roots are unable to breathe due to excess moisture, causing them to decay and eventually kill the plant. To prevent this from happening, make sure your potting mix is designed specifically for tropical plants like Alocasias.
A good rule of thumb is to choose a mix that contains perlite or vermiculite – these materials help water drain quickly and prevent waterlogging. You can also add organic matter like compost or peat moss to improve the soil‘s structure and fertility. By providing your Alocasia with well-draining soil, you’ll be taking a huge step towards preventing root rot and giving your plant the best chance at thriving.
Choosing the Right Pot for Your Alocasia
When it comes to choosing the right pot for your Alocasia, there are several factors to consider. First and foremost, make sure the pot has proper drainage holes to prevent waterlogged soil. This is crucial, as Alocasias don’t like wet feet and can be susceptible to root rot if the soil doesn’t dry out between waterings.
A good rule of thumb is to choose a pot that is only one to two sizes larger than the plant’s current container. This will prevent the soil from becoming too wet or dry, and also make it easier for you to repot the plant in the future.
In terms of material, ceramic or terracotta pots are great options because they allow for good air circulation and won’t retain heat. Avoid using plastic pots as they can trap moisture and cause your Alocasia’s roots to rot. If you’re looking for something more decorative, consider a pot made from natural materials like bamboo or wood.
Ultimately, the right pot will depend on your personal preference and the style of your home. Just remember to choose a pot that is well-draining, the right size, and made from a breathable material.
Lighting and Temperature Considerations
When it comes to creating a thriving environment for your Alocasia, proper lighting and temperature control are crucial factors that can make all the difference in their health and appearance. Let’s dive into some key considerations.
Providing Adequate Light for Your Alocasia
When it comes to providing adequate light for your Alocasia, understanding its specific needs is crucial. Different types of Alocasias have varying light requirements, and getting it right will make all the difference in promoting healthy growth.
If you’re growing a variegated or brightly colored Alocasia, direct sunlight can be too intense and may cause discoloration or scorching of the leaves. In such cases, filtered or dappled indirect sunlight is ideal. East- or west-facing windows are perfect for these varieties, as they provide gentle, indirect light without being too harsh.
On the other hand, some Alocasia species can thrive in low-light conditions. These include ‘Polly’ and ‘Black Velvet’, which can tolerate as little as 1-2 hours of direct sunlight a day. However, even for low-light varieties, providing some indirect light will still promote healthy growth and prevent leggy stems.
In general, Alocasias prefer bright, indirect light with temperatures between 65°F to 75°F (18°C to 24°C). By striking the right balance between light intensity and duration, you’ll be well on your way to growing vibrant, thriving Alocasia plants.
Managing Temperature Fluctuations
Maintaining optimal temperature ranges is crucial for healthy growth and development of your Alocasia plant. Most Alocasia species thrive in temperatures between 65°F to 75°F (18°C to 24°C) during the day, while keeping them in a cooler spot with temperatures around 55°F to 65°F (13°C to 18°C) at night is also essential.
If your daytime temperature consistently exceeds 80°F (27°C), it can cause leaf scorch and reduced growth. Similarly, if the nighttime temperature drops below 50°F (10°C), it may induce dormancy or even kill the plant.
To manage temperature fluctuations, you can place your Alocasia near an east- or west-facing window to benefit from gentle morning or afternoon sunlight without extreme heat buildup. You can also use a thermometer to monitor temperatures and adjust the plant’s position accordingly.
If you live in a region with extremely hot summers, consider using a shade cloth or a sheer curtain to filter direct sunlight during peak hours. Conversely, in cold climates, ensure your Alocasia is protected from drafts and cold air currents by placing it away from windows or exterior walls.
Watering and Humidity Needs
To keep your Alocasia happy and thriving, understanding its watering and humidity needs is crucial. In this section, we’ll dive into the specifics of providing optimal moisture levels.
Understanding the Importance of Proper Watering
Proper watering is crucial for the health and survival of Alocasia plants. Overwatering and underwatering can both lead to serious problems, including root rot and leaf drop. When you overwater an Alocasia, the roots are more likely to rot due to a lack of oxygen, causing the plant to weaken and eventually die.
On the other hand, underwatering can cause stress to the plant, leading to yellowing leaves and decreased growth rate. If the soil feels dry to the touch, it’s time for watering. But be careful not to waterlog the soil, which can be just as detrimental as underwatering. A good rule of thumb is to check the top 1-2 inches of soil for moisture.
Signs of overwatering include soft, mushy stems and leaves that drop off easily. If you notice these symptoms, it’s time to adjust your watering schedule. Reduce the frequency or amount of water you give your Alocasia, and make sure the pot has good drainage holes to prevent water from accumulating in the soil. Regularly inspect your plant for signs of root rot by gently removing the leaves and examining the roots.
Maintaining Optimal Humidity Levels
Maintaining optimal humidity levels is crucial for the health and well-being of your alocasias. These plants thrive in humid environments, typically between 50-70% relative humidity. However, achieving this level can be challenging, especially in dry indoor spaces.
One effective method to increase humidity around your alocasias is through misting. Use a water spray bottle to gently mist the leaves and surrounding area, ideally early in the morning or evening when the plant is less active. This will help maintain a humid microclimate without overwatering the soil.
Another option is using a humidifier specifically designed for indoor plants. These devices release moisture into the air, creating a more favorable environment for your alocasias. You can also place pebble trays under your potted plants to increase humidity through evaporation. Fill the tray with water, and as it evaporates, it will raise the surrounding humidity levels.
Monitor your plant’s response to these methods by observing its leaves and overall health. With proper attention to humidity levels, you’ll be rewarded with vibrant, healthy alocasias that thrive in their environment.
Fertilization and Pruning Techniques
To ensure your alocasia plants thrive, it’s essential to understand how to properly fertilize and prune them, which we’ll cover in detail below. We’ll walk you through the best practices for each process.
Fertilizing Your Alocasia for Maximum Growth
When it comes to fertilizing your Alocasia for maximum growth, choosing the right fertilizer is crucial. As an organic gardener, you’ll be pleased to know that there are plenty of options available. Compost tea and worm castings are excellent choices, as they release nutrients slowly, promoting healthy root development.
If you prefer synthetic fertilizers, look for products high in potassium (K) and phosphorus (P), but low in nitrogen (N). These will promote fruiting and flowering without encouraging too much leaf growth. It’s essential to note that over-fertilizing can damage your Alocasia, so start with a small dose and gradually increase as needed.
Fertilize during different growth stages: During the growing season (spring-fall), feed your Alocasia every 2-3 weeks. In the dormant season (winter), reduce fertilization to once a month. Keep in mind that newly planted Alocasias require more frequent fertilizing until they’re established. Monitor your plant’s response and adjust your fertilizer schedule accordingly.
Pruning Strategies for Healthy Plant Development
Pruning is an essential part of Alocasia care, as it helps control plant size, promotes bushy growth, and encourages blooming. To prune effectively, start by removing dead or damaged leaves to prevent the spread of disease and encourage healthy new growth.
To promote bushy growth, pinch off the tips of stems to encourage branching. This will help your Alocasia develop a fuller shape and increase air circulation around the plant. For more mature plants, consider cutting back canes to about half their height to control size and encourage new growth from the base.
When pruning for blooming, focus on removing any weak or spindly stems, as these can divert energy away from flowering. Instead, leave sturdy stems intact and prune out any deadheading to direct energy towards producing more flowers. Regular pruning will not only improve your Alocasia’s appearance but also encourage healthy growth and prevent it from becoming leggy.
By incorporating pruning into your regular care routine, you’ll be rewarded with a robust, blooming Alocasia that thrives in its environment.
Common Problems and Pests
As you care for your Alocasia, it’s not uncommon to encounter issues that can threaten their health – from pests to diseases, these problems are a gardener’s worst nightmare. We’ll walk you through common culprits and how to address them.
Identifying and Addressing Common Issues
As an alocasia owner, you may encounter common issues that can be frustrating and affect the health of your plant. Leaf drop is one such problem where leaves fall off prematurely due to overwatering, underwatering, or changes in temperature. To address this, ensure you’re not overwatering by checking the soil moisture regularly, and make sure the pot has good drainage holes. If you suspect underwatering, adjust your watering schedule accordingly.
Yellowing leaves can be caused by nutrient deficiencies, too much direct sunlight, or root bound conditions. Inspect your plant for signs of pests like spider mites, mealybugs, or scale insects, which can cause yellowing leaves. To prevent infestations, isolate new plants before introducing them to your collection, and inspect your plants regularly.
For severe cases of pest infestation, use neem oil or insecticidal soap to control the problem. Fertilize your alocasia with a balanced fertilizer during the growing season (spring-fall) to provide essential nutrients for healthy growth. Prune yellowing leaves to maintain the plant’s appearance and encourage new growth. Regular monitoring and prompt action can help prevent common problems from becoming severe issues.
Prevention Measures for Healthy Plant Maintenance
Regular inspections and timely interventions are crucial in preventing common problems and pests that can affect Alocasia plants. Set aside time each week to walk around your plant and check for any signs of distress such as yellowing leaves, black spots, or holes in the leaves. These symptoms can be indicative of overwatering, underwatering, or pest infestations.
To prevent pest infestations, ensure that you’re repotting your Alocasia regularly to provide a fresh potting mix and reduce the risk of fungal diseases. Use organic pesticides like neem oil or insecticidal soap as a last resort only when necessary. Also, avoid overwatering, which can attract pests and lead to root rot.
Keep an eye out for common pests such as spider mites, mealybugs, and scale insects. These tiny creatures can multiply quickly and cause irreparable damage if left unchecked. If you notice any signs of infestation, isolate the plant immediately and treat it with a gentle pesticide.
Conclusion: Tips for Successful Alocasia Care
Now that you’ve mastered the basics of alocasia care, let’s dive into some expert tips to take your plant care skills to the next level.
Recap of Key Takeaways
As you’ve made it through this comprehensive guide on Alocasia care, let’s recap the key takeaways to ensure you’re equipped with the knowledge to grow healthy and thriving plants.
Some of the most crucial points covered in this article include understanding the ideal temperature range for Alocasia (above 65°F but below 75°F) and knowing that these tropical plants prefer high humidity levels, making misting or placing them on a tray filled with water a necessity.
It’s also essential to remember that Alocasia requires bright, indirect light but should be protected from direct sunlight. Watering is another critical aspect; overwatering can lead to root rot, so make sure the soil is allowed to dry slightly between waterings.
Additionally, it was mentioned that repotting your Alocasia every 2-3 years will help maintain its health and promote growth, while also fertilizing regularly with a balanced fertilizer will provide essential nutrients for optimal development.
By keeping these points in mind, you’ll be well on your way to successfully growing healthy Alocasia plants that thrive under your care.
Encouragement for Continuous Learning and Improvement
As you’ve learned the ins and outs of alocasia care through this comprehensive guide, it’s essential to remember that caring for these beautiful plants is an ongoing process. Alocasias are not low-maintenance plants; they require regular attention to thrive. This might seem daunting, but with practice and patience, you’ll become more confident in your abilities.
To continue improving your alocasia care skills, start by observing your plant’s behavior and making adjustments accordingly. Pay attention to changes in its environment, such as temperature fluctuations or humidity levels, and adjust your care routine accordingly. For instance, if you notice your plant is developing brown tips due to overwatering, adjust your watering schedule to avoid this issue in the future.
By committing to continuous learning and improvement, you’ll not only develop a deeper connection with your plants but also ensure they receive the best possible care. Don’t be afraid to experiment and try new techniques – it’s all part of the journey to becoming an expert alocasia caregiver.
Frequently Asked Questions
How often should I repot my Alocasia, considering its sensitive roots?
Repotting your Alocasia every 1-2 years can help prevent root bound conditions. Spring or summer are ideal times for repotting, as the plant is actively growing. Use a well-draining potting mix and a slightly larger pot to accommodate the plant’s expanding root system.
Can I grow an Alocasia in a shaded area with low light?
Alocasias generally require bright, indirect light to photosynthesize efficiently. While they can tolerate some shade, it’s not ideal for optimal growth. If you must place your Alocasia in a shaded area, consider using grow lights to supplement the natural light.
How do I prevent root rot when overwatering my Alocasia?
Root rot is a common issue with Alocasias, especially when they’re overwatered. To prevent this, ensure your pot has excellent drainage holes and avoid watering your plant when the soil feels dry to the touch. Check for moisture by sticking your finger into the soil up to the first knuckle.
Can I propagate my Alocasia through leaf cuttings or division?
Alocasias can be propagated through division of established plants, but leaf cuttings are not typically recommended due to their low success rate. When dividing your plant, make sure each section has at least one growing eye (a small bud that will produce a new stem) for optimal growth.
How do I know if my Alocasia is getting too much direct sunlight?
If you notice your Alocasia’s leaves are scorched or develop brown spots, it may be due to excessive direct sunlight. Move the plant to a spot with filtered light, or use sheer curtains to diffuse the sun’s rays. Monitor your plant’s response to changes in lighting conditions.