Are you an avid gardener or nature enthusiast looking to grow your own oak tree from seed? Sprouting acorns can be a fun and rewarding experience, but it requires careful attention to detail and a good understanding of the right environmental conditions. In this article, we’ll take you through the process of successfully sprouting acorns and growing a healthy oak tree from seed to maturity. We’ll cover essential tips on providing the optimal soil quality and environmental conditions for your acorn seeds, as well as common problems that may arise during the process. Whether you’re a seasoned gardener or just starting out, this guide will provide you with the knowledge and confidence to successfully grow an oak tree from seed using acorns.
Understanding Acorns and Their Life Cycle
Acorns have a fascinating life cycle, from seed dispersal to sprouting, and understanding each stage is key to successfully growing these tiny trees. Let’s dive into the process of how acorns develop and grow.
What are Acorns?
An acorn is the nut-bearing fruit of an oak tree (Quercus spp.), a deciduous tree that belongs to the Fagaceae family. These trees are native to various parts of the world, including North America, Europe, and Asia. Acorns come in different shapes, sizes, and colors depending on the specific oak species they belong to.
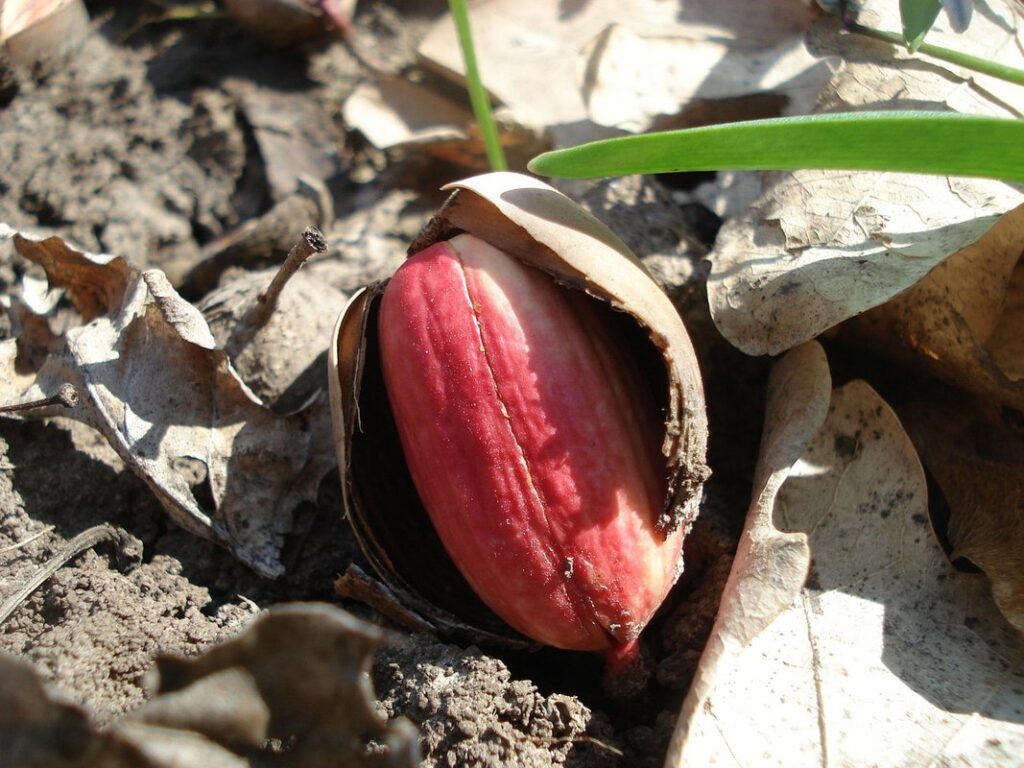
In general, acorns have a hard outer shell, also known as a cupule, that protects the seed inside. The seed itself has a single embryo, which contains the genetic material necessary for growth. The size of an acorn can vary greatly, ranging from 1 to 5 inches in length and weighing anywhere from 0.2 to 6 grams.
To identify an acorn, look for its distinctive shape and features. Some species have a ridged or grooved cap that covers the cupule, while others have a smooth surface. The color of an acorn can also vary from brown to tan, green, or even grayish-brown. When handling acorns, make sure to clean them thoroughly before storing or planting to ensure the best chance of germination.
The Life Cycle of an Oak Tree
As you’re learning about acorn sprouting, it’s essential to understand the life cycle of an oak tree. This process is fascinating and full of opportunities for growth and exploration. An oak tree’s journey from seed to mature tree spans many years, with several distinct stages.
First, there’s the seed stage – where your acorns come in! When a squirrel or other animal buries an acorn, it begins to sprout. The acorn absorbs water, and its embryo starts to grow. If conditions are right, a tiny root system develops first, followed by the emergence of leaves.
As the sapling grows, it enters the seedling stage. During this time, the tree focuses on developing a strong root system and producing more leaves. This is when you’ll start to notice noticeable growth and changes in your oak’s appearance.
Eventually, the sapling matures into a young tree, which can take anywhere from 10-50 years depending on factors like climate, soil quality, and species. At this stage, the tree continues to grow taller and wider, producing more leaves, acorns, and eventually new trees through reproduction.
Factors Affecting Acorn Sprouting
Several factors can impact whether your acorns sprout successfully, including moisture levels, soil temperature, and even the type of oak tree they came from. Understanding these variables is crucial to achieving optimal growth.
Environmental Conditions
When it comes to acorn sprouting, environmental conditions play a crucial role in determining the success of the process. Temperature, light, and moisture levels are three key factors that can significantly impact the rate at which an acorn sprouts.
Temperature is perhaps the most critical factor affecting acorn sprouting. Acorns typically require a cold period to break dormancy, which usually occurs between 30°F to 50°F (-1°C to 10°C). If the temperature is too high or too low, it can prevent the acorn from sprouting altogether. For example, if you live in an area with extremely cold winters, you may need to store your acorns in a refrigerated environment to simulate the required cold period.
Light and moisture levels are also essential for healthy sprouting. Acorns need indirect light to photosynthesize and grow, but excessive direct sunlight can cause them to dry out and fail to sprout. Similarly, if the soil is too dry or too waterlogged, it can prevent the acorn from absorbing necessary nutrients and oxygen.
To optimize your chances of successful acorning, make sure to store your acorns in a cool, dark place with consistent moisture levels until they’re ready for planting. Once planted, provide them with indirect light and maintain a humid environment to promote healthy growth.
Soil Quality and Nutrient Availability
Soil quality and nutrient availability play a crucial role in acorn sprouting. A healthy soil pH is essential for optimal germination and growth. Most oak tree species prefer slightly acidic to neutral soils, ranging from 6.0 to 7.0 on the pH scale. If your soil is too alkaline or acidic, it can limit nutrient availability, hindering acorn development.
Nutrient-deficient soils can also hinder sprouting. Acorns require a balanced mix of macronutrients like nitrogen, phosphorus, and potassium, as well as micronutrients like zinc and copper. To ensure optimal nutrient levels, test your soil pH and adjust it if necessary. You can add organic matter like compost or manure to improve soil fertility.
Another factor affecting acorn germination is aeration and water retention. Well-draining soils with adequate oxygen levels promote healthy root growth, while excessive moisture can lead to fungal diseases. Consider incorporating mulch or perlite to enhance soil structure and prevent waterlogging. By optimizing your soil’s conditions, you’ll create an environment conducive to successful acorn sprouting. Monitor your soil’s nutrient levels and adjust accordingly to give your acorns the best chance of thriving.
Presence of Pests or Diseases
Pests and diseases can significantly impact acorn sprouting, affecting not only the quantity but also the quality of the harvest. For instance, fungal infections like oak root fungus (Phytophthora cinnamomi) can cause root rot, preventing acorns from germinating or killing newly emerged seedlings. Aphids, on the other hand, can infest developing leaves and stems, weakening the plant and making it more susceptible to disease.
To prevent these issues, it’s essential to maintain a clean and dry environment for your acorn collection. Store them in an airtight container, ensuring they’re completely dry before sealing. Regularly inspect your seedlings for signs of pests or diseases, such as yellowing leaves or blackened stems, and take prompt action if you notice any issues.
Preventing pests and diseases often involves integrated pest management (IPM) strategies. This may include introducing beneficial insects like ladybugs to control aphid populations or using organic fungicides like copper-based sprays to prevent fungal infections.
Preparing Acorns for Sprouting
To successfully sprout acorns, you’ll need to properly prepare them first. This involves selecting healthy acorns and carefully treating them to break dormancy.
Harvesting and Storing Acorns
When it comes to harvesting and storing acorns for sprouting, timing is crucial. Ideally, you should collect acorns when they’re mature but still moist, typically between late autumn and early winter. This ensures the highest nutritional value and viability of the seeds.
To harvest, gently shake the branches over a container or bag to catch falling acorns, taking care not to damage the caps or underlying flesh. It’s essential to only collect acorns from healthy trees, as those from diseased or infested trees may be toxic or carry pests that can harm your sprouts.
Proper storage is vital for maintaining the viability of your harvested acorns. Store them in an airtight container filled with sawdust or sand, which will help regulate moisture and prevent mold growth. Keep the container away from direct sunlight, heat sources, and extreme temperatures. You can also store them in sealed plastic bags or containers lined with desiccants to control humidity.
Check on your stored acorns periodically to ensure they remain fresh and healthy for planting.
Cleaning and Disinfecting Acorns
When it comes to preparing acorns for sprouting, cleaning and disinfecting them is an essential step that’s often overlooked. But it’s crucial to remove dirt, debris, and potential pathogens from the surface of the acorn to prevent disease transmission and promote healthy growth.
To clean your acorns, start by gently scrubbing them with a soft-bristled brush under running water. This will help dislodge any loose dirt or debris. Next, submerge the acorns in a solution of 1 part white vinegar to 9 parts water for about an hour. The acidity in the vinegar will help break down and dissolve any remaining impurities.
After soaking, drain the acorns and rinse them thoroughly with clean water. You can also use a mixture of equal parts water and hydrogen peroxide as a disinfectant. Just be sure to rinse the acorns well after treatment to remove any residual chemicals. By taking these simple steps, you’ll help create an environment conducive to healthy sprouting and minimize the risk of disease transmission. This will give your acorns the best possible chance to grow into strong, thriving saplings.
The Sprouting Process
Now that you’ve prepared your acorns, it’s time to get them sprouting! This next step is crucial to ensuring a healthy and thriving oak tree.
Preparing the Soil
Preparing a suitable environment for your acorn sprouts is crucial for their healthy growth. When it comes to soil selection, look for a high-quality potting mix specifically designed for seed starting. Avoid using regular garden soil, as it can compact and prevent proper drainage.
If you prefer to make your own potting mix, combine peat moss or coconut coir with perlite or vermiculite. This blend will provide the necessary structure and retain adequate moisture levels. Before planting your acorns, moisten the prepared soil to create a stable environment for germination.
To prevent overwatering and ensure even growth, it’s essential to use a well-draining container. A plastic cup or a biodegradable pot made from coconut shells can serve this purpose. Fill the chosen vessel with about an inch of soil, leaving enough space for your acorn to sprout without being buried under a thick layer.
When planting, insert the pointed end of the acorn into the soil and press gently to secure it. Keep the soil consistently moist but not waterlogged during the initial stages of growth. By providing optimal conditions from the start, you’ll set your acorn sprouts up for success.
Planting Acorns
When it’s time to plant those newly sprouted acorns, you’ll want to make sure they’re given the best chance at thriving. Here are the step-by-step instructions for planting your acorns:
Begin by selecting a suitable location with well-draining soil and partial shade to full sun. Acorns prefer a slightly acidic to neutral soil pH, ranging from 6.0 to 7.0. Dig a small hole about 1-2 inches deep, depending on the size of the acorn.
Place the acorn in the hole, making sure the pointed end is facing upwards and the flat end is facing downwards. Cover the acorn with soil, firming it gently around the seed to secure it in place. Space your planted acorns about 1-2 feet apart, depending on the variety.
Keep in mind that acorns can be prone to mold and rot if they’re too moist or buried too deeply. Avoid planting them too close together, as this can lead to competition for resources and increase the risk of disease. With proper care and attention, your planted acorns should begin to sprout within 1-3 months.
Caring for Young Oak Trees
Young oak trees require careful attention during their early growth stage. After planting, it’s essential to establish a routine that fosters healthy development. Watering is critical during the first year; ensure the soil remains consistently moist but not waterlogged. Aim for about 1 inch of rainfall or irrigation per week.
As your young oak grows, fertilize it annually with a balanced, slow-release fertilizer. Follow the manufacturer’s instructions and avoid over-fertilizing, which can cause more harm than good. Oak trees are also prone to pests like aphids, scale insects, and root weevils. Monitor for signs of infestation and take action promptly.
Mulch around the base of your oak tree helps retain moisture, suppress weeds, and regulate soil temperature. Apply a 2-3 inch layer of organic mulch, keeping it several inches away from the trunk to prevent damage. Regular pruning during the dormant season maintains the tree’s structure and promotes a strong root system.
By following these care strategies, you’ll give your young oak tree the best chance at thriving. Remember that every tree is unique, so observe and respond to its specific needs over time.
Challenges and Solutions
Sprouting acorns can be a bit tricky, but don’t worry, we’ve got you covered. In this section, we’ll walk you through common challenges and practical solutions to help you succeed.
Common Problems Encountered During Acorn Sprouting
Acorn sprouting can be a delicate process, and as with any seed germination, things don’t always go as planned. One of the most common issues you may encounter is poor germination rates. This can be due to a variety of factors such as old or low-quality acorns, inadequate moisture, or insufficient light.
Fungal infections are another common problem that can arise during acorn sprouting. These infections can be caused by bacteria or fungi present on the surface of the seed, and can quickly spread if not addressed promptly. To prevent this, it’s essential to disinfect your equipment and work area thoroughly before starting the process.
To ensure healthy germination and minimize the risk of infection, make sure to soak the acorns in a solution of 1 tablespoon of bleach per quart of water for at least an hour before sowing. This will help to kill off any potential pathogens. It’s also crucial to maintain good air circulation around the seedlings to prevent moisture from becoming trapped and creating an ideal environment for fungal growth.
Regular monitoring and prompt action are key to addressing these issues early on, so be sure to keep a close eye on your acorns’ progress and take swift corrective measures if you notice any signs of trouble.
Troubleshooting Tips and Strategies
When faced with common challenges like slow growth, poor germination rates, or unexpected mold development, it’s essential to have a troubleshooting plan in place. One of the first steps is to assess the acorn’s viability before attempting to sprout it. A simple tap test can help determine if the acorn has a viable embryo.
To promote healthy germination, ensure the acorns are stored properly and kept at a consistent temperature between 35-45°F (2-7°C). Avoid exposing them to direct sunlight or heat sources, which can cause mold growth or uneven moisture levels. Check your water quality, as tap water may contain chemicals that inhibit germination.
If you notice slow growth or struggling seedlings, adjust the light spectrum and duration to meet their needs. Acorns prefer indirect bright light; avoid using grow lights with high intensity or blue spectrum, which can promote weak growth. Be prepared to repot seedlings when they outgrow their containers, ensuring a well-draining potting mix is used.
Regular monitoring for signs of mold, pests, and diseases will help you address issues before they become severe.
Conclusion: Cultivating a Healthy Oak Tree
Now that you’ve successfully sprouted your acorns, it’s time to focus on cultivating a healthy oak tree. Remember, proper care and attention during this critical stage will set the foundation for a strong and resilient tree. To ensure your young oak gets off to a great start, make sure to provide it with plenty of sunlight, ideally 6 hours a day. Water thoroughly, but avoid overwatering, which can lead to root rot and other issues.
Also, keep in mind that oak trees prefer well-draining soil and should be fertilized annually with a balanced fertilizer. Pruning is essential during the first year to establish a strong structure and promote healthy growth. As your tree grows, continue to prune regularly to maintain its shape and encourage branching. With proper care and attention, you’ll enjoy a stunning oak tree that thrives for years to come.
Frequently Asked Questions
How soon can I expect to see sprouting after planting acorns?
After carefully preparing the soil, planting acorns, and providing optimal environmental conditions, you can start expecting to see sprouts within 2-6 months. However, this timeframe may vary depending on factors such as oak species, soil quality, and temperature fluctuations.
What are some common mistakes people make when storing acorns for sprouting?
One common mistake is failing to dry the acorns properly before storage, which can lead to mold or fungal growth. Another error is not labeling the stored containers with the date and type of acorn, making it difficult to keep track of their age.
Can I use acorns from my neighborhood oak trees for sprouting?
Yes, you can use acorns from your local oak tree, but make sure they are healthy and free of signs of disease or pests. Collecting acorns from a nearby tree also allows you to observe the specific growing conditions in your area.
How do I identify if an acorn is suitable for sprouting?
A suitable acorn should have a hard, intact cupule and be relatively fresh with no visible mold or fungal growth. You can also check for any signs of physical damage, such as cracks or soft spots.
What are some natural predators to watch out for when growing young oak trees?
Keep an eye out for animals like deer, squirrels, and rabbits that might feed on your young oak tree saplings. To minimize the risk, consider fencing your garden or using other deterrents specific to these pests in your area.