If you’re one of the many plant enthusiasts out there, chances are you’ve fallen in love with the majestic staghorn fern. With its unique antler-like fronds and adaptability to indoor environments, it’s no wonder why this epiphyte has become a favorite among houseplant enthusiasts. However, mounting a staghorn fern can be intimidating, especially for beginners. Not only do you need to choose the right spot with optimal humidity and temperature conditions, but also properly prepare the plant itself to ensure its survival.
In this article, we’ll guide you through the process of how to mount a staghorn fern, including essential tips on selecting the ideal location, preparing your plant for mounting, and avoiding common mistakes that might lead to disappointment.
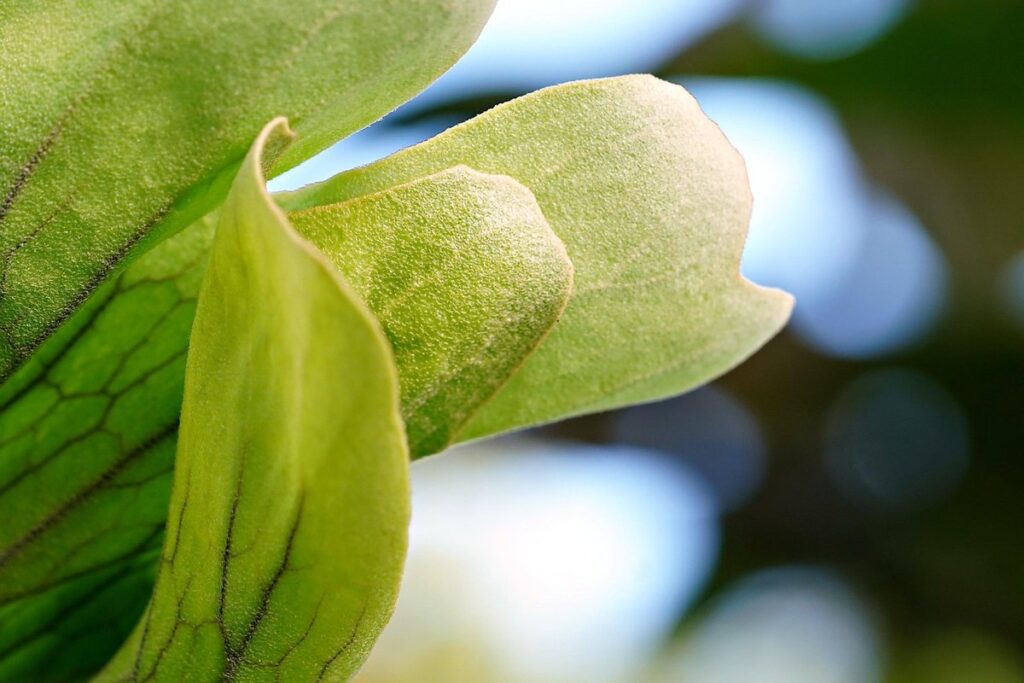
Understanding Your Staghorn Fern
To successfully mount a staghorn fern, you first need to understand its unique needs and characteristics, which will help guide your selection of materials and techniques. This section will walk you through those essential details.
Choosing the Right Location
When it comes to choosing the right location for your staghorn fern, you’ll want to consider its ideal conditions. Lighting is one of the most important factors, as these plants prefer bright, indirect light but can be damaged by direct sunlight. East- or west-facing windows are perfect, while south-facing windows should have a sheer curtain to filter the intense rays.
Temperature and humidity requirements also play a crucial role in your staghorn fern’s happiness. They thrive in temperatures between 50°F to 75°F (10°C to 24°C), making them ideal for indoor spaces. As for humidity, these plants love a misty environment, with levels around 40% to 70%. You can achieve this by placing the fern on a tray filled with water and pebbles or using a humidifier.
Remember, consistency is key when it comes to providing the right conditions for your staghorn fern. Choose a location that maintains a stable temperature and humidity level, and avoid placing your plant near heating or cooling vents, fireplaces, or drafty windows. By selecting an optimal spot, you’ll set your fern up for success and encourage healthy growth.
Preparing Your Fern for Mounting
Before you can start mounting your staghorn fern, it’s essential to prepare it for this process. Begin by gently removing your fern from its pot and carefully examining the roots. If they’re circling or growing through the soil, use a sterile tool to loosen them. This will make it easier to attach the plant to the mount.
Next, inspect your fern’s fronds for any dead or damaged leaves. Remove these immediately with clean scissors or pruning shears to prevent the spread of disease and encourage healthy growth. Don’t worry if some leaves are slightly yellowed or browning – this is a common issue when staghorn ferns are potted.
If you notice any algae or debris on your fern’s fronds, mix 1 tablespoon of baking soda with 1 quart of water to create a gentle cleaning solution. Dip a soft-bristled toothbrush into the solution and gently scrub away any unwanted growth. Rinse thoroughly with clean water before proceeding with mounting.
By taking these simple steps, you’ll ensure your staghorn fern is ready for its new home on your chosen mount, where it will thrive in its new environment.
Selecting a Suitable Mounting Surface
When mounting your staghorn fern, it’s crucial to choose a surface that provides excellent air circulation and can support its dense foliage. This section will walk you through selecting the perfect spot for your plant.
Types of Mounting Surfaces
When it comes to choosing a mounting surface for your staghorn fern, you’ll want to select a material that complements its natural beauty while also providing the right level of support. The most common materials used for mounting staghorn ferns are wood, bamboo, and metal.
Wood is a popular choice for staghorn fern mounts due to its natural warmth and ability to blend seamlessly with indoor environments. Consider using reclaimed or sustainably-sourced woods like cedar or cypress to add an organic touch to your space. When using wood, make sure to seal it first to prevent moisture from seeping into the mount and causing damage.
Bamboo is another excellent option for staghorn ferns, offering a lightweight and durable alternative to wood. Its unique texture also adds visual interest to the plant’s natural charm. If you choose bamboo, ensure that it’s properly treated to resist rot and pests.
Metal mounts are ideal for those who want a sleeker look or need more stability. Look for copper or aluminum options that will complement your staghorn fern’s earthy tones. Always use a breathable coating to prevent moisture buildup and ensure the plant’s health.
Preparing the Mounting Surface
Before attaching your staghorn fern to its chosen mounting surface, it’s essential to prepare the area properly. Start by cleaning the surface with a gentle soap solution and water. This step will remove dirt, oils, and other substances that might interfere with adhesion or harbor pests. Use a soft-bristled brush to gently scrub away any stubborn stains.
Once cleaned, allow the mounting surface to air dry completely. This is crucial as moisture can seep into the potting mix, potentially causing root rot in your staghorn fern. A well-ventilated area with low humidity will facilitate faster drying. You can also speed up the process by using a clean towel or cloth to gently pat the surface dry.
After the mounting surface has dried completely, inspect it for any remaining debris or dust particles. Use a soft cloth to wipe away any imperfections. At this point, your chosen mounting surface is ready to accept your staghorn fern, and you can proceed with attaching it according to the recommended method.
Mounting the Staghorn Fern
Now that you have prepared your staghorn fern for mounting, let’s focus on attaching it to its new home – a tree trunk, wall, or other decorative surface. This is where your creativity comes in!
Securing the Plant to the Mount
Attaching the staghorn fern to its mounting surface is an essential step in creating a sturdy and long-lasting display. You have several options for securing the plant, each with its own pros and cons.
One popular method is using wire, such as copper or aluminum, to create a frame around the fern’s rhizome (the thick stem from which leaves grow). This provides excellent support and can be shaped to fit your specific mounting surface. Be sure to use fine-gauge wire for this method to avoid damaging the plant.
Another option is to use a strong string or twine, often made from natural fibers like cotton or hemp. Simply wrap the string around the rhizome and attach it to the mount using a knot or tie. This method works well for smaller ferns or when you want a more rustic look.
For a more permanent solution, consider using an adhesive specifically designed for plant mounting. These products are usually made from a mixture of natural materials like beeswax and resins. Apply the adhesive according to the manufacturer’s instructions, following up with a small amount of pressure to ensure the fern adheres securely to the mount.
Ensuring Proper Drainage
When mounting a staghorn fern, ensuring proper drainage is crucial to prevent waterlogged soil and root rot. As a staghorn fern enthusiast, you’re likely aware that these epiphytes thrive in humid environments but can’t tolerate excessive moisture.
To achieve proper drainage, start by choosing a well-draining potting mix specifically designed for orchids or air plants. This type of mix typically contains perlite, vermiculite, or other materials that help excess water escape quickly. If you’re using a regular potting soil, mix in some perlite or sand to improve its drainage properties.
Another critical aspect is the mounting system itself. Use a sturdy wire or rod with small gaps between the wires to allow for air circulation and water escape. Avoid using soft materials like foam or fabric, as they can retain too much moisture.
Remember, it’s essential to inspect your mounted staghorn fern regularly, checking for signs of overwatering such as yellowing leaves or a soft, mushy texture. By following these guidelines, you’ll be able to create an optimal environment that meets the unique needs of your staghorn fern.
Caring for Your Mounted Staghorn Fern
Now that you’ve successfully mounted your staghorn fern, it’s essential to learn how to properly care for it to keep it thriving and vibrant in its new environment. This section will guide you through the basics of fern maintenance.
Watering and Humidity Requirements
When it comes to mounted staghorn ferns, proper watering and humidity levels are crucial for their survival. These plants thrive in high-humidity environments, typically between 40-70% relative humidity. To replicate this, you can place the fern on a tray filled with water and pebbles or use a humidifier nearby. Be cautious not to overwater, as excess moisture can lead to root rot.
A good rule of thumb is to water your staghorn fern when the potting mix feels dry to the touch, usually every 7-10 days during the spring and summer months. During the fall and winter, reduce watering to once a month, as the plant is dormant. Make sure the pot has adequate drainage holes to prevent waterlogged soil.
To monitor humidity levels, you can use a hygrometer or simply observe your fern’s behavior. If it starts to droop or its leaves turn yellow, it may be due to low humidity. Adjust the environment accordingly by increasing misting or using a humidifier. By understanding and meeting the watering and humidity requirements of your mounted staghorn fern, you’ll be able to keep this beautiful plant thriving for years to come.
Fertilization and Pruning
Fertilizing and pruning are essential tasks to ensure the overall health and appearance of your mounted staghorn fern. When it comes to fertilization, you’ll want to use a balanced, water-soluble fertilizer specifically formulated for ferns. Apply the fertilizer at half the recommended strength to avoid burning the roots. For optimal growth, fertilize your staghorn fern once a month during the spring and summer months when it’s actively growing.
As for pruning, this is done primarily to maintain the shape of the plant and encourage new growth. Use clean, sharp scissors or pruning shears to remove any dead or damaged fronds. Cut just above a node, as this will help the plant direct its energy towards producing new leaves. You can also trim back long stems to promote branching and encourage a fuller appearance.
A good rule of thumb is to prune your staghorn fern every 6-8 weeks during the growing season. This will keep your plant looking its best and prevent it from becoming leggy or unbalanced. By following these simple fertilization and pruning tips, you’ll be able to keep your mounted staghorn fern thriving and looking great for years to come.
Common Mistakes to Avoid
When mounting a staghorn fern, it’s easy to overlook crucial details that can harm your plant – and we’re here to help you avoid those mistakes altogether.
Overwatering and Underwatering
When mounting a staghorn fern, it’s easy to fall into the trap of either overwatering or underwatering. Both can be detrimental to the health and longevity of this beautiful plant. Overwatering is one of the most common mistakes people make when caring for a mounted staghorn fern. The excess moisture can lead to root rot, which will cause the fern’s roots to decay, ultimately killing the plant.
On the other hand, underwatering can also be just as damaging. A lack of moisture can cause the fronds to dry out and turn brown, giving your staghorn fern an unsightly appearance. To avoid these issues, it’s essential to find a balance when watering your mounted staghorn fern. Water your plant thoroughly once a week in the summer months when it’s actively growing, but reduce the frequency to every 10-14 days during the winter months.
Monitor your plant’s moisture levels by gently sticking your finger into the potting mix up to the first knuckle. If the mix feels dry, it’s time to water. Be cautious not to overwater, as this can be just as damaging as underwatering. Stick to a consistent watering schedule, and your mounted staghorn fern will thrive under your care.
Insufficient Light or Temperature Control
Mounting a staghorn fern can be a delicate process, and one common mistake that can lead to its demise is inadequate light and temperature control. When it comes to these crucial elements, even seasoned plant enthusiasts can make mistakes.
If you’re mounting your staghorn fern in an area with insufficient natural light, the consequences will be noticeable within weeks. The fronds may turn a pale yellow or grayish color, and growth may slow significantly. In extreme cases, the plant may drop its spores, making it more challenging to propagate. On the other hand, if your staghorn fern is exposed to direct sunlight for too long, it can suffer from scorching.
Maintaining an optimal temperature range (between 65°F to 80°F) is equally vital. Temperatures outside this range can cause the plant’s fronds to become brittle and prone to breakage. To avoid these issues, choose a location that receives bright, indirect light and maintain a consistent room temperature between 60°F to 70°F during winter and above 70°F in summer.
Troubleshooting Common Issues
Don’t worry if things aren’t going as planned, we’ve got you covered with some troubleshooting tips for common staghorn fern mounting mistakes and problems. Let’s get back on track!
Fungal Infections
As you care for your mounted staghorn fern, it’s essential to be aware of the potential risks of fungal infections. These can arise from a variety of factors, including high humidity levels, overwatering, and poor air circulation.
Some common signs of a fungal infection in a staghorn fern include yellowing or browning fronds, softening of leaves, and black or white spots on the plant’s surface. In severe cases, an infected staghorn fern may even drop its leaves entirely.
To identify a fungal infection, inspect your plant carefully for any signs of discoloration or damage. Fungal infections can be treated with antifungal medications specifically designed for indoor plants. However, it’s crucial to address the underlying cause of the infection rather than just treating the symptoms.
Preventative measures include maintaining optimal humidity levels (around 50-60%), avoiding overwatering, and ensuring good air circulation around your plant. Regularly inspecting your staghorn fern for signs of infection will help you catch any issues before they spread.
Leaf Loss or Yellowing
If you notice that your mounted staghorn fern is experiencing leaf loss or yellowing, it’s essential to identify and address the underlying causes. Over-watering is a common culprit behind this issue. When the potting mix becomes waterlogged, the roots can rot, causing the leaves to turn yellow and eventually drop off.
Check the moisture levels of your potting mix by gently sticking your finger into the soil up to the first knuckle. If it feels soggy or water-logged, reduce the frequency of watering. On the other hand, if the potting mix is too dry, adjust your watering schedule accordingly.
Other factors that can contribute to leaf loss or yellowing include inadequate light, extreme temperatures, and pest infestations. Ensure your staghorn fern is receiving bright, indirect light, but avoid placing it in direct sunlight, which can cause scorching.
Regularly inspect your plant for signs of pests like spider mites, mealybugs, or scale. If you notice any unwanted critters, treat the plant with insecticidal soap or neem oil according to the product’s instructions. By addressing these potential causes and making adjustments as needed, you can help prevent leaf loss and promote healthy growth in your mounted staghorn fern.
Frequently Asked Questions
How do I know if my staghorn fern is healthy enough for mounting?
Before attempting to mount your staghorn fern, make sure it’s free from pests and has a robust root system. Inspect the plant thoroughly, and gently remove any weak or dying fronds. A healthy fern will have vibrant green coloration and a sturdy stem.
Can I use a generic wire mesh for mounting my staghorn fern?
Yes, you can use a generic wire mesh, but ensure it’s designed specifically for plants and has small enough holes to accommodate the staghorn fern’s delicate roots. Avoid using materials with sharp edges that might damage the plant during mounting.
How often should I water my mounted staghorn fern after initial placement?
Water your staghorn fern sparingly after mounting, allowing the soil (or moss) to dry slightly between waterings. A good rule of thumb is to water when the top 1-2 inches of the potting medium feels dry to the touch.
Can I mount multiple staghorn ferns together on a single surface?
Yes, you can create a stunning display by mounting multiple staghorn ferns together. However, ensure each plant has enough space for proper air circulation and light penetration to prevent fungal infections.
How do I care for my mounted staghorn fern during the winter months when humidity is lower?
During the dry winter months, increase the frequency of watering, and consider placing your mounted staghorn fern near a humidifier or on an east- or west-facing window with gentle indirect light. This will help maintain optimal humidity levels for the plant’s survival.