Planting a tree can be a bit daunting, especially if you’re new to gardening or have had previous experiences with failed tree plantings. However, with the right guidance and knowledge, anyone can become a pro at planting trees like a pro! In this comprehensive guide, we’ll walk you through every step of the way, from choosing the perfect location for your new tree to ensuring optimal growth and health post-planting. Whether you’re looking to beautify your backyard or create a thriving ecosystem, proper tree planting is crucial for success. We’ll cover everything from site preparation and soil care to watering and pruning techniques that will give your tree the best chance of thriving for years to come, making this a must-read for any homeowner or gardener eager to learn how to plant a tree properly.
Choosing the Right Location
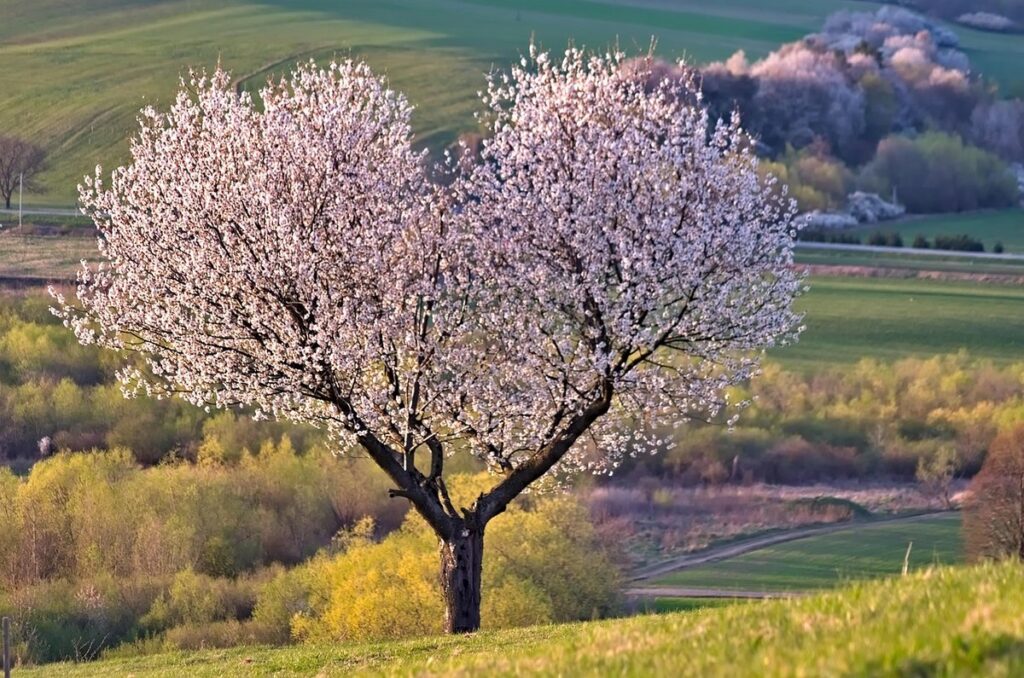
When selecting a location for your new tree, consider factors such as sunlight, soil type, and nearby structures to ensure its long-term health. This section provides guidance on making an informed decision.
Selecting a Sunny Spot
When it comes to planting a tree, one of the most critical factors to consider is sunlight. Trees need adequate sunlight to undergo photosynthesis, which is essential for their growth and development. In fact, most trees require at least 6 hours of direct sunlight per day to thrive.
So, how do you select a location with sufficient sunlight? Start by observing the area where you plan to plant your tree. Look for spots that receive direct sunlight for an extended period, ideally between 9 am and 3 pm when the sun is highest in the sky. Avoid areas shaded by nearby buildings, trees, or other structures, as this can limit your tree’s access to sunlight.
It’s also essential to consider the season. In warmer climates, south-facing locations receive more direct sunlight, while in cooler climates, west- or east-facing locations may be better suited. Keep in mind that even if an area receives some shade during certain times of the day, it can still be suitable for planting a tree if it gets plenty of sunlight overall.
By choosing a location with adequate sunlight, you’ll set your tree up for success and ensure it grows strong and healthy over time.
Avoiding Low-Lying Areas
When it comes to planting a tree, the location plays a crucial role in its overall health and well-being. One common mistake many gardeners make is planting their trees in low-lying areas. These are spots where water tends to collect, often due to poor drainage or a slightly lower elevation than surrounding land.
Planting in these areas can be detrimental to tree health for several reasons. For one, roots will often rot from excessive moisture, making the tree more susceptible to disease and pests. Additionally, low-lying areas can be prone to waterlogging, which deprives the tree of oxygen and essential nutrients. This can lead to reduced growth rates, weakened defenses, and even premature death.
To identify potential low-lying areas on your property, look for dips in the terrain or areas where water tends to collect after rainfall. If you notice standing water or water pooling around a specific spot, it’s best to steer clear of planting trees there. Consider installing French drains or improving soil drainage before planting if necessary. By choosing a suitable location, you can give your tree the best chance at thriving and reaching its full potential.
Considering Soil Conditions
When considering where to plant a tree, soil conditions are crucial for its health and longevity. The type of soil and drainage can significantly impact the growth and stability of your tree’s roots. If you’re unsure about the soil conditions on your property, it’s essential to assess them before planting.
Start by examining the soil texture – is it sandy, clay-based, or loamy? Sandy soils drain well but may not retain moisture, while clay soils can be waterlogged and restrictive for roots. Loamy soils strike a balance between both. Next, consider the drainage of your site. Look for signs of water accumulation or erosion to determine if the soil is poorly draining.
If you find poor soil conditions, there are solutions available. Consider amending the soil with organic matter like compost or mulch to improve its structure and fertility. You can also consult with a gardening expert or arborist to help you choose tree species that thrive in your specific soil type.
Preparing the Site
Before digging holes and planting roots, it’s crucial to prepare your yard for a healthy tree by clearing debris and loosening soil. This step ensures optimal growing conditions.
Clearing Debris and Vegetation
Before you can plant your tree, it’s essential to clear the area around the planting site. This involves removing debris, weeds, and other vegetation that could compete with your new tree for water, nutrients, and light. Start by clearing away any large branches or roots that may be in the way.
Next, focus on removing weeds and other unwanted plants. Use a tool like a hoe or weeding fork to carefully remove the roots of these plants, making sure not to damage the soil. You can also use mulch or cardboard to suppress weed growth, allowing you to plant your tree sooner.
It’s also crucial to clear any debris such as rocks, sticks, and other obstructions that could interfere with tree growth. This will give your tree a clean slate to grow and thrive. Take your time to thoroughly clear the area, and make sure it’s even and level before moving on to the next step in planting your tree.
Marking the Planting Area
Marking the planting area is an often-overlooked step in tree planting, but it’s crucial for ensuring that you’re planting your tree in the right spot. A poorly marked planting site can lead to a number of issues, from uneven growth to damage to nearby structures.
To mark the planting area effectively, use stakes or flags to create a clear boundary around the site. Drive the stakes into the ground at each corner of the planting area, making sure they’re level and secure. Alternatively, you can use brightly colored flags or ribbons tied to the trees themselves to mark the spot.
When choosing between stakes and flags, consider the size of your tree and the surrounding environment. If you have a large tree or are planting in a dense urban area, stakes may be more effective for marking the site. However, if you’re working with smaller plants or in a quieter rural setting, flags can be a better option.
Remember to check local regulations regarding temporary markers, as some areas may have restrictions on using stakes or flags. Regardless of your chosen method, make sure to mark the planting area clearly and consistently, taking note of any nearby utilities or obstacles.
Checking for Utilities
Before you start digging for that new tree, it’s essential to check if there are any underground utilities nearby. You might not think about it, but electric, gas, and water lines can be a serious hazard if damaged during the planting process.
According to the American Society of Landscape Architects, nearly 40% of all utility line strikes occur in urban areas where tree planting is common. To avoid costly repairs and potential safety risks, take the time to locate these utilities before digging.
Start by contacting your local utility company’s “Miss Utility” service, which can provide you with a map of underground lines in your area. You can also use online tools like the National Pipeline Mapping System or the Federal Communications Commission’s (FCC) mapping tool for cable and internet services.
It’s also a good idea to visually inspect the area by looking for manhole covers, utility poles, and other signs of infrastructure. If you do accidentally strike an underground line, have a professional on hand to repair it promptly and safely. Remember, safety first – don’t take any chances when it comes to your tree planting project.
Digging the Hole
Dig carefully, but not too carefully: a hole that’s just as deep as your tree’s roots spread is ideal for healthy growth.
Measuring and Digging the Hole
Before digging the hole, it’s essential to measure and plan its dimensions carefully. To determine the right size, consider the mature spread of the tree, including the canopy and root system. A good rule of thumb is to choose a spot with enough space for the branches to grow outwards without interfering with surrounding structures or power lines.
Measure the diameter of the hole at least 3-4 times wider than the tree’s root ball, and just as deep. This allows for proper root growth and soil aeration. For example, if your tree has a root ball that’s about 2 feet in diameter, dig a hole that’s around 6-8 feet wide.
As you dig, be mindful of the soil structure. If it’s heavy clay or sandy, take extra precautions to ensure the hole is not too compacted or loose. This can impact drainage and overall tree health. Use a mix of topsoil and compost to create a well-draining environment for your tree’s roots. Remember, a sturdy foundation sets the stage for a healthy and thriving tree.
Adding Organic Matter
Adding organic matter to your soil is one of the most beneficial steps you can take when planting a tree. Organic matter like compost or well-rotted manure acts as a natural fertilizer, improving the soil’s structure and fertility. This leads to healthier root growth, increased water retention, and a boost in nutrient availability for your tree.
When incorporating organic matter into your planting mix, it’s essential to use a 1:3 ratio with topsoil. For example, if you’re mixing 10 gallons of topsoil, add one gallon of compost or well-rotted manure. This will give your tree the necessary nutrients without overwhelming the soil.
You can also consider using other organic matter like leaf mold, peat moss, or worm castings. These materials have varying levels of acidity and nutrient content, so be sure to research their specific characteristics before incorporating them into your mix.
Remember, a well-balanced planting mix is crucial for establishing a strong root system in your tree. With the right combination of organic matter and topsoil, you’ll set your tree up for success from day one.
Breaking Up Clay Soil (Optional)
Clay soil can be a real challenge when it comes to planting trees. Its high water-holding capacity may lead to waterlogged conditions, making it difficult for roots to breathe and grow. If you’re dealing with clay soil, breaking it up is an optional but crucial step before planting.
To break up the clay, start by removing any debris or rocks from the area. Next, use a fork or spade to gently loosen the top 6-8 inches of soil. You can also rent a rototiller or aerator for more thorough work. Be careful not to compact the soil further as you till.
Once you’ve loosened the clay, mix in some organic matter like compost or well-rotted manure. This will help improve drainage and structure. If your clay is particularly stubborn, consider adding perlite or sand to increase its porosity. By breaking up the clay and improving its drainage, you’ll create a more hospitable environment for your tree’s roots to grow, setting it up for a healthy and thriving life.
Planting the Tree
Choose a spot for your tree that gets plenty of sunlight and is far enough from power lines to avoid any potential hazards. This will be where we walk you through the actual planting process.
Handling and Planting the Root System
When you’ve got your tree into place, it’s time to focus on the root system. The goal is to create an environment that promotes healthy growth and development. Start by gently spreading out the roots, being careful not to damage them in the process. Make sure they’re evenly distributed around the planting hole.
It’s essential to get the root flare depth just right – this is the point where the trunk flares out at the base of the tree. The top of the root flare should be level with or slightly above the surrounding soil. If it’s buried too deeply, it can lead to a range of problems including decay and reduced growth.
Once you’ve positioned the roots, fill in the hole with a mix of soil and organic matter. Leave about an inch at the top for watering and mulching. Avoid compacting the soil as this can cut off oxygen supply to the roots and hinder their ability to absorb nutrients.
Keep in mind that the soil should cover the root system but not be piled up against it – you want to create a slight mound around the base of the tree. This helps with drainage and prevents water from accumulating, which can cause root rot.
Securing the Tree
Securing the tree in place is crucial to its survival and health. A newly planted tree can be vulnerable to wind, water, and other environmental factors that can cause damage or even uproot it. To prevent this, you’ll need to stake and guy the tree properly.
When staking a tree, make sure the stakes are at least 18-24 inches away from the trunk to avoid damaging the bark. Drive the stakes into the ground on either side of the tree, about 12-18 inches deep, and tie the tree securely with soft materials like twine or rope. Avoid using wire or metal ties that can damage the bark.
Guying involves anchoring the tree to a nearby anchor point using ropes or wires. This is especially important for young trees in areas prone to strong winds. Use at least two guy lines and attach them to anchors about 6-8 feet from the tree’s trunk. Be sure to loosen the ties as the tree grows, to prevent damage from being tied too tightly.
By securing your tree properly, you’ll be giving it a good chance of thriving in its new environment.
Watering the Newly Planted Tree
Watering the newly planted tree is one of the most critical steps in establishing a healthy root system. This process can make or break the life of your young tree, so it’s essential to get it right. When watering your new tree, the goal is to provide enough moisture to support growth without overwatering and causing damage.
To determine how often to water, consider factors like climate, soil type, and tree size. A general rule of thumb is to water deeply once or twice a week during hot summer months and less frequently in cooler seasons. You can also check the soil’s moisture by inserting your finger into the soil up to the knuckle; if it feels dry, it’s time to water.
Use a gentle but thorough irrigation technique, such as soaking the area around the tree with a hose or using a drip irrigation system. Avoid getting water on the trunk, leaves, or branches to prevent disease and pests from taking hold. Keep in mind that newly planted trees require more water than established ones, so be sure to provide enough moisture to support their growth during this critical period.
Caring for the Newly Planted Tree
Now that you’ve successfully planted your tree, it’s essential to focus on its aftercare to ensure a healthy and thriving tree for years to come. This section will guide you through the key steps of caring for your newly planted tree.
Mulching Around the Base
Mulching around the base of your newly planted tree is an essential practice that offers numerous benefits. One of the primary advantages of mulching is weed suppression. Weeds can be a significant problem for young trees, competing with them for water and nutrients. Mulch acts as a barrier, preventing weeds from germinating and growing. A 2-3 inch layer of organic mulch such as wood chips or bark can effectively suppress weeds, giving your tree the best chance to establish itself.
Another key benefit of mulching is moisture retention. Mulch helps retain soil moisture by reducing evaporation and preventing water loss. This means that your tree will require less frequent watering, which can be especially beneficial during hot summer months. Additionally, mulch can help regulate soil temperature, keeping it cooler in the summer and warmer in the winter.
To get the most out of mulching, make sure to keep a 6-8 inch radius around the trunk clear of mulch. This will prevent moisture from accumulating and causing damage to the tree’s bark. Also, replenish the mulch layer as needed to maintain its effectiveness.
Providing Support (Optional)
When planting a young tree, it’s not uncommon for it to require some support as it establishes itself in its new surroundings. This is especially true if you’re planting a large or tall species that may be prone to wind damage or toppling over due to its own weight.
As your tree grows and develops, its root system will expand, but initially, it may not have the stability to withstand strong winds or heavy loads. That’s where stakes and ties come in – they provide essential support for young trees as they establish themselves. There are various types of stakes available, ranging from simple wooden stakes to more advanced systems like guy wires.
It’s worth noting that stakes and ties can be removed once your tree has reached a certain height or after the first growing season, at which point it should have developed enough root mass to support itself. If you do choose to use stakes, make sure to install them at an angle to prevent damage to the trunk of your tree.
Monitoring for Pests and Diseases
As you’re excited to see your newly planted tree thrive, it’s essential to keep an eye out for potential pests and diseases that can harm its growth. Common culprits include aphids, spider mites, scale insects, and bagworms, which can weaken the tree by sucking sap or spreading diseases.
To monitor for these issues, inspect your tree regularly, checking for signs like yellowing leaves, stunted growth, or sticky substance on the bark. Look for pests on the undersides of leaves, in the soil, or on nearby plants. Keep an eye out for disease symptoms such as black spots, powdery mildew, or cankers.
If you notice any problems, take action promptly to prevent further damage. For pest control, consider using neem oil, insecticidal soap, or introducing beneficial insects like ladybugs or lacewings. To manage diseases, remove infected areas, improve air circulation, and apply fungicides as needed. Keep in mind that prevention is key: ensure your tree gets enough water, sunlight, and nutrients to build its resilience against pests and diseases.
Regularly inspecting your tree will help you catch issues early on, allowing you to take swift action and protect your investment.
Frequently Asked Questions
What if I don’t know the exact soil type in my yard?
If you’re unsure about the soil type, consider taking a sample to your local nursery or gardening store for analysis. This will help you determine what amendments are needed and ensure proper tree growth.
Can I plant a tree in a spot with partial shade?
While some trees can tolerate partial shade, most still require at least 4 hours of direct sunlight per day to thrive. However, if the area receives filtered sunlight, consider selecting a shade-tolerant tree species or taking steps to improve air circulation and reduce competition from nearby vegetation.
How often should I water my newly planted tree?
Water your newly planted tree regularly, especially during its first year of growth. Aim for about 1 inch of water per week, either through rain or irrigation, but avoid overwatering which can lead to root rot and other issues.
What if I encounter obstacles like roots from nearby trees or power lines while digging the hole?
If you hit an obstacle, don’t try to force your way around it. Instead, adjust the planting location as needed, taking into account factors like sunlight and soil conditions. If the issue persists, consult with a professional arborist for guidance.
Are there any specific tools I need to plant a tree successfully?
While basic gardening tools are essential, consider investing in a tree planting bar or shovel specifically designed for digging deep holes and a root ball fork for handling the tree’s roots during planting. These specialized tools will make the process easier and help prevent damage to your tree’s delicate roots.