Have you ever stopped to think about where your sweetener comes from? Most store-bought syrups are made with refined sugars and preservatives, but there’s a natural alternative that’s growing in popularity: homegrown ginger syrup. Not only is it a healthier choice for your family, but using your own homegrown ginger also gives you complete control over the ingredients and process.
Growing your own ginger can be surprisingly easy, even if you don’t have a lot of space or experience with gardening. Once you’ve harvested your fresh ginger, we’ll show you how to turn it into a delicious and versatile syrup that’s perfect for sweetening drinks, cooking, and baking. We’ll also explore the benefits of using natural remedies like ginger syrup, from soothing digestive issues to adding flavor to your favorite recipes.
Benefits and Uses of Homegrown Ginger Syrup
Now that you’ve made your own ginger syrup, let’s explore all the exciting ways to use it, from flavoring cocktails to sweetening baked goods.
Natural Remedies for Digestive Issues
Ginger syrup has been used for centuries to alleviate digestive issues, and its natural properties make it an excellent alternative to commercial remedies. If you’re experiencing nausea, bloating, or indigestion, ginger syrup can provide relief without the harsh side effects of over-the-counter medications.
One of the primary benefits of homegrown ginger is that it’s free from chemicals and pesticides commonly found in store-bought ginger products. When used to make a syrup, the natural oils and compounds in homegrown ginger are preserved, making it more effective at soothing digestive issues. To get started, try adding a tablespoon or two of your homemade ginger syrup to a glass of water or tea when experiencing nausea or bloating.
In addition to its anti-inflammatory properties, ginger syrup also helps stimulate digestion by increasing the production of stomach acids and improving nutrient absorption. This is especially helpful for individuals who struggle with irritable bowel syndrome (IBS) or other digestive disorders. To incorporate ginger syrup into your daily routine, consider adding it to your morning tea or using it as a topping for yogurt or oatmeal.
When selecting homegrown ginger for making syrup, choose rhizomes that are firm and free of wrinkles. This will ensure the highest quality syrup with optimal medicinal properties. Once you’ve harvested your ginger, peel and chop it finely before cooking it down into a syrup.
Sweetener Alternatives and Health Benefits
When you’re looking for a natural sweetener alternative to refined sugars, artificial sweeteners, and even honey, homegrown ginger syrup is an excellent choice. Not only does it add a depth of flavor to your recipes, but it’s also packed with health benefits that can transform the way you approach baking and cooking.
One major advantage of using ginger syrup as a sweetener is its low glycemic index, making it suitable for people with diabetes or those who are watching their sugar intake. The active compound in ginger, called gingerol, has been shown to have potent anti-inflammatory properties, which can aid in digestion and alleviate nausea.
If you’re concerned about the calorie content of your baked goods, fear not! Ginger syrup is relatively low in calories compared to other sweeteners on the market. To use it effectively, start by substituting 25% of the refined sugar called for in a recipe with an equal amount of ginger syrup. You can also reduce the amount of liquid ingredients in the recipe by about 10% to compensate for the moisture content in the ginger syrup.
Incorporating homegrown ginger syrup into your recipes is a simple and delicious way to reap its numerous health benefits while reducing your reliance on refined sugars and artificial sweeteners.
Growing Your Own Ginger for Syrup
To grow high-quality ginger for syrup, you’ll want to choose a suitable location and prepare your soil properly. This section will walk you through the process.
Choosing the Right Variety for Syrup Making
When selecting a ginger variety for syrup making, you’ll want to choose one that suits your taste preferences and climate. With over 100 types of ginger available, the options can be overwhelming. For syrup making, you’ll typically opt for varieties that have a higher sugar content, which results in a more robust flavor.
Some popular varieties suitable for syrup making include ‘Jamaican’ or ‘African’ ginger, known for their intense spice and sweetness. These types of ginger are ideal for those who prefer a stronger flavor profile. On the other hand, if you prefer a milder taste, consider growing ‘Fiji’ or ‘Baby’ ginger. They have a sweeter, more delicate flavor.
When selecting a variety, also consider its growth requirements. Some ginger varieties, such as ‘Jamaican’, can tolerate full sun and high temperatures, while others like ‘Fiji’ prefer partial shade. Choose a variety that suits your local climate to ensure successful cultivation. Additionally, look for varieties with compact growth habits or those bred specifically for container gardening, which are perfect for small spaces.
In terms of growing requirements, most ginger varieties require well-draining soil and consistent moisture levels. With proper care, you can enjoy an abundance of homegrown ginger for your syrup making needs.
Tips for Successful Ginger Cultivation
To successfully cultivate healthy ginger plants, it’s essential to start with well-prepared soil. Choose a location that receives partial shade and has good air circulation. For optimal growth, the ideal pH range for ginger cultivation is between 5.5 and 6.5. To achieve this, mix in organic matter such as compost or manure into your soil.
Watering is also crucial for healthy ginger growth. Ginger requires consistent moisture, especially when it’s young. Water your plants regularly, but avoid overwatering, which can lead to root rot. Aim for about 1 inch of water per week, either from rainfall or irrigation.
Pruning is another critical aspect of ginger cultivation. Remove any weak or damaged leaves to prevent the spread of disease and promote healthy growth. Pinch off flower buds as they form to direct the plant’s energy towards producing a robust rhizome.
Regularly inspect your plants for signs of pests, such as aphids, whiteflies, or spider mites. Use neem oil or insecticidal soap to manage infestations before they spread. By following these steps and maintaining a clean and healthy growing environment, you’ll be well on your way to harvesting a bountiful crop of homegrown ginger for syrup production.
Harvesting and Preparing Ginger for Syrup
Now that you’ve harvested your homegrown ginger, it’s time to prepare it for syrup-making. Learn how to clean, peel, and chop your fresh ginger in this essential preparation guide.
When to Harvest Your Homegrown Ginger
When it comes to harvesting your homegrown ginger for syrup making, timing is everything. You want to catch your roots at their peak flavor and potency, which can make all the difference in the quality of your final product.
The ideal time to harvest your ginger roots depends on several factors, including the variety you’re growing and the climate you’re in. In general, most ginger varieties are ready to harvest 8-10 months after planting, when the tops of the plants begin to yellow and die back. This is a sign that the roots have reached their maximum size and flavor.
If you’re planning to make syrup, it’s best to harvest your ginger when the roots are mature but still firm, as this will help preserve their natural oils and flavors. You can check for readiness by gently digging around the base of the plant with a fork, feeling for the size and density of the root system. Harvesting at the right time ensures that your syrup has maximum flavor and aroma, making it perfect for preserving and enjoying throughout the year.
Keep in mind that over-maturity can cause your ginger to become fibrous and less flavorful, so monitor your plants closely and harvest when necessary.
Cleaning, Peeling, and Grating Ginger
When working with homegrown ginger for syrup making, it’s essential to start by cleaning and preparing the roots properly. Begin by gently washing the ginger under cold running water to remove any dirt or debris that may have accumulated during growth. Next, use a vegetable brush to scrub away any stubborn dirt or impurities.
Once clean, you’ll need to peel the ginger using a spoon or a swivel peeler. Hold the ginger firmly and insert the blade of the peeler at an angle, following the natural curves of the root. Continue peeling in one continuous motion until all the skin is removed. Alternatively, you can also use a zester or a microplane to peel the ginger, which will give it a more delicate appearance.
After peeling, use a box grater or a food processor with a grating attachment to grate the ginger into thin strips. Be careful not to over-grate, as this can make the syrup cloudy. Instead, aim for a coarse texture that will break down easily during cooking. You can also store grated ginger in an airtight container in the fridge for up to a week if you’re not using it immediately.
Making Homegrown Ginger Syrup
Now that you’ve grown and harvested your homegrown ginger, let’s transform it into a delicious and versatile syrup to elevate your cooking and baking.
Simple Syrup Recipe Using Fresh Ginger
Making fresh ginger syrup from homegrown ginger is a straightforward process that requires just a few simple ingredients and some basic kitchen equipment. To start, you’ll need to peel and chop the ginger into small pieces to release its natural oils and flavors.
Begin by combining 2 cups of water with 1 cup of granulated sugar in a medium saucepan. Bring this mixture to a boil over high heat, stirring occasionally until the sugar has dissolved. Add in the chopped fresh ginger, making sure it’s fully submerged in the syrup.
Reduce the heat to medium-low and simmer for about 20-25 minutes or until the syrup has thickened slightly and the flavors have melded together. Remove from heat and let cool before straining the syrup through a fine-mesh sieve into a clean glass bottle. Store the syrup in the fridge, where it will keep for several weeks.
This simple syrup recipe using fresh ginger is perfect for adding a spicy kick to cocktails, teas, or desserts.
Tips for Achieving the Perfect Syrup Concentration
When it comes to achieving the perfect syrup concentration, there’s no one-size-fits-all approach. The ideal level of sweetness and thickness will vary depending on personal preference, usage needs, and even the type of recipes you plan to use the syrup with.
To start, consider how you plan to use your homegrown ginger syrup. Will it be a cocktail mixer, a topping for pancakes or waffles, or an ingredient in desserts? Each application has its own sweet spot when it comes to concentration.
As a general rule of thumb, a 1:1 ratio of sugar to water is a good starting point. However, you can adjust this to suit your taste by adding more or less sugar to the mixture. Keep in mind that if you prefer a stronger syrup, it’s better to add more ginger and sugar to the initial batch rather than trying to dilute a concentrated syrup.
Here are some rough guidelines for adjusting the concentration of your syrup:
* For cocktails: 2-3% sugar by volume (relatively thin)
* For desserts or ice cream toppings: 5-7% sugar by volume (medium thickness)
* For pancakes, waffles, and other breakfast treats: 8-10% sugar by volume (thicker consistency)
Storing and Preserving Homegrown Ginger Syrup
Now that you’ve made a batch of your homegrown ginger syrup, let’s talk about how to keep it fresh for months to come. We’ll cover storage and preservation tips in this next section.
Short-Term Storage Methods for Fresh Syrup
When you’ve just made a batch of fresh ginger syrup and don’t plan to use it immediately, short-term storage methods come into play. There are two primary ways to store your ginger syrup: refrigeration and freezing.
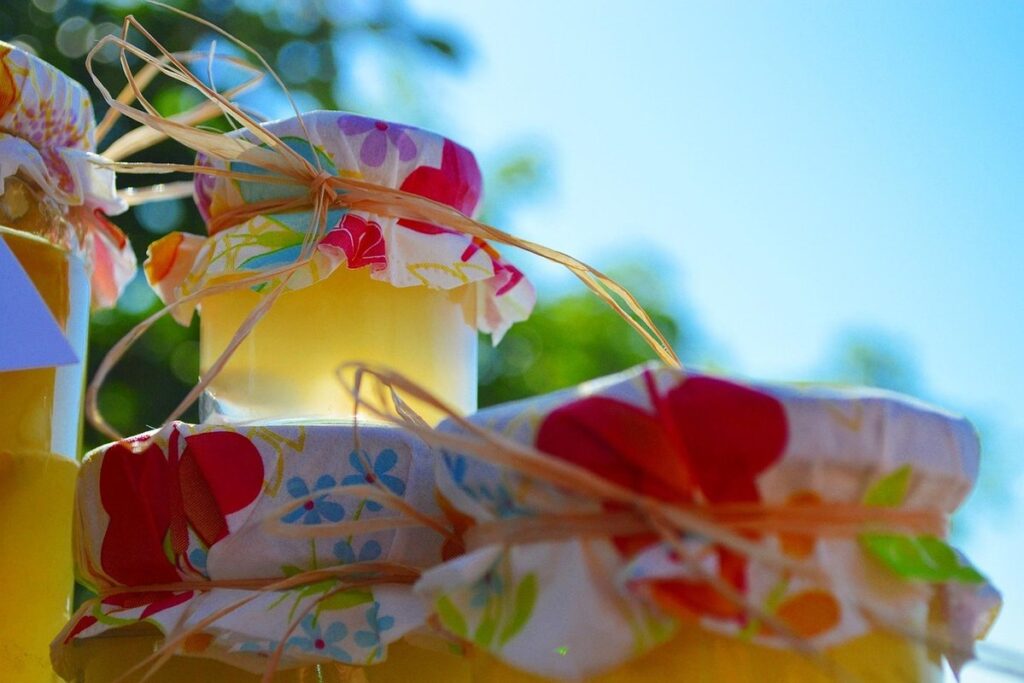
Refrigeration is the simplest method. Pour the syrup into an airtight container, such as glass or plastic bottles with tight-fitting lids, and place them in the refrigerator. The ideal temperature for storing ginger syrup is between 32°F (0°C) and 40°F (4°C). This will help slow down the fermentation process and prevent mold growth. When stored properly, refrigerated ginger syrup can last for up to 2 weeks.
If you won’t be using your ginger syrup within two weeks, consider freezing it instead. Transfer the syrup into an airtight container or freezer-safe bag, leaving about 1 inch (2.5 cm) of space at the top for expansion. Label and date the container or bag before placing it in the freezer at 0°F (-18°C). Frozen ginger syrup can be stored for up to 3-4 months.
Long-Term Preservation Methods for Syrup
When you’ve carefully crafted your homegrown ginger syrup and it’s time to store it for long-term use, there are several preservation methods to consider. Canning is a popular option, but it requires careful attention to acidity levels and jar sealing techniques to ensure the syrup remains shelf-stable.
Vacuum sealing offers another alternative, as it removes air from the container and prevents spoilage. This method works particularly well for small batches of syrup, which can be stored in airtight containers or pouches.
Freezing is also an effective preservation technique, especially if you’ve made large quantities of syrup. By dividing the syrup into ice cube trays and then transferring them to a freezer-safe container, you can preserve your ginger syrup for up to 6-8 months. When you need to use it, simply thaw the desired number of cubes.
To ensure the quality of your frozen syrup, consider making small batches that can be easily portioned out and used as needed. This way, you’ll always have access to fresh-tasting syrup without having to worry about spoilage or contamination.
Common Issues and Troubleshooting
Don’t worry if things don’t go as planned – we’ve got you covered. This section will help you troubleshoot common issues that can arise when making homegrown ginger syrup.
Troubleshooting Bitter or Off-Flavors in Your Syrup
If you’ve noticed that your homemade ginger syrup tastes bitter or has an off-flavor, don’t worry – it’s not uncommon. There are several reasons why this might be happening, and with a few adjustments to your recipe and technique, you can achieve the perfect flavor profile.
Firstly, let’s consider the root cause of bitter flavors in ginger syrup. It’s often due to over-extraction or under-steeping of the ginger roots. When ginger is over-extracted, it releases more bitter compounds than desired. On the other hand, if the ginger isn’t steeped long enough, its flavor may not be fully developed.
To adjust your recipe and technique, start by reducing the amount of ginger you’re using. If you prefer a stronger ginger flavor, try increasing the steeping time to allow for better extraction. Another approach is to roast your ginger before making the syrup – this will caramelize the natural sugars and enhance the flavor without introducing bitterness.
Experiment with different spice ratios or add a pinch of salt to balance out the flavors. Remember that practice makes perfect, so don’t be discouraged if it takes a few attempts to get it just right.
Tips for Avoiding Contamination and Mold Growth
When working with homegrown ginger to make syrup, it’s essential to follow proper sanitation practices and storage guidelines to avoid contamination and mold growth. Contamination can lead to off-flavors, unpleasant textures, and even health risks. To prevent this, ensure all equipment and utensils are thoroughly cleaned and sanitized before use.
Start by washing your hands, then clean and sanitize any containers, jugs, or utensils you’ll be using. Use a mixture of 1 part white vinegar to 9 parts water as a sanitizing solution. Let the items soak for at least 10 minutes, then rinse with clean water.
When storing your ginger syrup, keep it in an airtight container and refrigerate it immediately after making. This will help slow down bacterial growth and prevent mold from developing. Make sure to label the container clearly and store it away from direct sunlight and heat sources.
Regularly inspect your syrup for any signs of contamination or spoilage, such as visible mold, slimy texture, or off smells. If you notice anything unusual, discard the batch immediately and start fresh. By following these simple guidelines, you can enjoy a delicious and healthy homemade ginger syrup while minimizing the risk of contamination.
Frequently Asked Questions
How do I know if my homegrown ginger is ready to be harvested?
Your ginger is typically ready to harvest when the rhizomes are firm, about 3-4 inches long, and have a good amount of foliage growing around them. You can gently dig up a small section to check the size and maturity.
Can I use any variety of ginger for making syrup, or do some work better than others?
While most ginger varieties will produce a decent syrup, some like ‘Fiji’ and ‘Jamaican’, have a sweeter and milder flavor, making them ideal for syrup-making. Other varieties might be too spicy or fibrous.
What’s the best way to store homegrown ginger syrup to keep it fresh for a longer period?
To extend shelf life, store your homemade ginger syrup in an airtight container in the refrigerator at a temperature below 40°F (4°C). You can also freeze it in ice cube trays for later use. Always check the syrup for any signs of mold or fermentation before consuming.
How can I troubleshoot bitter or off-flavors in my homegrown ginger syrup?
If your syrup tastes bitter, it might be due to over-extraction of the oils from the ginger. Try reducing the steeping time or using a finer grater to release the flavors more evenly. For off-flavors, check for any contamination or mold growth and discard the syrup.
Can I make homegrown ginger syrup with a juicer instead of a blender or food processor?
Yes, you can use a juicer to extract the juice from your ginger, but be aware that it might affect the syrup’s consistency and texture. A blender or food processor will give you a smoother, more even consistency.