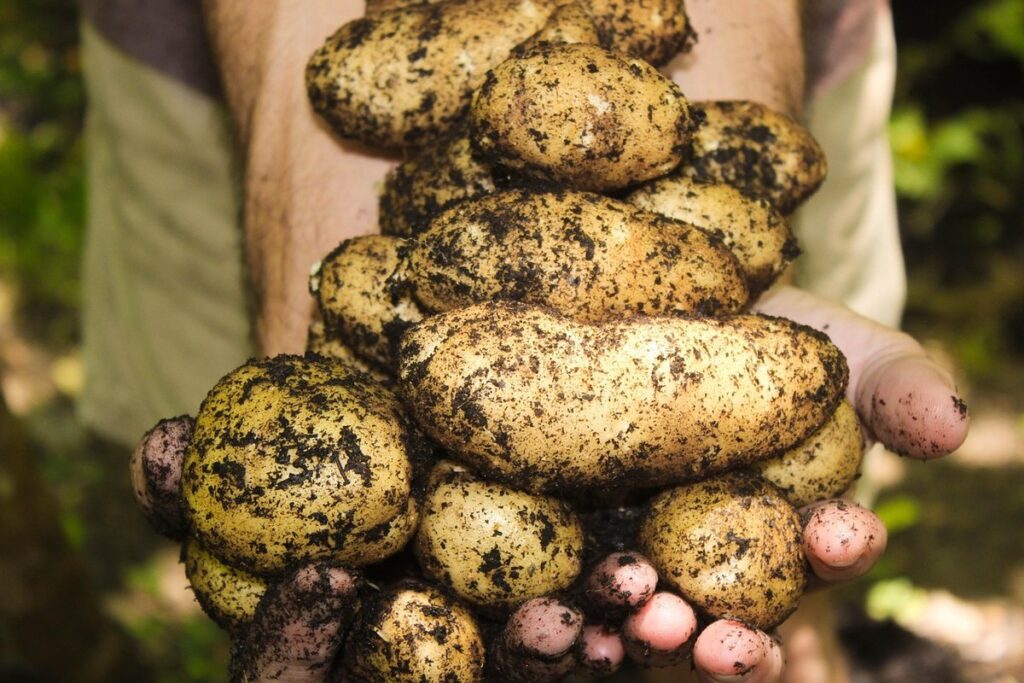
Creating a thriving vegetable garden requires more than just planting seeds and watering them regularly. A healthy garden also starts with a well-prepared and optimized soil ecosystem, which is crucial for plant growth and development. Unfortunately, many gardeners overlook the importance of soil preparation, leading to poor yields and reduced crop quality. But don’t worry, we’ve got you covered! In this article, we’ll share expert tips on how to test, improve, and prepare your soil for a bountiful harvest. From understanding the basics of soil testing and analysis to implementing simple yet effective methods for improving soil fertility and structure, we’ll take you through it all. Whether you’re a seasoned gardener or just starting out, this guide will help you create a healthy and productive garden that’s sure to impress!
Understanding Your Soil Type and Needs
To create a thriving vegetable garden, it’s essential to understand your soil type and needs. Learning how to identify your soil’s characteristics will help you provide the right conditions for your plants to grow.
Knowing Your Soil’s pH Level
Understanding your soil’s pH level is crucial for creating an optimal environment for your vegetable garden. Soil pH measures how acidic or alkaline your soil is, ranging from 0 to 14, with 7 being neutral. Most vegetables prefer a slightly acidic to neutral soil pH between 6.0 and 7.0.
To determine your soil’s pH level, you can use a DIY kit or send a sample to a lab for testing. A simple test will cost around $10-$20, and it’s worth the investment to get an accurate reading. If your soil is too acidic (pH below 6.0), it may leach nutrients away from plants, while alkaline soils (pH above 7.0) can lead to nutrient deficiencies.
For example, tomatoes thrive in a slightly acidic pH range of 6.0-6.8, while carrots prefer a more neutral soil pH around 7.0. Knowing your soil’s pH level allows you to make informed decisions about fertilization and amendments. If necessary, you can add lime to raise the pH or sulfur to lower it, ensuring your plants receive the right nutrients for optimal growth.
Identifying Soil Texture and Structure
Soil texture and structure play a significant role in determining the suitability of your garden for vegetable growth. To understand your soil type, you need to identify its texture and structure. There are three primary types of soil textures: clay, silt, and sand.
Clay soils have a high percentage of clay particles, which can retain water but also become compacted easily. This can hinder root development and make it difficult for air and water to penetrate. On the other hand, sandy soils drain quickly, losing moisture rapidly, while silt soils strike a balance between these two extremes. Sandy loam is often considered an ideal mix of clay, silt, and sand particles.
When examining your soil structure, look for signs of degradation or compaction. Is it dense and hard to dig into, or does it crumble easily? Understanding your soil’s texture and structure will help you choose the right amendments and management practices. For example, if your soil is clay-heavy, adding organic matter can improve its drainage and aeration.
To take this further, consider taking a soil sample for analysis. This will provide more detailed information about your soil’s composition, pH levels, and nutrient availability.
Common Soil Deficiencies and Challenges
Soil deficiencies and challenges can significantly impact vegetable garden productivity. One common issue is nutrient depletion due to intensive farming practices, leading to reduced crop yields and altered soil pH levels.
Nitrogen (N), phosphorus (P), and potassium (K) are essential macronutrients often lacking in soils. A lack of nitrogen causes stunted growth, yellowing leaves, and poor fruit set. Phosphorus deficiency results in weak root development, delayed maturity, and reduced yields. Potassium insufficiency leads to weakened plant resistance, increased susceptibility to diseases, and lower water use efficiency.
Soil acidity is another prevalent challenge, with pH levels below 6 causing nutrient deficiencies and impaired microbial activity. Soil salinization, often linked to irrigation practices, can lead to salt buildup and hinder root growth. To address these issues, consider regular soil testing to identify specific deficiencies and challenges. You can then implement targeted amendments, such as compost or fertilizers, to restore optimal nutrient levels and pH balance.
Some common symptoms of soil deficiency include:
• Yellowing or pale leaves
• Stunted plant growth
• Poor fruit set or low yields
• Increased susceptibility to pests and diseases
By being aware of these challenges and taking proactive steps to address them, you can create a more balanced and productive soil environment for your vegetable garden.
Testing Your Soil: A Step-by-Step Guide
Now that you’ve prepared your garden bed, it’s time to learn how to test your soil to determine its pH level and nutrient balance. This step is crucial for planting a thriving vegetable garden.
Collecting a Representative Sample
When collecting a representative soil sample for testing, it’s essential to get it right. You want the results to accurately reflect the overall health and composition of your garden’s soil, rather than just one isolated spot. This ensures that you’re making informed decisions about amendments and fertilizers.
To achieve this, take multiple samples from different areas of your garden. Aim for a total of 5-10 samples, spread out across various zones, such as the vegetable beds, paths, and any problem areas like compacted spots or where water tends to collect. If you have a large plot, consider dividing it into sections and sampling each one separately.
When collecting the samples, dig down about 6-8 inches with your shovel to get below the topsoil layer. Collect about a cupful of soil from each spot, then mix them together in a bucket or container to create a composite sample. Label each sample clearly so you know where it came from and what its characteristics are likely to be.
This process may seem tedious, but it pays off in the long run by giving you an accurate picture of your garden’s soil conditions.
Using pH Test Kits and Other Diagnostic Tools
When it comes to testing your soil’s pH levels and other conditions, you don’t need to send out samples to a lab. With the right tools, you can get an accurate reading of your soil’s condition from the comfort of your own garden.
pH Test Kits are a great starting point for assessing your soil’s acidity or alkalinity. These easy-to-use kits typically involve dipping a probe into your soil and then comparing the color of the resulting liquid to a chart provided with the kit. It’s essential to choose a reputable brand that offers accurate results, such as those from companies like pH Meter or Soil Testing Kit.
If you’re not getting an accurate reading from a pH test kit, consider investing in a more precise tool like a soil probe. This handheld device can give you a deeper understanding of your soil’s composition and moisture levels. It usually consists of a long rod with a sensor at the end that measures various parameters such as temperature, moisture, and electrical conductivity.
When interpreting your results, keep in mind that pH readings should be taken from multiple spots within your garden to get an accurate picture. This will help you identify any areas where the soil may need extra attention or amendments to support healthy plant growth.
Interpreting Soil Test Results
When you receive your soil test results, it’s essential to understand what they mean and how to apply that information to improve your vegetable garden. Soil pH is a critical factor to consider; if your soil pH is too high or too low, it can limit nutrient availability for your plants.
To interpret your soil test results, start by examining the pH level, which should be in the 6.0-7.0 range for most vegetables. If your soil’s pH is outside this range, you may need to lime or sulfur to adjust it. Next, look at the nutrient levels, specifically nitrogen (N), phosphorus (P), and potassium (K). These macronutrients are essential for plant growth.
Consider the following general guidelines: a low N level indicates that your plants might not be getting enough food to grow well; a low P level suggests poor root development. If you’re unsure about how to adjust nutrient levels, consult with a local gardening expert or follow recommendations from your soil testing service.
Improving Your Soil with Organic Amendments
When it comes to creating a thriving vegetable garden, improving your soil quality is key. In this next step, we’ll explore the benefits of using organic amendments to give your soil a nutrient-rich boost.
Composting for a Healthy Soil Ecosystem
Composting is one of the most effective ways to create a healthy soil ecosystem. By breaking down organic matter into a rich, nutrient-dense fertilizer, composting promotes beneficial microbial activity and enhances soil structure. This leads to improved water retention, reduced erosion, and increased plant growth.
To start composting, gather materials like food scraps, leaves, grass clippings, and shredded newspaper in equal parts. Avoid adding meat, dairy, or oily foods as they can attract pests. Keep the pile moist, but not soggy, and turn it every week to aerate. After 2-3 months, your compost should be dark, crumbly, and earthy-smelling.
Use this rich fertilizer by mixing 1/4 cup of compost into each planting hole or as a mulch around established plants. You can also make a liquid compost tea by steeping 5 cups of compost in 10 gallons of water for 24 hours. This will provide a concentrated dose of beneficial microbes to your soil, promoting a thriving ecosystem that supports healthy plant growth and resilience against pests and diseases.
Adding Manure and Other Organic Matter
When it comes to improving soil health, adding organic matter is one of the most effective ways to do so. Organic matter can help increase the water-holding capacity of the soil, reduce erosion, and provide essential nutrients for plants to grow. One of the most popular types of organic matter used in gardening is animal manure.
Composted chicken or cow manure can add a significant amount of nitrogen, phosphorus, and potassium to your soil. However, it’s essential to note that fresh manure should not be applied directly to the garden bed as it can burn plant roots with its high salt content. Instead, let it decompose for at least six months before using it.
Other types of organic matter you can consider adding include peat moss, which helps improve drainage and structure, and leaf mold, a natural fertilizer made from decomposed leaves. When incorporating these materials into your soil, remember to mix them in well and avoid overdoing it, as too much can lead to waterlogging or nutrient overload. Aim for a balanced ratio of 10-20% organic matter to the rest of the soil.
Mulching for Soil Retention and Weed Suppression
Mulching is an effective way to retain soil moisture and suppress weeds, making it an essential technique for vegetable gardeners. Organic mulches like wood chips, bark, straw, and grass clippings work by creating a physical barrier between the soil and the air, reducing evaporation and runoff. This means your plants will receive consistent moisture levels, even in hot or dry weather.
When choosing a mulch, consider its texture and durability. For example, wood chips are great for suppressing weeds but can be too coarse for some plants’ roots. On the other hand, straw is softer and won’t damage plant stems. Aim to apply 2-3 inches of mulch around your vegetable beds, keeping it a few inches away from plant stems.
To ensure soil retention and weed suppression, refresh the mulch periodically as it breaks down. For example, if you’ve applied wood chips, wait until they’re partially decomposed before reapplying more. Also, keep in mind that mulches can attract pests like slugs and snails, so monitor your garden regularly. By incorporating mulching into your vegetable gardening routine, you’ll enjoy healthier plants and reduced maintenance over time.
Preparing Your Soil for Planting
To ensure a healthy and thriving vegetable garden, it’s essential to prepare your soil correctly, and that starts with testing and assessing its condition. In this next step, we’ll cover how to get your soil ready for planting.
Tilling and Loosening the Soil
Tilling and loosening the soil is an essential step in preparing your garden bed for planting. It breaks up compacted soil, removes weeds, and brings oxygen to the roots of your future plants. If you’ve been using your garden plot for a while, it’s likely that the soil has become dense and hard, making it difficult for water and air to penetrate.
To till effectively, start by removing any debris or large rocks from the area. Next, use a rotary tiller or a garden fork to loosen the top 8-10 inches of soil. This will help break up clods and aerate the soil, allowing roots to grow deeper and healthier.
Don’t over-till, as this can damage the structure of the soil. Aim for about two passes with your tool, turning the soil in one direction first and then at a 90-degree angle. This will ensure that the soil is evenly loosened without being compacted again. If you’re just starting out with a new garden plot, consider incorporating organic matter like compost or manure to improve the overall health of your soil.
Raising Bed Edges and Creating a Healthy Drainage System
When preparing your soil for planting, it’s essential to create raised bed edges and establish a healthy drainage system. This ensures that your vegetables receive the right amount of moisture and oxygen, while preventing waterlogged soil that can lead to root rot.
To raise bed edges, you’ll need to mark out the desired area with stakes and twine or a hose, then dig a trench about 6-8 inches deep along one side. Fill this trench with compacted gravel or broken brick to create a stable foundation for your raised bed. Next, lay down a layer of landscape fabric to prevent weeds from growing up through the bed. Fill the bed itself with a mix of topsoil and compost, leaving about 2-3 inches at the top for mulching.
Improving drainage is also crucial. You can add organic matter like peat moss or coconut coir to your soil to increase its water-holding capacity. Additionally, installing a French drain or using a soaker hose can help excess water escape from the bed. Keep in mind that good drainage and proper soil structure are key factors in preventing root rot and promoting healthy plant growth.
Applying Fertilizers and Other Pre-Planting Treatments
When it comes to preparing your soil for planting, applying fertilizers and other pre-planting treatments is a crucial step. This process helps create a nutrient-rich environment that supports healthy root growth, promotes optimal plant development, and encourages robust yields.
First, determine the type of fertilizer you need based on your garden’s specific requirements. Organic options like compost or manure are excellent choices for most vegetable gardens, while synthetic fertilizers may be necessary in areas with poor soil quality. Follow the application instructions carefully to avoid over-fertilizing, which can harm your plants and the environment.
Before applying any pre-planting treatments, it’s essential to remove weeds and debris from the area. This helps prevent competition for nutrients and minimizes the risk of pests and diseases. Use a shallow tiller or hoe to gently loosen the top layer of soil, making it easier for roots to penetrate and water to reach your plants.
To ensure optimal results, consider combining fertilizers with other pre-planting treatments like mulching or cover cropping. These techniques help retain moisture, suppress weeds, and attract beneficial insects that support a healthy ecosystem.
Maintaining Your Soil Throughout the Growing Season
As you plant and tend your vegetable garden, it’s essential to remember that maintaining healthy soil is just as crucial as watering and fertilizing. This involves regular checks on moisture levels and pH balance throughout the growing season.
Monitoring pH Levels and Adjusting as Needed
Monitoring pH levels is crucial to ensure your vegetables receive the right nutrients. Soil pH affects nutrient availability, with most veggies thriving between 6.0 and 7.0. However, some plants like blueberries and azaleas require acidic conditions (pH 4.5-6.0), while others like alfalfa and clover prefer alkaline soil.
To monitor your soil’s pH level, you can purchase a DIY test kit or send a sample to a lab for analysis. The latter provides more accurate results but is pricier. If your test reveals an off-target pH reading, it’s time to adjust.
Apply elemental sulfur to lower the pH, as it’s a natural and slow-acting acidifier. Conversely, use lime to increase pH levels over several months. Be cautious when using these products, as excessive application can cause damage.
For example, if your test results show an excessively high pH reading (above 8.0), you’ll need to apply elemental sulfur. Mix one pound of sulfur per 1,000 square feet into the top six inches of soil during the winter months for a sustained effect.
Keep in mind that frequent monitoring and adjustments are necessary throughout the growing season. Regular testing also helps prevent over-correction and ensures optimal nutrient availability for your vegetables.
Controlling Weeds and Preventing Erosion
Controlling weeds and preventing erosion are crucial aspects of maintaining a healthy vegetable garden. Weeds can compete with your crops for water, nutrients, and light, while erosion can damage the soil structure and lead to nutrient depletion.
One effective way to control weeds is through mulching. Mulch acts as a barrier between the soil and the air, suppressing weed growth by depriving them of light and water. Organic materials like straw, bark chips, or grass clippings work well for mulching. Apply a 2-3 inch layer of mulch around your plants, keeping it a few inches away from the stems to prevent moisture buildup.
Cover cropping is another excellent technique for preventing erosion and controlling weeds. Planting cover crops in off-seasons like winter can help hold the soil in place, reduce weed growth, and even add nutrients to the soil. Some popular cover crop options include clover, rye, and oats. By incorporating these methods into your garden maintenance routine, you’ll be able to enjoy a healthier, more productive garden with reduced weed pressure and erosion risk.
It’s also essential to maintain a regular watering schedule to prevent weeds from growing in the first place. Drought stress can weaken your plants’ resistance to pests and diseases, making it easier for weeds to take over. Monitor your soil moisture levels and adjust your watering schedule accordingly.
Monitoring Soil Moisture and Watering Appropriately
Monitoring soil moisture is crucial to avoid overwatering or underwatering your vegetables. You can start by checking the soil’s moisture level with a finger or a soil probe. Stick it about 3-4 inches deep into the soil, and if the soil feels dry, it’s time to water. If it still feels damp, wait another day before watering again.
To make monitoring easier, install a rain gauge or a soil moisture sensor near your garden bed. These devices will give you accurate readings on how much rainfall has occurred and whether the soil needs more water. Some sensors even come with alerts sent to your phone when the soil reaches a critical level of dryness.
When watering, make sure not to overdo it! Vegetables need about 1-2 inches of water per week, either from rain or irrigation. Too much water can lead to root rot and other problems. To avoid this, try watering deeply but infrequently – this encourages deep root growth and makes your plants more drought-resistant.
Consider using mulch around the base of your plants to retain moisture in the soil. It’s also a good idea to check for signs of dryness, such as wilted leaves or discoloration.
Frequently Asked Questions
How do I know if my soil needs additional organic matter?
Adding organic matter like compost or well-rotted manure can greatly benefit your soil, especially if it’s lacking in nutrients or has poor structure. To determine if your soil needs extra organic matter, check the results of your soil test for nutrient deficiencies and consider factors like soil texture and age.
What are some common mistakes to avoid when testing my soil?
When collecting a representative sample, be sure to take into account the different soil zones in your garden, including areas near plants and tree roots. Avoid mixing the topsoil with underlying subsoil, as this can give inaccurate results. Also, make sure to handle the samples carefully to prevent contamination.
How often should I re-test my soil pH levels?
It’s recommended to test your soil pH every 1-2 years, especially if you’ve made significant changes to your garden or added new plants that have different pH requirements. However, if you notice a sudden change in plant growth or other soil-related issues, re-testing may be necessary sooner.
Can I use the same compost for both vegetable and flower gardens?
While compost can be beneficial for both types of gardens, it’s essential to consider the unique needs of each when creating your own compost. For example, if you’re growing vegetables with high nitrogen requirements, you may need to balance the C:N ratio in your compost pile accordingly.
How do I handle soil-borne diseases and pests without harming my plants?
To control soil-borne diseases and pests, focus on maintaining a balanced ecosystem through practices like crop rotation, proper irrigation, and integrated pest management. This can help prevent the buildup of pathogens and pests that thrive in unhealthy soils.