Tulips are one of the most popular and versatile spring-blooming flowers, loved by gardeners and florists alike. But did you know that with proper care, tulips can thrive both indoors and outdoors? Whether you’re a seasoned horticulturist or just starting out, growing stunning tulip blooms requires attention to detail and a solid understanding of their specific needs. In this comprehensive guide, we’ll walk you through the essential steps for selecting the right variety, planting, watering, fertilizing, and caring for your tulips post-flowering. From choosing between early- and late-season varieties to coaxing those gorgeous blooms indoors during the winter months, we’ve got you covered. By following our expert tips and advice, you’ll be well on your way to growing vibrant, healthy tulips that will brighten up any room or garden.
Choosing the Right Variety of Tulips
When it comes to growing tulips, selecting the right variety is crucial for a successful bloom. Let’s take a closer look at how to choose the perfect type of tulip for your garden and needs.
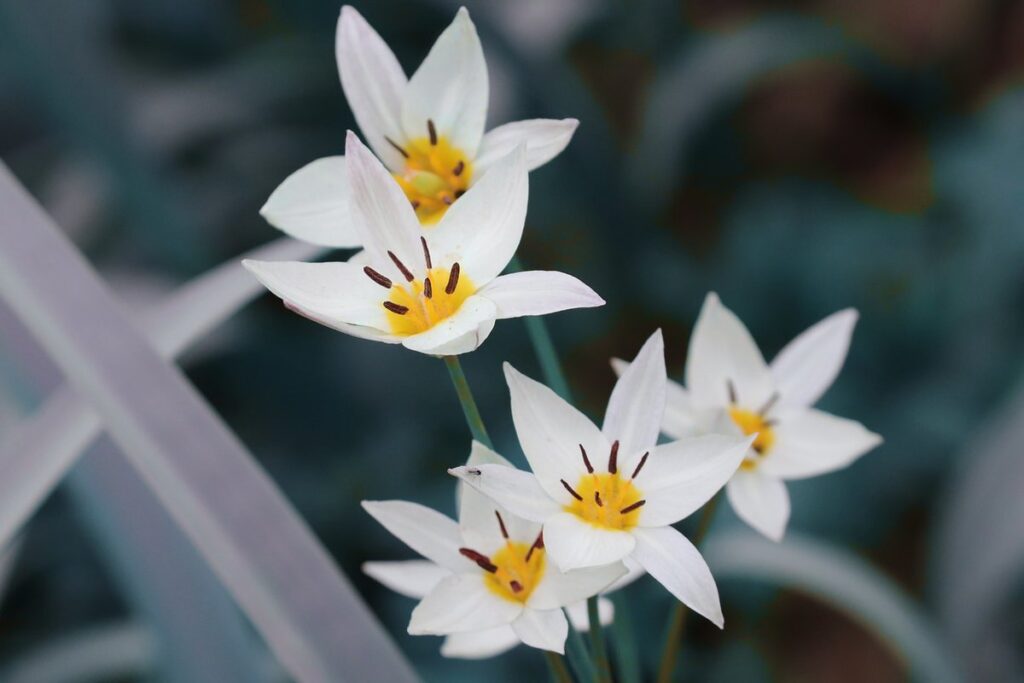
Understanding the Different Types of Tulips
When it comes to choosing the right variety of tulips, understanding their unique characteristics is crucial. There are several types of tulips, each with its own distinct features and growth habits.
Darwin Hybrids, for instance, are one of the most popular varieties. They’re known for their large, vibrant blooms that can grow up to 3 inches in diameter. These tulips thrive in well-drained soil and full sun, making them perfect for gardens with limited space. Fosteriana tulips, on the other hand, are among the largest and most exotic varieties. They have unique, cup-shaped flowers that can reach up to 6 inches in diameter and come in a range of colors.
Greigii tulips are another popular variety, prized for their unique, striped patterns and vibrant blooms. These tulips prefer well-drained soil and partial shade, making them ideal for gardens with dry or rocky areas. When selecting a type of tulip, consider factors like climate, soil type, and sunlight exposure to ensure you choose the best fit for your garden.
In addition to these varieties, there are also Lily-flowered, Viridiflora, and Kaufmanniana tulips, each with its own unique characteristics and growth habits. By understanding the needs of different types of tulips, you can create a diverse and thriving garden that showcases the beauty of these stunning flowers.
Selecting Tulip Bulbs for Your Garden
When selecting tulip bulbs for your garden, there are several factors to consider to ensure you get high-quality bulbs that will thrive and bloom beautifully. First and foremost, look for bulbs with a good size, typically around 2-3 cm in diameter. This indicates that the bulb has had enough energy stored up to produce a healthy flower stem.
Next, inspect the shape of the bulb. A well-formed bulb should be slightly rounded on top and flat on the bottom, indicating it’s ready to grow. Avoid bulbs with soft or mushy spots, as these can be signs of disease or rot.
When it comes to color, choose bulbs that are vibrant and evenly colored. Avoid bulbs with pale or faded colors, as these may not bloom as well as expected. Freshness is also crucial – look for bulbs with a few brown scales on the neck, which indicate they’re at least a year old and have been properly dried out.
When shopping for tulip bulbs, ask your supplier about the quality of their stock and how long ago they were harvested. Reputable suppliers will be happy to share information about their bulbs’ origin and freshness.
Planting Tulips: Timing and Technique
To grow beautiful tulip blooms, timing is everything – let’s dive into when to plant and how to do it correctly. A little practice makes perfect, so follow these essential steps!
Preparing the Soil for Tulip Planting
Preparing the soil for tulip planting is an often-overlooked step that can make all the difference in their growth and blooming. Before you start planting, it’s essential to test the pH levels of your soil. Tulips prefer a slightly acidic to neutral soil pH, ranging from 6.0 to 7.0. You can purchase a DIY soil testing kit or send a sample to a lab for analysis.
Once you have an idea of your soil’s pH level, it’s time to tackle the weeds. Remove any existing weeds by hand or with a tool, making sure to pull out as much of the root system as possible. This will prevent competition for water and nutrients. Adding organic matter like compost or well-rotted manure can help improve soil structure and fertility.
When selecting an area to plant your tulips, choose one that receives at least six hours of direct sunlight a day. If you’re dealing with heavy clay or sandy soils, consider adding organic matter to improve drainage and aeration.
Planting Tulip Bulbs at the Right Depth
When planting tulip bulbs, it’s essential to get the depth just right. This might seem like a simple task, but factors like climate, soil type, and bulb size can impact how deep you should plant. In general, tulip bulbs should be planted 2-3 times their height below the surface of the ground. For example, if your bulb is 2 inches tall, plant it 4-6 inches deep.
Climate plays a significant role in determining the right depth. In areas with cold winters and moist soil, you can plant tulips deeper – up to 6-8 inches. This helps protect the bulbs from extreme temperatures and potential winter heaving (when water freezes and causes the soil to shift). On the other hand, in warmer climates or areas with well-draining soil, it’s better to plant them shallower – around 3-4 inches deep.
Keep in mind that larger bulb varieties can be planted deeper than smaller ones. Make sure to space your bulbs correctly to allow for proper growth and air circulation between each stem. Aim for about 3-6 inches of space between each tulip, depending on the variety’s mature height.
Caring for Tulips: Watering, Fertilizing, and Pruning
To ensure your tulip bulbs thrive, it’s essential to learn how to properly water, fertilize, and prune them, which we’ll cover in detail below. This section will break down each of these critical care tasks for optimal growth.
Watering Tulips During Droughts and Wet Spells
When it comes to watering tulips, especially during periods of drought or excessive rainfall, maintaining a balance between moisture levels and air circulation is crucial. This delicate balance can be challenging to achieve, but with the right approach, you can ensure your tulips stay healthy and thrive.
During droughts, it’s essential to water your tulips deeply but infrequently. Avoid frequent shallow watering, which may encourage weak and shallow roots. Instead, water them thoroughly once or twice a week, depending on soil conditions. For instance, if the top 2-3 inches of soil feels dry to the touch, it’s time for another deep watering.
On the other hand, during periods of excessive rainfall, make sure your tulips have good drainage. If water is pooling around the base of the plants, consider elevating them or installing a French drain to direct excess water away from the roots. This will prevent root rot and ensure the soil doesn’t become waterlogged.
Monitor your tulip’s response to watering, adjusting your schedule as needed. By striking this balance between moisture levels and air circulation, you’ll be able to provide your tulips with the perfect conditions for growth and blooming.
Feeding Your Tulips with Nutrient-Rich Compost
When it comes to fertilizing tulips, using nutrient-rich compost is an excellent choice. Compost offers numerous benefits for these beautiful flowers, starting with promoting healthy growth. By adding a 2-3 inch layer of compost around the base of the plants, you’ll provide them with essential nutrients like nitrogen, phosphorus, and potassium.
Compost also improves soil structure, which helps tulips establish strong roots. This is especially important since tulip bulbs are sensitive to extreme moisture levels and can be susceptible to rot if the soil doesn’t drain well. Compost helps break up clay soils and adds organic matter to sandy soils, creating an optimal environment for root growth.
In addition to promoting healthy growth and improving soil structure, compost supports beneficial microorganisms in the soil. These microorganisms play a crucial role in decomposing organic matter and recycling nutrients, which are then available to your tulips as they grow. Some gardeners also swear by adding a balanced fertilizer during the growing season for an extra boost of nutrients.
To reap these benefits, simply mix 10-20% compost into the soil before planting or use it as a top dressing around established plants.
Common Issues in Tulip Care: Pests, Diseases, and More
Unfortunately, tulips can be susceptible to various problems that might affect their health and beauty. In this section, we’ll explore some common issues you may encounter when caring for your tulip bulbs.
Identifying and Managing Common Tulip Pests
As a tulip grower, it’s essential to be aware of the common pests that can affect your beautiful blooms. Among the most notorious culprits are aphids, slugs, and snails. Aphids are tiny, soft-bodied insects that feed on plant sap, causing curled or distorted leaves. To manage an aphid infestation, spray your tulips with a strong jet of water to dislodge them, followed by a mixture of neem oil and soap to prevent re-infestation.
Slugs and snails, on the other hand, are nocturnal pests that love to feast on tender tulip leaves and flowers. To deter these slimy critters, sprinkle crushed eggshells or copper tape around the plant base. You can also use beer traps – a shallow container filled with beer will attract slugs and snails, which will then drown in the liquid.
For an integrated pest management (IPM) approach, combine physical barriers, cultural controls, and organic pesticides to minimize chemical usage. Monitor your plants regularly for signs of pests and take action promptly to prevent infestations from getting out of hand. By being proactive and using a combination of these techniques, you’ll be well on your way to keeping your tulips pest-free and thriving.
Recognizing and Treating Tulip Fungal Diseases
Tulips are susceptible to various fungal diseases that can weaken their health and affect their appearance. Among the most common issues are powdery mildew and botrytis. Powdery mildew is characterized by a white, powdery coating on the leaves and stems, while botrytis appears as brown or grayish spots on the flowers.
Prevention measures are crucial in avoiding these fungal diseases. Make sure to provide your tulips with good air circulation by planting them at least 3-4 inches apart and keeping the surrounding area weed-free. Regularly inspect your plants for any signs of disease, and remove infected leaves or stems promptly.
If your tulips do contract a fungal disease, treatment options are available. For powdery mildew, use a fungicide containing sulfur or neem oil. Apply it according to the product’s instructions, usually every 7-10 days. For botrytis, consider using a fungicide with copper or chlorothalonil.
When opting for natural alternatives, try neem oil or baking soda solutions, which can be effective in preventing fungal diseases without harming beneficial insects and other organisms. In severe cases, it’s best to consult a gardening expert or your local nursery for guidance on the most suitable treatment options.
Post-Flowering Care: Deadheading and Bulb Storage
Now that your tulips have finished blooming, it’s essential to focus on their post-flowering care to ensure they thrive for years to come. Let’s cover deadheading and bulb storage in this crucial stage of their lifecycle.
Deadheading Tulip Flowers for Optimal Growth
When tulip flowers have bloomed and faded, it’s time to deadhead them. This simple process may seem insignificant, but it has a significant impact on the plant’s overall health and productivity. By removing the spent blooms, you’re encouraging the bulb to focus its energy on building up reserves for next year’s growth rather than seed production.
Deadheading tulip flowers also stimulates the plant to produce additional blooms in some varieties. This is particularly true for ‘Fosteriana’ and ‘Greigii’ types, which can often be coaxed into producing a second flowering. To take advantage of this, make sure to remove the dead flower heads as soon as they begin to wilt.
Reducing seed production is another benefit of deadheading. By removing the seeds, you’re preventing the plant from diverting energy away from the bulb and towards fruiting. This helps maintain plant vigor and ensures that the bulb remains healthy for next year’s bloom. Simply snip off the spent blooms at the base of the stem, taking care not to damage any nearby foliage or buds.
Storing Tulip Bulbs for Next Year’s Bloom
Digging up and storing tulip bulbs over winter is an essential step to ensure they thrive for next year’s bloom. Start by waiting until the foliage has yellowed and died back naturally, which can take several weeks after flowering. This allows the bulb to recharge its energy reserves.
Once the foliage is completely dry, carefully dig up the bulbs using a fork to avoid damaging them. Gently brush off any excess soil to expose the bulbs. Then, use a soft-bristled brush or a cloth to gently remove any remaining dirt and debris from the surface of each bulb.
Store the cleaned bulbs in a dry, cool place with good air circulation. A garage, shed, or unheated basement is ideal. Avoid storing them near heating vents or in areas prone to moisture buildup. Keep the bulbs separate from each other to prevent rot and disease. You can store them in paper bags, breathable mesh bags, or cardboard boxes filled with peat moss or vermiculite to maintain humidity.
Bringing Tulips Indoors: Forcing and Display
Now that you’ve enjoyed your tulip blooms, it’s time to learn how to bring them back indoors for a second show. We’ll share tips on forcing and displaying indoor tulips.
Forcing Tulip Bulbs for Indoor Blooms
Forcing tulip bulbs indoors requires careful attention to detail and a little bit of patience. To start, choose healthy tulip bulbs with firm, unblemished skin. Next, pot them up in a well-draining mix specifically designed for indoor forcing. A mixture of peat moss, perlite, and vermiculite will provide the right balance of moisture retention and air circulation.
Place the potted bulbs in a cool location (around 40-50°F) for 12-14 weeks to simulate winter dormancy. This period is crucial for root development and ensures that the bulbs produce a strong stem and healthy blooms. Once this phase is complete, move the pots to a bright, sunny spot with temperatures between 60-70°F.
Monitor watering carefully, as tulip bulbs require consistent moisture but can be susceptible to overwatering. Aim to keep the soil slightly moist during the growing phase, but avoid getting water on the leaves or crown of the bulb to prevent rot and disease. With proper care and attention, you should be rewarded with beautiful blooms in just a few weeks!
Arranging Cut Tulips for Stunning Displays
To create stunning displays with cut tulips, you’ll want to start by selecting the freshest blooms possible. Look for flowers that are firm to the touch and have no signs of wilting or drooping. Choose a mix of different varieties and colors to add visual interest to your arrangement.
When it comes to arranging your tulips, consider using a clear glass vase to showcase their beauty. Fill the vase about two-thirds full with water, and add a floral preservative (if included) to help extend the life of the flowers. Arrange the stems in a way that creates movement and balance – try grouping similar colors together or alternating between different varieties.
To prolong the vase life of your tulips, keep them away from direct sunlight and heat sources. Trim the stems every few days to promote water uptake, and change the water completely every 2-3 days. By following these simple care instructions, you can enjoy your stunning display of cut tulips for up to a week or more.
Frequently Asked Questions
Can I plant tulip bulbs at any time of the year?
No, it’s essential to plant tulip bulbs during the fall season, typically from September to November, depending on your location and climate. This allows the bulbs to establish themselves before winter and ensures a healthy bloom in the spring.
How do I prevent common pests like aphids and slugs from damaging my tulips?
To minimize pest damage, ensure you plant tulip bulbs at a depth of 3-4 times their height, and space them about 3-6 inches apart. You can also use physical barriers or organic pest control methods to deter these pests.
How long does it take for tulip bulbs to bloom after planting?
The time from planting to blooming varies depending on factors like weather conditions, soil quality, and the specific tulip variety. Generally, you can expect to see blooms within 6-12 weeks of planting.
Can I force tulip bulbs indoors during the winter months?
Yes, with proper care and attention, you can coax indoor blooms by forcing tulip bulbs in a cool, dark place until late winter or early spring when they’re ready to be moved into brighter light. This process is ideal for growing tulips in areas where the outdoor growing season is short.
How should I store my tulip bulbs after they’ve finished blooming?
After the blooming period, allow the foliage to die back naturally before digging up and storing the bulb in a cool, dry place with good air circulation. This will help prevent fungal diseases and ensure healthy growth for next year’s bloom.