Growing your own garden can be a delightful way to connect with nature, but did you know that some plants are more beneficial than others when it comes to attracting pollinators? Chives, in particular, make an excellent addition to any garden, not only for their flavorful uses in cooking but also for their ability to attract bees and butterflies. By incorporating chives into your garden, you’ll be supporting the local pollinator population while also enjoying a fresh supply of this versatile herb. In this article, we’ll show you how to grow chives that will bring in these beneficial insects and provide you with tips on creating a pollinator-friendly garden. We’ll cover everything from planting and caring for your chive plants to the benefits of having a garden that’s teeming with life and color.
Benefits of Planting Chives for Pollinators
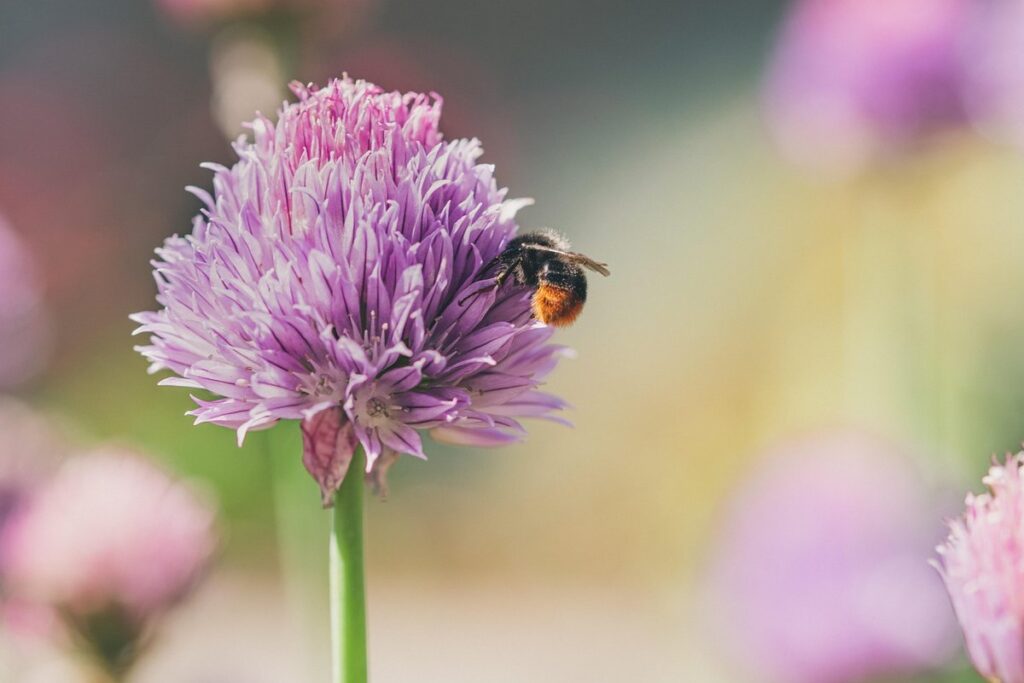
As a bee and butterfly gardener, you’re probably eager to learn how chives can benefit these crucial pollinators in your yard. Here’s what makes chives an excellent choice for supporting local pollinator populations.
Attracting Essential Pollinators
Pollinators like bees and butterflies play a vital role in maintaining ecosystem health. These tiny creatures are responsible for transferring pollen between plants, allowing them to reproduce and set seed. Without pollinators, many plant species would be unable to reproduce, leading to reduced crop yields and biodiversity loss.
In fact, it’s estimated that one-third of all crops worldwide rely on bees as their primary pollinator. This includes staples like apples, blueberries, and avocados, which are often taken for granted in our daily lives. Without the hard work of these tiny creatures, many of our favorite fruits and vegetables would simply cease to exist.
By planting chives and other pollinator-friendly plants, you can play a vital role in supporting local ecosystems. These flowers attract pollinators with their nectar-rich blooms, providing them with the energy they need to collect pollen and transfer it between plants. By creating a haven for these essential pollinators, you’ll not only be helping to maintain ecosystem health but also attracting a vibrant array of wildlife to your garden.
To maximize the impact of your chive plantings, consider incorporating a variety of nectar-rich flowers into your garden design. This will provide a constant source of food and shelter for pollinators throughout the growing season.
Types of Chives Suitable for Pollinator Gardens
When it comes to creating a pollinator-friendly garden, chives are an excellent choice. Not only do they provide a delicious addition to many dishes, but they also offer a valuable source of nectar and pollen for bees, butterflies, and other beneficial insects.
There are several types of chives that are particularly attractive to pollinators. Garlic chives (Allium tuberosum) are a favorite among bees, who love the sweet, onion-like flavor of their flowers. Onion chives (Allium schoenoprasum), on the other hand, tend to attract more butterflies and hoverflies.
For a truly diverse pollinator garden, consider planting a mix of these two varieties. Not only will this provide a constant source of nectar and pollen throughout the growing season, but it will also attract a wide range of beneficial insects.
Some popular cultivars to look for include ‘Forescate’, which has large, showy flowers that are particularly attractive to bees, and ‘Prolific’, which produces an abundance of small flowers that are perfect for smaller pollinators.
Choosing the Perfect Location for Your Chive Plantation
When it comes to creating a thriving chive plantation, choosing the right location is crucial for attracting pollinators and ensuring your plants’ overall health. Let’s dive into the key factors to consider when selecting a site for your chive garden.
Sunlight Requirements for Optimal Growth
When it comes to growing chives for pollinators, sunlight plays a crucial role in their optimal growth. Chives are sun-loving plants that thrive in full sun conditions, typically requiring at least 6 hours of direct sunlight per day. However, this can vary depending on the climate and region you’re in.
In areas with intense sunlight, such as near the equator or during peak summer months, it’s essential to provide some shade for your chives, especially during the hottest part of the day (usually between 11am-3pm). This will help prevent scorching and ensure even growth. On the other hand, if you’re growing in a region with limited sunlight, choose a spot that receives partial sun to full sun.
To gauge whether your chive plantation is receiving sufficient sunlight, look for these signs: a lush green foliage, compact growth habit, and an overall healthy appearance. By providing the right amount of direct sunlight, you’ll be rewarded with a bountiful harvest of fragrant chives that will attract pollinators to your garden all season long!
Soil Considerations for Healthy Chives
When selecting the perfect location for your chive plantation, it’s essential to consider the soil factors that will support healthy growth and attract pollinators. Chives require well-draining soil with a slightly acidic pH between 6.0 and 7.0. If your soil is too alkaline or has poor drainage, it can lead to root rot and reduced plant vitality.
To ensure optimal nutrient levels for chive growth, test your soil and amend it if necessary. Chives are heavy feeders and require a balanced diet of nitrogen, phosphorus, and potassium. A general-purpose fertilizer applied in the spring and again after harvesting will provide the necessary nutrients for robust growth.
Consider incorporating organic matter like compost or well-rotted manure to improve soil structure and fertility. This will not only promote healthy chive growth but also support the rich biodiversity of your pollinator-friendly garden. By giving your chives the right soil conditions, you’ll be creating a haven for bees, butterflies, and other beneficial insects that are essential for their survival and reproduction.
Planting and Caring for Chives
To get started with growing chives that pollinators love, let’s dive into the essential steps of planting and caring for these fragrant herbs. We’ll cover everything from preparation to maintenance.
Preparing the Soil for New Chive Plants
When preparing the soil for new chive plants, it’s essential to create an environment that will support their growth and encourage them to thrive. Start by loosening the top 6-8 inches of soil using a fork or spade, being careful not to damage any existing roots. Chives prefer well-draining soil with a pH between 6.0 and 7.0, so if your soil is heavy clay or sandy, mix in some organic matter like compost or well-rotted manure to improve its structure.
As chives are members of the Allium family, they have similar needs to garlic and onions. To ensure optimal conditions for new chive plants, test the soil’s pH level using a DIY kit or send a sample to a lab for analysis. Based on the results, add lime to raise the pH or sulfur to lower it. Chives also benefit from regular applications of balanced fertilizer during their growing season.
When preparing the bed, consider incorporating beneficial microorganisms like mycorrhizal fungi, which will help chive roots absorb nutrients and water more efficiently. This can be done by mixing in a commercial inoculant or using a mushroom compost that contains these microorganisms. By taking the time to prepare the soil correctly, you’ll set your new chive plants up for success and encourage them to produce plenty of edible flowers and leaves.
Watering and Maintenance Tips
Proper watering is essential for chives to thrive and support pollinators. Water them deeply once or twice a week, depending on the weather conditions. Make sure the soil isn’t waterlogged, as this can lead to root rot. Check the moisture level by inserting your finger into the soil up to the first knuckle.
When pruning your chives, cut off about one-third of the plant’s height using scissors or pinch off individual stems with your fingers. This encourages new growth and prevents the plant from flowering too quickly. Regular pruning also helps control weeds and promotes air circulation around the plants.
Maintain a balanced fertilizer routine by feeding your chives once a month during the growing season with a low-nitrogen, high-potassium fertilizer. This supports healthy root development and bolsters the plant’s natural defense against pests and diseases.
In addition to regular care, consider companion planting for maximum pollinator benefits. Chives pair well with flowers like lavender, rosemary, or thyme, which attract bees and butterflies. Plant these herbs alongside your chives to create a welcoming environment for pollinators.
Promoting a Pollinator-Friendly Environment
To create a haven for pollinators, it’s essential to not only grow chives but also consider other plants that will attract bees and butterflies to your garden. We’ll explore some simple tips for promoting biodiversity in this section.
Companion Planting Strategies
When it comes to creating a pollinator-friendly environment with chives, companion planting is an essential strategy to consider. By pairing your chives with other flowers and herbs, you can attract a diverse range of beneficial insects that will enhance the health and productivity of both your chive plants and the ecosystem as a whole.
One of the simplest yet most effective ways to implement companion planting is by growing chives alongside flowers that are rich in nectar and pollen. For example, pairing chives with lavender or coneflower can create a haven for bees and butterflies. These flowers not only provide a valuable source of food but also serve as natural attractors for beneficial insects.
Some other beneficial companions to consider include herbs like mint, oregano, and thyme, which repel pests that might otherwise damage your chives. You can also try pairing chives with marigold or calendula, both of which have been shown to improve soil health and reduce the need for pesticides.
Habitat Creation for Beneficial Insects
When it comes to creating a pollinator-friendly environment, providing habitats for beneficial insects is just as crucial as planting bee-friendly flowers. These tiny creatures play a vital role in our ecosystem, and by offering them shelter and sustenance, we can attract more visitors to our garden.
One of the simplest ways to create habitat for beneficial insects is to build or purchase bee hotels. These structures provide solitary bees with a place to nest and lay their eggs, as many species don’t use existing cavities in plants like honeybees do. You can buy pre-made bee hotels or get creative and build your own using bamboo tubes or hollow reeds.
Another option is to create a bug hotel using natural materials like sticks, leaves, and twigs. This structure provides shelter for beneficial insects like ladybugs, lacewings, and parasitic wasps. Place it in a sunny spot, and watch as these helpful insects move in. Consider adding a shallow dish or birdbath with fresh water and a few rocks for perching – a nearby source of hydration will make your garden even more attractive to pollinators.
By incorporating bee hotels and bug hotels into our garden design, we can attract a wider variety of beneficial insects, which in turn will help control pests naturally.
Chive Varieties and Their Impact on Pollinator Diversity
Let’s take a closer look at different chive varieties, as some have more significant effects on pollinator diversity than others do. From Allium to Garlic Chives, each type has its unique characteristics.
Garlic Chives: A Pollinator Magnet
Garlic chives are an exemplary choice for gardeners seeking to attract pollinators. Their unique characteristics make them a magnet for bees, butterflies, and other beneficial insects.
One key reason garlic chives stand out is their long, thin stems that produce multiple buds, which in turn bloom into small, bell-shaped flowers throughout the growing season. These blooms are rich in nectar, providing a vital source of energy for pollinators as they flit from flower to flower.
Moreover, garlic chives tend to bloom relatively late in the summer compared to other chive varieties. This extended blooming period not only supports pollinators during their peak activity but also provides a welcome respite from the more intense competition for nectar and pollen found in earlier-blooming flowers.
Incorporating garlic chives into your garden can have a significant impact on pollinator diversity, particularly when paired with native wildflowers or other herbs that provide similar benefits.
Onion Chives and Their Role in Supporting Bees
When it comes to supporting local bee populations, onion chives are an often-overlooked yet valuable addition to any pollinator-friendly garden. These hardy, perennial herbs have a unique role to play in providing a reliable source of nectar and pollen for bees.
One of the key benefits of growing onion chives is their ability to bloom in late spring, a time when many other flowers are fading. This ensures that bees have a steady supply of food throughout the summer months. In fact, studies have shown that plants with overlapping bloom periods can increase pollinator diversity by up to 30%. By incorporating onion chives into your garden, you’re providing a welcome boost to local bee populations.
To maximize the benefits of onion chives for pollinators, be sure to choose varieties that are rich in nectar and pollen. ‘Fritz Haeg’ and ‘Pallidum’ are two popular options that are particularly attractive to bees. Plant them alongside other pollinator-friendly plants, such as lavender and coneflower, to create a vibrant and diverse garden ecosystem.
Common Challenges and Solutions for Growing Chives
Growing chives can be a wonderful way to support pollinators, but you may encounter some common challenges along the way. Let’s tackle these issues together and find solutions to keep your chive garden thriving.
Identifying Pests and Diseases Affecting Chives
When it comes to growing chives for pollinators, identifying pests and diseases is crucial to ensure the health and productivity of your plants. Common pests that can affect chives include aphids, whiteflies, and spider mites. These tiny insects feed on the sap of the plant, weakening its defenses and leaving it vulnerable to disease.
Diseases such as powdery mildew and root rot are also common issues affecting chives. Powdery mildew appears as a white, powdery coating on the leaves, while root rot causes the roots to decay, leading to the collapse of the plant.
To identify pests and diseases early on, inspect your plants regularly for signs of infestation or infection. Check for sticky honeydew droplets, which can indicate aphid activity, and look for distorted or curled leaves, which may be a sign of viral infections. If you notice any issues, treat the affected areas promptly with neem oil or insecticidal soap to prevent further damage.
Keep in mind that prevention is key – maintain good air circulation around your plants, water carefully to avoid overwatering, and keep the soil consistently moist but not waterlogged.
Adapting to Climate Change and Extreme Weather Conditions
As you grow chives for pollinators, it’s essential to adapt your plantation to changing climate conditions. Rising temperatures and extreme weather events can impact not only the health of your plants but also the well-being of the pollinators that rely on them. Here are some strategies to help you adjust to these challenges:
Consider planting drought-tolerant chive varieties that require less water, such as ‘Red Chiffon’ or ‘White Linen’. These strains can survive with minimal watering and will still provide a rich source of nectar for pollinators. Also, think about incorporating perennials like lavender or bee balm into your garden, which are more resilient to temperature fluctuations.
In areas prone to heavy rainfall, install a French drain system to direct excess water away from your chives. This can help prevent root rot and other moisture-related issues that may harm the plants and attract pests.
Frequently Asked Questions
What are some common mistakes to avoid when planting chives for pollinators?
When introducing chives to your garden, be mindful of overwatering, which can lead to root rot. Also, ensure you’re planting the right variety for your climate and providing sufficient sunlight (at least 4-6 hours of direct sunlight). Lastly, be aware that chives are sensitive to frost; wait until the last frost date has passed before transplanting them outdoors.
Can I grow chives indoors if I don’t have an outdoor garden?
Yes, you can successfully grow chives indoors in containers. Choose a well-draining potting mix and provide sufficient light (at least 4-6 hours of direct sunlight or using grow lights). Water carefully, as indoor conditions can lead to overwatering. Keep your indoor chive plants away from drafts and maintain a temperature between 60°F to 70°F (15°C to 21°C).
How do I ensure that my pollinator-friendly garden remains diverse and thriving?
To promote diversity in your garden, incorporate a mix of annuals and perennials, including native flowers and herbs. Aim for a minimum of three different types of plants that bloom at various times to provide a constant source of nectar and pollen throughout the growing season. Also, avoid using pesticides, which can harm beneficial insects.
What if I notice pests or diseases affecting my chives – what are some natural remedies?
For common pests like aphids or spider mites, introduce beneficial insects such as ladybugs or lacewings to your garden. For fungal diseases like powdery mildew, try spraying a mixture of 1 tablespoon of baking soda and 1 gallon of water on the affected plants. Always identify the issue accurately before applying any remedy.
Can I propagate chives from seed or do they need to be purchased as established plants?
Chives can be successfully propagated from seed indoors 4-6 weeks before the last frost date. Sow seeds about ¼ inch deep and 1 inch apart in a well-draining seed starting mix. Keep the soil consistently moist but not waterlogged until germination occurs. Once seedlings have two sets of leaves, transplant them into individual pots or directly into your garden.