Are you looking for a sustainable way to protect your garden from pests and diseases? You’re in luck because we’re about to dive into one of nature’s most incredible gifts: beeswax. This natural wonder is not only a game-changer for gardeners but also a treasure trove of benefits waiting to be unleashed. From repelling pests with its waxy coating to sealing in moisture and nutrients, beeswax is the ultimate multi-tasker for your garden.
In this article, we’ll show you how to harvest, process, and apply beeswax like a pro. You’ll learn about the best practices for working with beeswax, from harvesting it sustainably to infusing it with natural oils for maximum effectiveness. Whether you’re a seasoned gardener or just starting out, our step-by-step guide will walk you through the entire process of harnessing the power of beeswax in your garden.
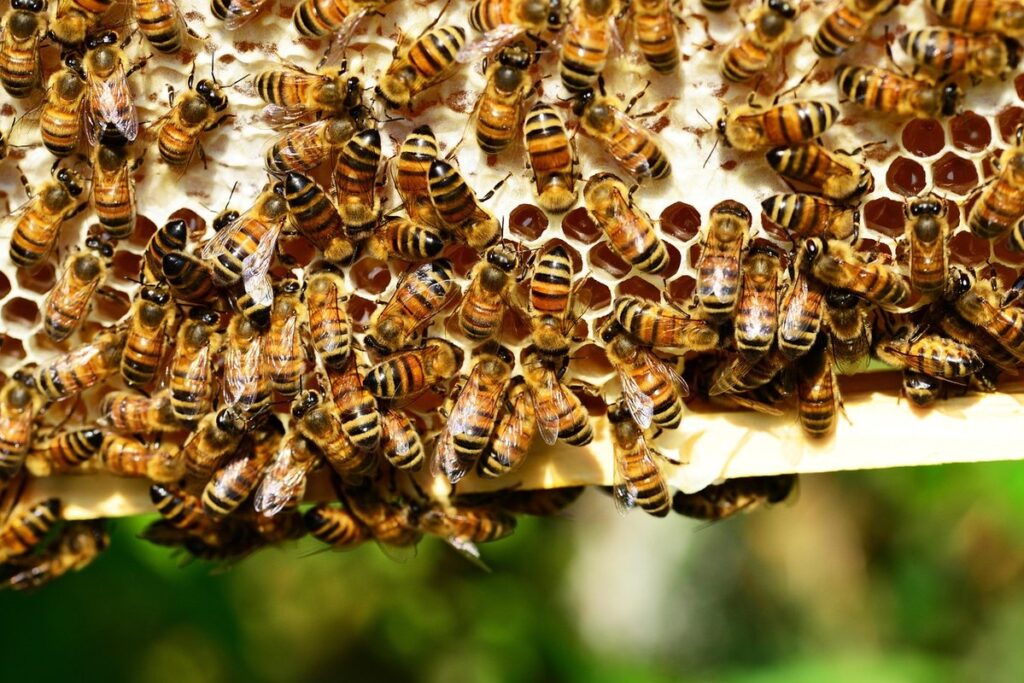
Harvesting and Collecting Beeswax
Now that you’ve extracted your beeswax, it’s time to collect it from the frames and harvest the wax for use in your garden. This section explains how to do this safely and efficiently.
Sources of Beeswax
When it comes to harvesting and collecting beeswax for garden use, one of the first steps is sourcing high-quality beeswax. You have several options available, depending on your location and preferences.
Local beekeepers are an excellent place to start. They often sell beeswax at a lower cost than commercial suppliers and may offer it in larger quantities. You can find local beekeepers through online directories or by attending beekeeping events in your area. When purchasing from a local beekeeper, make sure to ask about the origin of the wax, as this will help you ensure that it’s from sustainable sources.
You can also find beeswax online through suppliers like Amazon or specialty stores. However, be aware that prices may be higher than what you’d pay locally, and shipping costs should be factored into your overall expense.
When sourcing beeswax, consider the importance of sustainable and responsible practices. Look for suppliers who use environmentally friendly methods to harvest their wax, and opt for products with minimal packaging or waste. This not only helps reduce your environmental impact but also supports fair trade practices.
Understanding Beeswax Types
When it comes to harvesting and processing beeswax for garden use, understanding the different types of wax is crucial. There are three primary types of beeswax: yellow, white, and blended.
Yellow beeswax is the most common type and has a high melting point, making it ideal for candle-making and crafting. However, its color can sometimes be too dark for certain gardening applications. White beeswax, on the other hand, is typically used in cosmetics and skincare products due to its mild scent and color. This type of wax may not be suitable for garden use, but its properties make it an excellent addition to natural pest control methods.
Blended beeswax combines the benefits of both yellow and white wax, offering a lighter color and a more stable consistency. When processing beeswax for garden use, understanding these different types is essential. Knowing which type of wax you have can help you determine its best application in gardening. For example, using yellow or blended wax as a sealant for wooden planters can protect against moisture damage, while white wax may be used to repel pests and diseases.
When selecting beeswax for garden use, consider the specific needs of your plants and the desired outcome. Experiment with different types of wax to find what works best for you.
Preparing Beeswax for Processing
Before we can melt and mold the beeswax, you’ll need to clean it thoroughly to remove any dirt, debris, or impurities that may have accumulated during harvest. This process is crucial for achieving smooth, even results.
Cleaning and Sorting Beeswax
Before you can process beeswax for garden use, it’s essential to clean and sort it properly. This may seem like a tedious step, but trust me, it’s crucial to ensure the quality of your final product. Contaminants like debris, propolis, and other impurities can affect not only the texture and appearance of the wax but also its performance in your garden.
To remove debris, start by gently crushing or breaking up any large chunks into smaller pieces. Then, sift through the wax using a fine-mesh sieve or cheesecloth to catch any loose particles. If there are still stubborn bits of debris, try melting the wax and straining it through a coffee filter or a piece of clean cotton cloth.
Propolis, on the other hand, can be more challenging to remove. Try dissolving the propolis in hot water or a solvent like ethanol before washing the wax with soap and cold water. Repeat this process until the propolis is gone. It may take some patience, but it’s worth it to end up with clean, pure beeswax for your garden needs.
Remember, proper cleaning and sorting will pay off in the long run when you’re using high-quality beeswax in your gardening projects.
Melting and Moulding Beeswax
Melting beeswax is a crucial step in processing it for garden use. You’ll need to heat the wax until it reaches its melting point, which varies depending on its quality and purity. Generally, high-quality beeswax melts between 180°F to 190°F (82°C to 88°C). To melt the wax, you can use a double boiler or a dedicated wax melter. Be cautious not to overheat the wax, as this can cause it to degrade and become discolored.
Once melted, you’ll need to pour it into a mould to create the desired shape. There are various moulding techniques to explore, depending on your goals. For instance, you can use silicone or plastic moulds for intricate designs or pour the wax directly onto a surface, such as a planter or a bird bath, for a more rustic look.
Some common moulding techniques include:
* Creating beeswax ornaments by pouring hot wax into a metal dolly or a decorative mould
* Making candles by dipping wicks into the melted wax
* Pouring wax directly onto a surface to create a thin layer of protection and waterproofing
Melting and Purifying Beeswax
To get clean, usable beeswax for your garden projects, you’ll need to learn how to melt it down and purify it from any debris. This process is surprisingly easy once you know the basics!
Choosing a Melting Method
When it comes to melting beeswax for garden use, you have several methods at your disposal. One popular approach is using a double boiler setup. This involves placing the wax in a heat-proof bowl set over a pot of simmering water. The gentle heat from the water melts the wax without the risk of overheating or burning.
Another option is to utilize a dedicated wax melter, which can be specifically designed for this task. These devices often come with temperature controls and other safety features that make the process easier and more efficient.
If you’re in a hurry, you might consider using your microwave to melt small quantities of beeswax. However, exercise caution when doing so: overheating can easily occur, resulting in spoiled or even ignited wax. To avoid this risk, heat short intervals (about 10-15 seconds) and check the wax’s consistency between each heating period.
Regardless of the method you choose, always prioritize safety by keeping a watchful eye on the melting process and maintaining a safe distance from any flames or open elements.
Removing Impurities and Colorants
When it comes to using beeswax for garden purposes, purifying the wax is essential. Impurities and colorants can affect the performance of the beeswax, causing it to degrade faster or become discolored over time. To ensure that your beeswax serves its intended purpose, you’ll need to remove these unwanted elements.
One method for filtering impurities from beeswax is through a process called “melt and filter.” This involves melting the beeswax in a double boiler or a heat-proof container set over a pot of simmering water. Once the wax reaches a consistent temperature, it’s then strained through a cheesecloth or a fine-mesh sieve to remove any sediment or debris.
Bleaching or decolorizing beeswax can be done using various methods, including hydrogen peroxide or zinc oxide. However, these chemicals should be used with caution and in small quantities, as excessive use can damage the wax or leave behind unwanted residues. Another option is to use natural bleaching agents like activated charcoal or kaolin clay to absorb impurities without affecting the color.
Ultimately, the goal of purifying beeswax is to achieve a clean, stable product that will serve your garden needs effectively. By taking the time to remove impurities and colorants, you can enjoy optimal results from your beeswax applications.
Working with Beeswax in Garden Applications
When it comes to using beeswax in your garden, melting and working with it can be a bit tricky, but don’t worry, we’ve got you covered. In this section, we’ll walk you through some essential tips and techniques.
Using Beeswax as a Natural Pesticide
When used as a natural pesticide, beeswax has proven to be an effective and eco-friendly alternative to synthetic chemicals. Its unique properties make it an excellent repellent for various pests, including aphids, whiteflies, and spider mites. Beeswax contains waxes and fatty acids that create a physical barrier on plant surfaces, making it difficult for pests to feed or reproduce.
To apply beeswax as a natural pesticide, you can mix it with water and spray it directly onto affected plants. A 1:10 ratio of beeswax to water is a good starting point, but feel free to adjust the concentration based on your plant’s specific needs. For example, if you’re battling aphids, apply a stronger solution (2:10) for better results.
One potential drawback of using beeswax as a pest control method is its relatively short duration of effectiveness – typically 1-3 days before reapplication is necessary. Additionally, beeswax can be affected by extreme temperatures or high humidity levels, which may impact its performance. However, these limitations can be mitigated by combining beeswax with other natural pesticides or applying it in conjunction with integrated pest management strategies.
Creating Beeswax-Based Compost Tea
Creating beeswax-based compost tea is a fantastic way to utilize this natural wax for garden applications. To make it, you’ll need a few simple ingredients and some basic equipment. Begin by dissolving 1-2 tablespoons of finely ground beeswax into a quart of boiling water. Stir until the wax is fully incorporated, then remove from heat.
Next, add 1 cup of compost or worm casting to the mixture and stir well. The heat from the wax will help break down the compost, releasing its beneficial microbes and nutrients. Allow the mixture to steep for 24-48 hours, giving it a good stir every 6-8 hours. This will allow the beneficial microbes to multiply and colonize your garden soil.
After the steeping process, strain the liquid into a separate container using cheesecloth or a coffee filter. Discard the solids and reserve the liquid compost tea for use in your garden. You can apply it directly to the roots of plants, or use it as a foliar spray. Beeswax-based compost tea is an excellent way to improve soil structure, reduce pests and diseases, and promote healthy microbial activity in your garden.
Using Beeswax in Garden Crafts and DIY Projects
You’re likely eager to get creative with your beeswax, and we’ll show you how to use it in unique garden crafts and DIY projects that will add a touch of natural beauty to your outdoor space.
Beeswax Polish for Tools and Surfaces
Creating a beeswax polish is an excellent way to protect your garden tools and equipment from rust and wear. To make a beeswax polish, you’ll need high-quality beeswax pellets, a heat source (such as a double boiler or a dedicated wax melter), and a clean, dry workspace.
Start by melting the beeswax in the heat source until it reaches 180-190°F (82-88°C). Stir occasionally to ensure even heating. While the wax is melting, prepare your tools by wiping them down with a cloth to remove any dirt or debris. This will help the polish adhere evenly.
Next, add a small amount of oil (such as coconut or olive) to the melted beeswax and stir well. The oil will help thin out the wax and make it easier to apply. Pour the mixture into a clean container and let it cool until it reaches a thick, pourable consistency.
Apply the polish to your tools using a clean cloth, paying particular attention to areas prone to rust or wear. Allow the polish to cool and harden before handling the tools. This beeswax polish will provide long-lasting protection against corrosion and wear, keeping your garden equipment in top condition all season long.
Making Beeswax Seed Starters and Plant Labels
To make beeswax seed starters and plant labels, you’ll need some basic materials and skills. First, melt a small amount of beeswax in a double boiler or a dedicated candle warmer to create a workable consistency. Next, use a mold or a shape of your choice to form the beeswax into desired shapes for the seed starters or labels.
For seed starters, you can add a layer of coconut coir or a similar material to give them a gentle water-holding capacity. Plant the seeds in the prepared mold, leaving enough space for growth, and let the mixture cool and harden before placing it in your garden or indoor potting area.
You can also make plant labels by pouring melted beeswax into a small container with the name of the plant written on a piece of paper or using a permanent marker directly onto the surface. The wax will set over time, providing an attractive and durable label that withstands outdoor conditions.
Keep in mind that you can always add colorants like natural dyes to create visually appealing labels, but avoid mixing too many materials at once, as this might compromise the structural integrity of your creations. By following these steps, you’ll have functional beeswax seed starters and plant labels ready for use in no time.
Safety Precautions and Best Practices When Working with Beeswax
When working with beeswax, it’s essential to take necessary precautions to avoid accidents and ensure a safe environment. This section covers vital safety guidelines for handling and processing beeswax in your garden.
Handling Hot Wax and Equipment
When working with hot wax and equipment during beeswax processing, it’s essential to prioritize your safety. One of the primary hazards is burns from scalding hot surfaces and equipment. To minimize this risk, always wear heat-resistant gloves when handling hot tools or equipment.
Another potential hazard is splashing hot wax, which can cause severe burns or even set fire to nearby materials. When working with hot wax, keep a safe distance between yourself and the processing area, and ensure you have a fire extinguisher nearby. Always use a thermometer to monitor temperature levels, especially when melting large quantities of wax.
Regularly inspect your equipment for signs of wear and tear, such as loose connections or frayed cords. Keep flammable materials away from the processing area, and never leave hot equipment unattended. It’s also crucial to maintain good ventilation in the work area to prevent inhalation of fumes from melting wax. By following these guidelines, you can significantly reduce your risk of injury while working with hot wax and equipment.
Storing and Disposing of Beeswax
When it’s time to store and dispose of beeswax, proper handling is crucial to prevent damage, contamination, and even safety hazards. Always clean and dry the wax thoroughly before storing it in airtight containers. Keep these containers away from direct sunlight and heat sources, as this can cause the wax to melt or become brittle.
For long-term storage, consider labeling each container with its contents, date of harvest, and any relevant notes. This will help you keep track of your different wax batches and ensure you use the oldest stock first. If you’ve processed a large quantity of beeswax, consider dividing it into smaller portions and storing them in separate containers to prevent contamination.
When disposing of excess or unusable beeswax, be mindful of its environmental impact. Avoid pouring it down drains or storm sewers, as this can harm aquatic ecosystems. Instead, melt the wax and mix it with other natural materials like compost or mulch, which can then be safely disposed of through your regular yard waste collection.
Frequently Asked Questions
Can I reuse beeswax from previous garden projects?
Yes, you can definitely reuse beeswax for future gardening endeavors. In fact, using recycled beeswax is a great way to reduce waste and conserve resources. Simply clean the reused beeswax thoroughly before infusing it with new natural oils or blending it into other ingredients.
How do I know if my beeswax has gone rancid?
Rancidity can occur when beeswax is exposed to heat, moisture, or light for extended periods. Check your beeswax regularly by performing a simple smell and texture test: if the wax smells unpleasantly strong or feels brittle and discolored, it’s likely spoiled.
Can I use beeswax as a natural sealant for indoor plants?
While beeswax is primarily used in outdoor gardening applications, you can indeed use it to create a protective barrier against pests and diseases for your indoor plants. However, make sure to test the wax on a small area first to ensure compatibility with your plant’s specific needs.
Is it possible to infuse beeswax with essential oils from plants that are toxic to humans?
While beeswax can be infused with a wide range of natural oils, using essential oils derived from toxic plants is not recommended. This could potentially create hazardous situations for gardeners and others handling the treated wax. Stick to plant-based oils that are safe for human use.
What’s the best way to store melted beeswax between uses?
To maintain your beeswax’s quality and prevent contamination, it’s essential to store the melted wax in an airtight container made of food-grade materials (like glass or stainless steel) when not in use. Keep the container away from direct sunlight, moisture, and heat sources to preserve the wax’s natural properties.