As a gardener, you’re likely no stranger to the importance of bees in our ecosystem. Without these tiny pollinators, many of your favorite flowers and fruits wouldn’t be able to thrive. But have you ever stopped to think about the incredible life cycle of honey bees? From egg to adult, their journey is a fascinating process that’s essential for maintaining healthy bee populations. In this article, we’ll take a closer look at the life cycle of honey bees, from the moment they hatch from their eggs to the day they emerge as fully formed adults. We’ll also explore how you can create a bee-friendly garden that supports their growth and health, ensuring these vital pollinators continue to thrive in your yard. By understanding the life cycle of honey bees and taking steps to support them, you can play a crucial role in preserving our environment’s delicate balance.
Egg Stage: Understanding the Beginning
As a beekeeper, understanding how your colony begins is crucial for maintaining a healthy hive. In this next part of our bee life cycle series, we’ll explore the egg stage that sets everything in motion.
Types of Eggs Laid by Queens
When a honey bee queen lays eggs, she doesn’t just drop them into the hive like they’re going out of style. She carefully selects the ideal location within the brood nest to ensure the best chance for their survival and success. The type of egg laid is crucial in determining the future role of the emerging worker bee or drone.
There are two main types of eggs: fertilized and unfertilized. Fertilized eggs develop into female workers, while unfertilized ones become drones. A queen will typically lay around 1,500 to 2,000 eggs per day during peak season. It’s worth noting that the queen’s role is not just limited to laying eggs; she also has control over the colony’s growth and population through pheromones.
Interestingly, a single fertilized egg can result in either a worker or a drone depending on environmental factors, such as food availability and temperature. The sex of the emerging bee isn’t determined by the queen’s genetics but rather by external conditions.
As a gardener interested in supporting your local honey bees, understanding the types of eggs laid is essential for recognizing and addressing potential issues within the colony.
Factors Affecting Egg Survival
Egg survival rates can be influenced by several environmental factors that gardeners should be aware of. Temperature plays a crucial role, as eggs are sensitive to extreme temperatures. If the temperature is too high (above 90°F) or too low (below 50°F), it can cause the eggs to dry out or become dormant, leading to lower survival rates.
Humidity also affects egg viability. Bees typically prefer humidity levels between 60-80%. When the air is too dry, eggs can desiccate and die. Conversely, high humidity can lead to fungal growth on the eggs, further reducing chances of successful hatching.
Disease presence is another critical factor affecting egg survival. Varroa mite infestations can weaken the bees’ immune system, making them more susceptible to diseases that target the queen or eggs directly. Fungal and bacterial infections can also impact egg viability.
Gardeners who want to support healthy bee populations should maintain a balanced environment by controlling pests, providing adequate forage, and ensuring proper hive maintenance. Regular monitoring of temperature, humidity, and disease presence will help identify potential issues before they affect the queen’s egg-laying capacity or overall colony health.
Tips for Encouraging Healthy Egg Production
As you observe the busy activity within your beehive, it’s essential to ensure that the queen bee is laying eggs at a healthy rate. A thriving colony relies on this delicate balance. To encourage healthy egg production, start by providing an optimal environment.
A well-maintained hive with adequate ventilation and a stable temperature between 90°F to 100°F (32°C to 38°C) will keep your queen happy and productive. Ensure that the hive is not overcrowded, as this can lead to stress on the colony. A general rule of thumb is to maintain about two to three inches of space per frame.
Regular feeding with high-quality bee nutrition can also have a significant impact on egg production. Aim for a sugar-to-protein ratio of 1:1 or slightly higher. This balanced diet will fuel the queen’s reproductive cycles and ensure healthy development of brood. Consider supplementing with pollen substitutes during periods of low natural pollen availability.
By providing these essential conditions, you’ll be well on your way to supporting a thriving colony and healthy egg production. Remember to inspect your hive regularly for signs of disease or pests that could impact the queen’s performance.
Larval Stage: Feeding and Development
As a honey bee larva grows, it requires a steady supply of royal jelly and pollen to fuel its development into a healthy pupa, and eventually an adult bee. This section explores how feeding and growth shape the larval stage.
Understanding Honey Bee Larvae
As you observe the life cycle of honey bees, it’s essential to understand the characteristics and needs of their larvae during the larval stage. Honey bee larvae are tiny, legless creatures that rely heavily on royal jelly for nutrition. This nutrient-rich substance is produced by worker bees specifically for feeding the larvae, ensuring they receive the necessary proteins and vitamins for growth.
Royal jelly is a unique compound that contains high amounts of proteins, vitamins, and minerals. The nurse bees collect nectar from flowers and convert it into honey, which is then stored in the brood nest. However, the royal jelly produced by the nurse bees’ salivary glands is specifically used to feed the larvae.
To support healthy larval development, beekeepers can provide a warm environment (around 90-95°F) with adequate ventilation. This temperature range helps promote the growth of nurse bees and ensures they produce sufficient royal jelly for feeding the larvae.
Importance of Proper Nutrition
Proper nutrition is crucial for the larval stage of honey bees, as it sets the foundation for their development and future health. A well-fed larva will grow into a strong, healthy adult bee that can contribute to the colony’s growth and prosperity.
Pollen and nectar are essential nutrients for larvae, providing them with protein, vitamins, and minerals necessary for growth. Bees collect these resources from flowers and store them in their hives, where they feed them to their young. Without a steady supply of pollen and nectar, larvae may not receive the nutrients they need to develop properly.
When it comes to feeding your bees, consider offering a variety of flowers that provide different types of pollen and nectar. This will ensure that your bees have access to a broad range of nutrients throughout the growing season. Some excellent options for bee-friendly flowers include sunflowers, lavender, and coneflowers.
By providing your bees with proper nutrition during their larval stage, you’ll be supporting the overall health and resilience of your colony. Strong, well-fed bees are better equipped to withstand disease, pests, and environmental stressors, making them a vital component of a thriving ecosystem.
How to Create a Nourishing Environment
Creating a nourishing environment for honey bees to thrive is crucial during their larval stage. As a gardener, you play a significant role in providing the right conditions for healthy growth and development. To start, ensure that your garden has a diverse range of flowers that provide nectar and pollen rich in nutrients.
Some plants are more beneficial than others when it comes to supporting honey bee larvae. Consider planting lavender, coneflower, or sunflower, as these flowers are particularly rich in pollen. Additionally, maintain an apiary with a mix of annuals and perennials, which will provide a constant source of nectar and pollen throughout the season.
When tending to your garden, be mindful of pesticides and other chemicals that can harm honey bees. Instead, opt for natural methods to control pests and diseases. This may include introducing beneficial insects or using physical barriers to prevent damage. By creating a nutrient-rich environment and minimizing threats to their health, you’ll be well on your way to supporting healthy larval growth in your garden.
Pupal Stage: Transformation and Emergence
As we’ve reached the pupal stage, your honey bee colony is now undergoing a crucial transformation where new bees will emerge ready to take on adult roles. In this critical phase, development accelerates at an incredible pace.
The Metamorphic Process
As the pupal stage comes to an end, the honey bee undergoes a dramatic transformation known as metamorphosis. This process is where the caterpillar-like creature inside the cell begins to break down and reorganize into its adult form. During this time, the bee’s body structure undergoes significant changes.
One of the most notable changes is the development of wings. Initially, they are soft and folded against the bee’s body, but as metamorphosis progresses, they begin to harden and expand. The wings take shape, and the bee starts to resemble its adult form more closely. This process can be compared to a piece of cloth being transformed into a fully-fledged garment through washing, drying, and ironing.
In addition to wing development, other features like eyes, antennae, and legs also start to take shape. The pupa’s body begins to fill out with the bee’s adult form, including its characteristic stripes and coloration. It’s essential for gardeners to be patient during this time, as it can last anywhere from 4-7 days in ideal conditions.
Factors Affecting Successful Emergence
As your honey bee pupae transform into adult bees, they face several environmental challenges that can impact successful emergence. Temperature fluctuations are a significant factor to consider. Bees typically prefer temperatures between 64°F and 90°F (18°C and 32°C) for optimal development. However, if the temperature drops below 50°F (10°C), pupal development slows down or even halts.
On the other hand, excessive heat can also be detrimental. Pupae are particularly susceptible to heat stress when temperatures soar above 95°F (35°C). Bees that emerge in such conditions may be weakened and more prone to disease. Moreover, the presence of diseases like American Foulbrood (AFB) or Nosema can decimate your colony.
To minimize these risks, create a suitable environment for your bees by providing a sheltered location with adequate ventilation. This will help regulate temperatures and reduce the likelihood of heat stress or disease transmission. Regular monitoring of temperature fluctuations and disease presence is essential to ensure successful emergence and a healthy colony. By being aware of these environmental factors and taking proactive measures, you can create a nurturing environment for your honey bees to thrive in.
How to Support Healthy Pupal Development
As a gardener, you play a crucial role in supporting the life cycle of honey bees. During the pupal stage, the young bee’s development is vulnerable to environmental factors. To ensure healthy pupal development, provide a safe and stable environment for them.
Keep the area free from strong odors and chemical pesticides that can harm or even kill the developing bees. This includes avoiding nearby application of insecticides, herbicides, or fungicides. Instead, consider using integrated pest management techniques that minimize risks to pollinators.
Maintain a consistent temperature between 82°F to 90°F (28°C to 32°C) in the area where the pupae are located. Avoid placing them near drafty windows, air conditioning vents, or direct sunlight. This temperature range helps regulate their development and prevents overheating.
Also, ensure adequate humidity levels by misting the area lightly with water. Aim for a relative humidity of 50-70%. Monitor these conditions closely to create an optimal environment for healthy pupal development.
Adult Stage: Roles and Responsibilities
As a honey bee colony reaches maturity, adult bees take on critical roles that ensure the survival of their colony, including foragers, defenders, and care-givers. Let’s explore these essential responsibilities in detail.
Queen Bee Responsibilities
As a colony’s adult stage reaches its peak, one queen bee stands out from the rest. Her responsibilities are multifaceted and crucial to the survival of her colony. At the heart of it all is egg-laying. A single queen can lay up to 2,000 eggs per day, which is a staggering number considering the size of most backyard colonies.
But laying eggs is just one part of the queen’s job. She also produces pheromones, chemical signals that regulate the colony’s social hierarchy and communicate important information like food sources and threats. This intricate network allows the colony to function smoothly, with each bee playing its role in harmony.
If you’re new to beekeeping, understanding the queen’s responsibilities can be fascinating. By recognizing her importance, you’ll appreciate the delicate balance within your colony. As a beekeeper, it’s essential to maintain a healthy queen and ensure she’s producing offspring at an optimal rate. This can be achieved by providing a nutritious diet, monitoring for diseases, and performing regular inspections to spot any issues early on.
Worker Bee Tasks
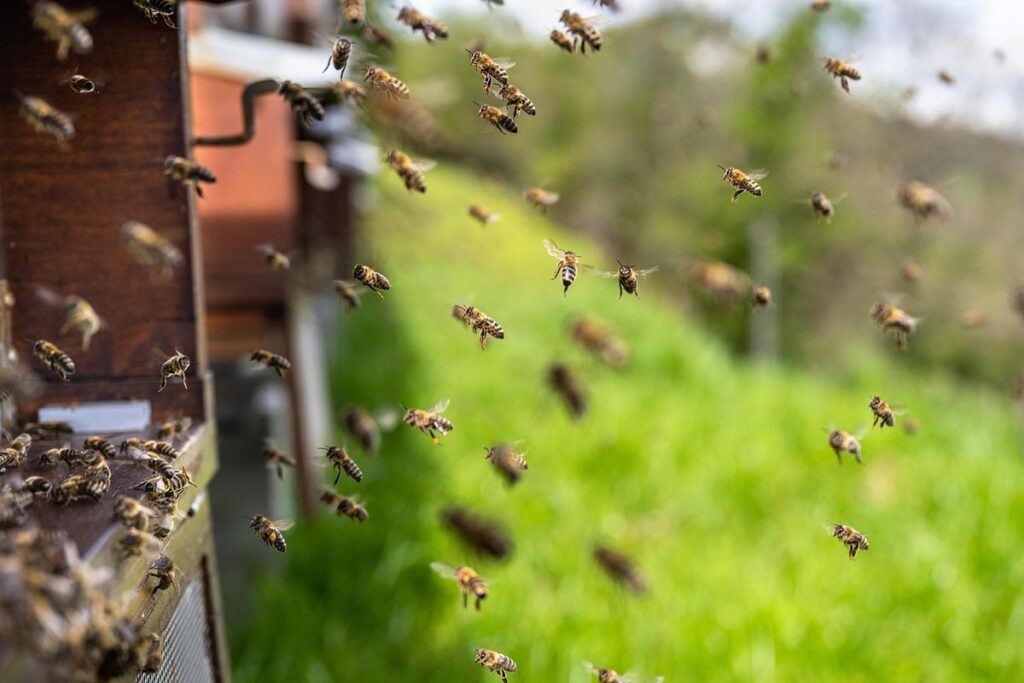
Worker bees are the backbone of the colony, responsible for various essential tasks that keep the hive thriving. One of their primary roles is foraging, where they venture out to gather nectar, pollen, and water from nearby sources. These foragers play a crucial role in maintaining the colony’s food supply, often traveling up to 3 miles or more in search of sustenance.
In addition to foraging, worker bees also take on the task of nursing young ones within the hive. They feed and care for larvae, ensuring they receive adequate nutrition to grow strong and healthy. This critical role requires a significant amount of time and energy from the workers, but it’s essential for the colony’s long-term survival.
Another vital responsibility of worker bees is defending the colony. These vigilant guards stand watch at the hive entrance, prepared to fend off potential threats such as predators or intruders. With their razor-sharp stingers, they’ll stop at nothing to protect their home and family.
As gardeners, it’s essential to create a bee-friendly environment that provides these hardworking bees with an ample supply of food and shelter. By planting a variety of flowers rich in nectar and pollen, you can help support the local worker bee population and promote healthy colony growth.
Drone Bees’ Importance
As you tend to your garden and observe the busy bees buzzing around your flowers, have you ever stopped to think about the role of drone bees? While they may not be as prolific as their worker sisters, drone bees play a crucial part in the colony’s survival. Their primary responsibility is fertilization – ensuring that the queen bee lays eggs that will go on to become new worker bees.
Drone bees are responsible for mating with the queen bee, and this union typically occurs in mid-air. During mating, the drone’s sole purpose is to transfer sperm from his reproductive organs to the queen’s receptacle. This brief encounter can result in several fertilized eggs being stored away in the queen’s body, waiting to be laid in the future.
Without these drones, your honey bee colony would struggle to reproduce and maintain its numbers. As a gardener, you play a vital role in supporting the health and well-being of your bees by providing a welcoming environment for them to thrive. By offering a variety of flowers rich in nectar and pollen, you’re helping to ensure that these important drones are healthy enough to perform their duties when the time comes.
Colony Life Cycle: Growth and Decline
As a bee colony grows, it goes through distinct phases that are crucial for your garden’s pollination needs. In this next part of our exploration, we’ll delve into these growth stages and what to expect.
Understanding Colony Development Phases
As you watch your honey bee colony thrive, it’s essential to understand the different stages of its development. The life cycle of a colony can be divided into several phases, each with unique characteristics and requirements.
Establishment Phase: When a new queen takes over an existing colony or establishes a new one from a swarm, this is known as the establishment phase. During this period, the colony grows rapidly as the queen lays eggs at an incredible rate. This phase typically lasts around 3-6 months, depending on factors like nectar flow and available resources.
Growth Phase: As the colony continues to expand, it reaches its peak population size during the growth phase. The queen’s egg-laying pace slows slightly, but the colony is now self-sustaining, producing new bees that take on various roles within the hive. This phase usually lasts around 6-12 months.
Maturation Phase: As the colony matures, the focus shifts from rapid expansion to maintaining a stable population and ensuring survival through winter. The queen’s egg-laying pace slows further, and the colony begins to produce more bees with specific responsibilities, such as foragers and guards.
During each phase, it’s crucial to monitor your colony’s growth and adjust management practices accordingly. Providing adequate food, water, and shelter is essential to support the colony through its various development stages. Keep an eye out for signs of decline or disease, which can impact the entire colony.
Factors Affecting Colony Health
As you tend to your honey bee colony, it’s essential to be aware of the environmental factors that can impact its health. Disease presence is one such factor, and unfortunately, many colonies succumb to diseases like American Foulbrood (AFB) or Nosema. These diseases can spread quickly if not detected early, so keep a close eye on your colony’s behavior and report any unusual symptoms to a beekeeper or apiary expert.
Pests are another significant concern, as mites, small hive beetles, and wax moths can all cause problems for your colony. Regular inspections will help you catch any infestations early, allowing you to take action before they become severe. Resource availability is also crucial; make sure your bees have access to an adequate food source (nectar-rich flowers) and water supply.
To maintain a healthy colony, ensure proper ventilation by opening the hive entrance or providing additional ventilation holes as needed. Regularly monitoring your colony’s health will help you address any issues promptly, keeping your bees thriving throughout their life cycle. By staying vigilant and proactive, you’ll be better equipped to handle potential challenges and support your colony’s growth.
Strategies for Supporting Colony Success
To support the success of your local honey bee colony, it’s essential to create an environment that meets their needs. This means providing a constant source of water and a diverse array of nectar-rich flowers throughout the growing season.
* Plant a mix of annuals and perennials that provide a long blooming period, such as lavender, coneflowers, and sunflowers.
* Incorporate native plants specific to your region, which will attract pollinators and support local ecosystems.
* Avoid using pesticides, which can harm or kill honey bees. Instead, adopt integrated pest management techniques that prioritize beneficial insects.
By following these strategies, you’ll be creating a welcoming environment for your colony to thrive in. Consider the needs of other pollinators as well, such as butterflies and hummingbirds, by incorporating a variety of plants with different bloom times into your garden design.
Remember, every small action counts when it comes to supporting local bee populations. By making conscious choices about how we manage our gardens, we can play an active role in the health and resilience of these vital pollinators.
Best Practices for Bee-Friendly Gardening
As you strive to create a haven for these vital pollinators, it’s essential to incorporate bee-friendly practices into your gardening routine. Let’s explore some expert tips to get started.
Plant Selection for Pollinator Support
When it comes to creating a bee-friendly garden, selecting the right plants is crucial for supporting our pollinator friends. As we’ve discussed earlier, honey bees rely on nectar and pollen from flowers to survive. So, what types of plants should you choose?
Consider plants with high nectar and pollen content, such as lavender, coneflower, and black-eyed Susan. These flowers are rich in energy-boosting sugars and protein-rich pollen, making them an ideal choice for pollinators. Native wildflowers like sunflowers, cosmos, and zinnias are also great options, as they tend to bloom at the same time each year, providing a consistent food source.
When selecting plants, also think about their blooming period. Choose varieties that flower from early spring to late fall, ensuring there’s always something in bloom for bees to feed on. Consider companion planting, too – pairing plants with complementary growth habits and flowering times can create a diverse and dynamic pollinator haven. By incorporating these bee-friendly plants into your garden design, you’ll be well on your way to supporting the life cycle of honey bees and other pollinators.
Habitat Creation for Bees
As a bee-friendly gardener, creating a welcoming habitat for these crucial pollinators is essential. To attract and support local bee populations, you’ll want to incorporate features that cater to their specific needs, such as nesting sites and water sources.
One of the most critical elements in any bee-friendly garden is providing adequate nesting sites. Bees need a safe place to lay their eggs and care for their young, and these can be created using natural materials like bamboo tubes, hollow reeds, or even wooden boxes with holes drilled into them. Consider placing these nesting sites in sunny spots, ideally near your flower plantings, as this will help the bees conserve energy while collecting nectar.
Another crucial aspect of bee-friendly gardening is ensuring a steady water source. Bees need water to drink and use for cooling their bodies during hot weather. Create a shallow dish or birdbath with fresh water and add rocks or twigs for perching – this will encourage the bees to visit regularly.
Bees are attracted to gardens that offer a diverse range of flowers, herbs, and shrubs. Incorporating plants that bloom at different times ensures a constant nectar flow throughout the growing season. Some excellent options include lavender, coneflower, and sunflower – all of which are known bee magnets!
Maintenance Tips for a Thriving Bee Community
To keep your bee community thriving, it’s essential to perform regular maintenance tasks. Start by inspecting your beehive at least once a month for signs of pests, diseases, and damage. Check for cracks in the hive or any gaps where predators might enter. Replace worn-out frames or damaged supers to maintain structural integrity.
Next, ensure the hive is clean and free from debris. Remove excess wax and propolis buildup, which can obstruct airflow and reduce honey production. Consider adding a bee escape to facilitate inspections without disrupting the colony’s routine.
Another crucial aspect of maintenance is monitoring water sources. Ensure that your beehive has access to fresh, clean water for the bees’ daily needs. Change the water source regularly to prevent bacterial growth.
By performing these simple tasks, you’ll create an ideal environment for your bee community to flourish. Remember, a thriving colony will reward you with abundant honey harvests and a healthy ecosystem in your garden.
Conclusion: Supporting the Life Cycle of Honey Bees
Now that you’ve learned about a honey bee’s life cycle, it’s time to explore practical ways to support their survival in your garden. Let’s dive into some actionable tips!
Recap of Key Takeaways
As we wrap up our journey through the life cycle of honey bees, let’s recap the key takeaways that will help you support these vital pollinators in your garden.
First and foremost, it’s essential to understand the different stages of a honey bee’s life: egg, larva, pupa, and adult. This knowledge will help you provide the right environment for them to thrive. By creating a bee-friendly habitat with a diverse range of flowers and plants, you’ll attract these beneficial insects and support their growth.
As we discussed, honey bees are social creatures that live in colonies, each with its own hierarchy and division of labor. To encourage their presence in your garden, provide a source of water for them to drink and collect nectar from. This can be as simple as installing a shallow dish or birdbath with fresh water.
By incorporating these simple steps into your gardening routine, you’ll be supporting the life cycle of honey bees and contributing to their survival. Remember, every small action counts, and together we can make a significant impact on the health of our pollinators.
Call to Action: Encouraging Bee-Friendly Practices
As you’ve now gained a deeper understanding of the life cycle of honey bees and their importance to our ecosystem, it’s time to take action. Encouraging bee-friendly practices in your garden not only supports these incredible pollinators but also benefits your local environment.
Start by incorporating a variety of flowers that are rich in nectar and pollen into your garden, as these provide the necessary sustenance for honey bees throughout their life stages. Consider planting native species, as they tend to be more attractive to local pollinators. A mix of annuals and perennials will ensure a constant source of food throughout the growing season.
Make sure to include a water source in your garden, as honey bees need water to cool their bodies and hydrate themselves. A shallow dish or birdbath with fresh water is perfect for this purpose.
By adopting these simple practices, you’ll be supporting the life cycle of honey bees and contributing to the health of our ecosystem.
Frequently Asked Questions
Can I create a bee-friendly garden even if I don’t have a lot of space?
Yes, you can definitely create a bee-friendly garden, even with a small yard or balcony! Consider using containers or vertical planters to grow nectar-rich flowers like lavender, coneflowers, and sunflowers. Every little bit counts in supporting these vital pollinators.
How often should I inspect my beehive for signs of disease?
Regular inspections are crucial in maintaining healthy bee populations. As a general rule, inspect your hive every 7-10 days during peak summer months when the colony is most active. Look for signs of disease like deformed wings, unusual odors, or an excessive amount of dead bees.
What’s the best way to support larval development and prevent mites?
To ensure healthy larval development and prevent mites, maintain a clean brood nest by removing debris and excess honeycomb. Also, consider using diatomaceous earth or powdered sugar as natural deterrents against mites. Keep your hive well-ventilated and at a comfortable temperature to promote optimal growth.
Can I use pesticides in my garden if it’s bee-friendly?
No, using pesticides in your bee-friendly garden can be counterproductive to supporting pollinators. Pesticides can harm or kill bees directly, as well as contaminate nectar and pollen sources. Instead, opt for natural pest control methods like introducing beneficial insects or using physical barriers.
How do I know if a honey bee is a queen or a worker?
Identifying the type of bee can be tricky, but look for characteristics like larger size, rounded abdomen, and a more docile temperament in queens. Workers, on the other hand, are smaller, have narrower waists, and tend to be more aggressive when defending their hive.