If you’re new to garden beekeeping or looking to expand your operation, selecting the right Langstroth hive dimensions is crucial. With so many variables to consider, from space constraints in your backyard to local regulations and equipment compatibility, it’s easy to get overwhelmed. The wrong size hive can lead to problems like overcrowding, heat stress, and even safety issues for both you and your bees.
In this article, we’ll break down the key factors to consider when choosing Langstroth hive dimensions for your garden beekeeping needs. We’ll explore the optimal sizes for different types of equipment, discuss how to calculate space requirements, and provide guidance on complying with local regulations. By the end of this post, you’ll be equipped with the knowledge to select the ideal Langstroth hive dimensions for a thriving and safe beekeeping operation in your garden.
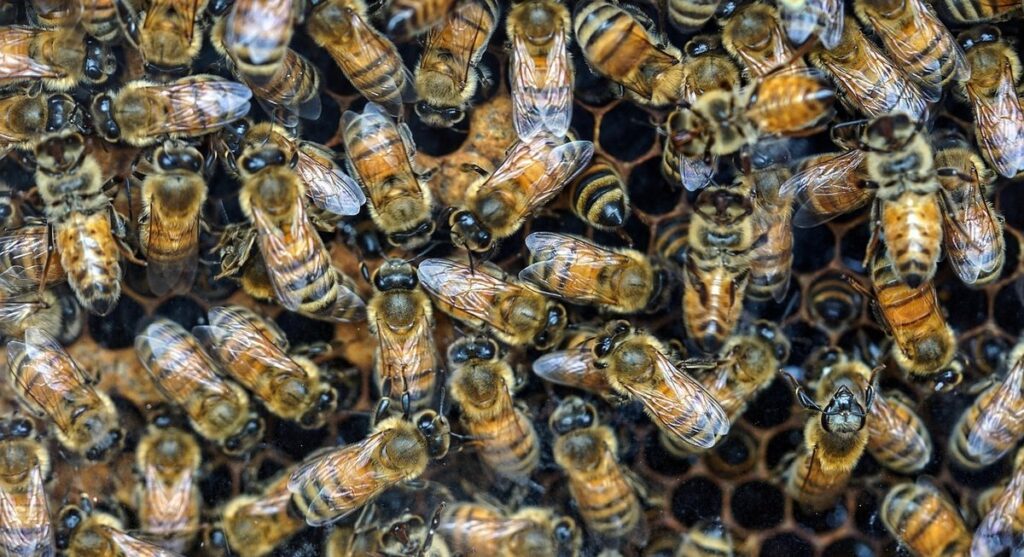
Understanding the Importance of Hive Size
When it comes to keeping healthy bees, understanding the importance of hive size is crucial for successful garden beekeeping. Let’s explore why a well-sized hive matters.
Factors to Consider When Selecting a Hive Size
When selecting a hive size for your langstroth beehive, there are several factors to consider. First and foremost, think about the available space you have in your garden or apiary. A larger hive requires more space to accommodate the growing colony, so ensure you have enough room for expansion.
Consider the number of colonies you plan to keep as well. If you’re just starting out with a single hive, a smaller size may be sufficient. However, if you’re planning to expand your operation in the future, it’s better to start with a larger hive that can accommodate more frames and boxes.
Local regulations also play a significant role in determining the optimal hive size for your area. Some municipalities have specific requirements or restrictions on the maximum number of hives allowed per property or the minimum distance between hives.
It’s essential to balance these factors to find the perfect fit for your beekeeping needs. Take note that larger hives can be more efficient and require less maintenance, but they also come with a higher upfront cost.
Benefits of Langstroth Hives for Garden Beekeeping
When it comes to garden beekeeping, few hive designs offer the same level of convenience and flexibility as Langstroth hives. Their compact design makes them an ideal choice for small-scale apiaries or even urban gardens. One of the primary benefits of Langstroth hives is their ease of management. The modular structure allows you to easily access individual frames, inspect the brood, and harvest honey without having to lift heavy lids.
This design also facilitates monitoring of the bees’ health, which is particularly important in a garden setting where pesticides and other chemicals can be a threat. Another advantage of Langstroth hives is their portability – perfect for rotating your bee colonies within your garden or relocating them as needed.
To get started with Langstroth hives, begin by selecting a location with good sunlight and protection from harsh winds. Next, familiarize yourself with the basic tools required for inspecting and maintaining these hives, such as a bee brush, smoker, and hive tool.
Measuring the Right Frame Size
To ensure a harmonious fit, measuring your frames accurately is crucial. In this next step, we’ll guide you through calculating the perfect frame size for your Langstroth hive.
Understanding Bees’ Space Requirements
When it comes to creating an optimal environment for our buzzing friends, understanding their space requirements is crucial. Bees thrive in specific dimensions, and failing to meet these needs can lead to reduced honey production and even colony losses.
The ideal frame size for Langstroth hives is typically around 8.5 x 19 inches (21.5 x 48 cm). However, this size can vary depending on the region and the type of bees you’re keeping. For example, some beekeepers swear by smaller frames, such as 6.75 x 18 inches (17 x 45.7 cm), which allow for more efficient nectar collection.
The spacing between frames is also critical. A general rule of thumb is to leave about 1 inch (2.5 cm) of space between each frame, allowing the bees to easily move in and out of the cells. This may seem like a small detail, but it can have a significant impact on brood rearing and honey production.
To give you a better idea, consider this: studies have shown that frames spaced 1 inch apart result in an average increase of 10-15% in honey production compared to tighter spacing. By paying attention to these details, you’ll be well on your way to creating a thriving bee environment that will reward you with plenty of honey and happy, healthy bees.
Calculating the Correct Number of Frames per Box
When it comes to langstroth hive dimensions for garden beekeeping, calculating the correct number of frames per box is crucial for optimal colony growth and honey production. To determine the ideal number of frames, you’ll need to consider two key factors: available space and desired colony growth rate.
Start by measuring the length and width of your hive box. A standard langstroth hive box typically measures 19.5 inches in length, 16.25 inches in width, and 9.75 inches in height. Next, calculate the maximum number of frames that can fit within the box’s length. Typically, a standard frame is 19.25 inches long, leaving about 1/4 inch on each end for easy removal.
Assuming you want to use full-depth frames, subtract the frame width (about 6-7 inches) from the box’s width to determine how many frames can fit side by side. Divide this number by two to account for both sides of the box. For example, if your box is 16.25 inches wide, you can fit six frames side by side, leaving about an inch on each end.
To accommodate desired colony growth rate, consider adding one or more “nucs” (nucleus colonies) to a larger hive. A general rule of thumb is to use ten frames per box for a strong, established colony and nine for a smaller or slower-growing colony.
Langstroth Hive Dimensions: Standard vs. Modified Sizes
As you plan your garden beekeeping setup, it’s essential to understand the standard and modified sizes of Langstroth hive dimensions, which can impact both efficiency and honey production. Let’s break down the options.
Overview of Standard Langstroth Hive Dimensions
A standard Langstroth hive typically consists of boxes measuring 8 inches deep by 16.5 inches wide and 19.5 inches long (Hive Depth: 8-10 inches). The most common dimensions for a full-depth brood box are 19.25 inches long, while shallower versions can range from 13 to 18 inches in length.
The frame size within these hives is generally standardized at 6.75 inches deep by 19.25 inches wide and 16.5 inches tall (Frame Depth: 4-7 inches). Standard Langstroth frames come in two primary sizes, with full-depth frames featuring a depth of around 7.125 inches and shallower frames measuring approximately 5.75 inches.
To ensure correct setup and assembly of your hive, you should carefully examine the dimensions listed on each component to guarantee everything fits snugly together without any gaps or obstructions. Using standard Langstroth hive components will make it easier for you to find spare parts and exchange equipment with other beekeepers in case you need help with repairs.
When purchasing a new hive kit, verify the box size, frame dimensions, and depth requirements to ensure they align with your existing beehives, or that you are prepared for the installation process. This step may seem minor, but it is essential for setting up a stable and efficient bee colony within your Langstroth hives.
Choosing the Right Size for Your Garden Beekeeping Operation
When it comes to setting up a langstroth hive for garden beekeeping, choosing the right size is crucial. While standard sizes are a good starting point, you may find that modified hive sizes better suit your specific needs.
One of the most significant advantages of using smaller frames or shallower boxes is increased efficiency in harvesting honey and inspecting the hive. For instance, shallower boxes can be used to create additional supers for expanding your bee population, while smaller frames can make it easier to handle and manipulate the frames during inspections.
Another consideration when choosing a modified size is the space available in your garden. If you have limited space, using smaller frames or shorter boxes can help you make the most of what you have. This can be particularly beneficial for urban beekeepers who need to balance their passion for beekeeping with the constraints of small spaces.
Some popular modifications include 6-frame hives and half-depth supers, which offer a great compromise between standard sizes and customized needs. When selecting a modified size, consider your long-term goals and the specific demands of your garden beekeeping operation.
Comparing Different Hive Sizes: Pros and Cons
When choosing a Langstroth hive for your garden beekeeping setup, one of the most important decisions you’ll make is selecting the right size. This section explores the pros and cons of different hive dimensions to help you decide.
Factors to Consider When Choosing a Hive Size
When choosing a langstroth hive size for garden beekeeping, there are several key factors to consider. First and foremost, think about the space constraints on your property. If you have limited room for a hive, a smaller size like an 8-frame or 10-frame will be more suitable than a larger one like a 12-frame or 14-frame.
Another consideration is the equipment availability. Check what type of frames and supers are readily available in your area before committing to a specific hive size. You don’t want to end up with a hive that’s not compatible with the standard equipment you can source locally.
Local regulations should also be taken into account when selecting a hive size. Some areas may have restrictions on the maximum height or size of beekeeping equipment, so it’s essential to check with your local authorities before making a decision. Lastly, consider your personal preference and the level of maintenance you’re willing to commit to. A larger hive requires more frequent inspections and maintenance than a smaller one.
For example, if you have limited space but want to keep a robust colony, consider using a vertical integration system like an nuc box or a top-bar hive with a compact design.
Weighing the Benefits of Bigger vs. Smaller Hives
When it comes to choosing the perfect hive size for your garden beekeeping setup, one of the most crucial considerations is weighing the benefits of bigger versus smaller hives. On one hand, larger hives have the potential to produce more honey, making them an attractive option for beekeepers looking to maximize their harvest.
However, bigger hives also come with a significant drawback: increased management complexity. With more frames and bees to contend with, maintaining a large hive can be overwhelming, especially for new beekeepers. Additionally, larger colonies require more resources, such as honey supers and equipment, which can add up quickly.
On the other hand, smaller hives are often easier to manage and maintain, making them ideal for beginners or those with limited space. While they may not produce as much honey, smaller colonies require less equipment and are generally simpler to care for. When deciding between a larger and smaller hive, consider your own experience level and management style. If you’re new to beekeeping, starting with a smaller hive can help you build confidence and skills before expanding to a bigger colony.
Hive Management Considerations for Different Hive Sizes
When managing a Langstroth hive, it’s essential to consider the specific needs and constraints of your beehive size, from small starter colonies to mature populations. We’ll explore how different hive sizes impact management decisions.
Managing Bees in Larger Hives
As your bee population grows and your Langstroth hive expands, managing the bees within becomes increasingly important. With a larger hive comes more honey production potential, but also greater challenges in maintaining the colony’s health.
Regular inspections become crucial to monitor for signs of disease, pests, or overcrowding. Aim to inspect your hive every 7-10 days during peak summer months when nectar flows are abundant. Look for issues such as American Foulbrood (AFB) symptoms like discolored brood or unusual odor, or Varroa mite infestations that can weaken the colony.
To control pests, consider using integrated pest management techniques like combining essential oil treatments with strategic medication applications. This multi-step approach helps minimize chemical exposure and promotes a healthy hive ecosystem.
Honey harvesting in larger hives requires careful planning to avoid disrupting the colony’s delicate balance. Wait until the nectar flow subsides or when you’ve detected a honey super nearly full, then gently extract excess honey without disturbing the brood nest below. Always prioritize caution and follow proper extraction procedures to minimize the risk of disease transmission or other issues.
Specialized Techniques for Smaller Hives
Managing smaller hives requires a more delicate approach to ensure their health and productivity. Since these hives have limited space, it’s crucial to inspect them more frequently, ideally every 7-10 days during the peak season. This allows you to catch any issues before they escalate into major problems.
For example, if you notice a drop in honey production or an unusual amount of dead bees, it could be a sign of queen failure or disease. With a smaller hive, it’s easier to make manual adjustments, such as replacing the queen yourself. However, this should only be done with caution and under proper guidance, as incorrect queen removal can lead to colony collapse.
Another technique for managing smaller hives is using a “supercedure” – where the bees take over the role of queen replacement themselves. This process typically occurs when the old queen’s pheromone levels drop, signaling the workers to create a new queen cell. By monitoring your hive closely, you can catch this process and prepare for the new queen’s emergence.
By being more attentive to smaller hives, beekeepers can mitigate potential issues and promote healthier colony growth. Regular inspections are essential, but it’s also vital to know when to intervene and how to do so without disrupting the hive’s delicate balance.
Setting Up Your Langstroth Hive: Step-by-Step Guide
When setting up your langstroth hive, understanding the correct dimensions is crucial to ensure a safe and healthy environment for your bees. Let’s walk through the essential steps together.
Preparing the Site and Installing the Hive Stand
Before installing your Langstroth hive, it’s crucial to prepare the site and set up a sturdy hive stand. This will ensure that your bees have a safe and stable home to thrive in. Begin by selecting a spot for your hive that receives direct sunlight for at least six hours a day. Avoid areas with standing water or where water tends to collect, as this can lead to moisture issues within the hive.
Next, clear any debris or vegetation from the site, and level the ground to create a stable base. If you’re using a hive stand, follow the manufacturer’s instructions for assembly and installation. Make sure it’s positioned at least 3-4 feet off the ground to prevent pests and predators from accessing your bees.
Consider adding a skirt around the hive stand to direct water away from the hive and reduce the risk of moisture-related issues. You can also use a weed barrier or mulch to suppress vegetation growth beneath the hive, keeping the area clean and free from potential threats to your colony’s health.
Assembling the Hive Components and Adding Frames
Now that you’ve assembled all the components of your Langstroth hive, it’s time to start building and setting up the individual boxes. Begin by placing a strip of beeswax foundation onto each frame, making sure to leave some space at the top for the bees to draw out their comb. For a standard Langstroth hive, you’ll need 8-10 frames per box.
Next, carefully insert the frames into the hive body, making sure they’re evenly spaced and securely held in place by the guides on the sides of the box. Don’t forget to leave some room for expansion – the bees will appreciate having a little extra space to move around as their colony grows.
Remember, the frames should be placed with the bars facing upwards and the foundation strips parallel to each other. This will give your bees an easy start in building their comb and ensure it’s properly aligned.
When adding the second box (the super), attach it to the hive body using screws or nails. Make sure the boxes are securely fastened together, as you don’t want any unexpected movements while the bees are hard at work inside!
Langstroth Hive Dimensions for Beginners
As you start building your own langstroth hive, it’s essential to understand the standard dimensions and measurements that ensure a safe and healthy environment for your bees. In this section, we’ll break down the key dimensions to get you started.
Tips for Choosing Your First Hive Size
When selecting your first Langstroth hive, choosing the right size is crucial. As a beginner, you may be tempted to opt for a smaller hive to save space and resources. However, this might limit your long-term potential as a beekeeper. Consider your short-term needs: learning and experimentation are essential during your initial stages.
A single deep box (10 frames) or a single medium box (8 frames) is an excellent starting point. These sizes allow you to experiment with different hive configurations without committing to larger equipment costs. Additionally, they’re perfect for managing smaller colonies that typically thrive in the early stages of beekeeping.
For long-term goals, consider investing in a 3- or 4-box setup. This will provide ample space for your colony’s growth and make it easier to inspect and manage as your apiary expands. Remember, expanding your hive size gradually will save you from costly equipment upgrades down the line.
Ultimately, select a hive size that balances short-term experimentation with long-term ambitions. Be prepared to adjust your setup as your beekeeping skills and knowledge evolve.
Setting Realistic Expectations and Managing Growth
As you begin your journey with langstroth hive beekeeping, it’s essential to set realistic expectations for colony growth. A healthy colony can grow rapidly, but this growth comes with its own set of challenges. Be prepared for an average annual increase of 50-100% in honey production and a corresponding rise in the number of bees.
To manage this growth, establish a clear management plan from the start. This should include regular inspections to monitor the queen’s performance and detect any signs of disease or pests early on. You’ll also need to plan for increased ventilation and temperature control as the colony expands. Don’t be afraid to split your colonies when they reach capacity to maintain health and prevent overcrowding.
Regularly review your operation to ensure you’re prepared for future growth. This may involve upgrading equipment, increasing storage space for honey and wax, or even considering a second apiary site if necessary. By setting realistic expectations and staying on top of management tasks, you’ll be well-equipped to handle the challenges that come with rapid colony growth.
Frequently Asked Questions
What are some common mistakes to avoid when selecting Langstroth hive dimensions for my garden beekeeping operation?
When choosing the right size for your Langstroth hive, it’s essential to consider factors like available space and equipment compatibility. Avoiding mistakes such as overcrowding or undercrowding can help prevent issues like heat stress and colony collapse. A general rule of thumb is to allocate at least 1-2 square feet per frame in a hive stand with adequate ventilation.
Can I use standard Langstroth hive dimensions for both beginner and experienced beekeepers?
Yes, the standard Langstroth hive sizes can be suitable for both beginners and experienced beekeepers. However, it’s crucial to consider factors like equipment compatibility and available space when choosing the right size. For beginners, a smaller modified hive might be more manageable, while experienced beekeepers may prefer larger hives with more frames.
How do I ensure my Langstroth hive is well-ventilated?
Good ventilation in your Langstroth hive is vital for maintaining healthy bees. To ensure proper airflow, consider the following: keep the hive stand elevated to allow air circulation, use screened bottoms and tops, and maintain an adequate distance between hives (about 3 feet) to prevent overcrowding.
What are some signs that my bee colony needs more space in their Langstroth hive?
If you notice signs like excessive swarming, reduced honey production, or increased aggression towards the beekeeper, it may be a sign that your bees need more space. You can determine this by observing the number of frames per box and ensuring there’s enough room for expansion.
Can I use a single Langstroth hive for multiple colonies?
It’s generally not recommended to keep multiple colonies in a single Langstroth hive, as this can lead to overcrowding and increased disease transmission between colonies. Instead, consider maintaining separate hives for each colony to prevent potential issues.