Preparing your soil for planting flowers is one of the most crucial steps in ensuring healthy growth and vibrant blooms. But did you know that most gardeners skip this essential step, leading to poor plant performance and wasted effort? If you want to grow stunning flowers, it all starts with the right soil preparation. In this article, we’ll dive into the importance of pH testing and analyzing your soil’s composition to determine its optimal nutrient levels. We’ll also share expert tips on adding organic matter, such as compost or manure, to boost fertility and improve drainage. By following these simple steps, you’ll be well on your way to creating a garden paradise that flourishes all season long.
Understanding Your Soil Type
To get started, you need to understand your soil type, which will determine how to properly prepare it for planting flowers that thrive in its conditions. This is crucial for a healthy garden.
Assessing Your Soil’s pH Level
Soil pH is often overlooked, but it plays a crucial role in determining which flowers will thrive in your garden. Think of soil pH as the garden’s acidity level – just like how too much sugar can ruin your coffee, extreme acidity or alkalinity can kill your plants.
To assess your soil’s pH level, you’ll need to test it. You can either purchase a DIY kit from a gardening store or opt for a more precise laboratory test. For the former, kits usually involve mixing a small sample of soil with a liquid solution and then comparing the resulting color change to a chart provided. This method is quick and cost-effective but may not be as accurate.
The ideal pH range varies depending on the flower type, but most varieties prefer a slightly acidic to neutral soil pH (between 6.0 and 7.0). For example, roses and lavender do well in slightly alkaline conditions (pH 7-8), while azaleas and hydrangeas thrive in acidic soils (pH 5.5-6.5).
You can also check your local nursery or gardening store for specific pH requirements for the flower varieties you’re interested in growing.
Identifying Soil Texture and Composition
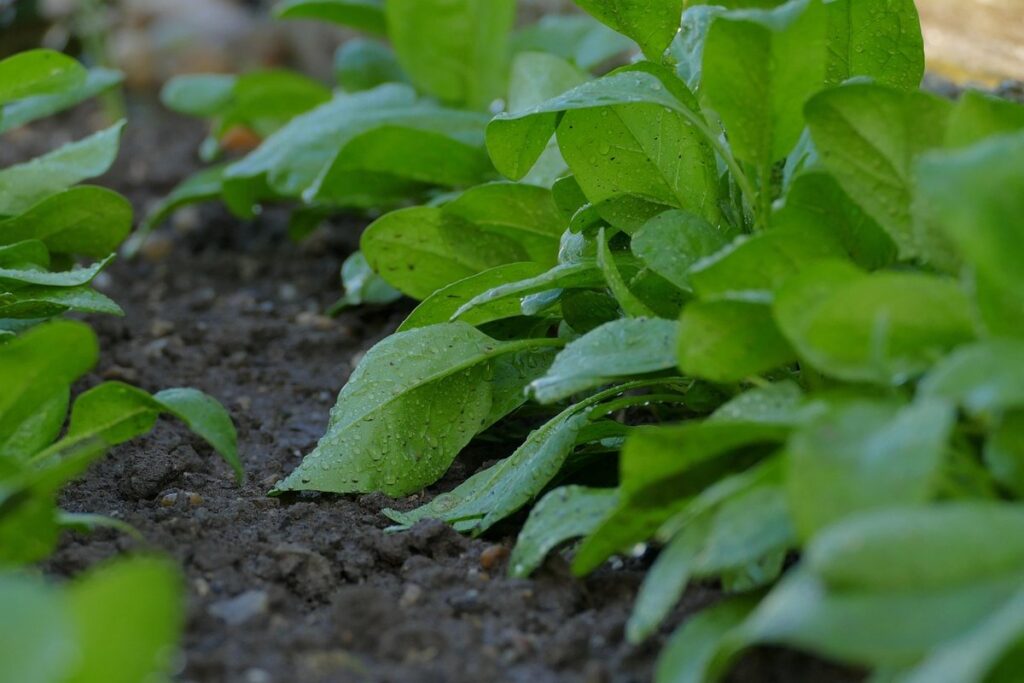
When it comes to preparing soil for planting flowers, understanding the soil texture and composition is crucial. Soil texture refers to the size of the particles that make up the soil, while soil composition refers to the type and proportion of minerals, organic matter, and other substances present.
The four main types of soil textures are clay, silt, sand, and loam. Clay soils tend to be dense and retain a lot of water, which can cause roots to rot and prevent healthy drainage. Silt soils, on the other hand, are often too light and may not provide enough nutrients for plants. Sand soils drain quickly but may lack essential minerals and organic matter.
Loam soils, a mix of sand, silt, and clay particles, offer an ideal balance for flower growth, allowing roots to breathe while retaining just the right amount of moisture. When assessing your soil composition, be on the lookout for issues like high salt levels or pH imbalances, which can severely impact flowering plants’ ability to thrive.
To identify any common soil composition problems, perform a simple test by mixing 1 tablespoon of soil with 2 tablespoons of water in a small container – if it forms a sticky ball, your soil may be too dense; if it crumbles quickly, it might lack cohesion.
Testing and Analyzing Your Soil
Now that you’ve got a better understanding of your soil type, it’s time to put it to the test. This next step will help you determine what adjustments need to be made for optimal flower growth.
Collecting a Soil Sample
When it comes to testing and analyzing your soil, collecting a representative sample is crucial. This ensures that you get an accurate picture of your soil’s composition, pH level, and nutrient content. To collect a reliable soil sample, timing is everything. The ideal time for collection is during the growing season, when the soil is moist but not waterlogged.
Begin by selecting five to ten spots in your garden or yard where you plan to plant flowers. These areas should be spaced about 10-15 feet apart to account for any variations in soil composition. Use a clean trowel or shovel to dig up a small sample from each spot, about 6-8 inches deep. Be sure to mix the samples together to create a composite sample that represents your entire garden.
Handle the sample carefully to prevent contamination. Avoid touching the soil with bare hands, as oils from your skin can affect test results. Store the sample in an airtight container or plastic bag and keep it moist until you’re ready to send it off for testing. This will help maintain its integrity and ensure accurate analysis.
Sending It Off for Analysis
Now that you have collected and processed your soil sample, it’s time to send it off for analysis. You can choose between sending it to a lab or using at-home testing kits. If you opt for professional laboratory testing, select a reputable lab that specializes in environmental testing and follows the US EPA guidelines. Follow their instructions carefully when preparing the sample, including labeling, packaging, and shipping.
At-home testing kits are also available for those on a budget or short on time. These DIY kits usually provide simple tests to measure pH and nutrient levels. While they may not be as comprehensive as lab results, at-home kits can still give you a good idea of your soil’s basic needs. Some popular options include pH paper strips and NPK testing kits.
Once the analysis is complete, you can expect to receive detailed reports on your soil’s nutrient levels, including nitrogen, phosphorus, potassium, and other essential minerals. The report will also indicate the optimal pH range for your specific plant species. This information will help you tailor your fertilization plan and make informed decisions about amendments.
Preparing Your Soil for Planting
To ensure your flowers thrive, it’s essential to start by preparing the soil. This means testing its pH levels and removing any debris that could hinder growth.
Removing Debris and Weeds
Before you start planting those beautiful flowers, it’s essential to clear your garden bed of debris and weeds. Removing these unwanted elements not only improves soil aeration but also reduces competition for nutrients and water between plants.
To begin, inspect your garden bed and identify areas with thick weed growth or debris accumulation. Wear gloves and carefully pull out as many weeds as possible by the roots. Be sure to remove any broken plant stalks, dead leaves, and other organic matter that can harbor pests and diseases.
For more stubborn weeds, consider using a tool like a hoe or cultivator to loosen soil without damaging its structure. A garden fork is also useful for gently turning over compacted areas. Regularly clearing debris and weeds will help prevent soil compaction, improve water penetration, and create an ideal environment for your flowers to thrive.
To make the process even more efficient, consider mulching around plants after weeding to suppress weed growth and retain moisture in the soil.
Tilling or Rototilling
When it comes to preparing your soil for planting flowers, tilling and rototilling are two common methods used to loosen and aerate the earth. But which one is best? Understanding the benefits and drawbacks of each will help you make an informed decision.
Tilling involves using a garden fork or shovel to manually break up the soil, while rototilling uses a powered machine to do the same job more quickly. Tilling can be beneficial for small areas or for breaking up compacted soil, but it requires manual labor and can be time-consuming. On the other hand, rototilling is faster and more efficient, but it can also damage roots and disrupt soil structure if not done carefully.
If you choose to use a rototiller, make sure to select one with adjustable depth settings and consider purchasing a tine type for gentler soil turning. Wear protective gear such as gloves, safety glasses, and ear protection when operating the machine, and keep children and pets at a safe distance.
Adding Organic Matter and Fertilizers
Now that you’ve loosened up your soil, it’s time to add some essential nutrients to give your flowers a healthy start. We’ll walk through the best types of organic matter and fertilizers for your garden.
Composting 101: Making Your Own Soil Amendments
Composting is a simple and effective way to create your own soil amendments for flower growth. To start composting, collect a mix of “green” materials like kitchen scraps (fruits and vegetables), grass clippings, and manure from herbivores, which are high in nitrogen. Balance these with “brown” materials such as dried leaves, shredded newspaper, or straw, which are high in carbon.
Maintain optimal conditions by keeping the pile moist, like a damp sponge, and turning it regularly to aerate. Aim for a ratio of 2/3 brown materials to 1/3 green materials. As you add materials, ensure they’re not too wet or dry – if it’s too soggy, microorganisms won’t thrive.
Compost is beneficial for flower growth as it retains moisture, suppresses weeds, and regulates soil pH. It also acts as a slow-release fertilizer, providing essential nutrients like nitrogen, phosphorus, and potassium. For example, adding compost to your soil can improve water retention by up to 20%, according to the USDA. By creating your own compost, you’ll have a natural, cost-effective way to enrich your flower beds and promote healthy growth.
Choosing the Right Fertilizer
When it comes to choosing the right fertilizer for your flower garden, you have two main options: organic and inorganic. Organic fertilizers are derived from natural sources such as animal manure, bone meal, or compost, while inorganic fertilizers are synthetic and often contain chemical compounds.
Organic fertilizers work slowly over time, releasing nutrients as they break down in the soil. They’re a great choice for flower gardens because they improve soil structure, support beneficial microbes, and promote healthy plant growth. For example, using compost tea as a fertilizer can provide flowers with essential micronutrients while also improving soil biodiversity.
On the other hand, inorganic fertilizers release their nutrients quickly, often within hours or days of application. While they can provide a quick boost to your flower’s growth, overuse can lead to environmental pollution and harm beneficial microbes in the soil.
To apply organic fertilizers effectively, use them at recommended rates (typically 1/4 cup per 10 square feet) and incorporate them into the top 6-8 inches of soil. Timing is also crucial: apply fertilizers during periods of active growth or after pruning to maximize their impact.
Creating a Flower-Friendly Soil Environment
To create a beautiful and thriving flower garden, it all starts with healthy soil. Next, we’ll explore the essential steps to prepare your soil for planting flowers.
Incorporating Mulch or Compost Tea
When it comes to creating a flower-friendly soil environment, incorporating mulch or compost tea can be a game-changer. Mulch, typically made from organic materials like bark chips or leaves, helps retain moisture in the soil, reducing the need for frequent watering. It also suppresses weeds by blocking light and preventing seed germination. To use mulch effectively, apply a 2-3 inch layer around your flowers, keeping it a few inches away from plant stems to prevent rot.
Compost tea is another excellent addition to your flower-friendly soil mix. This liquid solution is made by steeping compost in water, which infuses beneficial microbes that promote healthy plant growth. These microbes help break down nutrients in the soil, making them available to your flowers. To make compost tea, you’ll need a large bucket or container with a lid, some compost, and water. Steep the compost for 24-48 hours, then strain the liquid before using it as a foliar spray or adding it to the soil.
Using both mulch and compost tea can create a thriving ecosystem that supports your flowers’ growth. By combining these two methods, you’ll not only retain moisture and suppress weeds but also provide beneficial microbes for optimal plant health.
Ensuring Adequate Drainage and Aeration
When it comes to growing healthy flowers, two essential factors often overlooked are proper drainage and aeration. Poor drainage can lead to waterlogged soil, causing roots to rot and plants to suffer from root diseases. On the other hand, a lack of aeration restricts roots’ ability to breathe, stunting plant growth.
To improve soil structure and ensure adequate drainage and aeration, consider incorporating materials like perlite or vermiculite into your soil mix. These lightweight, porous aggregates increase water penetration and reduce soil density, allowing roots to breathe freely. You can also add organic matter such as compost or well-rotted manure, which helps improve soil structure while providing essential nutrients for healthy plant growth.
When choosing a potting mix or preparing your garden bed, look for products that contain perlite or vermiculite. Alternatively, you can create your own mix by blending 20-30% of one of these materials with your existing soil. By implementing these simple tips, you’ll be well on your way to creating an ideal environment for your flowers to thrive in.
Maintaining Your Soil Health Throughout the Growing Season
As you plant and tend your flowers, maintaining healthy soil throughout the growing season is crucial for vibrant blooms and a thriving garden ecosystem. This section shares tips for keeping your soil in top condition all year round.
Monitoring pH and Nutrient Levels
As you nurture your soil throughout the growing season, it’s essential to regularly monitor its pH levels and nutrient content. These factors have a significant impact on plant growth and overall health. Soil pH affects nutrient availability, and an imbalance can lead to deficiencies or even toxicity for plants.
To test your soil’s pH, use a DIY kit or send a sample to a lab for analysis. Most flowers prefer slightly acidic to neutral soil pH, between 6.0 and 7.0. For example, roses thrive in a slightly acidic environment, while sunflowers can tolerate more alkalinity.
Once you’ve determined your soil’s pH, adjust it accordingly. If it’s too acidic or alkaline, add lime or sulfur to bring it into balance. Also, keep an eye on nutrient levels, particularly nitrogen, phosphorus, and potassium (NPK). Regular monitoring will help you identify areas where supplements are necessary.
For instance, if your soil test reveals low phosphorus levels, apply a slow-release fertilizer containing this essential nutrient. Adjusting your care routine based on these results ensures optimal growing conditions for your flowers.
Adjusting for Weather Extremes
When it comes to maintaining soil health throughout the growing season, adapting to extreme weather conditions is crucial. Droughts and heavy rainfall events can significantly impact the soil’s structure, nutrient levels, and overall health.
To prepare for droughts, focus on building a robust root system in your flowers by incorporating mulch or compost into your soil. These organic materials help retain moisture, regulate soil temperature, and suppress weeds that compete with your plants for water. Additionally, choose flower varieties that are drought-tolerant or have deep taproots to access water deeper in the soil.
In preparation for heavy rainfall events, ensure your soil has good drainage by incorporating perlite or vermiculite into the mix. These materials help prevent waterlogged soil and reduce the risk of root rot and other water-borne diseases. You can also implement rainwater harvesting systems to collect excess rainwater for future use.
Regular monitoring of weather forecasts is essential to adjust your care plan accordingly. Be prepared to make adjustments to watering schedules, fertilization routines, and pest management strategies based on changing weather conditions. By being proactive and adaptable, you can ensure the health and resilience of your soil throughout the growing season.
Frequently Asked Questions
What if I don’t have the budget for a laboratory soil test? Can I still prepare my soil effectively?
You can still prepare your soil effectively without breaking the bank. Consider using a DIY soil testing kit, which is usually affordable and gives you an accurate pH reading. Additionally, you can observe your soil’s texture and composition by digging into it – if it crumbles easily or feels dense, this can indicate its nutrient levels.
How often should I retest my soil for optimal nutrient levels?
It’s recommended to retake a soil test every 1-2 years to ensure your soil’s pH level and nutrient content are within the ideal range. This will also help you identify any changes in your garden’s ecosystem, such as new plant growth or pest issues.
Can I use regular household compost for my flower garden?
Yes, but keep in mind that regular household compost may not provide the right balance of nutrients for your flowers. Consider creating a separate compost pile specifically for your garden, using materials like food scraps and tea bags. This will give you more control over the nutrient content.
How do I handle extreme weather conditions, such as drought or heavy rain, to prevent soil damage?
To ensure optimal drainage and aeration in your flower garden, create a 3-4 inch layer of organic mulch around your plants. This will help absorb excess water while preventing root rot. For areas prone to drought, consider installing drip irrigation systems to deliver precise amounts of water directly to the roots.
Can I mix different types of organic matter, like compost and manure, or should they be used separately?
Yes, you can mix different types of organic matter, but it’s essential to balance their nutrient levels correctly. For example, if using a high-nitrogen fertilizer like manure, pair it with a lower nitrogen source like compost tea to maintain equilibrium in your soil ecosystem.
How do I know when my soil needs more or less acidity?
Monitor your plants’ growth and adjust accordingly. Acid-loving flowers like azaleas and rhododendrons will thrive in acidic soils (pH 4.5-6), while alkaline-tolerant blooms like roses and petunias can handle higher pH levels (7-8).