When it comes to creating a stunning flower bed in your backyard, preparation is key. Choosing the right location for your garden can make all the difference between a thriving oasis and a struggling mess. A well-prepared soil environment is essential for healthy plant growth, but many of us don’t know where to start. From selecting the perfect spot to maintaining your bed’s beauty, there are numerous factors to consider.
In this article, we’ll walk you through the expert tips on how to prep your flower bed from scratch, covering everything from initial planning and soil preparation to plant selection and ongoing upkeep. We’ll share our top recommendations for creating a beautiful and thriving garden space that requires minimal maintenance and brings joy all year round. Whether you’re a seasoned gardener or just starting out, this comprehensive guide will provide you with the knowledge you need to create your dream flower bed.
Planning and Design
Before we start digging, let’s lay the groundwork for a beautiful flower bed. In this next part, we’ll cover planning and design essentials to ensure your new garden is stunning from day one.
Choosing the Right Location
When choosing the perfect location for your flower bed, there are several factors to consider. First and foremost, think about sunlight – most flowers require at least 6 hours of direct sunlight per day to thrive. Observe the sun’s path in your yard over a few days to determine where it shines brightest. A south-facing spot is usually ideal, but if that’s not feasible, look for an area with filtered or dappled shade.
Good drainage is also essential – you don’t want waterlogged soil that can lead to root rot and other problems. Choose a location that slopes slightly away from your home or other structures to prevent water accumulation. If your yard tends to be particularly soggy, consider installing French drains or raised beds with built-in irrigation systems.
Lastly, pick a spot that’s easily accessible – you don’t want to have to navigate treacherous terrain every time you need to tend to your flowers. A location near a water source and close to your house can make maintenance a breeze. Remember to also consider the mature size of your plants when selecting their final resting place.
Measuring and Mapping Your Space
Measuring and mapping out your space is an often-overlooked but crucial step in creating a beautiful and functional flower bed. Without it, you risk overcrowding the area, leaving too much empty space, or placing plants in areas where they won’t receive sufficient sunlight.
To begin, grab a measuring tape and take note of the dimensions of your space. Consider not only the length and width but also any obstructions like trees, paths, or garden features. Next, determine the mature size of each plant you plan to include. This will give you an idea of how much space they’ll require as they grow.
You can use string and stakes to visually map out your space by marking where each plant will go. Alternatively, grab a piece of graph paper and sketch out your design. This will help you experiment with different layouts without committing to a specific plan. Take note of any areas that might receive more or less sunlight throughout the day, as this will impact which plants thrive in those spots.
Soil Preparation
Before you start planting, it’s essential to prepare the soil for your flower bed by loosening and aerating the existing dirt. This step is crucial for healthy root growth and blooming flowers.
Testing and Amending Your Soil
Before you start preparing your flower bed, it’s essential to test and amend your soil. This may seem like a tedious step, but trust us, it’s crucial for healthy plant growth. Soil testing will reveal the pH level and nutrient content of your soil, helping you identify any potential issues.
Common soil problems include poor drainage, lack of nutrients, and an imbalanced pH level. For example, if your soil is too alkaline (high pH), plants may struggle to absorb essential micronutrients like iron. Similarly, if your soil is too acidic (low pH), it can lead to nutrient deficiencies and root damage.
To amend these issues, add organic matter like compost or manure to the soil. These natural additives improve soil structure, increase nutrient availability, and promote beneficial microbial activity. For example, a 2-inch layer of compost can raise the pH level by 1-2 points, making it more suitable for a wide range of plants.
When incorporating amendments, mix them into the top 6-8 inches of soil to ensure even distribution. This will help your flowers and other plants thrive in their new home.
Removing Debris and Weeds
Removing debris and weeds from your flower bed is an essential step before planting. Not only does it improve the appearance of your garden, but it also creates a healthy environment for your flowers to thrive. Over time, debris like twigs, branches, and dead leaves can build up and suffocate your plants’ roots.
To remove stubborn weeds without harming surrounding plants or soil, try using a tool specifically designed for weeding, such as a hand weeder or a cultivator with a curved blade. These tools allow you to get into tight spaces and target specific areas where weeds are growing.
Another effective method is to use mulch. By laying down a thick layer of organic mulch like wood chips or bark, you’ll be able to suppress weed growth and prevent debris from accumulating in the first place. This will save you time and effort in the long run by reducing the number of weeds that need to be removed manually.
Remember to always remove weeds by their roots for optimal results. This will prevent regrowth and ensure your flower bed remains weed-free for months to come.
Plant Selection
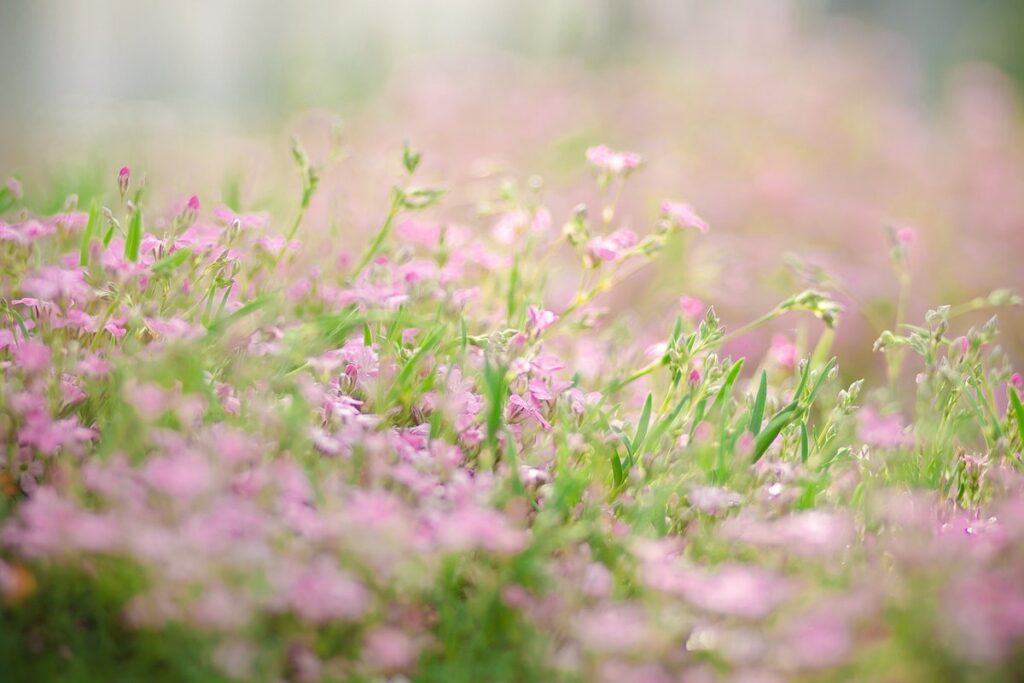
When it comes to creating a beautiful flower bed, choosing the right plants is crucial. Let’s explore some essential tips for selecting flowers that thrive in your specific climate and conditions.
Choosing Flowers That Thrive in Your Climate
When selecting flowers for your flower bed, it’s crucial to choose varieties that thrive in your specific climate and region. This might seem obvious, but many gardeners make the mistake of planting flowers that are not well-suited for their local conditions.
To ensure success, start by researching the hardiness zone map for your area. This will give you an idea of which plants can tolerate temperatures above or below freezing. Next, look for flowers that are specifically bred for your climate and region. These varieties have been engineered to withstand the unique conditions in your area, such as heat, humidity, or drought.
Consider choosing a mix of annuals and perennials that bloom at different times to provide a continuous display of color throughout the growing season. For example, plant spring-blooming bulbs like tulips or daffodils in the fall, followed by summer-blooming annuals like zinnias or marigolds. This will give your flower bed a vibrant and dynamic appearance all year round.
Considering Companion Planting
Companion planting is an age-old technique that can greatly enhance the health and productivity of your flower bed. By choosing plants that complement each other in terms of growth habits and bloom times, you can create a thriving ecosystem that minimizes pests and diseases.
When selecting companion plants, consider the “Three Sisters” method popularized by Native American farmers: planting corn, beans, and squash together. These three crops have distinct growing requirements, but work harmoniously to outcompete weeds and provide shade for each other’s roots. Similarly, pairing tall sunflowers with low-growing marigolds can create a visually appealing combination that also repels nematodes and attracts beneficial insects.
Some popular flower combinations include:
• Roses and lavender: the fragrance of lavender repels pests that target roses, while rose petals attract beneficial pollinators.
• Marigolds and tomatoes: marigold roots release chemicals that repel nematodes, which can devastate tomato plants.
• Nasturtiums and cabbage: nasturtium flowers trap aphids and whiteflies, reducing the risk of disease transmission to nearby cabbage.
Remember, companion planting is all about balance and diversity. Experiment with different combinations to find what works best for your specific climate and flower bed conditions.
Planting and Mulching
Now that you have a plan, it’s time to get your hands dirty by planting and mulching your flower bed. This is where the magic happens!
Preparing the Soil for Planting
Preparing your soil for planting is one of the most critical steps in creating a thriving flower bed. To do this effectively, start by loosening the top layer of soil to a depth of about 8-10 inches using a garden fork or spade. This will help break up any clumps and aerate the soil, allowing roots to grow more easily.
Next, add organic matter like compost or fertilizer to enrich the soil. You can purchase bagged compost or make your own by mixing food scraps and yard waste with some brown materials like leaves or straw. Spread a 2-3 inch layer of compost evenly over the bed, working it into the top 6 inches of soil as you go.
Consider getting a soil test done to determine what nutrients are lacking in your soil. Based on the results, add fertilizers that match the specific needs of your plants. For example, if your soil is heavy with clay or sandy, you may want to add organic matter like peat moss or perlite to improve its structure.
By loosening and enriching your soil, you’ll be creating a foundation for healthy plant growth. This will not only ensure that your flowers bloom beautifully but also make maintenance tasks like watering and pruning easier in the long run.
Watering and Mulching Tips
When it comes to watering and mulching, consistency is key. It’s essential to provide flowers with the right amount of moisture to prevent overwatering or underwatering, which can lead to weakened roots and decreased blooms.
Proper watering techniques involve understanding the specific needs of each plant species. For example, some plants like succulents and cacti require infrequent but thorough watering, while others like hydrangeas and azaleas prefer consistent moisture. To ensure you’re meeting your flowers’ needs, check the soil daily by inserting your finger into the soil up to the knuckle. If it feels dry, it’s time for a drink.
Mulching is also crucial in retaining moisture and suppressing weeds. Organic mulch options like wood chips, bark, or pine straw are perfect for this purpose. Apply a 2-3 inch layer of mulch around your plants, keeping it a few inches away from the stems to prevent rot. This will not only retain moisture but also regulate soil temperature and reduce weed growth by blocking light.
By following these watering and mulching tips, you’ll be well on your way to creating a thriving flower bed that blooms beautifully all season long.
Maintenance and Upkeep
Now that you’ve set up your flower bed, it’s time to focus on regular maintenance tasks to keep it looking its best all season long. We’ll walk you through essential upkeep habits.
Scheduling Regular Care
To keep your flower bed thriving, regular maintenance and upkeep are essential. Think of it as scheduling check-ups for your garden. This ensures that your plants receive the right care at the right time.
Start by creating a routine for watering. Check the soil moisture daily, especially during hot or dry spells. Aim to water deeply once or twice a week, depending on your region’s climate and plant species. For example, if you have plants like lavender or succulents that prefer well-draining soil, they may need more frequent watering.
Regular pruning is also crucial for maintaining the health and appearance of your flowers. Prune dead or dying flowers to prevent the spread of disease and encourage new growth. Remove any seed pods to direct the plant’s energy towards blooming instead of producing seeds. As a general rule, prune about one-third of the plant each time you do it, leaving enough foliage for photosynthesis.
To fertilize your flower bed effectively, choose a balanced fertilizer that provides equal amounts of nitrogen, phosphorus, and potassium. Follow the package instructions for application rates, but as a rough guide, apply 1-2 pounds per 100 square feet of bed area every 4-6 weeks during the growing season.
Dealing with Common Issues
As you tend to your flower bed, it’s essential to be aware of potential issues that can arise. One common problem is pests, such as aphids, whiteflies, and slugs, which can quickly damage your plants. To identify these pests, look for signs like yellowing leaves, distorted growth, or actual insects on the plants.
Some common diseases that affect flower beds include powdery mildew, leaf spot, and root rot. These conditions often appear as white powdery patches, circular lesions, or soft, mushy stems. Regularly inspect your plants to catch these issues early.
To address pests and diseases, adopt a preventative approach by using physical barriers like fine mesh to keep insects out, and avoid overwatering that can lead to root rot. Practice good sanitation, removing weeds and debris that can harbor pests and diseases. For more severe infestations or infections, consider using organic pest control methods or fungicides as directed on the label.
Identifying and addressing these issues promptly is crucial in preventing them from spreading and causing further damage to your flower bed.
Frequently Asked Questions
How do I know if my flower bed location has sufficient sunlight for different types of flowers?
If you’ve chosen a location based on the main article’s guidance, but want to ensure it suits specific plant needs, check your plants’ labels or research their required sunlight hours. You can also use online tools that provide climate-specific planting guides for various regions.
What if I have poor soil quality in my garden? How do I improve its condition?
Improving poor soil is crucial before planting a flower bed. To fix this, start by testing your soil type and pH using a DIY kit or sending it to a lab for analysis. Based on the results, add organic matter like compost, manure, or peat moss to adjust the pH and nutrient levels.
How often should I water my newly planted flowers?
The frequency of watering depends on weather conditions, soil moisture, and plant type. As a general rule, check the soil’s moisture by inserting your finger into it up to the knuckle. If dry, water thoroughly until water drains out. Avoid overwatering, which can lead to root rot.
Can I start planting immediately after preparing the soil, or is there a waiting period?
Yes, most plants prefer well-prepared soil but may need some time to settle and adjust before planting. Awaiting at least 1-2 weeks for the soil amendments to break down and mix with the existing soil allows roots to establish better and reduces transplant shock.
How do I maintain my flower bed during winter months when plants are dormant?
Yes, maintaining your flower bed in winter involves tasks like deadheading, cleaning up debris, and mulching around perennials. Apply a layer of compost or organic fertilizer around 2-3 inches deep to help retain moisture and suppress weeds, preparing the soil for new growth come spring.