As a gardener, you pour your heart and soul into nurturing your plants and creating a thriving outdoor space. But have you ever stopped to think about the equipment that makes it all possible? A well-maintained gardening toolset is essential for keeping your garden healthy and productive, but many of us neglect the upkeep of our gear. Cleaning, lubricating, and storing tools properly can extend their lifespan and prevent costly repairs – not to mention the frustration of a broken hoe or rusty pruning shears in the middle of gardening season! In this article, we’ll cover effective techniques for cleaning tools, preventing rust, choosing the right lubricants, and more, so you can keep your equipment in top condition.
Assessing Your Equipment Needs
Let’s take stock of what you already have: gardening equipment, tools, and machinery that need regular maintenance to keep them running smoothly. This assessment will guide you in identifying your equipment needs.
Knowing When to Clean Your Tools
Regular cleaning is not just a good habit, it’s essential for extending the life of your gardening tools. A clean tool performs better and lasts longer than a dirty one. Dirt, grime, and rust can compromise the functionality and safety of your equipment.
So, how do you know when your tools need attention? Check for signs like rusty handles, corroded metal parts, or stuck mechanisms. If you notice these issues, it’s time to give them a good clean. You can also inspect your tools after each use to catch any problems early on.
Basic cleaning methods include wiping down tool surfaces with a soft cloth and mild soap, rinsing and drying thoroughly, and applying lubricants to moving parts. For tougher messes, you may need to soak your tools in a mixture of water and baking soda or use a gentle scrubber to remove stubborn grime. Regular maintenance not only keeps your tools in good condition but also helps prevent the spread of diseases and pests that can harm plants. By making cleaning a part of your routine, you’ll enjoy healthier and more productive gardening sessions.
Regular Maintenance Schedule
Regular maintenance is crucial to extend the life of your gardening equipment. The frequency of maintenance depends on usage patterns, so let’s break it down by piece.
Pruning shears require sharpening every 10-15 uses or when you notice a significant decrease in performance. Clean them with soap and water after each use and store them in a dry place to prevent rust. For more heavy-duty pruning tasks, consider using an electric pruner for easier maintenance.
Garden hoses need regular checks for kinks and damage. Inspect the hose every 1-2 months for signs of wear and tear. Replace any damaged sections promptly to avoid leaks and water loss.
Lawn mowers require blade sharpening every 5-7 uses or when you notice a decrease in cutting performance. Check your mower’s owner manual for specific maintenance recommendations, as different models may have varying requirements. Always refer to the manufacturer’s guidelines for proper maintenance.
Cleaning Techniques for Various Equipment Types
Different types of gardening equipment require unique cleaning techniques to keep them running efficiently and prolong their lifespan. Let’s dive into specific cleaning tips for common garden tools.
Soap and Water vs. Specialized Cleaners
When it comes to cleaning gardening equipment, many gardeners are unsure whether to reach for soap and water or specialized cleaners. While a gentle soap and water solution can be effective for general maintenance, it may not provide the deep clean that certain tools require.
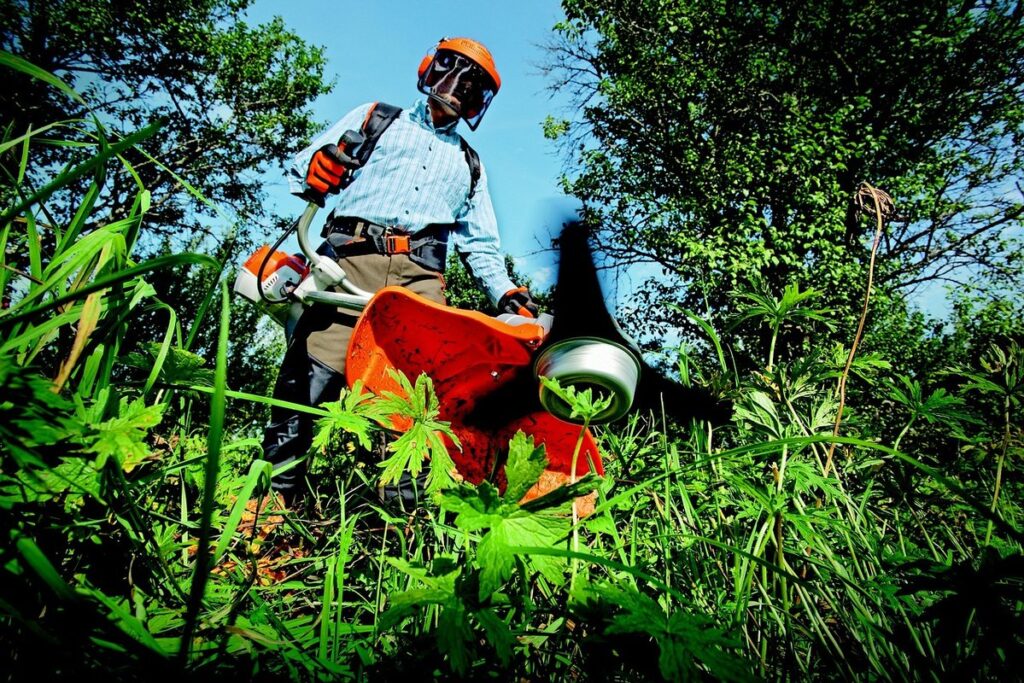
Specialized cleaners, on the other hand, are designed specifically for gardening tools and often contain additives that help protect metal components from rust and corrosion. For example, a brush cutter might benefit from a cleaner containing lubricants to keep moving parts running smoothly.
However, specialized cleaners can also be more expensive than soap and water solutions, and may require additional rinsing steps to remove any residue. Some gardeners find that general-purpose cleaners are sufficient for cleaning equipment between uses, but may choose to reserve specialized cleaners for the end-of-season deep clean.
Ultimately, it’s essential to read the labels and follow the manufacturer’s instructions for both soap and water solutions as well as specialized cleaners. This will help you determine which type of cleaner is best suited to your gardening needs and ensure that your equipment remains in top working order throughout the growing season.
Using Vinegar as a Natural Cleaner
When it comes to cleaning gardening equipment, especially metal surfaces, you might be surprised at how effective vinegar can be. Not only is it a natural and eco-friendly alternative to harsh chemicals, but it’s also gentle enough not to damage the metal. To use vinegar as a natural cleaner, mix 1 part white vinegar with 2 parts water in a spray bottle.
Spray the solution onto the metal surface, making sure to cover all areas evenly. Let it sit for about 10-15 minutes, allowing the acid in the vinegar to break down and dissolve any grease or grime. After the waiting period, use a soft-bristled brush or cloth to wipe away the dirt and grime, followed by a rinse with clean water.
This method is especially useful for removing stubborn stains and rust from metal equipment like pruning shears, garden forks, and watering cans. Just be sure to avoid using vinegar on aluminum or galvanized surfaces, as it can react with these materials and cause damage.
Disinfecting Pruning Tools
When handling pruning tools, it’s essential to disinfect them regularly to prevent the spread of diseases and pests. This is especially crucial if you’re working with plants that are susceptible to infections, such as roses or fruit trees. Failing to disinfect your pruning tools can lead to root rot, leaf spot, and other diseases that can devastate your garden.
To create a bleach solution for disinfection, mix 1 part of household bleach (5-6% sodium hypochlorite) with 9 parts of water in a spray bottle. Spray the solution onto your pruning tools, making sure to cover all surfaces thoroughly. Allow the solution to sit for 10 minutes before rinsing with clean water and allowing the tools to air dry.
It’s crucial to exercise caution when working with bleach solutions, as they can cause skin irritation and chemical burns if not handled properly. Wear protective gloves, safety glasses, and work in a well-ventilated area to minimize exposure risks. Always follow the manufacturer’s instructions for dilution ratios and handling procedures.
Storage Practices for Extending Tool Lifespan
Storing gardening tools correctly is crucial to extending their lifespan, so let’s explore some practical tips on organizing your equipment in a way that preserves their performance and longevity. Proper storage can make all the difference.
Proper Drying Techniques After Cleaning
When cleaning and maintaining gardening equipment, it’s essential to dry them properly to prevent rust, corrosion, and damage. The drying technique you use can significantly impact tool longevity. Air-drying is the simplest method, but it may not be sufficient for all tools.
For delicate items like pruning shears or scissors, air-drying is often the best option. However, for larger equipment like lawnmowers or hedge trimmers, using a drying rack or cloth can help speed up the process and prevent water spots. Drying racks are particularly useful as they allow air to circulate around the tool, reducing the risk of rust.
When choosing between air-drying and using drying racks or cloths, consider the material and design of your tools. For example, metal parts may require more thorough drying than plastic components. Additionally, be sure to dry equipment thoroughly before storing it in a shed or garage to prevent moisture buildup. This will help keep your tools in good condition for years to come.
In some cases, using microfiber cloths can also aid in drying and polishing equipment. These cloths are gentle on surfaces while effectively removing water spots and streaks. Always store clean and dry equipment in a designated area, away from direct sunlight or extreme temperatures.
Protecting Equipment from the Elements
Proper storage of gardening equipment is crucial to prevent damage from harsh weather conditions. When exposed to rain, snow, or intense sunlight, equipment can rust, corrode, or degrade quickly. This not only reduces its lifespan but also compromises performance.
To mitigate this risk, it’s essential to store your tools in a dry and protected area. A garage, shed, or storage room with a waterproof roof is ideal. If you don’t have access to such a space, consider investing in a waterproof cover for your equipment. This will protect against moisture and debris.
During periods of extreme weather, take extra precautions by covering your equipment with breathable tarps or mesh bags. These allow air to circulate while keeping rain and snow out. Secure the covers tightly to prevent them from blowing away in strong winds.
For items that can’t be stored indoors, such as lawn mowers and trimmers, consider using outdoor storage containers with waterproof lids. These will shield your equipment from the elements while still allowing for easy access when needed. By taking these simple steps, you’ll significantly extend the life of your gardening tools.
Handling Rust and Corrosion Issues
Rust and corrosion can be a major problem for gardening equipment, especially if you live in an area with high humidity or salt in the air. In this section, we’ll show you how to identify and fix these issues effectively.
Causes of Rust and How to Prevent It
Rust and corrosion are common issues that can affect gardening equipment, causing damage and reducing its lifespan. To prevent this from happening, it’s essential to understand the causes of rust and take proactive measures.
One of the primary causes of rust is excessive moisture. When metal is exposed to water or high humidity, it can lead to oxidation, resulting in rust formation. Regularly cleaning your equipment after use and storing it in a dry place can help minimize this risk. You should also inspect your tools regularly for signs of rust, addressing any issues promptly.
Poor maintenance is another contributing factor to rust. Infrequent lubrication of moving parts can cause friction, leading to wear and tear that creates an environment conducive to rust development. Applying a rust-resistant coating to metal surfaces can help protect against corrosion. Additionally, using a silicone-based lubricant on hinges and other moving parts can prevent moisture buildup.
To maintain your gardening equipment effectively, follow these tips: Regularly clean and dry your tools after use. Lubricate moving parts with silicone-based products. Apply a rust-resistant coating to metal surfaces. Store your equipment in a dry place to minimize exposure to moisture.
Removing Rust from Metal Surfaces
Removing surface rust from metal gardening equipment is a crucial step in maintaining its longevity and preventing further damage. One of the most effective methods for removing rust is through chemical treatments. For example, using a wire brush to scrub away loose rust, followed by an application of CLR (calcium, lime, and rust remover) or a similar product can be an efficient way to remove rust without causing harm to the metal.
However, it’s essential to exercise caution when using chemical treatments as they can also strip away the metal’s protective coating. To avoid this, always read the instructions carefully, and test the product on a small area first. Alternatively, you can use mechanical removal techniques such as sanding or grinding to remove rust. This method is more time-consuming but gentler on the metal.
It’s also worth noting that preventing rust in the first place is easier than removing it. Regularly washing and drying your equipment after use, applying a protective coating, and storing it in a dry area can go a long way in keeping rust at bay.
Choosing and Using Lubricants Safely
When it comes to lubricating your gardening equipment, proper usage is crucial to avoid damage, injuries, and environmental harm. In this next section, we’ll walk you through safe handling and application techniques.
Types of Lubricants Suitable for Gardening Tools
When it comes to lubricating your gardening tools, you have two primary options: petroleum-based lubricants and plant-based alternatives. Both types have their pros and cons, and the right choice for you will depend on your specific needs and priorities.
Petroleum-based lubricants are effective at reducing friction and preventing rust on metal parts, making them a popular choice among gardeners. They’re often cheaper than plant-based options and provide long-lasting protection against wear and tear. However, they can be toxic to plants and soil, so it’s essential to handle them carefully and dispose of any excess properly.
On the other hand, plant-based lubricants are biodegradable, non-toxic, and gentler on the environment. They’re often made from natural ingredients like soybean oil or coconut oil and are a popular choice among organic gardeners. While they may not provide the same level of protection as petroleum-based lubricants, they can still help extend the life of your tools.
Some plant-based lubricants to consider include those made from:
* Soybean oil: A popular choice for its high viscosity index and resistance to corrosion
* Coconut oil: A versatile option that’s suitable for a wide range of gardening tasks
* Olive oil: A gentle, non-toxic option that’s perfect for cleaning and maintaining delicate tools
When choosing between petroleum-based and plant-based lubricants, consider the specific needs of your gardening tasks. If you’re working with heavy machinery or need long-lasting protection, petroleum-based may be the better choice. However, if you’re looking for a more eco-friendly option or have concerns about toxicity, plant-based alternatives are definitely worth exploring.
Safe Application Methods to Avoid Damage
When applying lubricants to your gardening equipment, it’s essential to strike the right balance. Over-lubricating can lead to a buildup of dirt and grime, while under-lubricating can cause excessive friction that damages equipment components.
To avoid these issues, start by reading your equipment’s manual for specific lubrication guidelines. This will give you an idea of how much lubricant to use and which type is recommended. When applying lubricants, follow the 3-spray rule: one light spray on each bearing or moving part, making sure not to over-saturate. For example, if your lawnmower has a gear box that needs lubrication, apply three light sprays around the gears.
Also, be mindful of areas with high wear and tear, such as chains and pivot points, where extra lubricant may be necessary. However, be cautious not to pool excess lubricant in low-lying areas or corners, which can attract dirt. Regularly inspect your equipment for signs of over-lubrication, like sticky residues or oil buildup. If you notice any of these issues, clean the area with a rag and reapply a minimal amount of lubricant as needed.
Budgeting for Routine Repairs and Replacement
To keep your gardening equipment running smoothly, it’s essential to set aside funds for routine repairs and replacements of worn-out parts. This includes budgeting for unexpected expenses that can arise at any time.
Identifying Wearable Parts Before They Fail
As you continue to use your gardening equipment regularly, it’s essential to keep an eye out for signs of wear that can lead to costly repairs or replacements. One way to identify potential problems is by inspecting the wearable parts before they fail.
Look for worn-out handles, which can become loose or even break off if not addressed promptly. A handle with visible cracks, scratches, or a worn-out grip is a warning sign that it’s time for replacement. Similarly, loose screws and bolts can compromise the structural integrity of your equipment, causing it to malfunction or break down.
Damaged blades are another common issue that requires attention. Rust, dents, or excessive wear on blade edges can reduce their effectiveness and put additional strain on your equipment. Regularly check your mower’s blade for these signs and consider replacing it every season or when you notice a decrease in performance.
By catching these issues early on, you can prevent more extensive damage and extend the lifespan of your gardening equipment.
DIY Repair vs. Professional Service
When it comes to maintaining your gardening equipment, you’ll eventually face the decision of whether to tackle repairs yourself or seek professional help. While DIY repair can be cost-effective and satisfying, there are times when it’s better to bring in a pro.
One key consideration is safety. If you’re not comfortable with working with sharp blades or operating complex machinery, it’s best to leave repairs to someone who has the necessary training and experience. A small mistake can lead to serious injury, so err on the side of caution.
Another factor to consider is the complexity of the repair itself. If you’re dealing with a simple issue like tightening loose screws or replacing worn-out belts, DIY might be feasible. However, if you’re facing more intricate problems such as engine overhauls or electronic system repairs, it’s best to consult a professional who has the expertise and specialized tools needed for the job.
Remember, your gardening equipment is an investment – prioritize its longevity and performance by knowing when to seek help from a qualified technician.
Frequently Asked Questions
Can I use a single lubricant for all my gardening tools?
When choosing a lubricant, consider the specific needs of each tool type. For example, chain saws require a lubricant with Teflon or silicone additives to reduce wear on moving parts. Other tools might benefit from plant-based oils or greases that won’t attract dirt and dust. Always check your tool’s manufacturer recommendations before selecting a lubricant.
What if I don’t have time for regular maintenance – can I still keep my equipment in good condition?
Yes, even with limited time, you can maintain your gardening tools by focusing on high-priority tasks like cleaning after each use and storing them properly. This will help prevent rust and corrosion issues from arising. Set aside a specific day each week or month to perform more extensive maintenance tasks.
Can I reuse old lubricants if they’ve been stored for an extended period?
No, it’s best not to reuse lubricants that have been stored for too long, as their effectiveness can degrade over time. If you’re unsure whether the lubricant is still usable, consider replacing it with a fresh supply. Always check your tool’s manufacturer guidelines for storage and maintenance recommendations.
How do I know if my gardening tools are safe to use after cleaning or disinfecting?
After cleaning or disinfecting your tools, inspect them for any signs of damage or wear. Check for loose handles, sharp edges, or other hazards that could cause injury. If you’re unsure whether a tool is ready for use, err on the side of caution and wait until it’s fully dry before putting it back into service.
Can I mix different types of cleaners or lubricants when maintaining my gardening tools?
No, mixing different cleaners or lubricants can create unpredictable results and potentially damage your equipment. Always follow the manufacturer’s instructions for each product and use them separately as recommended. If you’re unsure about compatibility, consult with a gardening expert or the tool’s manufacturer before attempting to mix products.