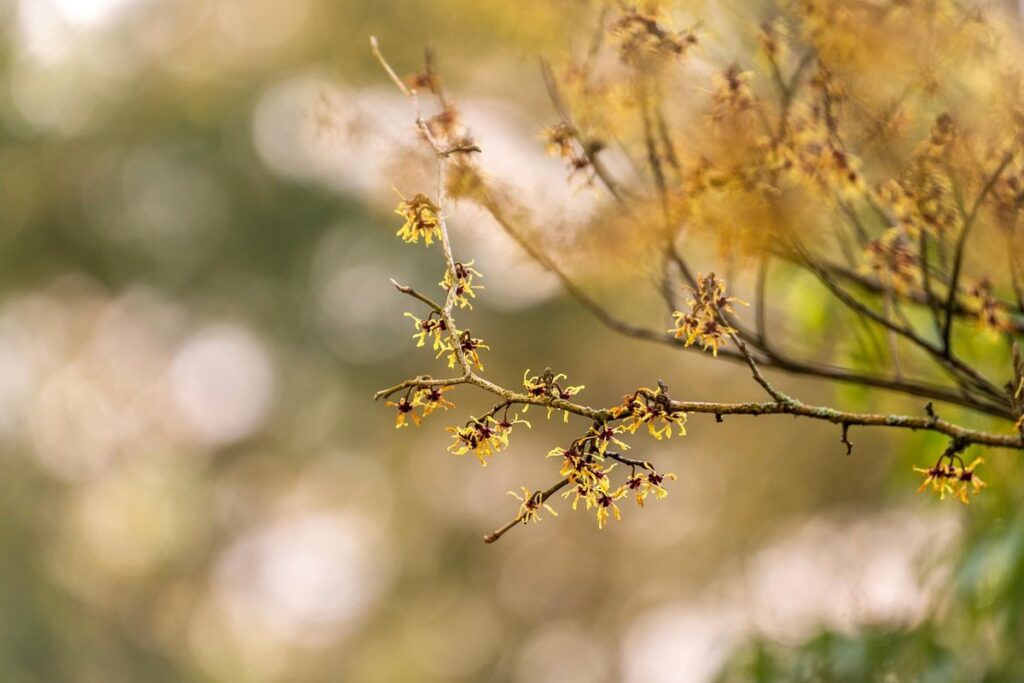
Are you eager to grow your own witch hazel but don’t know where to start? Planting this versatile shrub can be incredibly rewarding, providing you with beautiful winter blooms and a wealth of practical uses. Not only does witch hazel have stunning yellow or orange flowers that add a pop of color to even the darkest winter days, but its fragrant leaves and bark also offer numerous benefits for skincare, haircare, and even medicinal purposes.
If you’re ready to cultivate your own witch hazel and unlock its full potential, we’ve got the ultimate guide for you. From choosing the right variety for your climate and needs to pruning and harvesting, our comprehensive guide will walk you through every step of the process. Whether you’re a seasoned gardener or just starting out, get ready to learn how to plant, care for, and harvest witch hazel with ease and confidence.
Choosing the Right Variety
When it comes to planting witch hazel, selecting the right variety is crucial for achieving the desired growth and flowering results. There are several options to consider, each with its unique characteristics.
Understanding Witch Hazel Types
When it comes to planting witch hazel, understanding the different types is crucial. There are several varieties, but two of the most popular ones are Hamamelis x intermedia and Hamamelis virginiana.
Hamamelis x intermedia, also known as hybrid witch hazel, is a cross between H. mollis and H. vernalis. It’s a versatile variety that thrives in a range of conditions, from full sun to partial shade, and can tolerate a variety of soils. This type of witch hazel is ideal for gardeners who want a low-maintenance option with plenty of flowers.
On the other hand, Hamamelis virginiana, also known as American witch hazel, is native to North America and prefers well-drained acidic soil in full sun or partial shade. It’s a more delicate variety that requires regular watering and fertilization to maintain its vibrant blooms. If you live in an area with high humidity and warm summers, H. virginiana may be the better choice for your garden.
When selecting a witch hazel type, consider factors like climate, soil quality, and desired maintenance level. This will help you choose the perfect variety for your specific needs.
Selecting for Climate and Soil Conditions
When selecting a witch hazel variety for your garden, it’s essential to consider the local climate and soil conditions. Different regions have distinct temperature ranges, humidity levels, and sunlight patterns that can impact the plant’s growth and hardiness.
In cooler climates with short growing seasons, choose a variety like ‘Amethyst’ or ‘Diane’, which are more tolerant of frost and have a slower growth rate. These plants will still bloom in late winter to early spring, providing vibrant colors amidst the cold weather.
For warmer regions, opt for varieties like ‘Winter Sun’ or ‘Solar Flare’, which thrive in temperatures above 40°F (4°C). These plants require less chill hours and produce an abundance of flowers from mid-winter to early spring.
Before making a final decision, inspect your soil’s pH level. Witch hazel prefers well-draining acidic soils with a pH between 6.0 and 7.0. If your soil is too alkaline or heavy clay, consider amending it before planting.
By selecting a witch hazel variety suitable for your climate and soil conditions, you’ll be able to provide the best possible environment for optimal growth and a stunning display of flowers.
Preparing the Planting Site
Before planting your witch hazel, it’s essential to prepare a suitable site that will provide the right conditions for growth. This means creating a space with well-draining soil and full sun to partial shade.
Soil Requirements and pH Level
When it comes to planting witch hazel, understanding its ideal soil requirements is crucial for optimal growth and health. Witch hazel thrives in well-draining, fertile soils with a pH range between 6.0 and 7.5. If your soil’s pH level falls outside of this range, consider taking corrective action before planting.
To determine the pH level of your soil, you can purchase a DIY testing kit or consult with a local nursery or gardening expert. Once you know your soil’s pH level, you can amend it by adding organic matter like compost or peat moss to lower the pH or lime to raise it. Keep in mind that witch hazel prefers slightly acidic to neutral soils, so avoid highly alkaline conditions.
In terms of nutrient needs, witch hazel requires a balanced diet of nitrogen, phosphorus, and potassium. You can supplement your soil with a slow-release fertilizer during the growing season, but be cautious not to over-fertilize, as this can damage the roots and affect growth. A general rule of thumb is to apply 5-10 pounds of compost per 100 square feet of planting area.
Sunlight and Watering Considerations
When planting witch hazel, it’s essential to consider two critical factors: sunlight and watering. Witch hazel is a deciduous shrub that thrives in environments with partial shade to full sun. However, the amount of direct sunlight required can vary depending on the specific cultivar. For example, ‘Amethyst’ prefers full sun, while ‘Dart’s Gold’ tolerates partial shade.
To create a suitable environment for your witch hazel, start by observing the sunlight patterns in your planting site. Choose a location that receives at least 4-6 hours of direct sunlight per day. If your yard is densely shaded, consider pruning nearby trees or shrubs to allow more sunlight to filter through.
When it comes to watering, witch hazel prefers moist, well-draining soil. Aim to provide about 1 inch of water per week, either through rainfall or irrigation. Be cautious not to overwater, as this can lead to root rot and other issues. Check the soil moisture by inserting your finger into the soil up to the knuckle; if the soil feels dry, it’s time to water.
Planting Witch Hazel: A Step-by-Step Guide
To successfully plant witch hazel, follow these essential steps to ensure your new shrub gets off to a healthy start. Let’s dive into the process together!
Digging and Preparing the Hole
When digging and preparing the planting hole for your witch hazel, it’s essential to consider a few key factors that will impact root growth. Start by selecting a location with well-draining soil, as witch hazel prefers a slightly acidic to neutral soil pH (around 6.0-7.0). If your soil is heavy clay or prone to waterlogging, raise the bed to improve drainage.
Dig a hole about twice as wide and just as deep as the plant’s root ball. Make sure the surrounding area is clear of any debris or obstructions that could hinder growth. If your soil lacks nutrients, consider mixing in some organic matter like compost or well-rotted manure to give your witch hazel a head start.
Be careful not to compact the soil during planting, as this can impede root growth and water uptake. Instead, gently firm the soil around the roots to secure the plant in place. Finally, make sure to water thoroughly after planting, and keep the soil consistently moist during its first year of growth.
Planting Techniques and Considerations
When it comes to planting witch hazel, you have two main options: bare-root or container-grown plants. Bare-root witch hazels are typically sold during their dormant season, and they’re a cost-effective option for gardeners on a budget. However, they can be more challenging to plant, as they require careful handling and immediate watering.
On the other hand, container-grown witch hazels are available year-round and come in a range of pot sizes. They offer more flexibility when it comes to planting time and can be transplanted at any season. When selecting a container-grown plant, choose one with a well-developed root system to ensure a smooth transition.
Regardless of which option you choose, make sure to dig a hole that’s twice as wide and just as deep as the root ball. Gently remove any packaging or burlap around the roots, taking care not to damage them. For bare-root plants, spread the roots out evenly in the hole before backfilling with soil.
When transplanting container-grown witch hazels, dig a similar-sized hole, but add some organic matter like compost or well-rotted manure to improve drainage and fertility. Gently place the plant in its new home, firming the soil gently around the roots. Water thoroughly after planting, making sure not to overwater.
It’s also essential to consider the location when planting witch hazel. Choose a spot with good air circulation and partial shade, especially if you live in warmer climates. Witch hazels prefer slightly acidic to neutral soil pH, so test your soil before planting. Make any necessary adjustments to create an ideal environment for your new plant.
Post-Planting Care and Maintenance
Now that you’ve planted your witch hazel, it’s time to focus on giving it the best care possible as it establishes itself in its new home. This section will walk you through essential maintenance tasks.
Watering and Fertilization Routines
Watering and fertilization are crucial aspects of post-planting care for your witch hazel. A newly planted witch hazel needs consistent moisture, especially during its first year. Water your witch hazel when the top 1-2 inches of soil feel dry to the touch. Avoid overwatering, which can lead to root rot and other problems. Aim for about 1 inch of water per week, either through rainfall or irrigation.
Fertilization should be done lightly, as excessive nutrients can harm your witch hazel. Apply a balanced fertilizer (10-10-10 NPK) in early spring and again in summer when new growth appears. Dilute the fertilizer to half the recommended strength to prevent burning the roots. Also, consider using organic fertilizers like compost or well-rotted manure for added benefits.
Some additional tips include:
* Mulching around the base of your witch hazel helps retain moisture and suppress weeds.
* Monitor soil pH levels, as witch hazels prefer slightly acidic to neutral conditions (pH 6.0-7.0).
* Fertilize sparingly in subsequent years, as established witch hazels have a more efficient nutrient uptake system.
Pruning and Training Techniques
Pruning and training are crucial aspects of witch hazel care. Regular pruning helps control the size and shape of your plant, while also promoting healthy growth. To encourage a strong, upright habit, remove lower branches to allow air to circulate around the base.
When shaping your witch hazel, consider its mature size and desired form. You can prune in late winter or early spring before new growth begins. Remove any dead, diseased, or damaged branches as you see them throughout the growing season.
For more substantial pruning, use loppers or hand pruners to cut back overgrown stems to about one-third of their length. This encourages branching and stimulates flowering. You can also shape your witch hazel into a hedge or topiary by carefully pruning and training new growth.
Some key tips for pruning and training witch hazel include:
* Prune in late winter or early spring, before new growth begins
* Remove lower branches to promote air circulation around the base
* Cut back overgrown stems to about one-third of their length to encourage branching
Common Issues and Troubleshooting
Don’t worry if things don’t go as planned when planting witch hazel – we’ve got you covered with solutions to common issues that might arise. This section tackles some of the most frequently encountered problems.
Identifying and Addressing Pests and Diseases
When planting witch hazel, you’ll likely encounter some common pests and diseases that can affect its growth. Keep an eye out for signs of trouble, such as yellowing leaves, black spots, or a sticky substance on the stems.
One of the most common pests affecting witch hazel is aphids, small sap-sucking insects that can cause curled or distorted leaves. To prevent infestations, use neem oil or insecticidal soap to repel aphids and other unwanted visitors. If you do notice an infestation, treat your plant with a strong spray of water to dislodge the aphids.
Root rot is another common issue, caused by overwatering or poor drainage. To prevent root rot, ensure that your witch hazel has well-draining soil and isn’t waterlogged. Remove any dead or dying leaves to prevent fungal growth.
Regularly inspect your plant for signs of disease, such as black spots or powdery mildew. Use a fungicide if necessary to treat fungal infections.
Dealing with Environmental Stressors
Witch hazel is a resilient plant that can thrive in various conditions, but it’s not immune to environmental stressors. Drought, frost, and extreme temperatures can all impact its health. To deal with drought, ensure the soil has good drainage and water deeply once or twice a week during hot spells. Mulch around the base of the plant helps retain moisture.
In areas prone to frost, choose a witch hazel variety that’s hardy in your zone or bring potted plants indoors before the first frost. If you do get frost damage, cut back damaged branches and apply a balanced fertilizer to promote new growth.
Extreme temperatures can be just as damaging. Avoid planting in areas with full sun if your area experiences intense heat waves. Also, protect your witch hazel from sudden temperature drops by covering it with a sheet or tarp during extreme cold snaps.
Monitor your plant regularly for signs of stress and adjust its environment accordingly. With proper care, your witch hazel should be able to bounce back quickly from environmental setbacks.
Harvesting and Using Witch Hazel
Now that you’ve successfully grown your witch hazel plant, it’s time to learn how to harvest its leaves and bark for use in a variety of skincare treatments. We’ll walk you through the process step by step!
Timing and Techniques for Harvesting
When it’s time to harvest your witch hazel plants, you’ll want to consider when and how to collect the flowers, leaves, and bark for use in various applications. Typically, the best time for harvesting is during the fall season, around September or October, when the flowers are in full bloom. This is because the leaves and stems of the plant are at their highest concentration of witch hazel’s active ingredients, tannins, and essential oils.
You can harvest individual flowers by hand-picking them directly from the stem, or use a small pair of scissors to cut off the flower spikes. For leaf harvesting, choose healthy, disease-free leaves with no signs of wilting or damage. Simply snip off the leaves near the base of the stem using scissors or pinch them off between your fingers. When it comes to bark harvesting, wait until late winter or early spring when new growth begins. Use a sharp knife to carefully peel away sections of bark, making sure not to damage the underlying tissue.
Remember to always harvest sustainably and with consideration for the plant’s long-term health.
Preserving and Storing Witch Hazel Products
When you’ve harvested your witch hazel leaves and twigs, it’s essential to preserve them properly to maintain their medicinal properties. One of the simplest methods is air drying, where you tie the harvested materials in small bunches and hang them upside down in a warm, dry place with good airflow. This method can take several weeks to months, depending on the humidity level.
Freezing is another excellent way to preserve witch hazel products. Simply chop or bruise the leaves and twigs to release their oils, then place them in an airtight container or freezer bag. Store them in the freezer at 0°F (-18°C) or below. Frozen witch hazel can be used as needed by simply grating it over wounds or adding it to your herbal remedies.
Infusing witch hazel is also possible by making a tincture using high-proof alcohol or vinegar. Combine one part witch hazel material with two parts solvent in an airtight container, and store it in a cool, dark place for 2-6 weeks, shaking the mixture daily. Strain the liquid and discard the solids to obtain your infused witch hazel. This method allows you to extract the most potent medicinal properties from the plant.
Frequently Asked Questions
Can I grow witch hazel in a container or do I need to plant it directly in the ground?
Yes, you can grow witch hazel in a container if you have limited space or prefer to move your plants around. However, make sure the container is at least 12-18 inches deep and has good drainage holes to accommodate the shrub’s extensive root system.
How often should I prune my witch hazel plant for optimal growth and flowering?
Prune your witch hazel plant in late winter or early spring, removing any dead or damaged branches. After the first year, prune it back by about one-third to encourage bushy growth and promote flowering. Prune annually thereafter to maintain shape and encourage new growth.
What are some common pests that can affect my witch hazel plants, and how do I prevent them?
Common pests like aphids, whiteflies, and spider mites can harm your witch hazel plants. To prevent infestations, keep an eye out for signs of pests and treat your plants promptly with organic pest control methods or insecticidal soap.
Can I use my homegrown witch hazel in skincare products, or do I need to process it first?
Yes, you can use your homegrown witch hazel directly in skincare products after harvesting the leaves, bark, or flowers. However, make sure to dry and store them properly to preserve their medicinal properties and shelf life.
How long does it take for a witch hazel plant to mature and produce its fragrant leaves and bark?
A witch hazel plant typically takes 2-5 years to mature and produce its fragrant leaves and bark. However, you can start harvesting the flowers after just one year of growth. Be patient, as the rewards of growing your own witch hazel are well worth the wait!