Growing your own marigolds from seed can be a truly rewarding experience, especially when you see those bright orange blooms bursting forth in your garden. But let’s face it: growing from seed can also be intimidating, especially if you’re new to gardening. Choosing the right variety of marigold is just the first step – you’ll also need to know how to sow and care for them to ensure they thrive. In this article, we’ll take you through everything you need to know to grow marigolds from seed successfully, from selecting the best varieties to troubleshooting common issues like poor germination or pests. Whether you’re a seasoned gardener looking to expand your knowledge or a beginner eager to get started, this guide will walk you through every step of the process so you can enjoy a bountiful harvest of these beautiful flowers.
Choosing the Right Marigold Variety
With so many vibrant marigold varieties to choose from, selecting the right one for your garden can be a bit overwhelming. Let’s break down the key characteristics of each type.
Understanding Different Types of Marigolds
When it comes to choosing marigolds from seed, understanding the different types is crucial. With numerous varieties available, you might wonder which one suits your needs best.
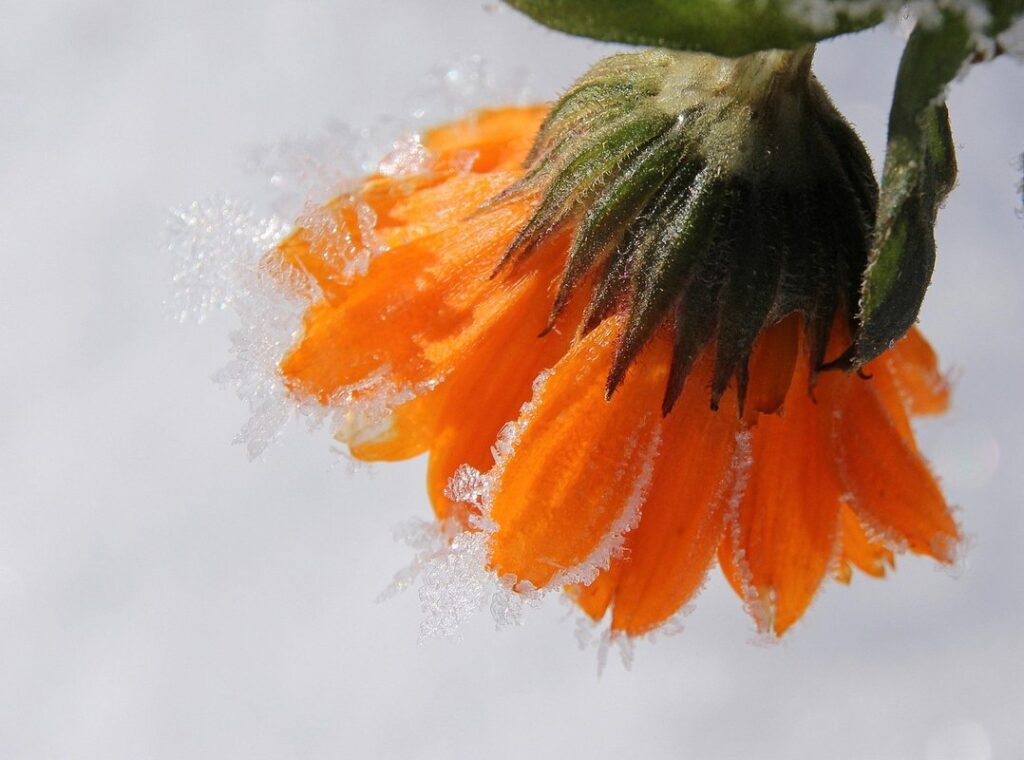
Let’s start with the most popular type: African Marigolds (Tagetes erecta). These bright and cheery flowers are easy to grow and maintain, making them perfect for beginners. They come in a range of vibrant colors, from orange and yellow to red and bi-colored. Their strong fragrance also repels nematodes, whiteflies, and other pests, making them an excellent choice for gardeners looking to naturally control pests.
French Marigolds (Tagetes patula), on the other hand, are more compact and versatile. They produce a continuous display of small blooms in shades of yellow, orange, and red. French Marigolds are ideal for containers, hanging baskets, or adding color to borders.
Signet Marigolds (Tagetes tenuifolia) are another popular variety known for their delicate, fern-like foliage and daisy-like flowers. They come in a range of colors, including white and bi-colored varieties. Signet Marigolds prefer well-drained soil and full sun, making them perfect for adding color to rock gardens or raised beds.
When selecting a marigold variety, consider factors such as climate, soil type, and desired bloom size and duration. By choosing the right type of marigold for your garden, you’ll be able to enjoy their vibrant colors and benefits all season long.
Selecting Seeds Over Seedlings
When it comes to growing marigolds from seed, many gardeners are surprised by just how simple and cost-effective this process can be. One of the primary benefits of selecting seeds over seedlings is the affordability factor – packets of marigold seeds can be purchased for a fraction of the cost of buying individual seedlings.
In fact, with a single packet of seeds, you can start multiple plants at once, allowing you to spread your marigolds out across a larger area of your garden. This not only saves you money but also gives you the flexibility to experiment with different varieties and arrangements.
To get started, simply sow your marigold seeds directly into the ground after the last frost date in your area. Keep the soil consistently moist during the germination period, which typically takes around 7-10 days. Once your seedlings emerge, thin them out to about 6-12 inches apart to allow for proper growth and air circulation.
By growing from seed, you’ll also have the opportunity to witness the unique process of marigold development – from tiny sprouts bursting forth from the earth to vibrant flowers blooming in all their glory.
Preparing the Soil and Environment
Before you start sowing marigold seeds, it’s essential to prepare your soil and environment for optimal growth. This involves creating a warm and well-draining spot for your young plants.
Creating a Suitable Growing Medium
To create an ideal growing medium for marigolds from seed, you need to focus on preparing the soil for optimal growth. Marigolds prefer well-draining soil with a slightly acidic pH, ranging from 6.0 to 7.0. A higher or lower pH can lead to nutrient deficiencies and affect plant health.
To determine your soil’s pH level, consider purchasing a DIY pH testing kit or sending a sample to a lab for analysis. Once you’ve determined the pH, you can adjust it by adding lime to raise the pH or peat moss to lower it.
In terms of nutrients, marigolds require a balanced fertilizer that is rich in nitrogen, phosphorus, and potassium (NPK). You can also mix in organic matter like compost, well-rotted manure, or peat moss to improve soil structure and fertility. A good rule of thumb is to add 2-3 inches of compost or well-rotted manure to the top 6-8 inches of soil before sowing seeds.
Remember that marigolds have shallow roots, so it’s essential to create a loose, crumbly texture by mixing in some perlite or vermiculite. This will help prevent waterlogged soil and ensure healthy root growth.
Providing Adequate Light and Temperature Conditions
When growing marigolds from seed, it’s essential to provide them with optimal light and temperature conditions. Marigolds love bright sunlight, but they can’t tolerate extreme temperatures. To ensure healthy growth, aim for at least 4-6 hours of direct sunlight per day. However, if you’re growing marigolds indoors or in a shaded area, supplemental lighting will be necessary.
Temperature-wise, marigolds prefer daytime temperatures between 65°F to 75°F (18°C to 24°C) and nighttime temperatures around 55°F to 65°F (13°C to 18°C). Avoid exposing them to temperatures below 50°F (10°C) or above 85°F (29°C), as this can cause damage or even kill the plant. Keep in mind that marigolds are sensitive to wind, so if you’re growing them outdoors, choose a protected location.
If you live in an area with frost, wait until the last frost date has passed before sowing your marigold seeds. By providing the right balance of light and temperature conditions, you’ll be well on your way to growing healthy, vibrant marigolds from seed.
Sowing Marigold Seeds
To get a strong start, you’ll want to sow marigold seeds indoors 6-8 weeks before the last frost date in your area, using a good quality seed starting mix. This will give them a head start on the growing season.
Understanding Seed Depth and Spacing
When sowing marigold seeds, it’s essential to consider the proper depth and spacing to ensure healthy germination. The seed size plays a significant role in determining the correct planting depth. For example, larger marigold seeds like ‘African’ or ‘French’ varieties can be planted ¼ inch deep, while smaller seeds like ‘Zenith’ or ‘Pompon’ require only a 1/8 inch planting depth.
The spacing between seeds is also crucial for healthy growth and to prevent overcrowding. Marigolds are warm-season annuals that thrive in well-drained soil and full sun. Planting them too close together can lead to competition for resources, resulting in stunted or diseased plants. A general rule of thumb is to sow marigold seeds 12-18 inches apart in rows spaced 24 inches apart. However, this spacing may need to be adjusted based on the specific variety and growing conditions. For example, compact varieties can be planted 6-8 inches apart in containers or small gardens.
Watering Techniques After Sowing
Maintaining the right moisture levels is crucial during the germination period. This is when seeds are most vulnerable and need consistent, yet controlled water supply to emerge successfully. To avoid overwatering, ensure that the soil isn’t too moist or soggy after sowing marigold seeds.
Check the soil’s moisture by inserting your finger into it up to the first knuckle. If it feels dry, give it a light watering. However, if you notice water pooling on the surface, withhold watering for 24 hours. This approach allows excess water to evaporate and prevents root rot from setting in.
Some common signs of overwatering include yellowing leaves or stems that begin to wilt even when the soil appears moist. Conversely, dry soil can also hinder germination, so monitor your marigold seeds closely during this period. Keep the soil consistently damp but not waterlogged to encourage healthy seedling growth and ensure successful transition from seed sowing to transplanting stage.
Germinating Marigolds: Common Challenges and Solutions
When germinating marigold seeds, you may encounter some bumps along the way, from poor germination rates to seedling diseases. Let’s tackle these common challenges together.
Overcoming Seed Dormancy Issues
Marigold seeds can be notoriously finicky when it comes to germination. One of the most common issues is seed dormancy, where the seed appears to be dead but can still sprout after a period of time. This can be frustrating for gardeners who are eager to get their marigolds growing.
To overcome seed dormancy issues, try scarifying the seeds by gently nicking them with a nail or sandpaper. This helps to break down the outer shell and allow water to penetrate more easily. Soaking the seeds in warm water for 24 hours can also help to soften the seed coat and encourage germination.
Another strategy is to use a propagation tray or cell pack, which provides a controlled environment that can help to stimulate germination. Keep the soil consistently moist but not waterlogged, as this can be detrimental to the seeds. With patience and persistence, you should start to see your marigold seeds sprouting within 7-10 days.
If you’re still experiencing difficulties, try using fresh seed or adjusting the sowing depth – some varieties prefer a shallower sowing depth than others.
Managing Pests and Diseases During the Germination Stage
As you wait for your marigold seeds to germinate, it’s essential to be aware of potential pest issues and disease risks. Slugs and snails are notorious pests that can quickly devour tiny seedlings, so take preventative measures such as using copper tape around the pot or applying a barrier of crushed eggshells around the plant.
To protect your marigolds from fungal infections, ensure good air circulation by keeping them at least 6-8 inches away from other plants. Avoid overwatering, which can lead to moisture retention and create an ideal environment for fungal spores to thrive. Instead, water gently but thoroughly when the top inch of soil feels dry.
If you notice any signs of pests or diseases during this critical germination stage, act quickly. For example, if you catch a slug in the act, simply remove it by hand. If you spot any powdery mildew or rust on your seedlings, treat them with a fungicide specifically designed for seedlings.
Keep an eye out for these common issues and take prompt action to prevent their spread.
Caring for Young Marigold Plants
To ensure those tender shoots keep growing strong, we’ll cover the essential care steps you need to follow when tending to young marigold plants. This includes tips on watering, fertilizing, and more.
Providing Support and Pruning Techniques
As your young marigold plants grow and develop their root systems, they’ll start to reach for the sun. To prevent them from becoming top-heavy and vulnerable to wind damage, provide support without causing harm to the delicate stems. You can use stakes or tomato cages to keep them upright, gently tying the stems with soft twine or plant clips.
When it comes to pruning, timing is everything. Prune your marigold plants when they’ve reached about half their mature height – usually around 6-8 weeks after sowing. Remove any weak or spindly growth, cutting back stems by about one-third to encourage bushy growth and prevent the plant from flowering too early.
Pruning also helps control the overall shape of your marigold plants, promoting more blooms and a fuller appearance. By removing any stray or unsightly shoots, you’ll direct the plant’s energy towards producing healthy flowers and foliage.
Fertilization Practices and Timing
Fertilizing young marigolds is crucial for their growth and development. As they begin to produce leaves and stems, it’s essential to provide them with a balanced diet of nutrients. Start by using a starter fertilizer specifically designed for seedlings, which typically contains a higher concentration of phosphorus to promote root development.
When to fertilize? For young marigolds, the best time is when they have 2-3 sets of leaves. This usually occurs about 1-2 weeks after germination. At this stage, you can switch to a balanced fertilizer with equal parts nitrogen, phosphorus, and potassium (NPK).
Timing is crucial, as overfertilization can harm your young marigolds. Too much nitrogen can cause weak stems and excessive leaf growth, making them more susceptible to pests and diseases. A general rule of thumb is to fertilize once a week during the first month after germination, then gradually reduce frequency to once every 2-3 weeks.
To avoid overfertilization, it’s better to err on the side of caution. Start with low concentrations and gradually increase as needed. Monitor your plants’ response, and adjust your fertilizer application accordingly. Keep in mind that marigolds prefer well-draining soil, so avoid overwatering, which can lead to nutrient deficiencies.
Transplanting Marigold Seedlings
When transplanting marigold seedlings, make sure the soil is warm and has reached at least 60°F for optimal growth. This step helps prevent shock to the young plants.
Understanding the Optimal Time for Transplanting
When it comes to transplanting marigold seedlings, timing is everything. You’ll want to wait until they’ve developed a strong root system and are ready to thrive in their new environment. Typically, this occurs when the seedlings have 2-3 sets of leaves and are about 1-2 inches tall.
To determine if your seedlings are ready for transplanting, gently remove them from their pots or cell packs and inspect the roots. If they’ve developed a robust network of fine hairs, it’s time to move them up to larger containers or directly into the garden. This usually takes around 7-10 days after germination.
If you’re transplanting directly into the garden, make sure the soil is warm enough for marigolds (above 60°F). Harden off your seedlings by gradually exposing them to outdoor conditions over the course of 3-5 days before transplanting. Water well and keep the soil consistently moist during this period to ensure a smooth transition. With proper care, your transplanted marigold seedlings will flourish in no time.
Minimizing Shock During Transplantation
When transplanting marigold seedlings, it’s essential to minimize shock and ensure they continue to thrive. One way to do this is by hardening off the seedlings before moving them outside into their permanent location. This process involves gradually exposing them to outdoor conditions over a period of 7-10 days.
Start by placing the seedlings in a shaded area outdoors for 2-3 hours a day, then gradually increase the duration and exposure to direct sunlight over the next few days. Be sure to monitor the weather and bring them back indoors if there’s a risk of extreme temperatures or moisture.
You can also take steps to reduce shock during transplantation itself. Avoid transplanting seedlings when they’re under stress from dry soil or extreme temperatures. Water the seedlings well before moving them, and make sure the new pot has good drainage holes to prevent waterlogged soil.
By following these tips, you’ll give your marigold seedlings a much-needed head start on adjusting to their new environment. With proper care, they should continue to grow and bloom beautifully in their new location.
Final Tips and Precautions for Success
As you’re preparing to plant your marigold seeds, take a moment to review these crucial final tips and precautions that’ll ensure a thriving and healthy harvest. Let’s get you set up for success!
Common Mistakes to Avoid in Marigold Cultivation
When growing marigolds from seed, it’s easy to get caught up in the excitement of nurturing new life and overlook crucial aspects that can make all the difference between a thriving garden and one on the brink of disaster. One of the most common mistakes growers make is neglecting soil care. Marigold seeds require well-draining, fertile soil with a pH between 6.0 and 7.0. Failing to test your soil or amend it accordingly can lead to stunted growth, weak plants, or even root rot.
Another critical mistake is underestimating the importance of sunlight. Marigolds love full sun (at least six hours of direct sunlight daily) and can quickly become leggy if not given enough light. To avoid this, make sure your seedlings are placed in a spot that receives sufficient sunlight from an early stage. Don’t be tempted to keep them indoors for longer than necessary – this can lead to weakened plants that struggle to adapt to outdoor conditions when transplanted.
Finally, it’s essential to monitor watering habits closely, as overwatering is another common pitfall many growers fall into.
Troubleshooting Common Issues After Transplantation
Growing marigolds from seed can be a rewarding experience, but like with any other plant, issues may arise. Don’t panic if you encounter problems after transplantation; instead, tackle them promptly to ensure the health and well-being of your marigold plants.
One common issue is transplant shock, which occurs when seedlings are suddenly transferred to a new environment. To mitigate this, acclimate your seedlings to outdoor conditions by gradually exposing them to sunlight and wind over several days. This will help reduce stress and promote healthy growth.
Another problem you might face is pests or diseases. Regularly inspect your plants for signs of infestation, such as white powdery patches (powdery mildew) or tiny holes in leaves (caterpillars). Use organic pest control methods whenever possible – neem oil can be effective against a variety of pests.
In some cases, marigold seedlings may develop root bound conditions if their containers are too small. Transplant them into larger pots to provide more space for the roots to grow, promoting healthy development and preventing stunted growth.
Frequently Asked Questions
How Long Does it Take for Marigold Seeds to Germinate?
Marigold seeds typically take 7-14 days to germinate after sowing, depending on the variety and environmental conditions. Keep the soil consistently moist during this period to ensure optimal growth.
Can I Use Last Year’s Soil for Growing Marigolds from Seed?
Yes, but it’s recommended to refresh your soil annually with a mix specifically designed for flowers or vegetables. Old soil can harbor diseases or pests that might affect your marigold seedlings. Start fresh and create a suitable growing medium for best results.
How Often Should I Water My Sown Marigold Seeds?
Water your sown marigold seeds gently but thoroughly once or twice a day, depending on the weather conditions. The soil should be consistently moist but not waterlogged to prevent root rot. As the seedlings grow, gradually reduce watering to about 1-2 times per week.
What Are Some Common Pests That Can Affect Marigold Seedlings?
Aphids and whiteflies are common pests that can harm marigold seedlings. Regularly inspect your plants for signs of infestation and use organic or chemical pesticides as necessary to prevent damage. Maintain a healthy growing environment by ensuring proper air circulation and sanitation.
At What Stage Should I Start Providing Support for My Marigold Plants?
Begin providing support for your marigold plants when they reach about 6-8 inches in height, usually around 2-3 weeks after sowing. Use stakes or trellises to keep the stems upright and promote healthy growth. Regular pruning will also help maintain a balanced shape and encourage more blooms.