Growing your own herbs can be incredibly rewarding, but dill is often one of the trickiest to cultivate successfully. Yet, with its delicate flavor and crunchy texture, fresh dill is an essential ingredient for many popular dishes – from pickling and salads to sauces and marinades. If you’re eager to enjoy a bountiful harvest of this versatile herb, our guide has got you covered.
We’ll walk you through the key steps to growing dill, including choosing the right variety for your needs, preparing the perfect soil conditions, and learning how to care for your plants from seedling to maturity. You’ll also discover expert tips on harvesting and preserving your fresh dill to enjoy it year-round. Whether you’re a seasoned gardener or just starting out, this comprehensive guide will help you unlock the secrets of growing delicious and fragrant dill herb in no time.
Choosing the Right Variety
When it comes to growing dill, selecting the right variety is crucial for optimal flavor and pest resistance. You’ll want to choose between popular options like ‘Fernleaf’ and ‘Mammoth’.
Understanding Dill Varieties
When it comes to growing dill herb, understanding the different varieties is crucial for selecting the right one for your needs. There are several types of dill herbs, each with its unique characteristics and uses in cooking.
Sweet dill, also known as Mammoth or Fernleaf, is a popular variety among gardeners. It has larger leaves and a sweeter flavor compared to regular dill. This variety is ideal for pickling and adding a subtle sweetness to dishes. Regular dill, on the other hand, is a more traditional variety with smaller leaves and a stronger flavor. It’s commonly used in Scandinavian cuisine and pairs well with fish and vegetables.
Dill pickling is a type of dill specifically bred for its ability to ferment quickly and produce a tangy, slightly sour taste. This variety is perfect for creating fermented foods like sauerkraut and kimchi. When selecting a dill variety, consider the space you have available in your garden, as some varieties can grow quite tall.
Keep in mind that most dill varieties are annuals, meaning they complete their life cycle within a year. This means you’ll need to replant every spring for continuous harvests. By choosing the right variety, you’ll be able to enjoy fresh dill throughout the growing season and add it to a wide range of dishes.
Factors to Consider When Selecting a Variety
When selecting a dill variety for home growth, there are several key factors to consider. Climate is an important consideration, as some dill varieties thrive in cooler temperatures while others prefer warmer weather. For example, the popular ‘Fernleaf’ variety grows well in temperate climates with moderate summers, but may bolt (go to seed) if exposed to extreme heat.
Soil type is another crucial factor to consider. Dill prefers well-draining soil that is rich in organic matter. If your soil is heavy clay or sandy, you may need to amend it with compost or other additives to create a more suitable growing environment.
Finally, think about the flavor profile you’re aiming for. Do you want a mild, fresh dill flavor or something more robust and intense? Different varieties can exhibit varying levels of bitterness and sweetness, so choose one that suits your taste preferences. For example, ‘Mammoth’ dill is known for its large, fragrant leaves with a milder flavor, while ‘Dukhless’ has smaller leaves but a more intense, pungent taste.
Planting Dill from Seed
To grow dill from seed, you’ll need to prepare a seed tray or directly sow them into a small pot filled with a well-draining soil mix. Learn how to get started on this page!
Preparing the Soil
Before planting dill seeds, it’s essential to prepare the soil for optimal growth. One crucial step is to test the pH levels of your soil. Dill prefers a slightly acidic to neutral soil pH, ranging from 6.0 to 7.0. If your soil is too alkaline or acidic, it can affect nutrient availability and root development.
To determine your soil’s pH level, you can use a DIY testing kit or send a sample to a lab for analysis. Based on the results, add necessary nutrients to balance out the pH. For example, if your soil is too alkaline, you may need to add elemental sulfur or peat moss to lower the pH.
Adding organic matter like compost or well-rotted manure can also improve soil fertility and structure. These amendments help retain moisture, suppress weeds, and provide essential nutrients for healthy growth. As a general rule of thumb, mix 2-3 inches of compost into the top 6-8 inches of soil before planting dill seeds.
This simple step may seem insignificant, but it can make a significant difference in your dill crop’s performance. A well-prepared soil ensures that your dill plants receive the necessary nutrients for optimal growth and flavor development.
Sowing Seeds Indoors or Outdoors
When deciding where to sow dill seeds – indoors or outdoors – it’s essential to consider your climate and last frost date. If you live in a region with a short growing season or cool winters, sowing dill seeds indoors 4-6 weeks before the last frost date can give them a head start on the growing season. This allows them to mature quickly once transferred outside.
For areas with mild winters, direct sowing outdoors after the last frost is usually best. Sow dill seeds about 1/8 inch deep and 1-2 inches apart in well-draining soil. Keep the soil consistently moist during the first few weeks after planting.
In regions with hot summers or extreme temperatures, consider providing your dill plants with some shade to prevent bolting. You can also start dill seeds indoors and then transfer them to a shaded area outside once they’re established.
Make sure to check the weather forecast before transplanting your seedlings outdoors. Avoid exposing them to direct sunlight, strong winds, or extreme temperatures.
Caring for Dill Plants
To keep your dill plants thriving, you’ll want to learn how to provide them with the right conditions and care to prevent common issues from arising. This section will cover essential tips for healthy growth.
Watering and Moisture Requirements
Watering dill plants requires attention to their moisture needs. Dill prefers well-draining soil and consistent moisture levels. It’s essential to water the plants when the top inch of soil feels dry to the touch, usually every 1-2 days during hot weather.
To avoid overwatering, check the drainage holes in the pot regularly. Water should flow freely out of these holes, indicating that the plant isn’t retaining too much moisture. A general rule is to water dill plants thoroughly until water starts to seep from the bottom of the container.
When watering your dill plants, make sure not to get water on their leaves or crown to prevent fungal diseases. Instead, water at the soil level, allowing the roots to absorb the moisture. Be mindful that dill plants grown in containers require more frequent watering than those planted directly into the ground due to the smaller root system.
Keep an eye out for signs of underwatering, such as wilted leaves or a lack of growth. Conversely, overwatering can lead to yellowing or droopy leaves and root rot. Monitor your plant’s response to adjust its water schedule accordingly.
Fertilizing and Pruning
Fertilizing dill plants is crucial for their healthy growth and development. Dill requires well-balanced fertilizer that provides essential nutrients like nitrogen (N), phosphorus (P), and potassium (K). A general-purpose 10-10-10 NPK fertilizer can be used, but if you’re looking to promote leafy growth, consider a fertilizer with a higher nitrogen content.
To apply fertilizer, mix it according to the instructions on the package, then water your dill plants thoroughly. You can also side-dress by sprinkling the fertilizer around the base of the plant, about 6 inches away from the stem. This method encourages root development and prevents over-fertilization.
Pruning dill is another essential aspect of care that promotes continued growth and flavor. Pinch off flower buds as they form to encourage leaf production and prevent the plant from going to seed too quickly. Regular pruning also helps maintain a bushy shape, allowing more leaves to grow and increasing the overall yield. When pruning, cut back the top sets of leaves by about one-third to stimulate new growth and keep the plant compact. This technique will also direct the plant’s energy towards producing more flavorful foliage.
Common Problems and Solutions
Growing dill can be a bit finicky, so we’re covering some common problems you might encounter and sharing simple solutions to keep your plants thriving. Don’t worry, we’ve got this!
Pests and Diseases
Dill plants are susceptible to various pests and diseases that can significantly impact their growth and yield. One of the most common issues is aphid infestation, which can cause curled leaves and stunted growth. To prevent aphids, ensure you’re growing dill in a location with good air circulation and inspect your plants regularly for any signs of infestation. For severe cases, use neem oil or insecticidal soap to control the population.
Another common issue is powdery mildew, which appears as a white, powdery coating on leaves. This fungal disease thrives in humid environments and can be controlled by improving air circulation and reducing watering frequency. You can also treat affected plants with a fungicide specifically designed for powdery mildew.
Regularly inspect your dill plants for signs of pests or diseases and take prompt action to prevent the issue from spreading. By being proactive, you’ll reduce the risk of losing your crop and ensure a healthy, thriving dill plant.
Environmental Factors Affecting Growth
When growing dill, you’ll find that environmental factors play a significant role in its growth and development. Temperature fluctuations can be particularly challenging for this herb, as it thrives in cooler temperatures between 65°F to 75°F (18°C to 24°C). If the temperature exceeds 85°F (29°C), dill may bolt, causing it to focus energy on producing flowers rather than leaves.
Wind and shade are also crucial factors to consider. Dill can be quite sensitive to wind, which can cause it to become dislodged from its container or suffer damage to its delicate stems. On the other hand, too much shade can prevent dill from receiving sufficient light, leading to weak and leggy growth.
To mitigate these effects, ensure your dill plants are in a location that receives full sun to partial shade, with protection from harsh winds. Mulching around the base of the plants can also help retain moisture and regulate soil temperature. By providing optimal environmental conditions, you’ll be well on your way to growing healthy and productive dill plants.
Harvesting and Storing Dill
Now that your dill plants are thriving, it’s time to learn how to harvest them at their peak flavor and aroma, and store them for future use. We’ll walk you through the best methods for harvesting and storing fresh dill.
When to Harvest
When it comes to harvesting dill, timing is everything. You want to pluck your dill leaves, stems, or seeds at the optimal moment to preserve their maximum flavor and aroma.
For leafy dill varieties, you can start harvesting individual leaves as soon as they’re large enough to use in cooking. Simply pinch off the top set of leaves with your fingers or a pair of scissors, leaving about an inch of stem attached to the plant. This will encourage new growth and prevent the plant from flowering prematurely.
For stems, wait until the plant is around 6-8 inches tall and has a good balance of leaves and stem length. Cut the entire stem back just above a node (the joint where a leaf meets the stem), making sure each cut is at an angle to help water run off.
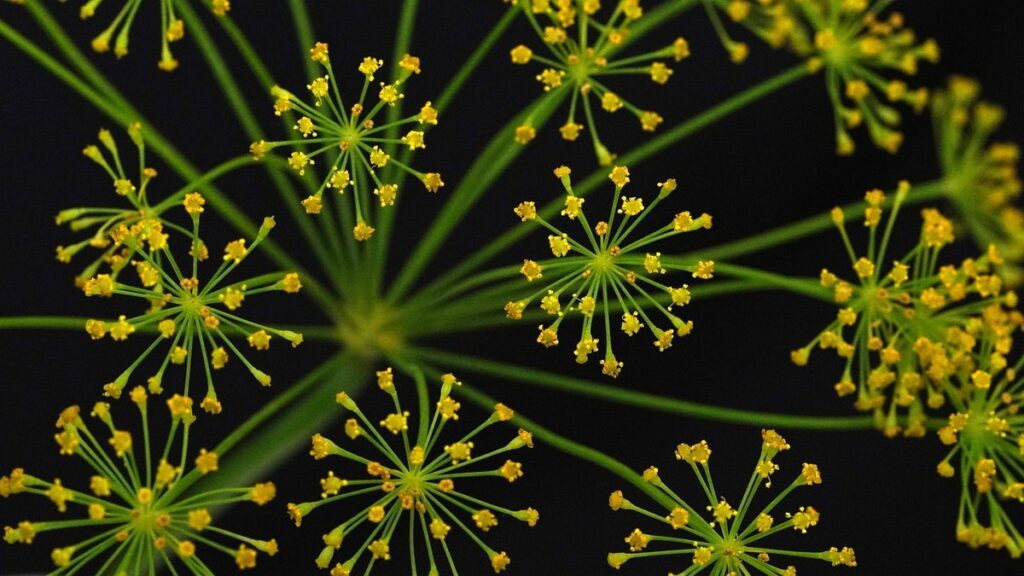
As for seeds, you can harvest them when the dill flowers have turned a light brown color and the seed pods have split open. Simply cut off the flower stalks near the base of the plant, tie them in small bunches, and hang them upside down in a warm, dry place to finish drying out completely.
Preserving Fresh Dill
Preserving fresh dill is an excellent way to enjoy its flavor and aroma throughout the year. With so many methods available, you’re sure to find one that suits your needs.
Freezing is a popular method for preserving fresh dill, as it helps maintain its delicate flavor and texture. To freeze dill, simply chop the leaves and stems finely, then spread them out on a baking sheet lined with parchment paper. Place the sheet in the freezer until the dill is frozen solid, about 1-2 hours. Transfer the frozen dill to an airtight container or freezer bag for long-term storage.
Dehydrating is another effective method for preserving fresh dill. You can use a food dehydrator or your oven on its lowest temperature setting to dry out the leaves and stems. Store the dried dill in a cool, dark place or airtight container to maintain its flavor and aroma.
Pickling is also a great way to preserve fresh dill, especially for those who enjoy adding a tangy twist to their dishes. To pickle dill, simply chop the leaves and stems finely and soak them in a brine solution of vinegar, salt, and water. The pickled dill can be stored in an airtight container in the fridge or canned using a pressure canner.
Regardless of the preservation method you choose, it’s essential to remember that fresh dill is highly perishable and loses its flavor and aroma quickly once picked. To maintain its quality, harvest dill leaves and stems regularly, as this will encourage new growth and prevent the plant from flowering.
Tips for Continuous Harvesting
To keep a steady supply of fresh dill, you’ll want to learn how to harvest it continuously without harming your plant’s growth and productivity. We’ve got some expert tips to share on this crucial aspect!
Succession Planting
Succession planting is a game-changer for continuous dill harvesting. By sowing new seeds every 1-2 weeks, you can ensure a fresh supply of this popular herb throughout the growing season. This technique allows you to have multiple crops maturing at different times, providing a steady stream of fresh dill for cooking and preserving.
To implement succession planting effectively, start by identifying the ideal spacing between each sowing. Dill seeds should be sown about 6-8 inches apart, allowing for proper air circulation and growth. As one crop begins to bolt (go to seed), simply remove it and replace with a new sowing in the same spot. This will give the new seeds ample time to mature before the previous crop’s flowering phase.
Keep track of your planting schedule to maintain a continuous harvest. For example, if you plant on May 1st, and it takes about 20-25 days for dill to reach maturity, you can sow again every week or two to keep the supply fresh. By following this simple succession planting plan, you’ll enjoy an endless supply of fragrant, delicious dill all season long!
Companion Planting
When growing dill, it’s not just about providing it with the right amount of sunlight and water. To ensure a continuous harvest, you can also use companion planting to repel pests and improve soil health. Companion plants like marigolds and nasturtiums are natural pest repellents that can help keep unwanted insects away from your dill crop.
For example, marigold flowers release chemicals that deter nematodes, which can harm dill roots, while also attracting beneficial insects that prey on pests. Nasturtiums, on the other hand, have large leaves that provide shade for the soil, reducing moisture loss and preventing weeds from growing, which in turn reduces competition for nutrients.
To incorporate companion planting into your garden, simply plant marigolds and nasturtiums alongside your dill crop. They can be planted at different stages of growth, but it’s essential to space them correctly to allow each plant enough room to thrive. With proper spacing, you’ll be able to enjoy a continuous harvest while keeping pests under control and improving soil health.
Frequently Asked Questions
Can I grow dill indoors if I don’t have an outdoor garden?
Yes, you can definitely grow dill indoors, provided you have a suitable spot with sufficient light (at least 4-6 hours of direct sunlight) and well-draining soil. You’ll need to use containers that are at least 6 inches deep to accommodate the taproot.
How often should I harvest my dill crop to encourage continuous growth?
To promote continuous harvesting, you can pick individual stems or entire heads every week. This will not only provide a steady supply of fresh dill but also prevent the plants from flowering and going to seed.
What are some common pests that target dill plants, and how do I control them?
Common pests like aphids, spider mites, and caterpillars can damage your dill crop. To control these infestations, use neem oil or insecticidal soap to repel the insects, and remove any affected leaves to prevent further damage.
Can I grow multiple varieties of dill together in a single bed?
While it’s possible to interplant different dill varieties, doing so can lead to overcrowding and reduced growth. For optimal results, plant each variety separately in well-spaced beds (about 12-18 inches apart) to allow for proper air circulation.
How do I preserve fresh dill to enjoy throughout the year?
To preserve your fresh dill harvest, simply tie the stems together in small bunches and hang them upside down in a warm, dry place. You can also freeze or dry the leaves to retain their flavor and aroma for later use.