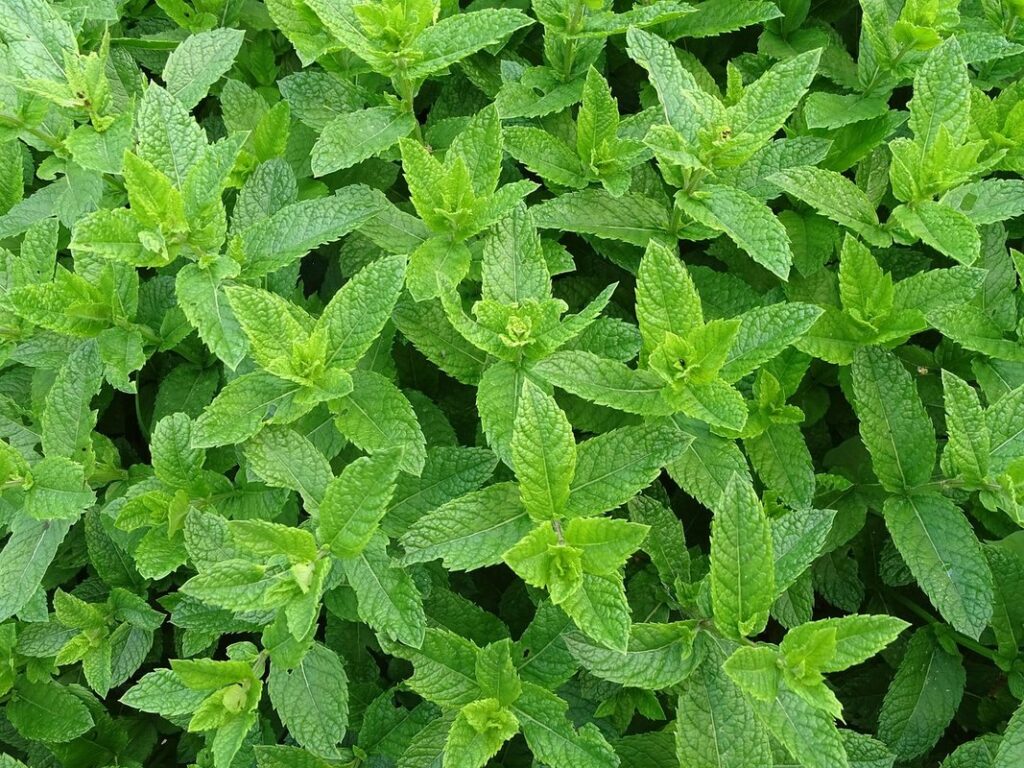
Are you ready to grow your own fresh mint leaves in no time? Mint plants are a staple in many gardens, but can be notoriously finicky. With their delicate roots and specific light requirements, it’s easy to get it wrong. But don’t worry, we’ve got you covered! In this comprehensive guide, we’ll walk you through the step-by-step process of planting a mint plant from scratch. From preparing the right soil to pruning for maximum growth, we’ll cover everything you need to know to successfully grow and care for your mint plants. Whether you’re a seasoned gardener or just starting out, our expert advice will have you harvesting fresh mint leaves in no time. Get ready to unleash the full potential of this versatile herb!
Choosing the Right Location
When it comes to planting a mint plant, choosing the right location is crucial to its success and growth. Selecting a spot that receives partial shade can help prevent over-growing.
Understanding Light Requirements
When it comes to choosing the perfect location for your mint plant, understanding its light requirements is crucial. Mint plants thrive in bright, sunny spots with plenty of direct and indirect light. Direct sunlight, typically between 4-6 hours per day, is ideal for promoting healthy growth and development.
However, be cautious not to place your mint plant in a spot that receives full sun throughout the day, as this can cause scorching or burning of the leaves. Instead, opt for a location with partial shade, especially during peak summer months. You can also consider providing some indirect light by placing your mint plant near an east- or west-facing window.
If you live in a region with limited sunlight, don’t worry! Mint plants can still thrive in low-light conditions. In fact, they can tolerate shaded areas and even grow well under artificial lighting. To give your mint plant the best chance of success, aim to provide at least 2-3 hours of direct or indirect light per day.
In addition to providing adequate light, be mindful of temperature fluctuations, which can affect your mint plant’s overall health. A consistent temperature between 60-70°F (15-21°C) will promote healthy growth and prevent potential issues. By understanding the light requirements of your mint plant and choosing a suitable location, you’ll be well on your way to growing a lush, thriving herb garden.
Selecting a Well-Ventilated Area
When selecting a location for your mint plant, it’s essential to choose an area that provides sufficient air circulation. This might seem like a minor consideration, but trust us – it makes all the difference! Air circulation is crucial for preventing fungal diseases that can wreak havoc on your mint plants.
Mint plants are notorious for their love of moisture, which sounds great, right? But when the air is too still, the excess moisture creates an ideal breeding ground for fungi. By choosing a well-ventilated area, you’ll be creating a healthier environment for your mint plant to thrive. Imagine placing your mint pot on a pedestal or bench, slightly elevated from the surrounding soil – this allows for better airflow and reduces the risk of fungal diseases.
To ensure good air circulation around your mint plant, consider the following:
• Keep your mint plant at least 6-8 inches away from any nearby plants to allow for adequate space between them.
• Avoid planting mint in areas with standing water or where water tends to collect – this can create a humid microclimate that fosters fungal growth.
• Choose a location with some direct sunlight, but also provides shade during the hottest part of the day. This will help regulate temperature and prevent excessive moisture buildup.
By following these simple tips, you’ll be creating an ideal environment for your mint plant to grow strong and healthy – and enjoy those delicious fresh sprigs all season long!
Preparing the Soil
Before planting mint, it’s essential to prepare your soil for optimal growth. This step involves loosening and aerating the earth to ensure healthy roots can develop.
Testing Your Soil pH Level
Testing your soil pH level is an essential step before planting mint. Mint plants thrive in slightly acidic to neutral soil with a pH range of 6.0-7.0. If the pH level falls outside this range, it can affect the plant’s growth and nutrient absorption.
To test your soil pH, you have two options: DIY methods or hiring a professional. For a quick and inexpensive option, use a soil testing kit available at most gardening stores. These kits usually include pH test strips that change color depending on the acidity level of the soil. Compare the result to the color chart provided with the kit.
Another method is to collect a sample of your soil and send it to a laboratory for analysis. This will provide you with more detailed information about your soil’s nutrient content, pH level, and other factors affecting plant growth. If you’re unsure about how to proceed or if you have complex soil conditions, consider hiring a professional to test your soil.
Keep in mind that using the wrong type of potting mix can also impact your mint plant’s performance. Opt for a well-balanced mix specifically designed for containers or gardens with poor drainage. This will help ensure your mint plant gets off to a healthy start.
Amending Your Soil with Organic Matter
When planting a mint plant, it’s essential to create an environment that is conducive to its growth. One of the most effective ways to do this is by amending your soil with organic matter. This not only improves the soil’s fertility but also enhances its drainage properties.
Adding compost or manure to your soil can significantly boost its nutrient levels. These rich sources of nutrients will give your mint plant the energy it needs to thrive. For instance, a mixture of 20% compost and 80% existing soil is an excellent starting point. You can make your own compost at home using kitchen scraps, leaves, and grass clippings.
Alternatively, consider incorporating animal manure into your soil mix. Chicken or cow dung can provide the necessary nitrogen, phosphorus, and potassium for healthy plant growth. To incorporate these amendments effectively, start by tilling a 6-inch layer of compost or manure into the top 8-10 inches of soil. This will allow the beneficial microorganisms to break down the organic matter and create a nutrient-rich environment for your mint plant to flourish in.
Planting the Mint Seeds or Cuttings
To successfully plant mint seeds or cuttings, you’ll want to follow a few key steps that will ensure healthy growth and prevent any potential issues. We’ll guide you through these essential procedures next.
Sowing Seeds Indoors or Outdoors
When it comes to sowing mint seeds, you have two options: indoors or outdoors. The ideal time for sowing depends on your location and the climate.
Sowing indoors 6-8 weeks before the last frost is a great way to get a head start on the growing season. This allows you to transplant the seedlings into larger pots or directly into the garden when the weather permits. To do this, fill a seed tray with a good quality potting mix and sow the seeds about 1/4 inch deep. Keep the soil consistently moist but not waterlogged. Once the seedlings have two sets of leaves, you can transplant them into larger containers.
On the other hand, if you live in an area with mild winters or a long growing season, you can sow mint seeds directly outdoors when the weather permits. Choose a spot that receives partial shade and has well-draining soil. Sow the seeds about 1/4 inch deep and 6-8 inches apart. Keep the soil moist during the first few weeks after sowing, but avoid overwatering.
It’s worth noting that mint can be quite invasive, so it’s a good idea to contain it in a pot or planter to prevent it from spreading into nearby areas.
Propagating from Cuttings
Propagating from cuttings is an excellent way to multiply your favorite mint plants and share them with friends and family. To take stem cuttings, choose healthy stems from a mature mint plant with at least two sets of leaves. Cut the stems just above a node using sharp pruning scissors or a knife, making sure each cutting has at least one set of leaves.
You can root these cuttings in water or a propagation medium like perlite or vermiculite. Fill a glass or jar with lukewarm water and place the cut ends of the stem into it. Place the jar in a warm location away from direct sunlight, changing the water every 2-3 days to prevent bacterial growth.
Alternatively, fill small pots or cells with your chosen propagation medium, leaving about an inch at the top for watering. Plant the cuttings in the medium, firming the soil gently around each cutting. Water thoroughly and keep the medium consistently moist but not waterlogged until roots develop. Roots should emerge within 2-4 weeks, and once they have developed, you can transfer your new mint plants to individual pots or directly into the garden.
Caring for Your Newly Planted Mint
Now that you’ve successfully planted your mint, it’s time to focus on giving it the best care possible. In this next step, we’ll cover everything you need to keep your new plant thriving!
Watering Habits
When it comes to watering habits for mint plants, consistency is key. However, it’s easy to overwater, which can be detrimental to the plant’s health. To avoid this, make sure to check the soil moisture daily by sticking your finger into the soil up to the first knuckle.
If the soil feels dry, it’s time to water your mint plant. Water thoroughly until you see water coming out of the drainage holes in the pot. Be cautious not to let the water collect on the leaves or crown of the plant as this can cause rot.
Signs of overwatering include yellowing leaves, droopy stems, and a soft, mushy texture to the leaves. If you notice any of these symptoms, reduce watering immediately to allow the soil to dry out slightly between waterings.
Remember that mint plants prefer well-draining soil and can be sensitive to root rot. By maintaining consistent but not excessive watering habits, you’ll help your mint plant establish a strong root system and thrive in its new environment.
Pruning and Dividing
Regular pruning is essential to keep your mint plant under control and encourage bushy growth. If left unpruned, mint can quickly become invasive, spreading its roots and stems beyond your garden bed. To prevent this, make it a habit to trim back your mint plant every 1-2 weeks during the growing season.
When pruning, focus on removing any long stems or those that are starting to flower. This will encourage the plant to put energy into producing new growth rather than seed production. Cut just above a node (where a leaf meets the stem) using sharp, clean scissors or pruning shears. This will help prevent damage to the plant and promote healthy regrowth.
You can also divide your mint plant every 6-12 months to control its spread and share with friends. Dig up the entire root system, separate the roots gently, and re-pot each section in fresh soil. Water well and keep the soil consistently moist until new growth appears.
Troubleshooting Common Issues
If you’re having trouble with your mint plant, don’t worry – we’ve got solutions for common problems that can help get your plant back on track. Let’s dive into troubleshooting!
Dealing with Pests
Mint plants can be susceptible to pests, especially when grown indoors. One of the most common pests that target mint is the aphid. These tiny insects feed on the sap of the plant, causing curled leaves and a sticky substance called honeydew to form on the leaves.
Another pest that affects mint is the spider mite. These microscopic arachnids spin fine webs and suck the sap from the leaves, leaving behind yellow or bronzy spots. To control these pests, try using neem oil as an organic pesticide. Mix 2-3% neem oil with water according to the label instructions and spray it on the affected areas.
In addition to neem oil, you can also use other natural pest control methods such as introducing beneficial insects like ladybugs or lacewings that feed on aphids and spider mites. Keep in mind that preventing pests is easier than treating them, so make sure to maintain good air circulation around your mint plant and water it carefully to avoid overwatering.
To prevent pest infestations, inspect your mint plant regularly for signs of pests and treat any issues promptly. By taking these steps, you can keep your mint plant healthy and thriving without the need for harsh chemicals.
Solving Nutrient Deficiencies
Mint plants are prone to nutrient deficiencies, which can manifest as yellowing leaves, stunted growth, or poor flavor. If you notice your mint plant exhibiting these symptoms, it’s likely due to a lack of essential nutrients like nitrogen, iron, or magnesium.
To identify the specific deficiency, examine the color and texture of the affected leaves. Yellowing leaves may indicate a nitrogen deficiency, while pale yellow or white spots could be a sign of iron or magnesium deficiency. Inspect the soil pH as well; mint prefers a slightly acidic to neutral soil pH between 6.0-7.0.
To address nutrient deficiencies, fertilize your mint plant with a balanced, water-soluble fertilizer (10-10-10 N-P-K) during the growing season. You can also apply a slow-release fertilizer or compost tea for a more sustainable option. If your soil is too alkaline, add elemental sulfur to lower the pH. Alternatively, incorporate organic matter like peat moss or well-rotted manure into the soil to improve its nutrient-holding capacity and structure.
Regularly monitoring your mint plant’s condition will help you catch potential issues early on, allowing for prompt corrective action.
Harvesting Your Fresh Mint Leaves
Now that you have a thriving mint plant, it’s time to enjoy the fruits of your labor and harvest those delicious fresh leaves for cooking and brewing. This is where things get exciting!
Timing for Optimal Flavor and Aroma
When it comes to harvesting mint leaves for their optimal flavor and aroma, timing is everything. If you’ve been waiting for the perfect moment, here’s what you need to know: fresh mint leaves are typically at their best when they’re harvested in the morning after the dew has evaporated but before the heat of the day sets in.
Weather conditions can also impact the quality of your mint leaves. High temperatures and intense sunlight can cause the leaves to become bitter and lose their aroma, while excessive rain or humidity can lead to a loss of flavor and texture. To minimize these effects, try to harvest your mint leaves on overcast days or during periods of gentle rainfall.
Aim to pick individual leaves or sprigs at any stage of growth, but for peak flavor and aroma, focus on harvesting the top sets of leaves when they’re around 2-3 inches long. This will encourage new growth while allowing you to enjoy the best of your mint plant’s bounty.
Preserving and Storing Mint
Preserving and storing fresh mint is an essential step to maintain its flavor and aroma. Mint leaves are highly perishable and can spoil quickly if not stored properly. To enjoy the benefits of mint throughout the year, you need to preserve it using various methods.
One popular method is drying mint leaves. You can dry them by tying them in small bunches and hanging them upside down in a warm, well-ventilated area. Alternatively, you can use a food dehydrator or your oven on the lowest temperature setting. Once dry, store them in airtight containers to maintain their flavor.
Freezing mint leaves is another effective method for preservation. Simply chop the leaves, place them in an ice cube tray, and cover with water or olive oil. Once frozen, transfer the cubes to a freezer-safe bag or container for later use. Frozen mint can be used in soups, sauces, or as a garnish.
When storing fresh mint, it’s essential to keep it away from direct sunlight and heat sources. You can store it in a glass of water on your kitchen counter or wrap the stems in plastic bags to maintain moisture. Regularly trim the plant to encourage new growth and prevent it from flowering.
Frequently Asked Questions
How often should I water my newly planted mint?
Water your mint plant regularly, but make sure not to overwater it. Check the soil daily by sticking your finger about an inch deep into the soil. If the soil feels dry, it’s time to water. Aim for about 1-2 inches of water per week, either from rain or irrigation.
Can I grow mint indoors if I don’t have a sunny spot?
Yes, you can still grow mint indoors with sufficient light. Choose a location near an east-facing window, which provides gentle and indirect sunlight. Alternatively, use grow lights to supplement the natural light. This will help your mint plant thrive even in low-light conditions.
How do I prevent my mint from becoming invasive?
Mint plants are notorious for spreading quickly. To contain them, plant them in a large container or a separate bed with good drainage. Regularly trim and prune the stems to encourage bushy growth rather than sprawling outwards. This will help keep your mint under control while still allowing it to grow.
Can I harvest mint leaves at any time?
No, the best time to harvest mint leaves depends on their purpose. For cooking and culinary use, pick the top sets of leaves when they’re young and tender. For tea or medicinal purposes, wait until the plant is fully established and the leaves are more mature.
What happens if I notice pests on my mint plant?
Act quickly to address any pest issues on your mint plant. Check for common pests like aphids, whiteflies, or spider mites. Use neem oil or insecticidal soap to treat infestations. Regularly inspect your plants and take action promptly to prevent the problem from spreading.