Are you looking to add some fresh flavor and fragrance to your garden? Look no further than planting sage, a versatile and aromatic herb that’s perfect for cooking and decorating. But before you can enjoy its many benefits, you need to know how to plant it right. In this comprehensive guide, we’ll walk you through the process of choosing the best variety of sage for your needs, preparing the soil for optimal growth, and providing young plants with the care they need to thrive.
We’ll cover everything from selecting a sunny spot in your garden to protecting your young sage plants from pests and diseases. By following our step-by-step instructions, you’ll be able to grow delicious and fragrant sage that will add depth and complexity to your cooking, as well as beautiful purple flowers to your garden. So, let’s get started on this journey to growing perfect sage!
Choosing the Right Sage Variety
When it comes to planting sage, selecting the right variety is crucial for a healthy and thriving garden. Let’s explore the different types of sage that are perfect for your garden.
Understanding Sage Types
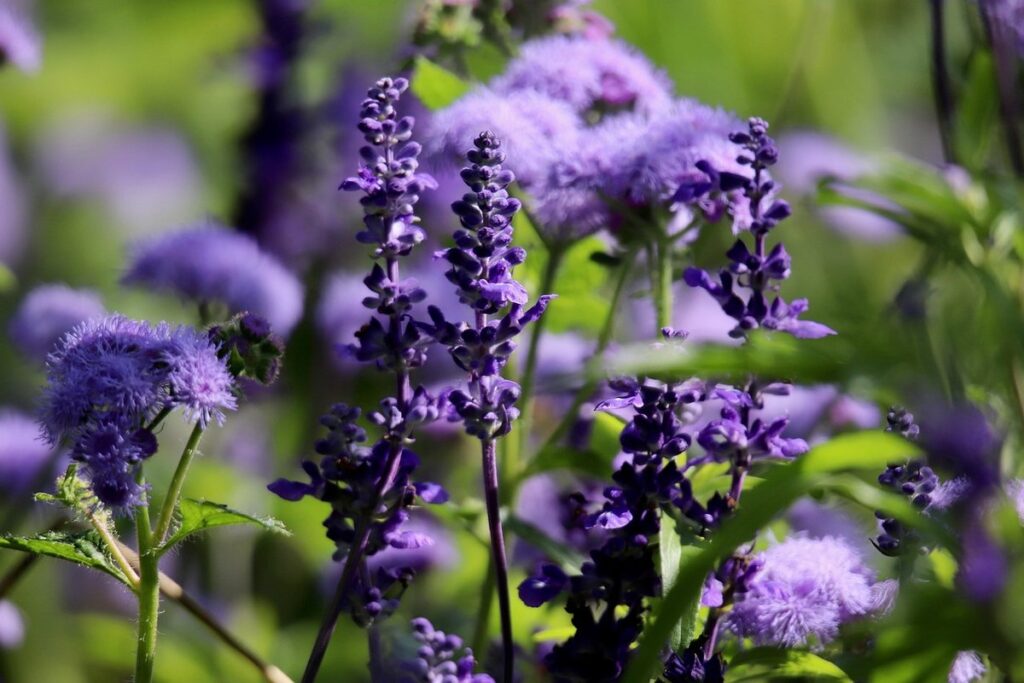
When it comes to planting sage, understanding the different types of sage available is crucial. There are several varieties to choose from, each with its unique characteristics and uses. Common sage (Salvia officinalis) is one of the most widely grown varieties, known for its culinary and medicinal properties. It has a delicate flavor and aroma, making it an ideal choice for cooking and herbal remedies.
Purple sage, on the other hand, boasts deeper purple leaves and a slightly sweeter flavor than common sage. This variety is often used in traditional medicine to aid digestion and relieve respiratory issues. White sage (Salvia apiana) is a popular choice for its distinctive white flowers and fragrant foliage. It’s commonly used in smudging ceremonies to purify the air and promote spiritual growth.
When selecting a sage variety, consider your climate and intended use. For example, if you live in a dry region, common sage may be a better choice due to its drought tolerance. If you’re looking for a medicinal herb, purple or white sage might be more suitable. By choosing the right type of sage, you’ll ensure that your plant thrives and meets your needs.
Considering Climate and Hardiness
When choosing a sage variety, it’s essential to consider your region’s climate and hardiness zone. This will ensure that your sage plant thrives in your garden and provides the best results. To determine which sage variety is suitable for your area, you’ll need to know your USDA Hardiness Zone.
If you live in a region with cold winters (Hardiness Zones 3-5), opt for sage varieties like ‘Triolor’ or ‘Purple Sage’, which are more resistant to frost and can tolerate temperatures as low as -10°F (-23°C). On the other hand, if you’re in a warmer climate (Hardiness Zones 6-9), you can grow ‘Dwarf Purple Sage’ or ‘Tricolor Sage’, which prefer milder winters and hotter summers.
Be sure to check the specific growing conditions for your chosen sage variety, as some may require more protection from extreme temperatures. By choosing a sage variety that suits your climate and hardiness zone, you’ll be well on your way to growing healthy, fragrant sage in your garden.
Preparing the Soil
Before you start planting, let’s make sure your soil is ready for sage by loosening it to a depth of 12-18 inches and removing any debris. This will give roots room to grow.
Testing Your Soil pH
Soil pH matters significantly when it comes to growing sage. This herb thrives in slightly acidic to neutral soil, with a pH range of 6.0-7.0 being ideal for its growth. If your soil is too alkaline or acidic, it can lead to nutrient deficiencies and stunted growth.
To test your soil pH levels, you’ll need a soil testing kit or send a sample to a lab for analysis. The most common methods are pH paper strips or digital pH meters. These tools will give you an accurate reading of your soil’s acidity or alkalinity.
If you’re using a DIY testing kit, make sure to follow the instructions carefully and take multiple readings to ensure accuracy. For instance, if your test shows that your soil pH is too high (above 7.0), you may need to add elemental sulfur or peat moss to lower it. Conversely, if your soil pH is too low (below 6.0), adding lime will help raise the levels.
Keep in mind that some testing kits may not provide accurate results for highly alkaline soils, so it’s essential to use a reliable tool or consult with a gardening expert if you’re unsure about your soil’s pH levels.
Adding Organic Matter
Adding organic matter to your soil is one of the most effective ways to improve its structure and fertility for optimal sage growth. Sage is a Mediterranean herb that thrives in well-draining, fertile soils with a pH between 6.0 and 7.0. However, most garden soils tend to be compacted, depleted of nutrients, and lacking in organic matter.
To address these issues, start by adding compost or well-rotted manure to your soil. Aim for at least 2-3 inches of compost depth, mixing it thoroughly with the existing soil. This will help break up clay particles, improve water penetration, and provide essential nutrients for sage growth. Alternatively, you can also use peat moss or coconut coir as a substitute.
When choosing an organic matter source, consider using aged compost or worm castings, which are rich in micronutrients and beneficial microorganisms. These microorganisms will help to solubilize phosphorus, making it available for sage uptake. For instance, according to a study by the University of California, Davis, compost amended with worm castings significantly increased plant growth and yields compared to unamended soils.
Planting Sage Seeds or Seedlings
You’ve got two options for starting your sage garden: planting seeds directly into the ground or transplanting seedlings from pots. Let’s dive into both methods in detail.
Sowing Sage Seeds Indoors
Sowing sage seeds indoors 6-8 weeks before the last frost date is a great way to get a head start on the growing season. To begin, prepare some seed trays by filling them with a good quality potting mix specifically designed for indoor seed starting. Moisten the mix with water, but make sure it’s not too wet as this can cause the seeds to rot.
Next, place one or two sage seeds about 1/8 inch deep in each cell of the tray. Cover the seeds with a thin layer of the potting mix and gently firm it down. Water the trays again, but this time lightly, making sure the surface is just moist.
Maintaining proper temperature and humidity levels is crucial for successful germination. Keep the seed trays in a warm location with temperatures between 65-70°F (18-21°C). The ideal humidity level is around 70-80%. To maintain this level, cover the trays with clear plastic bags or cloths, but make sure they don’t touch the leaves to prevent fungal diseases.
Check on your seeds every day, and remove the covers when you notice roots emerging. This usually takes around 1-2 weeks, depending on the temperature. By following these steps, you’ll be well on your way to successfully sowing sage seeds indoors.
Transplanting Sage Seedlings
When it’s time to transplant your sage seedlings outdoors, they should have around 2-3 sets of leaves. This is a crucial stage where proper care and preparation can make all the difference. Begin by hardening off your seedlings for about a week before moving them outside. Place them in direct sunlight for a few hours each day, gradually increasing the duration over time.
Once you’re ready to transplant, prepare the soil first. Sage prefers well-draining soil with a pH between 6.0 and 7.0. Test your soil type and adjust it if necessary. Dig a hole that’s about twice as wide and just as deep as the seedling’s root ball. Gently remove the seedling from its container and place it in the hole, making sure not to disturb the roots.
Space sage plants around 12-18 inches apart, depending on their expected growth. Water thoroughly after transplanting, but avoid overwatering, which can lead to root rot. Mulch around the base of the plant to retain moisture and suppress weeds. Keep the soil consistently moist during the first few weeks after transplanting, then reduce watering as the plants establish themselves.
Caring for Young Sage Plants
Now that you’ve planted your sage, it’s time to focus on caring for young plants. In this crucial period, proper care will determine their growth and success in the long run.
Watering and Mulching
Consistent moisture is crucial for young sage plants as it allows them to establish a strong root system. Water your sage plant when the top 1-2 inches of soil feels dry to the touch. It’s essential to avoid overwatering, which can lead to root rot and other issues. To water effectively, use a gentle stream of water, and make sure not to get any on the leaves to prevent fungal diseases.
Mulching is another vital aspect of caring for young sage plants. Organic mulch helps retain moisture in the soil, suppresses weeds, and regulates soil temperature. Use a 2-3 inch layer of organic mulch like wood chips or bark around your sage plant. Avoid using gravel or other materials that can repel water.
Keep an eye on the weather and adjust your watering schedule accordingly. During hot summer months, young sage plants may need more frequent watering, while cooler months require less. Regularly check the moisture level in the soil to ensure you’re not over- or underwatering your plant. By maintaining consistent moisture levels and mulching effectively, you’ll give your young sage plant a solid foundation for healthy growth.
Fertilizing and Pruning
Fertilizing young sage plants is essential for promoting healthy growth and root development. As a general rule, it’s best to fertilize them when they’re about 6-8 inches tall. You can use a balanced fertilizer, such as 10-10-10 NPK, which provides equal amounts of nitrogen, phosphorus, and potassium.
When choosing a fertilizer, make sure it’s specifically designed for herbs or vegetables, as these formulas tend to have the right balance of nutrients for plants like sage. Follow the instructions on the packaging and fertilize your young sage plants at half the recommended strength to avoid burning their roots.
As for pruning, it’s crucial to encourage branching in young sage plants. Pinch off the top set of leaves when they’re about 6 inches tall to promote a bushy shape. This will also help prevent them from becoming leggy and top-heavy. You can also remove any weak or spindly growth to direct the plant’s energy towards healthy, productive stems. Prune your sage plants regularly to maintain their shape and encourage new growth throughout the season.
Pest and Disease Management
To keep your sage plants healthy and thriving, it’s essential to know how to prevent common pests and diseases that can damage them. This section will cover some simple strategies for pest control and disease prevention.
Common Sage Pests and Diseases
Sage plants can be susceptible to various pests and diseases that can affect their growth and overall health. Some common pests that may infest sage plants include aphids, whiteflies, and spider mites. These tiny insects can cause significant damage by sucking sap from the plant’s leaves and stems.
Aphids, in particular, are known to feed on sage’s tender shoots, causing curled or distorted leaves. Whiteflies, on the other hand, can transmit diseases like powdery mildew and downy mildew to the plant. To control these pests, regular monitoring is essential. You can inspect your plants regularly for signs of infestation, such as sticky honeydew droplets or actual insects.
As for diseases, powdery mildew and downy mildew are two common issues that may affect sage plants. Powdery mildew causes a white, powdery coating on the leaves, while downy mildew leads to yellowing leaves with black spores on the underside. To prevent these diseases, ensure good air circulation around your plants by pruning nearby foliage and providing sufficient space between each plant.
Organic Control Methods
When it comes to managing pests and diseases on your sage plants using organic control methods, there are several effective techniques you can employ. One of the most popular options is neem oil, a natural pesticide that disrupts insect growth and development. To use neem oil, mix 2-3% with water according to the label instructions and spray it on the affected areas.
Another option is soap solutions, which can be made by mixing 1 tablespoon of mild liquid soap with 1 quart of water. This solution is gentle enough for most plants but will still help control pests like aphids and whiteflies. For more severe infestations or diseases, consider introducing resistant varieties such as ‘Tricolor’ or ‘Purpurascens’, which are bred to be less susceptible to common pests and diseases.
When using these methods, be sure to identify the pest or disease correctly before applying any control measures. This will help you target the issue effectively and minimize harm to beneficial insects like bees and butterflies that visit your garden. Regular monitoring is also essential for catching problems early on.
Harvesting and Preserving Sage
Now that you’ve successfully grown your sage plant, it’s time to reap the rewards and preserve its goodness for months to come. In this next step, we’ll guide you through harvesting and preserving your prized herb.
Timing and Frequency of Harvests
When it comes to harvesting sage, timing and frequency are crucial for preserving its flavor and aroma. For best results, consider individual leaves when they reach about 2-3 inches long, usually within 6-8 weeks of planting. Harvesting at this stage not only encourages bushy growth but also prevents the plant from flowering.
If you prefer to harvest entire stems, wait until the plant reaches maturity, around 12-18 months after planting. Cut back the stem to about half its height to promote new growth and prevent it from becoming woody. This method is ideal for preserving larger quantities of sage or creating a continuous supply throughout the growing season.
To maximize flavor preservation, harvest in the morning, just before the plant starts to release its oils. Avoid harvesting during peak heat hours when the sun can cause essential oils to evaporate quickly. Regular pruning and pinching also help maintain bushy growth and prevent flowering, ultimately promoting healthy sage plants that yield fragrant leaves throughout their lifespan.
Drying, Freezing, and Storing Sage
Once you’ve harvested your sage, it’s essential to preserve its flavor and aroma for year-round use. There are several methods to dry, freeze, or store sage effectively.
Drying is a great way to retain the herb’s potency. Tie the stems together and hang them upside down in a warm, dry place with good air circulation. You can also use a food dehydrator on its lowest setting. Check on the leaves every few hours until they crumble easily when touched. Store dried sage in airtight containers to maintain freshness.
Freezing is another excellent option for preserving sage. Simply chop or bruise the leaves, place them in an airtight container or freezer bag, and store them in the freezer. Frozen sage will retain its flavor and aroma when added to dishes towards the end of cooking time.
When storing fresh sage, keep it away from direct sunlight and moisture. Wrap the stems loosely in paper towels and place them in a plastic bag. Store the bag in the refrigerator’s crisper drawer to prolong freshness. Use stored sage within a few days for optimal flavor and aroma.
Frequently Asked Questions
Can I grow sage indoors if I don’t have outdoor space?
Yes, you can definitely grow sage indoors, especially during the winter months when it’s not possible to plant outside. Make sure your indoor space has plenty of sunlight and a consistent temperature between 60-70°F (15-21°C) for optimal growth.
How long does it take for sage to mature after planting?
After planting, it can take anywhere from 3-6 weeks for sage seedlings to emerge above ground. Once they reach about 6 inches tall, you can start pruning them regularly to encourage bushy growth and prevent flowering. Harvesting individual leaves or stems will also help control the plant’s height.
What are some common pests that target sage plants?
Aphids, whiteflies, and spider mites are common pests that may target your sage plants. Keep an eye out for these tiny insects on the underside of leaves, and treat them promptly with neem oil or insecticidal soap to prevent infestations.
How often should I water my mature sage plants?
Water your mature sage plants regularly, but make sure not to overwater them. Aim for about 1-2 inches of water per week, either from rainfall or irrigation. Water deeply once or twice a week during hot summer months when the plant is actively growing.