Are you looking for an easy way to propagate your favorite herb, mint? Growing mint from cuttings is a fantastic way to get more plants without spending money on new seeds or seedlings. Not only is it budget-friendly, but it’s also super convenient and yields great results. If you’re struggling to grow mint in your garden or want to share some with friends and family, this guide will walk you through the simple steps to success.
In this article, we’ll cover everything from selecting healthy cuttings to promoting optimal growth conditions. You’ll learn how to prepare rooting mediums that give your mint cuttings the best chance of thriving. With our easy-to-follow tips and tricks, you’ll be well on your way to growing lush, fragrant mint in no time.
Choosing the Right Type of Mint
When it comes to growing mint from cuttings, selecting the right type is crucial. Not all mints are created equal, and some will thrive better in your garden than others.
Understanding Mint Varieties
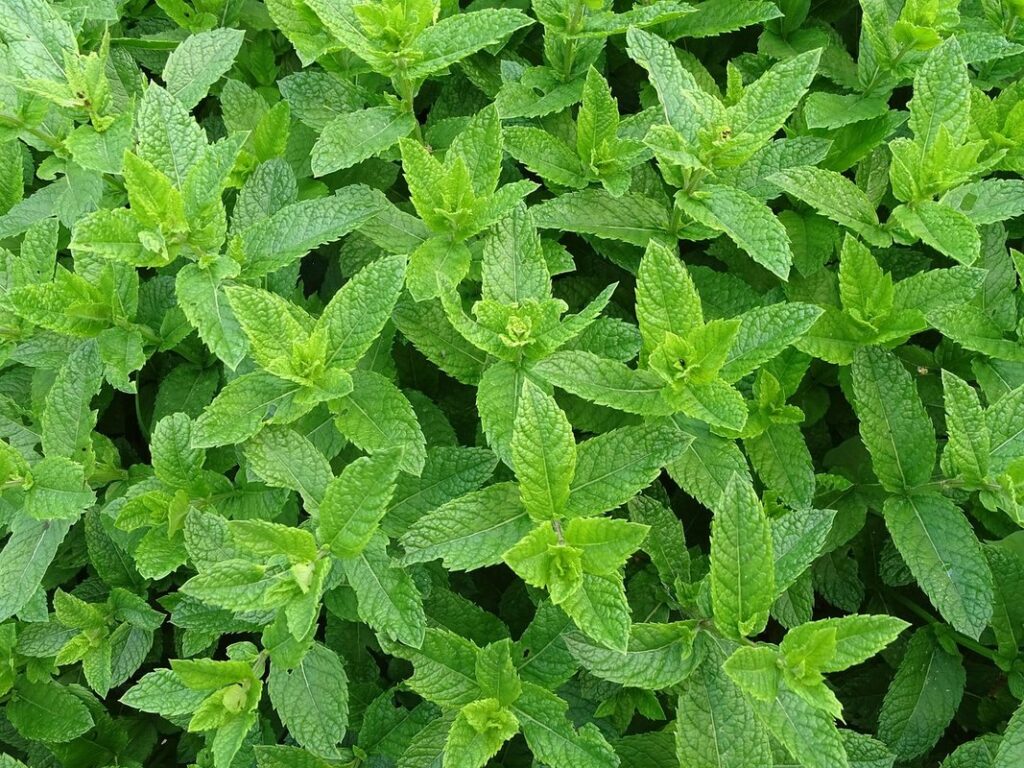
When it comes to growing mint from cuttings, understanding the different varieties is crucial. There are several types of mint, each with its unique characteristics and uses. Peppermint (Mentha piperita) is one of the most popular types, known for its high menthol content and refreshing aroma. Its leaves have a distinctive pointed tip and are often used in cooking and herbal teas.
Spearmint (Mentha spicata), on the other hand, has a milder flavor and scent compared to peppermint. It’s also more hardy and easier to grow, making it a great choice for beginners. Chocolate mint (Mentha x piperita f. citrata ‘Chocolate’) is a hybrid of peppermint and spearmint, with a unique flavor that’s both sweet and minty.
Before deciding which type of mint to grow from cuttings, consider your personal preferences and needs. If you want a strong, refreshing aroma, peppermint might be the best choice. If you prefer a milder flavor, spearmint or chocolate mint could be more suitable. You can also experiment with different varieties to find the one that works best for you.
Keep in mind that some types of mint can be invasive, so make sure to research and choose a variety that’s compact or non-invasive to prevent overgrowth.
Selecting Healthy Cuttings
When selecting healthy cuttings from a mature mint plant, it’s essential to identify stems, leaves, and roots that will give you the best chance of success. Look for stems with at least two sets of leaves, as these will root more easily than single-leafed cuttings.
Choose cuttings with firm, bright green leaves that are free from brown or yellow spots. Avoid cuttings with wilted or droopy leaves, as this can indicate a lack of moisture and potentially compromised roots. Inspect the stem itself for any signs of disease or pests, such as white powdery mildew or tiny eggs.
Check the root system by gently teasing apart the soil around the cutting. Healthy roots should be visible and look like fine hairs. Avoid cuttings with very little or no root development, as these may struggle to establish themselves in their new environment. When selecting healthy cuttings, take multiple stems at once to ensure you have a good selection to work from.
Preparing the Cuttings
When taking cuttings from a mature mint plant, it’s essential to carefully prepare them for rooting. In the next few steps, we’ll cover how to create healthy and successful cuttings for propagation.
Cleaning and Sterilizing Tools
When working with plant cuttings, it’s crucial to use clean and sterilized tools to prevent the spread of diseases and pests. Bacteria, fungi, and other microorganisms can easily contaminate cuttings, leading to root rot, leaf spot, and other issues that can devastate your mint plants.
To properly clean your pruning shears, start by rinsing them with warm water to remove any debris or residue. Next, soak the blades in a mixture of one part bleach to nine parts water for 10-15 minutes. This will help kill off any bacteria or fungi present on the tools. After soaking, scrub the blades with a soft brush and rinse thoroughly with clean water.
It’s also essential to sterilize your equipment regularly, especially if you’re working with multiple cuttings from different sources. To do this, dip the pruning shears in a solution of 3% hydrogen peroxide for a few minutes before use. This will help prevent cross-contamination and ensure healthy growth for your mint plants.
Remember, cleanliness is key when propagating plant cuttings. By following these simple steps, you can create an environment that promotes healthy growth and minimizes the risk of disease or pests.
Preparing the Rooting Medium
When it comes to preparing the rooting medium for your mint cuttings, you have several options to choose from. One popular choice is perlite, a lightweight and well-draining material that helps prevent root rot. To use perlite, simply moisten it with water and then gently mix in some fertilizer for an added boost.
Another option is vermiculite, which retains moisture but also allows for good air circulation. Mix 1 part vermiculite with 2 parts water to create a consistency that’s just right for planting your cuttings. You can also combine perlite and vermiculite in a ratio of 1:1 or even add some peat moss to help retain moisture.
If you’re short on time, you can also use store-bought potting mix specifically designed for indoor plants. However, be aware that these mixes may contain fertilizers already, so it’s best to skip adding extra fertilizer when using this option. Regardless of which medium you choose, make sure it’s moist but not waterlogged, as this will help your cuttings establish a strong root system and increase their chances of thriving in the long run.
Taking Cuttings
Take a healthy stem from your existing mint plant and prepare it for propagation by cutting just above a node, making sure each cutting has at least two leaves. This is crucial for successful growth.
Timing and Harvesting
When to Take Cuttings from the Parent Plant
Timing is crucial when it comes to taking cuttings from the parent mint plant. In general, it’s best to take cuttings in the spring or early summer when the plant is actively growing and producing new stems. This allows for a higher success rate of propagation and helps the cutting adapt more easily to its new environment.
If you’re looking to propagate mint indoors, consider taking cuttings in late winter or early spring when the parent plant is still dormant. This way, you can give the cuttings a head start on their growth cycle before the warmer months begin.
To identify the best time to harvest fresh stems for propagation, look for signs of new growth on the parent plant. Stems with healthy nodes (the point where leaves meet the stem) and no visible damage or disease are ideal candidates for cutting.
When selecting cuttings, choose those that are about 2-3 inches long, including a few sets of leaves and at least one node. This will give them the best chance to root and grow into new mint plants.
Removing Lower Leaves and Stems
When preparing to take cuttings from your mint plant, it’s essential to remove lower leaves and stems to promote healthy growth. Start by holding the cutting at an angle under a pair of scissors or pruning shears. Remove any leaves that will be submerged in water or soil when planted. This is crucial to prevent bacterial growth and root rot.
Now, look for the top sets of leaves on your cutting – you’ll want to leave these intact as they are responsible for producing chlorophyll and supporting photosynthesis. Typically, two to three sets of leaves at the top are sufficient. Gently strip off any lower leaves, making sure not to damage the node (the joint where the leaf meets the stem). This will help prevent decay and encourage the cutting to focus its energy on developing roots.
As you remove lower leaves and stems, take care not to damage the delicate tips of your mint cutting. A few sets of healthy leaves at the top will provide enough sustenance for your new plant to thrive. When in doubt, it’s always better to err on the side of caution and remove more rather than less. This simple step is crucial to giving your mint cutting its best chance at success.
Rooting and Establishing
Now that you have your mint cuttings ready, let’s move on to rooting them properly so they can establish strong roots and grow into healthy plants. This process is crucial for their survival.
Watering and Humidity
Maintaining high humidity is crucial for successful rooting of mint cuttings. Mint thrives in moist environments, and its roots develop quickly when the air is humid. To create a humid microclimate around your cuttings, you can place them on top of a damp cloth or tray filled with water and pebbles. This will ensure that the surrounding air remains humid without overwatering the cutting.
Aim to maintain humidity levels between 50-70% during the rooting process, which typically takes 1-2 weeks. You can also cover the container with a clear plastic bag or a cloche to trap moisture and warmth. However, be cautious not to create a “greenhouse effect” that promotes fungal growth.
Water your cuttings gently but thoroughly when the top inch of soil feels dry to the touch. Avoid getting water on the leaves to prevent rotting. Instead, water at soil level, making sure the roots receive adequate moisture. Monitor your cuttings’ progress closely and adjust watering and humidity levels as needed to ensure optimal conditions for rooting.
Providing Light and Temperature Conditions
When growing mint from cuttings, it’s essential to provide optimal light and temperature conditions to promote healthy growth. Bright indirect light is ideal for mint plants, as direct sunlight can cause the leaves to become scorched. To achieve this balance, place your mint cutting near an east- or west-facing window, or use a sheer curtain to filter the sun’s rays.
Temperature also plays a crucial role in mint growth. Aim for temperatures between 65°F and 75°F (18°C and 24°C) during the day, with slightly cooler temperatures at night. This range allows the plant to thrive without experiencing stress from extreme heat or cold. Avoid placing your mint cutting near heating vents or radiators, as this can cause temperature fluctuations.
Maintaining these conditions will encourage your mint cutting to develop a robust root system and establish itself successfully in its new environment.
Caring for Established Mint Plants
Now that you have successfully rooted your mint cuttings, it’s time to learn how to care for them and keep them thriving in their new home. This section will walk you through the essential maintenance tasks.
Pruning and Maintenance
Regular pruning is essential to maintain healthy and vibrant mint plants. If left unpruned, established mint plants can become leggy and sprawling, making them more susceptible to pests and diseases. Pruning not only controls the plant’s growth but also encourages new stem production, resulting in a bushier and more robust plant.
To prune your mint plants effectively, start by removing any dead or damaged leaves and stems. This will prevent the spread of disease and encourage healthy growth. Next, cut back the longest stems to about one-third of their height, making sure to leave at least two nodes (the joint where a leaf meets the stem) on each stem. This will allow for new growth to emerge from the nodes.
Prune your mint plants regularly, ideally every 1-2 weeks during the growing season, to maintain a balanced and compact shape. You can also harvest individual leaves or stems as needed, promoting further growth and encouraging the plant to produce more foliage. By incorporating regular pruning into your care routine, you’ll be rewarded with a lush, healthy mint plant that’s perfect for cooking, tea-making, or other uses.
Propagation Methods
If you’ve grown tired of rooting mint cuttings or need an alternative method for propagating new plants, there are several other ways to go about it. One such method is division, which involves separating established mint roots from the mother plant and replanting them.
To divide mint roots effectively, dig up the entire plant and gently separate the individual stems from one another. This can be a bit more labor-intensive than rooting cuttings but allows you to create multiple new plants in the process. Be sure to replant each divided section as soon as possible to prevent drying out of the roots.
Another option is starting mint seeds indoors, either directly sown into small pots or pre-started in seed trays before being transplanted outside. Sowing mint seeds can be a bit tricky due to their extremely small size and requirement for consistent moisture levels. However, it does offer an opportunity to select from various varieties of mint that may not propagate as well via cuttings.
When growing mint from seeds, it’s essential to maintain high humidity levels until germination occurs – this is typically around 7-10 days after sowing.
Troubleshooting Common Issues
If you’re running into problems with your mint cuttings, don’t worry – we’ve got you covered. This next part will walk you through common issues and offer solutions to get your plants thriving again.
Pests and Diseases
As you nurture your mint cutting into a healthy plant, it’s essential to keep an eye out for common pests and diseases that can affect its growth. One of the most notorious culprits is aphids, tiny sap-sucking insects that can multiply rapidly on the tender shoots of your mint plant. To identify aphid infestations, look for curled or distorted leaves, sticky honeydew droplets on the stems, or even white, cottony patches on the undersides of the leaves.
Another threat to mint growth is root rot, a fungal disease that can be caused by overwatering or poor drainage. If you notice yellowing or wilting leaves, or if the plant’s roots are soft and mushy, it may be a sign of root rot. To treat infestations, use neem oil or insecticidal soap to control aphid populations, while addressing root rot requires pruning affected roots and improving soil drainage.
Prevention is key: keep your mint plants in well-ventilated areas, avoid overwatering, and maintain good hygiene when handling the plant to minimize the risk of infestation. Regularly inspect your plants for signs of pests or disease, and take swift action if you notice any issues.
Environmental Stressors
When growing mint from cuttings, it’s essential to be mindful of environmental stressors that can impact its growth. Temperature fluctuations, for instance, can be detrimental to mint plants. If the temperature drops below 55°F (13°C) or rises above 75°F (24°C), mint growth will slow down significantly. To mitigate this effect, ensure your propagation station is maintained at a consistent temperature between 65-70°F (18-21°C).
Inadequate watering can also stress out mint plants. Mint requires moist soil to thrive, but overwatering can be just as damaging as underwatering. Check the soil daily by sticking your finger into it up to the first knuckle; if it feels dry, it’s time for a drink. Water thoroughly until water drains from the bottom of the pot, and then allow the top 1-2 inches of soil to dry out before watering again.
Additionally, exposure to direct sunlight can cause mint plants to become scorched, so provide them with filtered or dappled light. By controlling these environmental factors, you’ll be well on your way to successfully growing healthy mint from cuttings.
Harvesting and Using Your Fresh Mint
Now that you’ve successfully propagated mint from cuttings, it’s time to harvest and use your fresh mint – let’s explore some creative ways to do just that.
Tips for Maximizing Yield
Maximizing mint yield requires some regular TLC, but trust us, it’s worth the effort. To keep your mint plants thriving and encourage bushy growth, make harvesting a part of your routine. Simply snip off the top leaves with scissors or pinch them between your fingers to prevent damage to the stems.
Regular pruning also helps control the spread and encourages new growth from below. Cut back any leggy stems by about one-third, and remove any weak or spindly shoots. This will direct the plant’s energy towards producing more robust foliage and promoting healthy roots.
Another key factor is timing – harvest your mint at the right moment to ensure maximum flavor and aroma. Pinch off flower buds as they form to prevent seed production and redirect energy towards leaf growth. For a continuous supply, try harvesting individual leaves or sprigs regularly, rather than waiting for the entire plant to mature at once.
By incorporating these simple tips into your care routine, you’ll be rewarded with a bountiful harvest of fresh, fragrant mint that’s perfect for cooking, tea-making, and more!
Using Fresh Mint in Cooking and Crafts
Fresh mint is one of those herbs that’s just begging to be used up as soon as it’s picked. And for good reason – its bright, refreshing flavor and aroma make it a natural addition to everything from cocktails to salads, not to mention crafts and decorations.
When it comes to cooking with fresh mint, there are countless possibilities. One of the most popular ways to use it is in drinks: add a sprig to your favorite cocktail for a twist on classic flavors, or muddle a few leaves into lemonade or iced tea for a refreshing summer pick-me-up. In salads, mint pairs particularly well with fruit – try combining fresh strawberries and blueberries with chopped mint and a drizzle of balsamic glaze.
But fresh mint is just as versatile in crafts and decorations. Create potpourri blends using dried mint leaves, or use them to make herbal wreaths that will fill your home with fragrance all season long. You can even press fresh mint leaves between sheets of paper towel to create delicate, edible “cookies” – perfect for garnishing desserts or adding a pop of color to salads. Whatever you choose, be sure to use up your fresh mint as soon as possible – its flavor and aroma are at their peak when it’s freshly picked!
Frequently Asked Questions
Can I use any type of container for rooting mint cuttings?
You can, but it’s best to use a container that allows for good drainage, such as a plastic cup or a small pot with holes in the bottom. This will help prevent root rot and ensure healthy growth.
How often should I water my rooted mint cuttings?
Water your rooted mint cuttings regularly, keeping the soil consistently moist but not waterlogged. It’s best to check the soil daily and water when the top inch of soil feels dry to the touch.
What if some of my mint cuttings don’t root? Can I use them elsewhere?
Yes, if some of your mint cuttings don’t root, you can still use them for tea or cooking. Simply harvest a few leaves from each cutting and enjoy their flavor and fragrance.
How do I prevent pests like aphids and spider mites from infesting my new mint plants?
To prevent pests, make sure to clean and sterilize your tools regularly and keep an eye out for any signs of infestation. You can also use neem oil or insecticidal soap as a preventative measure.
Can I grow mint in a shaded area, or does it need direct sunlight?
While mint prefers partial shade, especially in warmer climates, it will still thrive in a shaded area with good air circulation and proper watering conditions. However, direct sunlight can enhance its growth and fragrance.