Are you looking to add some fresh flavor to your cooking? Growing dill is a great way to have this versatile herb on hand whenever you need it. Not only does dill add a unique taste to salads, sauces, and fish dishes, but it’s also packed with health benefits – from reducing inflammation to supporting digestive health. However, growing dill can be a bit tricky, which is why we’ve put together this comprehensive guide to help you grow dill from seed to harvest. In this article, we’ll cover everything from preparing the perfect soil to troubleshooting common issues that might arise along the way. Whether you’re a seasoned gardener or just starting out, our step-by-step guide will have you enjoying fresh homegrown dill in no time. Let’s get started!
Understanding Dill and Its Benefits
Dill is a popular herb used in many cuisines, but its benefits go beyond just flavor – it’s also packed with nutrients that can support health and wellbeing. Let’s explore what makes dill so special.
What is Dill?
Dill is a popular herb that’s been prized for its unique flavor and aroma for thousands of years. But what exactly is dill? From a botanical standpoint, dill is classified as Anethum graveolens, a member of the parsley family (Apiaceae). Native to the Mediterranean region, dill has been cultivated for centuries in warm climates with mild winters.
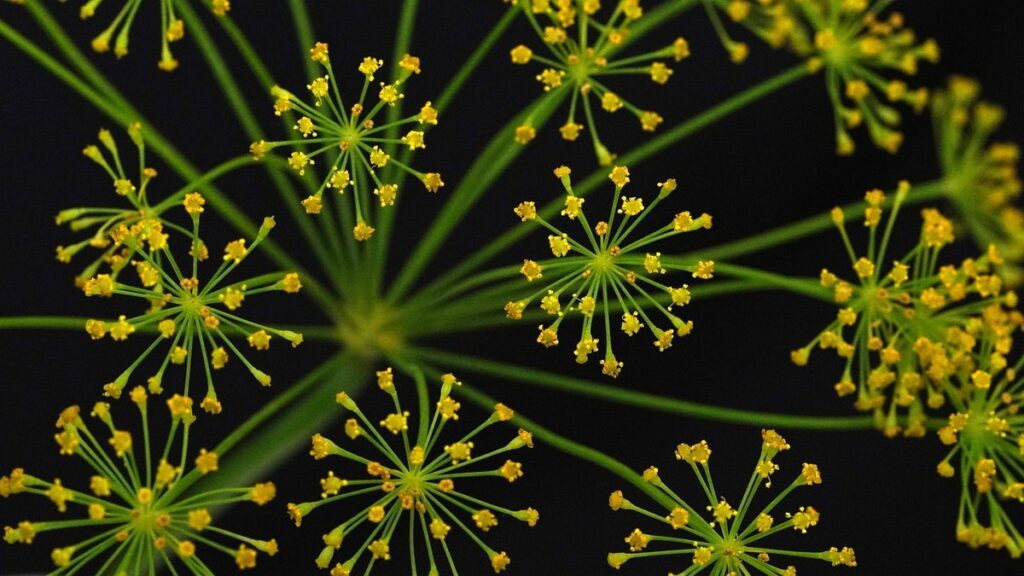
The plant’s distinctive flavor and fragrance come from its tiny yellow flowers, which are actually a type of umbrella-like structure that releases a pungent oil when crushed. Dill is often used as a culinary herb, adding a fresh, slightly sweet taste to dishes like pickles, salads, and sauces. Its versatility extends beyond the kitchen, however – dill has also been used in traditional medicine for its digestive and anti-inflammatory properties.
Interestingly, dill is also known to be a natural insect repellent and can be used to keep mosquitoes at bay. In terms of cultivation, dill prefers well-drained soil and full sun, making it an ideal addition to many home gardens. Whether you’re looking to add some fresh flavor to your cooking or take advantage of its medicinal properties, understanding the basics of what dill is and where it comes from can help you get started on your journey to growing this versatile herb.
Health Benefits of Dill
Consuming dill has been linked to numerous health benefits, making it an excellent addition to a balanced diet. One of the most significant advantages of dill is its high antioxidant content. Antioxidants play a crucial role in protecting the body from free radicals that can cause cell damage and lead to chronic diseases like cancer and heart disease.
Dill has also been shown to aid digestion, helping to alleviate symptoms associated with irritable bowel syndrome (IBS) such as bloating and abdominal pain. Its anti-inflammatory properties have also been found to reduce inflammation in the digestive tract, promoting a healthy gut microbiome.
Incorporating dill into your diet can be as simple as adding it to salads, using it as a marinade for grilled meats or vegetables, or making pickled dill cucumbers. Fresh dill is relatively easy to grow at home and can be harvested throughout the summer months. To maximize its health benefits, aim to consume fresh or dried dill within 6-12 months of harvesting.
Incorporating dill into your diet may also help reduce symptoms associated with colds and respiratory issues due to its expectorant properties, which help loosen mucus in the chest.
Culinary Uses of Dill
Dill is an incredibly versatile herb that’s used in countless culinary applications around the world. When it comes to using fresh and dried dill in cooking, there are a few key areas where its unique flavor shines through.
For those familiar with traditional Eastern European cuisine, pickling is perhaps one of the most well-known uses for fresh dill. Simply add a handful of fresh dill fronds to your jar of cucumbers, onions, and garlic, along with some vinegar and salt, for an authentic-tasting homemade pickle. Dried dill weed can also be used in this context, although it’s worth noting that its flavor profile will be slightly different.
Beyond pickling, fresh dill is a staple in many Middle Eastern salads, such as tabbouleh and tzatziki. To make the latter, combine diced cucumber, yogurt, garlic, lemon juice, salt, and a generous sprinkling of chopped fresh dill for a refreshing side dish perfect for hot summer days.
In terms of sauces, dill pairs beautifully with cream, making it an excellent addition to dips like ranch dressing or creamy soups. Simply add a teaspoon or two of dried dill weed to your favorite recipe for an instant flavor boost.
Preparing the Soil for Dill Growth
Before you start planting dill, it’s essential to prepare the soil to give your seeds the best chance of germinating and thriving. Let’s walk through some simple steps to create a perfect growing environment for your dill.
Choosing the Right Location
When choosing the right location for growing dill, sunlight and temperature play a crucial role. Dill requires at least 6 hours of direct sunlight per day to thrive, so select a spot that receives plenty of natural light. However, be cautious not to expose your dill plants to extreme temperatures, as they can be sensitive to heat stress above 85°F (30°C) or cold damage below 50°F (10°C).
In terms of soil conditions, dill prefers well-draining, loose soil with a pH between 6.0 and 7.0. Avoid planting in areas with standing water or where water tends to collect, as this can lead to root rot.
When selecting a location, also consider the space needed for mature plants. Dill can grow quite tall (up to 3 feet), so ensure you have enough room for them to spread out without overcrowding nearby plants. If you’re planting in containers, choose ones with good drainage and at least 6-8 hours of direct sunlight per day.
When possible, plant dill near a trellis or other support system to help keep the tall stems upright and encourage better air circulation around the plants. This simple step can make a big difference in promoting healthy growth and preventing pest issues.
Testing and Amending Soil pH
Testing soil pH levels is crucial to ensure an ideal growing environment for dill. Dill prefers slightly acidic to neutral soil with a pH between 6.0 and 7.0. To test the pH level of your soil, you can use a DIY kit or send a sample to a lab for analysis.
A simple pH meter can be purchased online or at a local gardening store, and it will give you an accurate reading in minutes. If your soil’s pH is too high (alkaline), add elemental sulfur or aluminum sulfate to lower it. On the other hand, if the pH is too low (acidic), add dolomitic limestone or calcite to raise it.
For example, if your soil test shows a pH of 8.5 and you want to bring it down to 7.0 for dill growth, mix in 2 pounds of elemental sulfur per 100 square feet of soil. Repeat the application every few months until the desired pH is achieved. Keep in mind that amending the soil can be an ongoing process, so regular testing is essential to ensure optimal growing conditions for your dill crop.
Composting and Fertilizing Dill
Composting and fertilizing dill plants is essential to promote healthy growth and maximize yields. When you compost and fertilize dill, it not only improves the soil’s fertility but also reduces the need for synthetic fertilizers. This approach helps create a balanced ecosystem that benefits both the plant and the environment.
To start, consider using natural fertilizer options like fish emulsion, bone meal, or alfalfa meal. These alternatives are rich in nutrients and can be easily incorporated into your compost pile. For instance, adding 1-2 tablespoons of fish emulsion to your compost will provide a boost of nitrogen that dill plants love.
Another option is to use compost tea as a liquid fertilizer. This method involves steeping a cup of compost in water for 24 hours and then using the solution as a foliar spray or soil drench. Compost tea is an excellent way to deliver beneficial microorganisms directly to the roots, promoting robust growth and immunity.
When preparing your compost pile, include green materials like kitchen scraps and fresh grass clippings alongside brown materials like leaves and shredded paper. Aim for a mix of 2/3 “brown” materials and 1/3 “green” materials to maintain optimal carbon-to-nitrogen ratios. Regularly turning the pile will also help ensure that it breaks down efficiently, releasing essential nutrients as your dill plants grow.
Sowing and Transplanting Dill Seeds
When sowing dill seeds directly into your garden, make sure to follow some key guidelines to ensure a healthy start for your crop. Planting them at the right depth and spacing is crucial.
Seed Selection and Storage
When it comes to growing dill, selecting high-quality seeds is crucial for a successful harvest. Look for seeds from reputable suppliers that have been stored properly and have a high germination rate. Check the seed package for the following information: moisture content, purity, and germination test percentage. A good rule of thumb is to choose seeds with at least 80% germination.
Proper storage is also essential to maintain seed viability. Store seeds in an airtight container or envelope in a cool, dry place away from direct sunlight. Avoid storing seeds near heat sources, ovens, or radiators. Keep the container in a dark cupboard or drawer. For long-term storage, consider using desiccant packets or silica gel to control moisture levels.
Seed germination rates vary depending on factors like temperature and humidity. Most dill varieties germinate within 7-14 days at temperatures between 65°F to 75°F (18°C to 24°C). Keep in mind that older seeds may have lower germination rates, so it’s best to sow fresh seeds for optimal results.
Direct Sowing vs. Transplanting
When it comes to growing dill, you have two primary options: direct sowing and transplanting. While both methods can produce excellent results, they have their pros and cons.
Direct sowing involves scattering dill seeds directly into the garden bed, where they will germinate and grow. This method is ideal for cooler climates with well-draining soil. The seeds are less susceptible to being disturbed during transplanting, which can lead to root damage. Additionally, direct-sown dill plants tend to be more vigorous and better adapted to their local growing conditions.
On the other hand, transplanting involves starting dill seeds in seed trays or small pots indoors before transferring them to the garden when they have 2-3 sets of leaves. This method allows for earlier harvesting, as seedlings can be transferred outside at an optimal size. However, it requires more effort and attention, including providing adequate light and care during the transplanting process.
Ultimately, both methods work well for growing dill, but consider your climate, soil type, and personal preference when deciding which approach to take.
Timing and Spacing Dill Plants
When it comes to timing and spacing dill plants for optimal growth, there are several key factors to consider. First, let’s talk about sowing times. In most regions, spring is the best time to sow dill seeds directly into the ground. This allows the plants to mature during the cooler temperatures of late spring and early summer when they’re less susceptible to bolting. If you live in an area with a long growing season, you can also direct-sow dill in late summer for a fall harvest.
When it comes to spacing, most dill varieties prefer to be planted 6-12 inches apart. However, if you’re growing a compact variety or want to promote leaf growth over seed production, you can plant them as close as 4-6 inches apart. Be sure to sow seeds about 1/8 inch deep and keep the soil consistently moist during the germination period.
To ensure proper development, dill plants typically require at least 6 hours of direct sunlight per day and well-draining soil. By providing these basic conditions and paying attention to timing and spacing, you should be able to grow healthy, productive dill plants.
Caring for Dill Plants
To keep your dill plants thriving, it’s essential to provide them with regular care, which includes watering, pruning, and monitoring their growing conditions. This will help prevent common issues like bolting and pest infestations.
Watering and Irrigation Requirements
When it comes to watering and irrigation requirements for dill plants, providing adequate moisture is crucial for healthy growth. Dill needs about 1-2 inches of water per week, either from rainfall or irrigation. To ensure consistent moisture levels, consider installing a drip irrigation system or soaker hose that delivers water directly to the roots.
Irrigation systems can save time and reduce evaporation, making it easier to manage your watering schedule. Water dill plants in the morning or early afternoon to allow the plants to dry out slightly before nightfall, reducing the risk of fungal diseases.
To avoid overwatering, check the soil moisture by inserting a finger into the soil up to the knuckle. If the soil feels dry, it’s time to water. Also, consider using a rain gauge to measure rainfall and adjust your irrigation schedule accordingly. Aim for about 1 inch of water per week during hot summer months when dill plants are actively growing.
Dill is generally drought-tolerant but will perform better with regular watering.
Mulching and Pest Control
Mulching is an essential practice for dill plants, and it’s not just about retaining moisture. A thick layer of organic mulch helps suppress weeds that can compete with your dill for nutrients, water, and light. This gives your plants a head start on growth and reduces the need for frequent weeding.
As for pests, dill is often targeted by aphids, spider mites, and whiteflies. To manage these pests, use neem oil or insecticidal soap to control infestations. For more severe problems, introduce natural predators like ladybugs or lacewings to your garden. Regularly inspect your plants for signs of damage, such as yellowing leaves or sticky residue.
Diseases can also impact dill health, with powdery mildew and root rot being common issues. To prevent these problems, ensure good air circulation around your plants and avoid overwatering. If you do encounter disease, treat the affected area with a fungicide specifically designed for use on herbs. For example, copper-based fungicides are effective against fungal diseases.
When choosing a mulch, opt for organic materials like straw or bark chips that won’t retain moisture and exacerbate root rot. By implementing these strategies, you’ll be well on your way to growing robust, healthy dill plants.
Pruning and Training Dill
When it comes to promoting bushy growth and encouraging leaf production in dill plants, pruning is an essential technique. To begin with, remove any dead or damaged leaves as soon as you notice them. This will not only maintain the plant’s appearance but also prevent the spread of disease.
For optimal results, prune your dill regularly throughout its growing season. Cut back the stem to about half its height every 1-2 weeks to encourage new growth and leaf production. Make clean cuts just above a node (where a leaf meets the stem) using a pair of sharp scissors or pruning shears. This will help direct the plant’s energy towards producing more leaves rather than flowering.
By pruning your dill regularly, you can also control its height and prevent it from flowering prematurely. Pinch off any flower buds that form to encourage leaf growth instead. With regular pruning, your dill plants should remain bushy and productive throughout the season, providing you with a continuous supply of fresh leaves for cooking.
Harvesting and Preserving Dill
Now that you’ve successfully grown your dill crop, it’s time to enjoy its fresh flavor year-round by learning how to harvest and preserve it for future use. We’ll cover the best methods to store and conserve dill for optimal flavor and nutrition.
Identifying Mature Dill
When it comes to harvesting dill, timing is everything. You’ll want to identify when your dill is mature and ready for picking to ensure you get the most flavorful and aromatic stems possible. To determine if your dill is ready, look for signs of maturity such as a slight yellowing or darkening of the lower leaves, which indicates that the plant has stopped growing new leaves.
Check the flower stalks too – when they reach around 18-20 inches tall, it’s usually a sign that the dill is mature and ready to be harvested. You should also notice the seed heads forming at the top of the stalk, which will eventually turn brown and release their seeds.
The optimal time for picking dill is usually in the morning after the dew has evaporated but before the heat of the day sets in. This helps prevent moisture from causing the stems to become limp or develop off-flavors. Use scissors or pinch off individual stems at the base to harvest your mature dill, taking care not to damage any nearby leaves or flowers.
Techniques for Fresh Dill Handling
To maintain the freshness and flavor of your dill crop for as long as possible, it’s essential to handle and store it properly. When harvesting fresh dill, make sure to cut the stems at an angle just above a node, leaving about 1 inch of stem intact. This helps prevent moisture from entering the plant through the stem and causing rot.
For short-term storage, place your freshly harvested dill in a glass jar or container with a damp paper towel covering the leaves. Store it in the refrigerator to maintain humidity and keep it away from direct sunlight. For longer-term preservation, consider freezing or dehydrating your dill. When freezing, chop the dill finely before placing it in an airtight container or freezer bag, allowing for proper air circulation to prevent the growth of off-flavors.
When transporting freshly harvested dill, ensure that the leaves are not touching each other or any other surfaces to avoid bruising and moisture transfer. This can cause the delicate herb to wilt quickly, reducing its shelf life.
Drying, Freezing, and Pickling Methods
Dill can be preserved through various methods to enjoy it year-round. Drying is an effective way to preserve dill’s flavor and aroma. Tie the fresh dill stems together and hang them upside down in a warm, dry place. Once dried, store the dill in airtight containers.
Freezing is another excellent method for preserving dill. To freeze, chop the fresh dill leaves and place them in an airtight container or freezer bag. When you’re ready to use it, simply add the frozen dill to soups, stews, or salads. Make sure to label the container with the date.
For pickling, combine chopped dill with vinegar, salt, and water to create a brine solution. Pack the dill into clean glass jars, covering them completely with the brine. Store the jars in the fridge for up to six months.
To make dill essential oil, steep dried or fresh dill in a carrier oil like olive or coconut oil. Strain the mixture after several days and discard the solids. Use the dill essential oil as a seasoning or add it to beauty products for its skin benefits.
Common Problems and Solutions
Growing dill can be a bit tricky, so let’s tackle some of the common issues gardeners face when cultivating this fragrant herb. We’ll dive into solutions to help you overcome these problems and achieve success.
Pests and Diseases Affecting Dill
Dill plants are susceptible to various pests and diseases that can affect their growth and productivity. One of the most common pests is aphids, which feed on the plant’s sap and secrete a sticky substance called honeydew. This can attract other insects like ants and bees, creating an even bigger problem. To control aphid infestations, use neem oil or insecticidal soap to spray the affected areas.
Another pest that dill plants often encounter is spider mites, which are tiny arachnids that feed on plant sap. They cause fine webbing on the leaves and can be difficult to spot with the naked eye. To combat spider mite infestations, increase the humidity around your plants or use miticidal soap.
Powdery mildew and root rot are two common diseases affecting dill plants. Powdery mildew is a fungal disease that causes white powdery patches on the leaves, while root rot is caused by overwatering and can lead to yellowing leaves and a mushy stem. To prevent these diseases, ensure good air circulation around your plants and avoid overwatering. Regularly inspect your dill plants for signs of pests or diseases and take action promptly if you notice any issues.
Troubleshooting Tips for Healthy Growth
Growing dill can be a delightful experience, but it’s not uncommon to encounter some setbacks along the way. If you’re struggling with slow growth, yellowing leaves, or inadequate yields, don’t worry – we’ve got some troubleshooting tips to help you get back on track.
Firstly, let’s tackle slow growth. Dill plants typically grow at a rate of 1-2 inches per week under ideal conditions. If your plant is growing slower than expected, check the soil temperature. Dill prefers warmer temperatures above 60°F (15°C) and can be sensitive to cooler temps. Also, ensure that your dill is receiving sufficient light – it needs direct sunlight for at least 4-6 hours a day.
If you notice yellowing leaves, it may indicate overwatering or nutrient deficiencies. Make sure the soil isn’t waterlogged and consider adding a balanced fertilizer to provide essential nutrients. To avoid root rot, allow the top inch of soil to dry out between waterings.
Lastly, if your dill yield is disappointing, take a closer look at pollination. Dill plants rely on wind pollination or insect activity, so ensure that you’re providing enough space for air circulation and attracting beneficial insects like bees and butterflies.
Frequently Asked Questions
Can I grow dill indoors if I don’t have a garden?
Yes, you can definitely grow dill indoors on a sunny windowsill or under grow lights. Just make sure to provide it with well-draining soil and maintain a consistent temperature between 60-70°F (15-21°C) for optimal growth.
How do I protect my dill plants from pests like aphids and spider mites?
To control pests, use neem oil or insecticidal soap on your dill plants. Regularly inspect your plants and remove any infested leaves to prevent the problem from spreading. You can also try introducing beneficial insects like ladybugs or lacewings to your garden.
What is the ideal soil pH for growing dill?
Dill prefers a slightly acidic to neutral soil pH, ranging from 6.0-7.0. If your soil test shows it’s too alkaline or acidic, amend it with lime or sulfur to adjust the pH and create an optimal environment for dill growth.
Can I harvest dill leaves at any stage of growth?
While you can start harvesting dill leaves when they’re about 6-8 inches tall, wait until the plant reaches its full height (about 12-18 inches) for the best flavor and aroma. Avoid over-harvesting, as this can stress the plant and reduce future yields.
How do I store fresh dill to keep it fresh for longer?
To preserve the freshness of your homegrown dill, trim the stems, place them in a glass jar with an inch of water, cover with a plastic bag or wrap in plastic wrap, and refrigerate. This will help maintain moisture and prevent spoilage for up to 5-7 days.