Growing your own mint can be a game-changer for any garden or kitchen. Not only does it add a fresh, cooling flavor to drinks and dishes, but it’s also incredibly easy to care for. However, many of us struggle with keeping our mint plants healthy and thriving – whether it’s due to overwatering, pests, or simply not knowing the right conditions to provide.
In this comprehensive guide, we’ll take you through everything you need to know about growing mint like a pro. From choosing the best variety for your space and needs (yes, there are many types of mint!) to preparing the perfect soil and troubleshooting common issues, we’ve got you covered. Whether you’re a seasoned gardener or just starting out, our expert advice will have you enjoying fresh homegrown mint in no time.
Choosing the Right Variety
Now that you’ve decided to grow mint, it’s time to choose the right variety for your needs and climate. Let’s explore the different types of mint plants available.
Types of Mint
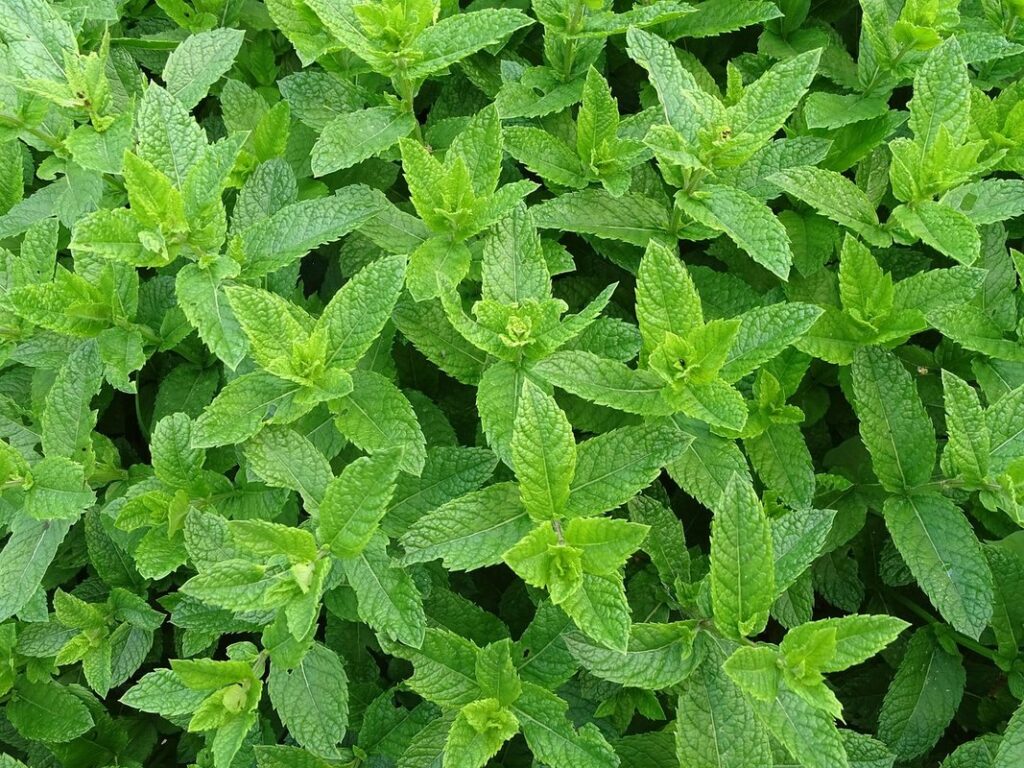
When it comes to growing mint, one of the most important decisions you’ll make is choosing the right variety. With so many types of mint out there, it can be overwhelming to decide which one to grow. Let’s take a closer look at three of the most popular varieties: peppermint, spearmint, and chocolate mint.
Peppermint (Mentha x piperita) is perhaps the most well-known variety, with its bright green leaves and distinctive red veins. It has a strong, refreshing flavor and aroma that’s perfect for teas, cocktails, and desserts. Spearmint (Mentha spicata), on the other hand, has a milder flavor and a more delicate appearance. Its leaves are typically lighter green than peppermint, with a more rounded tip. Chocolate mint (Mentha x piperita f. citrata ‘Chocolate’) is a popular choice for its unique flavor and aroma, which combines the cooling properties of peppermint with the sweetness of chocolate.
Each type of mint has its own unique characteristics, so it’s essential to choose one that suits your needs. For example, if you’re looking for a strong, refreshing flavor for teas or cocktails, peppermint may be the best choice. If you prefer a milder flavor and aroma, spearmint could be the way to go.
Considerations for Selection
When selecting a mint variety for your garden, there are several factors to consider. The first thing to think about is the climate you live in. If you have a hot and dry summer, look for varieties that are more drought-tolerant, such as ‘Peggy’ or ‘Chocolate Mint’. On the other hand, if you have a cool and moist climate, varieties like ‘Spearmint’ or ‘Peppermint’ will thrive.
Another important consideration is the type of soil you have. Mint prefers well-draining soil that’s rich in organic matter. If your soil is heavy clay or sandy, consider amending it with compost before planting mint. The purpose you want to use your mint for also plays a role in selection. For example, if you’re looking to make medicinal teas, ‘Peppermint’ is a popular choice due to its high menthol content.
Lastly, think about the level of fragrance and flavor you prefer. Some varieties, like ‘Chocolate Mint’, have a more subtle aroma and taste, while others, like ‘Spearmint’, are stronger. Consider your personal preferences and needs when choosing a variety that suits you best.
Preparing the Soil
Before you start planting mint, it’s essential to prepare your soil correctly to ensure healthy growth and prevent any potential problems. In this next step, we’ll walk you through how to get your soil ready for mint.
pH Requirements
When it comes to growing mint, understanding its pH requirements is crucial for optimal health and flavor. Mint prefers a slightly acidic to neutral soil pH, ranging from 6.0 to 7.0. If the pH falls outside this range, it can lead to nutrient deficiencies and affect the plant’s ability to absorb essential micronutrients.
To determine your soil’s pH level, you’ll need to perform a soil test. You can purchase a DIY testing kit or send a sample to a lab for analysis. Keep in mind that some of these kits may not provide accurate results, especially if you’re new to gardening. If you’re unsure about the accuracy of your results, consider consulting with a local nursery or gardening expert.
A pH between 6.0 and 7.0 is ideal for mint growth. To maintain this balance, you can adjust the soil pH by adding lime to raise it (for lower pH levels) or sulfur to decrease it (for higher pH levels). For example, if your soil test shows a pH of 5.5, you’ll need to add lime to bring it up to the optimal range.
Remember that mint is relatively adaptable and can tolerate some variation in pH. However, for peak performance and flavor, stick with the recommended range.
Adding Organic Matter
When adding organic matter to your soil for growing mint, you’re not just enhancing its fertility – you’re also improving its drainage and overall health. Compost is an excellent choice for this purpose. Rich in nutrients, compost can help increase the mint plant’s vigor and resilience to pests and diseases.
For optimal results, mix 2-4 inches of compost into the top 6-8 inches of soil. This will not only provide a nutrient boost but also help improve drainage and structure. Manure from herbivores such as cows or goats is another option. It’s high in nitrogen, phosphorus, and potassium – essential for mint growth.
As you prepare your soil, remember that too much organic matter can be detrimental to the plant’s roots. A mix of 10% compost to 90% native soil will provide the necessary nutrients without overwhelming the plant. Regularly incorporating small amounts of compost or manure into your soil will keep it fertile and healthy throughout the growing season.
When using manure, ensure it’s fully broken down and free of pathogens. Mixing it with soil in a ratio of 1:4 (one part manure to four parts soil) is recommended for safe and effective use.
Planting Mint
When it comes to planting mint, the key is to choose a location that provides enough moisture and partial shade. We’ll walk you through the process step-by-step in our next section.
Spacing and Depth
When planting mint, it’s essential to consider both spacing and depth to ensure healthy growth and prevent overcrowding. Mint roots are quite aggressive and can spread quickly, so giving them enough room to breathe is crucial.
As a general rule of thumb, plant mint seeds or seedlings 12-18 inches apart in well-draining soil. This allows for proper air circulation and prevents the roots from becoming too congested. If you’re planting mint in a container, make sure it’s at least 6-8 inches deep to accommodate its extensive root system.
When it comes to depth, plant the seeds about 1/4 inch beneath the surface. Water gently but thoroughly after planting, and keep the soil consistently moist during the first few weeks. As the plants grow, you can gradually reduce watering to prevent overwatering.
To promote healthy growth and prevent mint from taking over your garden, consider containing it in a separate bed or pot. This will also make it easier to harvest and maintain. With proper spacing and depth, you’ll be able to enjoy a bountiful harvest of fresh mint all season long.
Watering and Mulching
When it comes to maintaining a healthy mint crop, consistent moisture and mulch play crucial roles. Mint plants prefer well-draining soil that is consistently moist but not waterlogged. To achieve this balance, aim to provide about 1-2 inches of water per week through a combination of rainfall and supplemental irrigation.
Mulching around your mint plants can help retain moisture in the soil, suppress weeds, and regulate soil temperature. Organic mulch options like straw or bark chips are excellent choices for mint gardens. Apply a 2-3 inch layer of mulch around the base of your plants, keeping it a few inches away from the stems to prevent rot.
Be mindful not to over-mulch, as this can lead to an anaerobic environment that fosters disease and pests. Instead, aim for regular replenishment of the mulch layer throughout the growing season. This will help create a balanced ecosystem that supports healthy mint growth.
By providing your mint plants with consistent moisture and mulching, you’ll be well on your way to cultivating a thriving and fragrant herb garden.
Caring for Mint
To keep your mint plants thriving, you’ll want to focus on providing them with the right conditions and regular care. This includes watering, pruning, and protecting from pests.
Sunlight and Temperature
When it comes to mint growth, sunlight and temperature play crucial roles. Mint is a sun-loving plant that thrives in partial shade to full sun conditions. Aim for at least 4-6 hours of direct sunlight per day, but be mindful not to expose it to extreme heat or intense midday sun, which can cause scorching.
As for temperature, mint prefers cooler temperatures between 60°F (15°C) and 70°F (21°C). This range allows the plant to photosynthesize efficiently and prevents it from becoming stressed. If you live in a region with extremely high summer temperatures, consider providing shade for your mint plants during peak sun hours.
Avoid placing mint near heating vents or radiators, as sudden temperature fluctuations can shock the plant. Similarly, keep mint away from cold drafts, which can cause damage to young shoots and roots. By understanding and replicating these optimal conditions, you’ll be able to promote healthy growth, robust flavor, and continuous leaf production in your mint plants.
Pruning and Harvesting
When it comes to caring for mint, pruning and harvesting are crucial steps to maintain its health, encourage bushy growth, and prevent it from taking over your garden. Pruning helps control the plant’s size, shape, and spread, while also promoting new growth and preventing woody stems.
To prune your mint plant, simply trim back any long stems or leggy branches to about half their length. You can do this every few weeks during the growing season to encourage bushy growth. Make clean cuts just above a node (where a leaf meets the stem) using sharp, sterile pruning tools. This will help prevent the spread of disease and promote healthy growth.
As for harvesting, it’s best to pick your mint leaves regularly to encourage the plant to produce new ones. Pinch or cut off individual leaves or stems as needed, or snip off larger bunches just above a node. The optimal time to harvest is when the leaves are at their peak flavor and aroma, usually in the morning after the dew has dried.
Troubleshooting Common Issues
Growing mint can be a bit finicky, and we know that pesky problems are inevitable. Let’s tackle some of the most common issues you might encounter when growing your own mint.
Pests and Diseases
As you tend to your mint plants, it’s not uncommon for them to fall prey to pests and diseases that can quickly spread and cause damage. Two of the most common culprits are aphids and root rot.
Aphids are small, soft-bodied insects that feed on plant sap, causing curled or distorted leaves. They’re often accompanied by ants, which protect the aphids from predators in exchange for sweet, sticky honeydew secretions. To control aphid infestations, try spraying your plants with a strong jet of water to dislodge them, followed by a mild dish soap solution (1 tablespoon per quart of water). Neem oil and insecticidal soap are also effective controls.
Root rot is a more insidious problem, often caused by overwatering or poor drainage. Fungal growths can spread quickly through the plant’s roots, causing wilting and leaf drop. To prevent root rot, ensure your mint plants have good air circulation and don’t sit in waterlogged soil. If you suspect root rot, carefully remove the affected plant, taking care not to spread the disease. Sterilize any tools used during removal with a mixture of 1 part bleach to 3 parts water.
Nutrient Deficiencies
When it comes to growing mint, nutrient deficiencies can be a common issue that can affect the health and appearance of your plants. One of the most obvious signs of a nutrient deficiency is yellowing leaves, but this symptom can also be caused by other factors such as overwatering or underwatering.
To identify if your mint plant has a nutrient deficiency, look for a range of symptoms including stunted growth, pale or discolored leaves, and a decrease in the plant’s overall vigor. Nitrogen deficiency is particularly common in mint plants, and can cause yellowing leaves to turn pale brown or even drop off entirely.
If you suspect that your mint plant has a nutrient deficiency, there are several steps you can take to address it. First, have your soil tested to determine its pH level and nutrient content. Based on the results, you can add fertilizers or other nutrients as needed. You should also ensure that your mint plants are receiving sufficient water and sunlight, as these factors can impact nutrient uptake.
In addition to providing essential nutrients through fertilization, you can also promote healthy growth by adding organic matter such as compost or manure tea to the soil. This will not only provide a boost of nutrients but also improve the overall structure and fertility of the soil. By taking proactive steps to address nutrient deficiencies, you can help your mint plants thrive and enjoy a bountiful harvest.
Propagating Mint
Now that you’ve successfully grown some mint, it’s time to learn how to multiply your crop and share it with friends by propagating new plants. We’ll walk through the simple steps together!
Division and Cuttings
When it comes to propagating mint, two of the most popular methods are division and stem cuttings. Division is a great way to propagate mint, especially when you want to multiply the roots as well as the top growth. To do this, wait until spring or early summer when the plant is actively growing, then carefully dig up the entire root system. Gently separate the individual stems, making sure each section has at least one node (where a leaf meets the stem). Replant these divisions in moist soil and keep them consistently watered.
Stem cuttings are another effective method for propagating mint. Take 3-4 inch stem cuttings from the top of healthy plants, just above a node. Remove lower leaves to prevent bacterial growth, then dip the cut end in rooting hormone powder or liquid. Place the cutting in a glass of water or propagate in a pot filled with moistened seed starting mix. Roots should develop within 1-2 weeks, and you can transplant the new plant into soil once it’s established.
For both methods, make sure to choose healthy mother plants with no signs of disease or pests. This will increase the chances of successful propagation and give your new mint plants a head start on establishing themselves.
Tips for Success
When it comes to successfully propagating mint, timing is everything. It’s essential to propagate new mint plants during the spring or early summer months when the weather is mild and there’s ample moisture in the air. Avoid propagating during the peak of summer heat, as this can cause the cuttings to dry out quickly.
Choose a well-draining potting mix specifically designed for indoor plants to ensure healthy root growth. A mix with perlite or vermiculite will help prevent waterlogged soil and root rot. Fill a small container with the chosen potting mix, leaving enough space for the cutting to grow.
To promote successful propagation, keep the environment consistently moist but not waterlogged. Avoid direct sunlight, which can cause the cuttings to become scorched. Instead, provide bright, indirect light or partial shade. Maintain temperatures between 65-75°F (18-24°C) to encourage root development. With proper care and attention, you should see new roots developing within 1-2 weeks, followed by leaf growth and a healthy new mint plant.
Frequently Asked Questions
Can I grow mint indoors if I don’t have a garden?
Yes, you can definitely grow mint indoors, especially if you have limited outdoor space or live in an area with harsh weather conditions. Mint plants thrive in containers and can be placed on a sunny windowsill or under grow lights.
How often should I harvest my mint leaves to encourage healthy growth?
It’s essential to regularly harvest your mint leaves to promote bushy growth and prevent the plant from flowering. Pinch off individual stems when they reach 6-8 inches tall, or cut back the entire plant by one-third every week or two.
What can I do if my mint plant is developing yellow or brown leaves?
If you notice yellow or brown leaves on your mint plant, it may be due to overwatering, underwatering, or exposure to extreme temperatures. Check the soil moisture and adjust your watering schedule accordingly. Also, ensure that your mint plant receives sufficient sunlight and maintain a consistent temperature between 60-70°F (15-21°C).
Can I propagate my mint plant using stem cuttings?
Yes, mint plants are relatively easy to propagate using stem cuttings. Simply take a few inches of stem with leaves from the tip of the plant, remove lower leaves, and plant it in well-draining soil. Keep the soil consistently moist until roots develop.
How do I prevent pests like aphids or spider mites from infesting my mint plants?
To prevent pests like aphids or spider mites, ensure good air circulation around your mint plants by providing enough space between each plant. Regularly inspect your plants for signs of infestation and treat with neem oil or insecticidal soap if necessary. Also, keep your mint plants healthy through proper watering, fertilization, and pruning practices.