Creating a stunning cut flower garden can be a rewarding experience for any gardener. Not only do these beautiful blooms add a touch of elegance to your home, but they also provide a steady supply of fresh flowers throughout the growing season. If you’re looking to take your gardening skills to the next level and enjoy the satisfaction of bringing in bouquets from your own yard, this guide is for you. In this article, we’ll walk through every step of planning, designing, and maintaining a thriving cut flower garden, covering topics like choosing the right varieties, creating a layout that maximizes space and light, and tips for harvesting and preserving your blooms at their peak freshness. Whether you’re a seasoned pro or just starting out, our comprehensive guide will help you grow the perfect cut flower garden to enjoy all season long.
Planning Your Cut Flower Garden
Now that you’ve chosen your cut flower varieties, it’s time to think about how they’ll fit into a harmonious and thriving garden. This section will walk you through the essential steps for planning a beautiful cut flower garden.
Choosing the Right Location
When choosing the location for your cut flower garden, there are several key factors to consider. First and foremost, think about sunlight. Most flowers require at least six hours of direct sunlight per day, so choose a spot that receives plenty of sun. Consider the orientation of your garden as well – south-facing gardens receive the most sunlight, while north-facing ones get less.
Soil quality is another crucial factor to consider. If you have heavy clay or sandy soil, you may need to add amendments such as compost or manure to create a fertile and well-draining environment for your flowers. Make sure to test your soil pH before planting, as this can impact the types of flowers that thrive in your garden.
Accessibility is also important – think about how easy it will be to get into the garden to cut your flowers, as well as how you’ll transport them from the garden to a cool place for drying. Consider creating a path or walkway through your garden to make harvesting easier, and choose a location that’s close to your home or workspace.
Ultimately, the type of flowers you can grow in your garden will be determined by these factors – so take the time to carefully consider each one before making a decision.
Selecting a Variety of Flowers
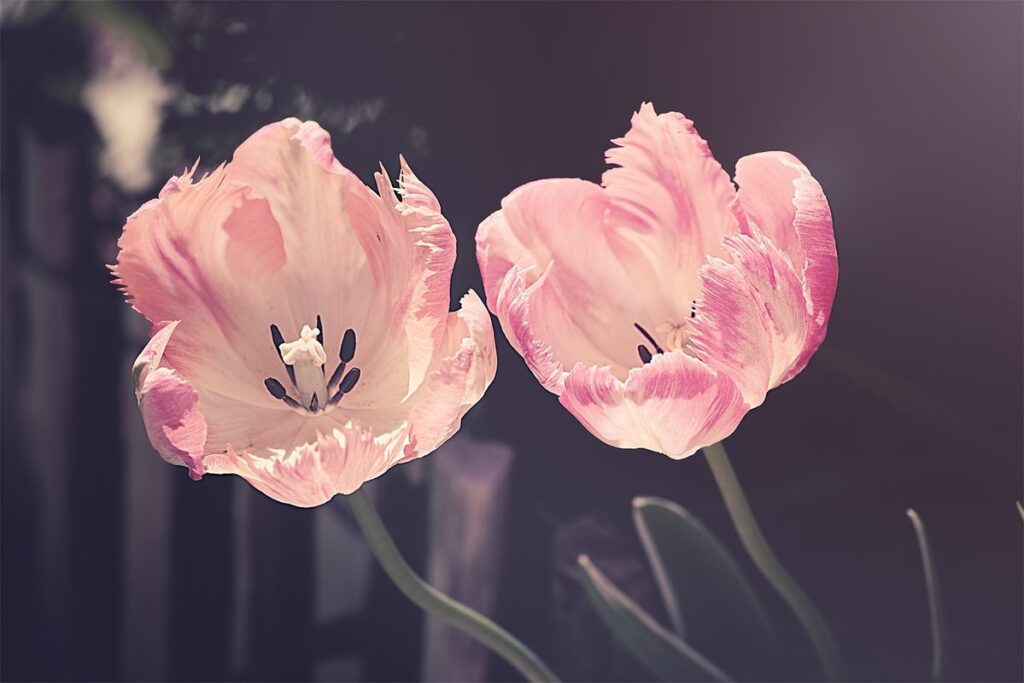
When selecting a variety of flowers for your cut flower garden, it’s essential to consider both annuals and perennials. Annuals are perfect for filling gaps in the garden during their short growing season, while perennials provide structure and longevity.
Some popular annuals include marigolds, zinnias, sunflowers, and cosmos. These flowers are easy to grow from seed, bloom quickly, and come in a range of colors. For example, marigolds require full sun and well-draining soil, making them ideal for warm climates. Zinnias, on the other hand, thrive in partial shade and prefer rich, fertile soil.
Perennials like peonies, dahlias, and sweet peas offer repeat blooms over multiple seasons. Peonies, for instance, need well-drained soil and full sun to produce their iconic flowers. Dahlias require staking to prevent toppling in the wind, but reward with vibrant blooms from mid-summer to fall.
When selecting varieties, consider factors like growth habits, bloom times, and maintenance needs. Mixing annuals and perennials ensures a continuous supply of cut flowers throughout the growing season.
Designing Your Cut Flower Garden
Now that you’ve chosen your cut flower garden location, let’s dive into designing a beautiful and functional space that will yield an abundance of blooms for years to come.
Considerations for Layout and Space
When designing a cut flower garden, maximizing space is crucial, especially if you’re working with a small plot. To create a diverse selection of flowers while still making the most of your space, consider companion planting. This involves pairing plants that complement each other in terms of growth habits, bloom times, and pest resistance.
For instance, plant tall sunflowers behind shorter blooms like marigolds or zinnias to make the most of vertical space. Similarly, pair compact roses with sprawling clematis to create a visually appealing tapestry of textures and colors.
Another trick is to plan your layout according to the growth habits of different flowers. Plant spreading varieties like delphiniums on the north side of your garden to prevent shading, while placing upright blooms like dahlias in a prominent spot where they can be easily admired. With a little planning and creativity, you can create a stunning cut flower garden that makes the most of even the smallest spaces.
Consider dedicating one area of your garden to annuals, which can be easily swapped out each season for new varieties. This will give you flexibility in terms of color and texture without overwhelming the space with too many permanent fixtures.
Incorporating Companion Planting
When designing your cut flower garden, don’t forget to consider incorporating companion planting. This simple yet effective technique can have a significant impact on the overall health and productivity of your garden. By pairing different flowers together, you can create a balanced ecosystem that benefits from mutual relationships.
One of the primary advantages of companion planting is pest control. For instance, planting marigolds with tomatoes repels nematodes, whiteflies, and aphids. Similarly, basil and nasturtiums can help deter pests like squash bugs and striped cucumber beetles. Nutrient sharing is another benefit of companion planting, where plants like legumes (beans, peas) fix nitrogen in the soil, enriching it for neighboring flowers.
To add visual interest to your garden, mix and match complementary plant combinations. Pair tall sunflowers with shorter cosmos or zinnias, creating a layered effect. Alternatively, group bold-colored dahlias with soft-hued lisianthus for a striking contrast. Experiment with different pairings to discover unique harmonies that enhance the beauty of your cut flower garden.
Soil Preparation and Maintenance
To grow vibrant cut flowers, it’s crucial to prepare your soil properly, which includes loosening, aerating, and enriching it with essential nutrients. We’ll walk you through these key steps in our next section.
Preparing the Soil for Cut Flower Growth
Before planting your cut flower garden, it’s essential to prepare the soil for optimal growth. This involves testing the pH levels to ensure they’re suitable for your chosen flowers. Most cut flowers prefer a slightly acidic to neutral soil pH, ranging from 6.0 to 7.0. If your soil is too alkaline or acidic, you can adjust it by adding lime to raise the pH or sulfur to lower it.
Adding organic matter is another crucial step in preparing the soil. This can include compost, well-rotted manure, or peat moss. Not only does it improve soil structure and fertility but also retains moisture and suppresses weeds. Aim to add at least 2-3 inches of organic matter to your soil, mixing it thoroughly before planting.
Removing weeds is equally important as they compete with your cut flowers for water, nutrients, and light. Till the soil to loosen and remove any visible weeds, then mulch the area to prevent new ones from growing. By following these steps, you’ll create a fertile and weed-free environment for your cut flowers to thrive in.
Ongoing Maintenance Tips
As you tend to your cut flower garden, it’s essential to maintain its health and vitality throughout the growing season. This involves regular watering, fertilizing, and deadheading – tasks that might seem straightforward but require attention to detail.
Start by checking the soil moisture daily, especially during hot spells or periods of rapid growth. Avoid overwatering, which can lead to root rot and other issues; instead, water deeply when necessary to encourage deep root development. You can also implement a drip irrigation system for more efficient watering.
Fertilization is another crucial aspect of maintenance. Use balanced fertilizers (10-10-10 NPK) during the growing season, following the manufacturer’s instructions for application rates and timing. Consider side-dressing with calcium or magnesium to address potential deficiencies in these essential nutrients.
Don’t forget about deadheading – the process of removing spent blooms to promote continuous flowering. This task is usually done after cutting a bouquet; simply trim the stem at an angle just above a leaf node, and voilà! Your garden will reward you with an ongoing display of vibrant flowers.
Planting and Growing Cut Flowers
When it comes to growing cut flowers, knowing how to plant them properly is essential for a successful harvest. In this section, we’ll cover everything you need to know to get started.
Sowing Seeds and Transplanting Seedlings
When it comes to planting cut flowers, you have two main options: sowing seeds directly into the ground or transplanting seedlings from pots or cell packs. While both methods can be successful, there are some key considerations to keep in mind.
Sowing seeds directly into the ground is a great option for many cut flower varieties, including cosmos, zinnias, and sunflowers. This method allows the roots of the plants to grow deep into the soil, developing a strong root system that will support the plant’s growth throughout its lifespan. To ensure successful germination, make sure the soil is well-draining and has a pH between 6.0 and 7.0. Sow seeds at the correct depth for each variety (usually 1/4 inch deep) and keep the soil consistently moist during the first few weeks after sowing.
Transplanting seedlings from pots or cell packs can also be effective, especially for more delicate varieties like dahlias and sweet peas. However, it’s essential to handle the roots carefully to avoid damaging them. Water the seedling thoroughly before transplanting, then gently place the plant in the soil, firming the soil around the base of the stem to secure it.
Supporting Tall Crops and Preventing Damage
When growing cut flowers, it’s essential to support tall stems to prevent damage and promote healthy growth. Tall flower stems can be prone to wind damage, which can lead to snapped stems and reduced blooms. To prevent this, you can use stakes or trellises to provide support.
For staking, choose stakes that are sturdy enough to hold the weight of your plant’s stems. Drive the stake into the ground next to the plant, making sure not to damage any roots. Gently tie the stem to the stake using twine or wire, leaving some slack for growth. For trellises, install them near the plant and gently weave the stems through the wires.
Some cut flowers that benefit from staking include delphiniums, sunflowers, and glads. If you’re short on space, consider using a trellis to maximize your garden’s vertical potential. Make sure to check on your plants regularly and adjust the stakes or trellises as needed to ensure they remain upright and secure.
Harvesting and Preparing Cut Flowers
To bring your cut flowers from the garden to a vase, you’ll need to know how to harvest them at just the right moment and prepare them for display. We’ll walk you through both steps in detail next.
Identifying the Right Time to Harvest
When it comes to harvesting cut flowers, timing is everything. You want to pick them at their peak quality, just before they start to fade. This can be a bit tricky, especially if you’re new to growing cut flowers.
To determine when your blooms are ready for harvest, inspect them regularly, ideally in the morning after the dew has dried but before the heat of the day sets in. Look for signs of maturity, such as:
* Petals that have fully opened and are no longer tightly closed
* A slightly softened stem, which indicates that the plant is releasing its grip on the bloom
* A vibrant color that’s not yet begun to fade
Avoid picking flowers that are past their prime or are showing signs of stress, like wilting or brown edges. These will be more prone to premature aging once cut. Instead, look for those with a firm, springy texture and a bright sheen.
As a general rule, it’s best to harvest your cut flowers in the morning, when the plant is at its most hydrated. This ensures that you’re getting the freshest, longest-lasting blooms possible.
Basic Techniques for Cutting and Conditioning
When cutting flowers from your garden, it’s essential to do so correctly to ensure they last as long as possible in a vase. To start, choose a sharp tool like a pruning shear or knife, and cut the stem at an angle. This helps prevent water from pooling on the stem and promotes better uptake of water by the flower.
Next, trim off any leaves that will be submerged in water, as these can cause bacterial growth and shorten the life of your flowers. Remove all foliage below the first set of leaves or node, leaving only the top part of the plant exposed to the air. This helps prevent contamination and keeps the stem hydrated.
For example, when cutting sunflowers, you’ll want to remove most of the lower leaves, but leave a few at the base to provide support for the stem in the vase. For delicate flowers like orchids or carnations, be more precise and only trim off the very lowest set of leaves.
Displaying Your Cut Flowers
Now that you’ve cut and harvested your beautiful flowers, it’s time to showcase them at their best in your home. This section will walk you through stylish display ideas for your cut blooms.
Choosing Vases and Arranging Blooms
When it comes to choosing vases and arranging blooms, there are a few key things to keep in mind. First, consider the color palette of your flowers. If you’re working with bright, bold blooms, opt for clear glass or mercury glass vases that will let their beauty shine through. On the other hand, if you have more delicate or pastel-colored flowers, choose a vase that complements their soft hue.
Consider the texture and shape of your flowers as well. For example, statement flowers like peonies or hydrangeas look stunning in a simple, elegant vase with clean lines, while smaller blooms like baby’s breath or Queen Anne’s lace can be arranged in a more whimsical, curved container.
To create visually appealing arrangements, remember the rule of odd numbers: arrange your blooms in groups of three, five, or seven for a balanced and harmonious look. Experiment with different combinations of heights, textures, and colors to add depth and interest to your arrangement. And don’t forget to leave some negative space – it’s just as important as the flowers themselves!
Preserving Cut Flowers for Long-Term Enjoyment
Preserving cut flowers is a great way to enjoy their beauty year-round. There are several methods for preserving cut flowers, including drying and pressing. Drying involves removing moisture from the flowers, either by air-drying them or using desiccants like silica gel.
To air-dry your cut flowers, tie them in small bunches and hang them upside down in a warm, dry place with good air circulation. This method works best for flowers with delicate petals, such as baby’s breath and Queen Anne’s lace. For more robust flowers like sunflowers and daisies, you can use a desiccant like silica gel to speed up the drying process.
Pressing is another effective way to preserve cut flowers. Place the flowers between sheets of paper towels or blotting paper and weigh them down with a heavy book. This method works best for flat flowers like lavender and pansies. By following these simple steps, you can enjoy your beautiful cut flowers throughout the year.
Frequently Asked Questions
What if I have limited space for a cut flower garden?
In that case, consider vertical gardening options like trellises or arbors to maximize space. You can also choose compact or dwarf varieties of flowers that are specifically bred for smaller spaces. Make sure to leave enough room for proper air circulation and sunlight penetration.
How often should I water my cut flower garden?
The frequency of watering depends on weather conditions, soil type, and the specific needs of your plants. As a general rule, check the soil moisture by inserting your finger into the soil up to the knuckle. If it feels dry, it’s time for watering. Water deeply but avoid overwatering, which can lead to root rot and other problems.
Can I grow cut flowers in containers?
Yes, you can definitely grow cut flowers in containers! Choose a container that is at least 6-8 inches deep to accommodate the roots of your plants. Use a well-draining potting mix and make sure the container has good drainage holes to prevent waterlogged soil. Consider using self-watering planters for added convenience.
How do I know when my cut flowers are ready to harvest?
Check for flower buds that are fully opened or slightly past their prime. Cut them in the morning, when the dew is still present on the petals. Use a sharp knife or pruning shears and make clean cuts just above a leaf node to promote healthy growth.
What’s the best way to preserve my cut flowers for long-term enjoyment?
To preserve your cut flowers, you can use techniques like air drying, pressing, or freezing. Air drying involves tying the stems together and hanging them upside down in a warm, dry place. Pressing involves placing the flowers between sheets of paper towel or blotting paper under heavy weights. Freezing involves placing the flowers in a single layer on a baking sheet lined with parchment paper and then transferring them to an airtight container once frozen solid.