Are you ready to unlock the secrets of growing thriving common sage plants? Whether you’re a seasoned gardener or just starting out, learning how to grow this versatile herb can elevate your cooking and add a touch of elegance to any meal. But with so many factors to consider – from soil preparation to pruning – it’s easy to get overwhelmed and end up with struggling plants.
Don’t worry, we’ve got you covered! In this comprehensive guide, we’ll walk you through the entire process of growing common sage from seed to harvest. We’ll cover everything from how to prepare your soil for optimal growth to tips on transplanting and pruning your plants to encourage healthy development. By the end of this article, you’ll be well on your way to enjoying fresh, fragrant sage right in your own kitchen – indoors or out!
Understanding Common Sage
To grow common sage successfully, it’s essential to understand its unique characteristics and how they impact your garden. Let’s explore what makes common sage tick.
Origins and Varieties of Sage
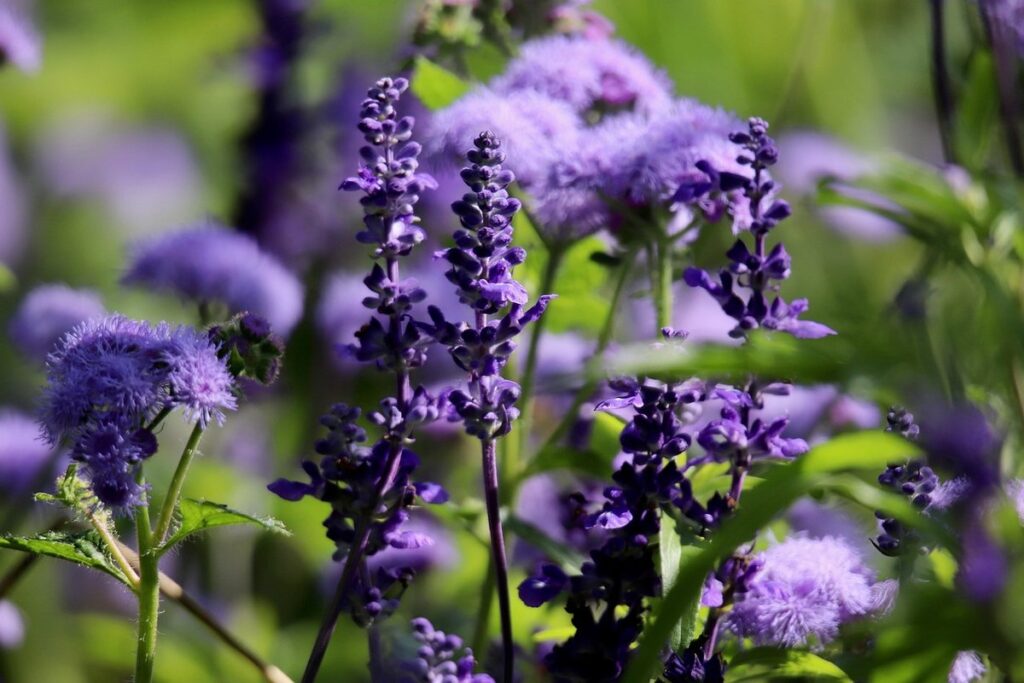
Common sage (Salvia officinalis) is a versatile herb with a rich history and diverse characteristics. There are several varieties of common sage, each with its own unique flavor profile and growth habits.
One of the most popular varieties is ‘Berggarten’, which has large leaves and a strong, pungent flavor. This variety is ideal for cooking and is often used in traditional Mediterranean dishes. On the other hand, ‘Tricolor’ has variegated leaves with white and pink stripes, adding a decorative touch to gardens.
Another variety is ‘Purpurascens’, which has deep purple leaves and a slightly sweeter flavor than other common sage varieties. This variety is perfect for gardeners who want to add some color to their herb garden. When selecting a variety of common sage, consider the flavor profile you prefer and the growth habits that suit your climate.
In general, common sage is a hardy perennial that can tolerate full sun and well-drained soil. It’s relatively easy to grow and requires minimal maintenance, making it an excellent choice for beginner gardeners.
Importance of Sage in Cooking and Medicine
Sage has been a revered herb for centuries, valued not only for its rich flavor but also for its numerous health benefits. In fact, it’s one of the oldest herbs known to humans, with evidence of its use dating back to ancient Greece and Rome. As a culinary herb, sage is a staple in many traditional dishes, particularly in Mediterranean and Italian cuisine. Its distinctive piney flavor adds depth to everything from roasted meats to savory sauces.
Beyond its gastronomic uses, sage has been employed for centuries as a medicinal plant. The herb contains camphor, bornyl acetate, and thujone, compounds that have anti-inflammatory and antiseptic properties. Studies have shown that sage extract can help alleviate symptoms of anxiety and depression by reducing cortisol levels and promoting relaxation. In traditional medicine, sage tea has long been used to soothe sore throats, calm digestive issues, and even treat memory loss.
To harness the nutritional benefits of sage, add fresh leaves to your meals or use dried sage in teas and infusions. A teaspoon of dried sage is rich in vitamin K and contains a modest amount of iron, magnesium, and potassium.
Preparing the Soil for Sage Growth
Before planting sage, it’s essential to prepare the soil by loosening and aerating the area to give the roots room to grow. This simple step can make all the difference in your sage’s success.
Choosing the Right Location for Your Sage Plant
When choosing the right location for your sage plant, it’s essential to consider three key factors: sunlight, soil quality, and drainage. Sage is a Mediterranean native, so it thrives in sunny spots with well-draining soil.
Start by selecting a spot that receives full sun to partial shade. Aim for at least 4-6 hours of direct sunlight per day, as this will promote healthy growth and prevent legginess. If your area has intense heat, consider providing some afternoon shade to prevent scorching.
Next, think about the soil quality in your chosen location. Sage prefers well-draining soil with a pH between 6.0 and 7.0. Avoid areas with standing water or where water tends to collect, as this can lead to root rot. Test your soil before planting to determine its pH level and adjust accordingly.
Finally, ensure good drainage by avoiding low-lying areas or spots prone to waterlogging. Sage plants don’t like wet feet, so choose a location with excellent air circulation and moisture-wicking properties. By considering these factors, you’ll set your sage plant up for success and enjoy a bountiful harvest of fragrant leaves.
Understanding Sage’s Soil Requirements
When it comes to growing sage, understanding its soil requirements is crucial for optimal growth. Sage prefers well-draining soil that’s rich in organic matter, as this allows the roots to breathe and absorb essential nutrients.
The ideal pH range for sage is between 6.0 and 7.0. If your soil’s pH level is too high or too low, it can lead to nutrient deficiencies and reduced growth. To test your soil’s pH level, you can purchase a DIY kit or send a sample to a lab for analysis.
In terms of nutrients, sage requires a balanced diet that includes nitrogen, phosphorus, potassium, and micronutrients like magnesium and iron. You can amend the soil with compost or well-rotted manure to provide these essential nutrients. A general rule of thumb is to add 2-3 inches of compost to the top 6-8 inches of soil before planting.
It’s also worth noting that sage has a deep taproot, which requires good drainage and aeration in the soil. Avoid overwatering or compacting the soil, as this can lead to root rot and poor growth. By understanding and meeting sage’s specific soil requirements, you’ll be well on your way to growing healthy, thriving plants.
Sowing and Transplanting Common Sage
When it comes to growing common sage from seed, timing is everything: sowing at the right moment can make all the difference in getting a healthy start. Learn how to sow and transplant this versatile herb successfully.
Direct Sowing vs. Seed Starters: What Works Best?
When it comes to growing common sage from seed, you have two main options: direct sowing and using seed starters. While both methods can be effective, they have their own set of pros and cons.
Direct sowing involves scattering seeds directly into the garden bed, where they will germinate and grow into mature plants. This method is great for common sage because it allows the roots to spread out freely, which promotes healthy growth and a robust flavor. Additionally, direct sowing eliminates the need for transplanting, which can be stressful for young seedlings.
On the other hand, using seed starters involves sowing seeds in small pots or trays indoors before transferring them to the garden bed. This method provides more control over soil quality and moisture levels, but it can also lead to transplant shock if not done carefully.
In general, direct sowing is a better option for common sage because it allows the plants to establish themselves in their native environment with minimal disruption. However, using seed starters can be beneficial for smaller batches of seeds or when starting seeds indoors during the off-season.
Transplanting Sage Seedlings into Individual Containers or the Garden
When transplanting sage seedlings into individual containers or the garden, it’s essential to handle them gently to minimize shock and promote healthy growth. Start by carefully removing the seedlings from their tray or cell pack, taking care not to disturb the roots.
Begin by preparing the new container or planting site with well-draining potting mix or garden soil. Water the soil lightly before placing the seedling in its new location. Gently firm the soil around the roots, making sure not to compact it too much, which can prevent water and air from reaching the roots.
Water the seedlings thoroughly after transplanting to help them settle in their new environment. Keep the soil consistently moist during the first few weeks after transplanting to reduce stress on the young plants. Make sure to provide sufficient light, either direct or indirect, depending on the time of day and season.
It’s also crucial to monitor for pests and diseases that can be more prevalent when seedlings are transplanted. Regularly inspect your plants and take action promptly if you notice any issues to prevent them from spreading.
Caring for Mature Sage Plants
As your sage plants mature, they’ll require a bit more TLC to keep them thriving. This includes pruning and repotting to ensure they stay healthy and productive.
Watering Habits: How Much is Too Little or Too Much?
Proper watering habits are crucial for mature sage plants to thrive. Sage is drought-tolerant but requires consistent moisture levels to maintain its health and promote healthy growth. Watering frequency depends on the climate, soil type, and season. As a general rule, water your sage plant when the top 1-2 inches of soil feels dry to the touch.
It’s essential not to overwater, as this can lead to root rot and other issues. A good starting point is to check the moisture level in the soil by inserting your finger into it. If the soil is too dry, water thoroughly until you see water coming out from the drainage holes. Allow the excess water to drain before resuming regular watering.
As a rough estimate, water your mature sage plant once a week during spring and summer months when temperatures are above 60°F (15°C). In fall and winter, reduce watering frequency to once every two weeks, as plants require less moisture in cooler conditions. Keep an eye on the plant’s response to adjust the watering schedule accordingly. Monitor for signs of drought stress, such as yellowing leaves or droopy stems.
Pruning and Harvesting Methods for Maximum Yield
When it comes to pruning and harvesting mature sage plants, timing is everything. Pruning should be done after flowering, typically in late summer or early fall, to encourage bushy growth and prevent the plant from becoming leggy. Cut back the stems by about one-third to promote new growth, making sure to remove any weak or spindly branches.
To harvest leaves without damaging the plant, simply pinch off individual leaves with your fingers, or use scissors to snip them off just above a node (where the leaf meets the stem). Avoid cutting into the woody base of the plant, as this can damage the roots and reduce next year’s growth. Harvesting regularly will also help control the plant’s size and encourage new growth.
Some gardeners prefer to harvest sage leaves in the morning, after the dew has dried but before the heat of the day, when the oils are most concentrated in the leaves. This is a great time to harvest for cooking and tea-making purposes. Be sure to dry or freeze any excess leaves to preserve them for later use.
Common Pests and Diseases Affecting Sage Plants
Sage plants can be susceptible to certain pests and diseases, so it’s essential to recognize the common issues you might encounter when growing these herbs. Keep an eye out for signs of infestation or infection in your sage garden.
Identifying and Managing Common Pests
Sage plants are susceptible to various pests that can cause significant damage if left unchecked. Among the most common pests affecting sage are aphids, whiteflies, and spider mites.
Aphids are small, soft-bodied insects that feed on sap, causing curled or distorted leaves. They multiply rapidly, producing live young in as little as 7-10 days. Whiteflies, on the other hand, are tiny winged insects that suck plant juices, often spreading diseases like virus Y. Spider mites are microscopic arachnids that spin fine webs and feed on plant sap, causing yellowing or bronzing of leaves.
To manage these pests, inspect your sage plants regularly for signs of infestation. Use neem oil or insecticidal soap to control aphid populations by spraying the undersides of leaves where they tend to congregate. For whiteflies, introduce natural predators like parasitic wasps or lacewings into your garden. Spider mites can be controlled with fine-mist water sprays or horticultural oils.
Preventative measures include maintaining good air circulation around plants and avoiding overwatering, which can attract pests. Inspect new plants for signs of infestation before introducing them to your garden. Regularly monitor your sage plants for early warning signs of pest activity to prevent severe infestations from developing.
Recognizing and Treating Fungal and Bacterial Infections
As a sage plant owner, it’s essential to recognize the signs of fungal and bacterial infections, which can quickly spread and cause significant damage. Fungal infections often manifest as white, cottony growths on leaves or stems, while bacterial infections may appear as black spots or patches on foliage.
To identify these infections, inspect your plants regularly for any unusual growths or discolorations. Check for yellowing or browning leaves, which can be a sign of root rot caused by overwatering or poor drainage. Keep an eye out for powdery mildew, a fungal disease that looks like a white, powdery coating on leaves.
If you suspect your plant has a fungal or bacterial infection, treat it promptly with the right fungicides or bactericides. For instance, neem oil can be used to control fungal diseases, while copper-based products can help combat bacterial infections. Always follow label instructions and take precautions when handling these chemicals.
To prevent infections in the first place, ensure your plants receive good air circulation, water them properly, and avoid overfertilizing. Regular pruning also helps remove any infected areas, reducing the risk of further infection.
Propagating and Preserving Sage Plants
To successfully grow and care for your sage plants, you’ll need to know how to properly propagate and preserve them. We’ll cover both methods in detail here.
Methods for Propagation (Cuttings, Division, Seed)
When it comes to propagating common sage, you have several methods at your disposal. One of the most popular and efficient ways is through cuttings. To do this, choose a healthy stem with plenty of leaves, and trim off the lower set of leaves, leaving only two or three pairs near the top. Then, dip the cut end into rooting hormone powder or liquid to stimulate root growth. Place the cutting in a pot filled with well-draining soil, water thoroughly, and keep it in a warm, humid spot until roots develop.
Another method is division, which involves separating established plants at the roots. This works best for larger, mature sage plants that have outgrown their containers or are becoming too crowded. Gently dig up the plant, separate the roots with your fingers or a blunt instrument, and replant each section in its own pot. Make sure to water well after division and keep the soil consistently moist until new growth appears.
Lastly, you can also propagate sage from seed. Sow seeds indoors 6-8 weeks before the last frost date, sowing them about 1/4 inch deep in a pot filled with good quality seed starting mix. Keep the soil warm and moist, and once the seedlings have two sets of leaves, transplant them outdoors into well-draining soil in full sun to partial shade.
Ways to Preserve Fresh or Dried Sage Herbs
Fresh sage herbs can be preserved through air-drying, where bunches of leaves are hung upside down in a warm, dry place. Alternatively, you can use a food dehydrator to speed up the process. For dried sage, it’s essential to store it in airtight containers to maintain its flavor and aroma.
To preserve fresh or dried sage herbs for extended periods, consider freezing them. Simply chop the leaves finely and place them in an ice cube tray with olive oil or water. Once frozen, transfer the cubes to a freezer bag or container for later use. This method is ideal for salvaging last year’s harvest or preserving excess foliage.
When storing dried sage, make sure it’s away from direct sunlight, heat sources, and moisture. A cool, dark cupboard or pantry is perfect for this purpose. Label the containers so you can easily identify which batch of sage you’re using in your recipes.
Remember that frozen or dried sage will have a slightly different flavor profile compared to fresh sage. Use them accordingly in your cooking and baking experiments to find the perfect balance of flavors for your dishes.
Seasonal Maintenance and Winter Care
To keep your sage healthy and thriving, it’s essential to perform seasonal maintenance tasks that ensure its growth and productivity throughout the year. This includes winter care strategies to protect your plant from harsh cold weather conditions.
Preparing Your Sage Plant for Cold Weather
As winter approaches, it’s essential to prepare your sage plant for the cold weather ahead. Sage is a hardy perennial, but it still needs some TLC to survive the freezing temperatures and potential snow cover. Start by mulching around the base of your plant, using a thick layer (about 3-4 inches) of organic material like straw or bark chips. This will help insulate the roots and prevent them from getting damaged.
Next, protect your sage plant from extreme temperatures by providing some additional protection. If you live in an area with frequent frost, consider bringing your pot indoors or moving it to a sheltered location like a garage or sunroom. If that’s not possible, cover the plant with a breathable cloth or tarp to shield it from harsh winds and cold snaps.
Be sure to also inspect your sage plant regularly during winter for signs of damage or disease. Keep an eye out for yellowing leaves or black spots, and trim back any affected areas promptly. By taking these simple steps, you can ensure your sage plant stays healthy and thriving throughout the winter months.
Spring Revival: Tips for Reviving Dormant Sage Plants
As we welcome the arrival of spring, it’s time to revive those dormant sage plants that may have suffered during the harsh winter months. Sage is a hardy perennial, but even it can fall victim to extreme cold and dry weather. If you’re finding your once-thriving sage plant looking wilted or lifeless, don’t worry – with some simple care and attention, you can breathe new life into it.
First things first: inspect your plant carefully for any signs of damage or rot. Remove any dead or damaged leaves to prevent the spread of disease and encourage healthy growth. Next, prune back the stems to about half their original length, which will help stimulate new growth and promote a bushy shape.
Give your sage plant a good soak in a bucket of water, making sure the soil is thoroughly saturated. Then, transfer it back to its pot or garden bed, where it can receive plenty of sunlight and warmth. Keep an eye on the temperature – most types of sage thrive in temperatures between 65-75°F (18-24°C).
Frequently Asked Questions
What are some common mistakes to avoid when transplanting sage seedlings?
Transplanting sage seedlings can be a delicate process, but it’s essential to avoid overwatering, which can lead to root rot and poor establishment of the plant. Make sure the soil is well-draining, and gently water the transplanted seedlings after a few days.
Can I propagate common sage from leaf cuttings or must I use roots?
Yes, you can propagate common sage from leaf cuttings, but it may not be as successful as using root cuttings or seeds. Take healthy leaves with petioles (stems) attached and plant them in moistened potting mix. Keep the soil consistently moist until new growth appears.
How do I prevent sage plants from becoming too leggy?
Sage plants can become leggy if they don’t receive enough light or are not pruned regularly. To prevent this, provide your sage plants with at least 4-6 hours of direct sunlight per day and prune them back by about one-third after harvesting to encourage bushy growth.
Can I grow common sage indoors year-round, or do I need to bring it outside during the winter?
Yes, you can grow common sage indoors year-round in a container with good air circulation. Bring your plant outdoors during the warmer months for better light and fresh air, but protect it from extreme temperatures and frost by moving it back inside before the first frost.
How long does it take to propagate common sage using seeds or cuttings?
The time it takes to propagate common sage depends on the method used. Seeds typically germinate within 1-2 weeks after sowing, while rooted cuttings can be harvested for leaves in about 6-8 weeks after propagation. Leaf cuttings may take longer (up to 3 months) to produce new roots and start producing leaves.