Planting dill is an art that requires attention to detail and the right conditions. Whether you’re a seasoned gardener or just starting out, growing your own dill can elevate your cooking and save you money on store-bought varieties. But with so many types of dill available, how do you choose the right one for your garden? And what about soil preparation – is it best to go with organic methods or synthetic fertilizers?
In this comprehensive guide, we’ll walk you through everything you need to know to plant and care for dill successfully. From selecting the perfect variety to managing pests and harvesting at peak flavor, we’ve got you covered. By following our expert tips and advice, you’ll be well on your way to growing delicious, high-quality dill that adds depth and complexity to any dish.
Choosing the Right Variety of Dill
When it comes to planting dill, selecting the right variety can make all the difference in your harvest. Let’s take a look at some popular types and their unique characteristics.
Selecting Dill Types for Different Climates
When selecting dill for your garden, it’s essential to consider the climate and regional weather conditions where you live. Different types of dill have varying levels of adaptability to different climates, so choosing the right variety is crucial.
Mammoth Dill, for example, is a popular choice for cooler climates with moderate temperatures. It grows well in regions with short growing seasons and can tolerate light frosts. If you live in an area with warm summers and cool winters, such as the Pacific Northwest or Northern Europe, Mammoth Dill is an excellent option.
On the other hand, Bouquet Dill thrives in warmer climates with long growing seasons. It’s ideal for regions like California, Florida, or the Mediterranean, where temperatures remain above 60°F (15°C) throughout the summer. Bouquet Dill produces larger leaves and a stronger flavor, making it perfect for pickling and other culinary uses.
Consider Forespur Dill if you live in an area with unpredictable weather patterns or harsh winters. This type of dill is more resistant to heat stress and can tolerate some frost damage, making it a great choice for gardeners in regions like the Northeastern United States.
When selecting dill for your climate, look for varieties that are disease-resistant and tolerant of local pests. Be sure to check the seed package or consult with a local nursery expert to determine which type of dill will perform best in your region.
Understanding Dill’s Growth Requirements
Dill requires ideal growing conditions to thrive. To start with, it prefers well-drained soil that is rich in organic matter. A pH between 6.0 and 7.0 is considered optimal for dill growth. If your soil lacks these characteristics, you can amend it by adding compost or manure.
When it comes to sunlight, dill needs full sun to partial shade. Direct sunlight for at least six hours a day will promote healthy growth and prevent legginess. Watering is also crucial; keep the soil consistently moist but not waterlogged. Dill is susceptible to root rot if the soil is too wet.
To prepare your soil before planting, test its pH level and adjust it accordingly. Mix in compost or well-rotted manure to improve drainage and fertility. You can also add a balanced fertilizer once a month to support dill’s growth. If you’re using seedlings, transplant them when the weather is warm and there’s no risk of frost. For direct sowing, plant seeds 1/4 inch deep and 12-18 inches apart in late spring or early summer.
Preparing the Soil for Dill Planting
Before you start planting your dill seeds, it’s essential to prepare the soil properly. This involves loosening and aerating the ground to ensure optimal growing conditions for your dill plants.
Testing and Amending the Soil
Testing and amending the soil is an essential step before planting dill. Dill requires a well-balanced environment to grow optimally, which includes the right pH level and nutrient composition. A soil test can help you determine the current pH level and nutrient availability.
To test your soil’s pH, you can purchase a DIY testing kit or send a sample to a laboratory for analysis. The ideal pH range for dill is between 6.0 and 7.0. If your soil’s pH falls outside this range, you may need to amend it with lime (to raise the pH) or sulfur (to lower it).
In addition to adjusting the pH, it’s also crucial to ensure adequate nutrient levels. Dill requires a balanced diet of nitrogen, phosphorus, and potassium (NPK). If your soil test reveals low nutrient levels, consider adding organic matter like compost or well-rotted manure. These amendments not only improve nutrient availability but also enhance soil structure and fertility.
For example, if your soil test indicates low nitrogen levels, you can side-dress with a balanced fertilizer at the recommended rate for dill.
Creating a Well-Draining Bed for Dill
When it comes to growing dill, creating a well-draining bed is crucial for preventing waterlogged soil that can lead to root rot. Dill plants are sensitive to overwatering and can be prone to fungal diseases if the soil doesn’t drain properly.
To ensure good drainage in your dill bed, start by selecting a location with full sun and slightly elevated ground. If you’re planting in a low-lying area or where water tends to collect, consider building a raised bed using well-draining materials like wood chips or gravel. This will help excess water escape quickly and prevent it from accumulating around the roots.
When preparing your soil, mix in a 2-3 inch layer of organic matter such as compost or well-rotted manure. This will improve the soil’s structure and ability to drain excess water. Avoid using regular garden soil, which can be too dense and heavy for dill plants. Instead, opt for a light, loose mixture that allows roots to grow freely.
In addition to improving drainage, ensure the bed is level and even to prevent pooling of water. You can achieve this by raking the surface or installing a gentle slope in the direction of the water flow. By taking these simple steps, you’ll create an ideal environment for your dill plants to thrive and reduce the risk of root rot and other problems associated with waterlogged soil.
Sowing Dill Seeds or Seedlings
Whether you’re starting from scratch or transplanting seedlings, we’ll walk you through the best ways to get your dill garden growing quickly and healthily. Let’s dive into sowing dill seeds or seedlings successfully.
Direct Sowing vs. Starting Indoors
When deciding how to plant dill, you have two primary options: direct sowing and starting indoors. Both methods have their benefits, but they’re not interchangeable for every gardener.
Direct sowing allows you to sow seeds directly into the ground at the right time for your climate. This method is ideal when dill seeds are readily available in your area, and the weather is suitable for germination. In regions with long growing seasons or warm climates, direct sowing can be a more straightforward approach. Additionally, direct sowing avoids the need for indoor space, which can be limited.
However, direct sowing may not be feasible if you live in an area with a short growing season or cooler temperatures. In such cases, starting dill seeds indoors gives you a head start on the growing season and allows for earlier harvests. When choosing this method, ensure you have adequate indoor space for seedlings to thrive before transplanting them outside.
Consider your climate, available space, and seed availability when deciding between direct sowing and starting dill seeds indoors.
Planting Dill Seedlings in the Garden
When it’s time to transplant dill seedlings into larger containers or directly into the garden bed, make sure you’re doing it correctly to ensure they thrive. Begin by gently removing the seedling from its container and inspecting the roots for any damage. If necessary, trim back the longest stems by about one-third to encourage bushy growth.
Plant the dill seedlings 12-18 inches apart in a location with full sun and well-draining soil. You can also grow them in containers at least 6-8 inches deep. To support the tall stems, install stakes or a trellis near the plants as they grow.
After planting, water the dill seedlings thoroughly to settle the soil around their roots. Keep the soil consistently moist during the first few weeks after transplanting. Fertilize lightly with a balanced fertilizer once a month to promote healthy growth.
In the garden bed, consider companion planting by interspersing dill with other vegetables like cucumbers or tomatoes that benefit from its natural pest-repellent properties.
Caring for Dill Plants Throughout Their Growth Cycle
As you nurture your dill plants from seedling to harvest, it’s essential to provide them with optimal care throughout their growth cycle, ensuring a bountiful and healthy crop.
Watering and Irrigation Strategies
When it comes to watering and irrigation strategies for dill plants, getting it just right can be a challenge. The good news is that with a few simple tips and tricks, you’ll be able to provide the perfect amount of moisture for your plants to thrive.
First, let’s talk about frequency and amount. Dill plants need about 1-2 inches of water per week, either from rain or irrigation. In hot climates, they may need more frequent watering, while in cooler climates, they can get by with less often. Soil type also plays a role – if your soil is sandy, it will drain quickly and require more frequent watering, whereas clay soil will retain moisture longer.
To conserve water and ensure consistent moisture levels, consider using drip irrigation or soaker hoses. These systems deliver water directly to the roots of the plant, reducing evaporation and runoff. Aim for about 1/4 cup of water per plant, depending on size. Another technique is to use mulch around the base of your dill plants – it will help retain moisture in the soil while also suppressing weeds.
Keep an eye out for signs that your plants need more or less water – wilted leaves can indicate underwatering, while yellowing leaves may be a sign of overwatering. Adjust your watering schedule accordingly to ensure your dill plants stay happy and healthy throughout their growth cycle.
Fertilizing and Pruning Dill Plants
Fertilizing dill plants at different growth stages is crucial for optimal yields and healthy plant development. When your dill seedlings are about two weeks old, start fertilizing them with a balanced, water-soluble fertilizer (20-20-20). This will promote root growth and establishment of the seedlings.
As your dill plants begin to flower, switch to a high-phosphorus fertilizer (10-20-10) to encourage blooming and seed production. You can also side-dress with a kelp meal or fish emulsion to provide essential micronutrients.
Pruning is another crucial aspect of caring for dill plants. Regular pruning will control the plant’s shape, promote bushy growth, and direct the plant’s energy towards producing more leaves and seeds. To prune your dill, simply snip off the flower stalks when they reach 6-8 inches tall to encourage leaf production.
For maximum yields, pinch or cut off individual flower buds as soon as you notice them forming. This will redirect the plant’s energy toward producing more foliage rather than seed heads. By pruning and fertilizing at different growth stages, you can optimize your dill plants’ performance and enjoy a bountiful harvest of fresh herbs.
Pest Management and Common Issues with Dill
When it comes to growing dill, pest management is a crucial aspect to consider, as common issues can quickly ruin your crop. Let’s explore some effective ways to keep pests at bay and address these challenges head-on.
Controlling Pests that Target Dill
Dill plants are notorious for attracting pests that can quickly take over if not managed properly. Three common culprits you should watch out for are aphids, spider mites, and nematodes. Aphids are tiny sap-sucking insects that reproduce rapidly, leaving behind a sticky substance that attracts other pests. Spider mites, on the other hand, spin fine webs and suck the plant’s sap, causing yellowing leaves.
To control these pests naturally, consider using neem oil, which is derived from the seeds of the neem tree. Mix it with water according to the label instructions and spray it directly on the affected areas. Another option is garlic sprays, made by infusing crushed garlic in water. This solution repels aphids and other insects.
Attracting beneficial insects like ladybugs and lacewings can also help control pest populations. These natural predators feed on pests, reducing the need for chemical pesticides. By incorporating these organic methods into your pest management strategy, you’ll be well-equipped to keep dill plant-damaging pests under control.
Troubleshooting: Common Problems with Dill Plant Growth
If you’ve noticed that your dill plants are struggling with yellowing leaves, stunted growth, or reduced yields, don’t worry – it’s not uncommon for these issues to arise due to various factors. One common culprit is temperature fluctuations – if your plants experience a sudden drop or rise in temperature, it can cause stress and lead to discoloration.
Another potential issue is nutrient deficiency, particularly nitrogen. Dill requires consistent moisture and well-draining soil to absorb essential nutrients like nitrogen, potassium, and phosphorus. If the soil lacks these elements, you may see yellowing leaves, weak stems, or reduced leaf growth. To prevent this, ensure your dill plants receive a balanced fertilizer mix during the growing season.
In addition to nutrient deficiencies, pests can also impact your dill yields. Keep an eye out for aphids, whiteflies, and spider mites – these tiny insects can spread diseases and weaken your plants. Regularly inspect your plants for signs of infestation and use organic pest control methods whenever possible. By monitoring your plants’ health and adjusting your care routine accordingly, you can avoid common problems like stunted growth or reduced yields.
Harvesting and Storing Dill for Optimal Flavor and Quality
Now that your dill crop is thriving, it’s time to think about harvesting and storing its delicate leaves to preserve their signature flavor and aroma for months to come. Proper handling will ensure optimal flavor and quality in your home cooking.
When to Harvest Dill for Fresh Use
When it comes to harvesting dill for fresh use, timing is everything. You want to pick your dill at the right stage of maturity to ensure optimal flavor and quality.
For leafy dill varieties, such as ‘Fernleaf’ or ‘Mammoth’, wait until the leaves are a vibrant green color and reach 6-8 inches in length. Harvest individual leaves or stems by pinching them off with your fingers, leaving about an inch of stem intact to prevent damage to the plant.
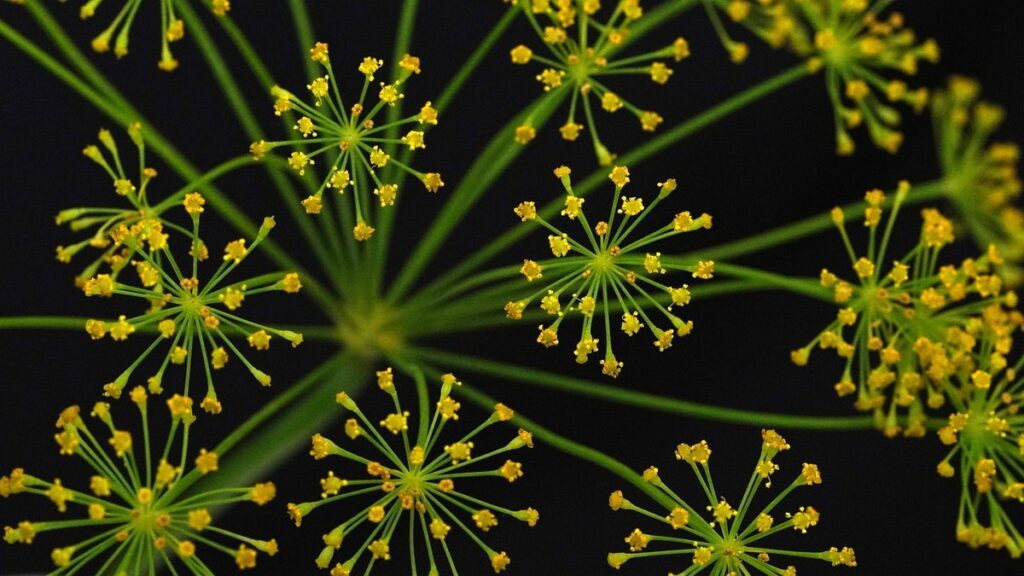
For seed production, allow the dill flowers to bloom and go to seed. This typically takes around 90-120 days from sowing. Cut off the flower stalks when they reach 12-18 inches tall, leaving a small portion of stem attached to the main plant. Tie the stems together in small bunches and hang upside down in a warm, dry place.
For recipes that require fresh dill leaves, such as pickling or salads, harvest your dill daily or every other day to encourage new growth. For seed production, you can wait until the seeds are fully mature and dry before collecting them for use or saving for future planting.
Preserving Dill through Freezing, Dehydrating, or Fermenting
If you’re looking to preserve dill for year-round use, you’ve got several options: freezing, dehydrating, and fermenting. Each method has its own benefits and best results, depending on the part of the plant being preserved.
Freezing is a great way to preserve delicate herbs like dill without losing their flavor or aroma. Simply chop the leaves and stems, place them in an airtight container or freezer bag, and store at 0°F (-18°C) or below. Frozen dill is perfect for soups, stews, and sauces.
Dehydrating dill using a food dehydrator or your oven on its lowest setting removes excess moisture, allowing you to store the dried herb in airtight containers for up to six months. This method is ideal for making dill powder or mixing with other herbs for seasoning blends.
Fermenting is another option, particularly for preserving dill seeds and leaves. Create a brine solution (water, salt, and sometimes sugar) and soak the dill parts in it for several days or weeks. The fermentation process will create lactic acid, which acts as a natural preservative, allowing you to store the fermented dill in a cool, dark place.
When choosing a preservation method, consider the intended use of your preserved dill. For example, frozen dill is best suited for cooking methods that involve high heat or long simmering times, while dried dill can be used for flavoring oils and vinegars. Fermented dill makes a great addition to pickling recipes.
Keep in mind that proper storage and handling are crucial to maintaining the quality and safety of preserved dill. Always label containers with the date and contents, and keep them away from direct sunlight and heat sources.
Frequently Asked Questions
Can I grow dill indoors if my outdoor climate is not suitable for it?
Yes, you can definitely grow dill indoors using a well-draining potting mix and providing sufficient light (at least 4-6 hours of direct sunlight). Choose a compact or dwarf variety that thrives in containers. Ensure proper ventilation and maintain temperatures between 60°F to 70°F (15°C to 21°C) for optimal growth.
What are the most common pests that target dill, and how can I control them?
Common pests like aphids, spider mites, and root-knot nematodes can harm your dill plants. Use neem oil or insecticidal soap to control aphid infestations, while introducing beneficial nematode-killing microorganisms into the soil can help manage nematodes. Monitor your plants regularly and take prompt action when you notice any pest issues.
How long does it take for dill to mature after sowing seeds?
The maturation period of dill varies depending on the variety, but generally, it takes around 60-90 days from sowing seeds to harvesting fresh dill leaves. For optimal flavor and aroma, wait until the plants reach their full height (around 12-18 inches) before harvesting individual leaves or stems.
Can I use regular garden soil for planting dill, or do I need a specific type?
While you can use regular garden soil, it’s recommended to create a well-draining bed specifically designed for dill. Mix in some compost or organic matter to improve the soil structure and fertility. If your garden soil is heavy clay or prone to waterlogging, consider repotting the dill seedlings into a more suitable growing medium.
What’s the best way to preserve fresh dill for later use?
To preserve fresh dill for later use, you can freeze it by chopping the leaves finely and placing them in an airtight container or freezer bag. Alternatively, dry the leaves using a food dehydrator or air-dry them on paper towels before storing them in an airtight container. Fermentation is also a great way to preserve dill, but be sure to follow proper fermentation techniques to avoid spoilage.