Wax moths may seem like a harmless pest, but they can cause significant damage to your home, especially if you store valuable items in your attic. If you’re not careful, these pesky insects can destroy your precious belongings, leaving you with costly repairs and a headache. The good news is that identifying the signs of infestation and taking preventive measures can save you from this nightmare. In this article, we’ll delve into the world of wax moths, exploring how to identify them, preventing damage, and controlling their populations. We’ll also provide expert tips on storage and prevention methods to keep your attic safe from these unwelcome guests. By the end of this article, you’ll be equipped with the knowledge to protect your home and belongings from the hidden dangers of wax moths.
Understanding Wax Moth Infestations
If you’re dealing with a wax moth infestation, understanding its causes and symptoms is crucial to preventing further damage to your beehives or storage containers. This section will break down these key factors for you.
What Are Wax Moths?
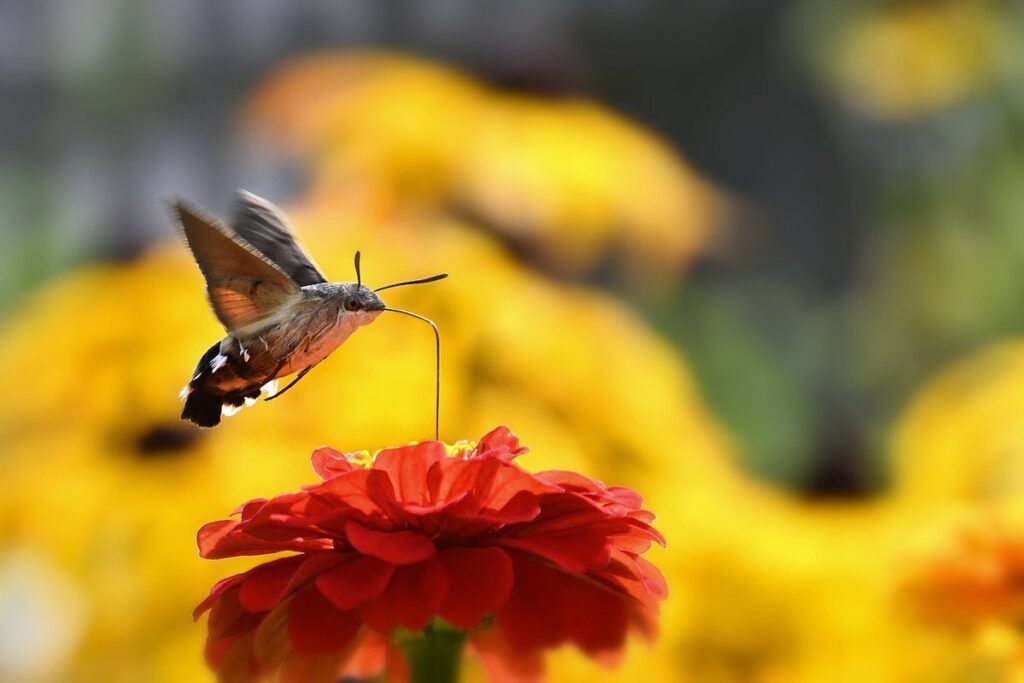
Wax moths are a type of pest that belongs to the family Crambidae. These moths are notorious for infesting beehives and honeycombs, causing significant damage to the stored wax. Wax moths can be identified by their grayish-white color with dark stripes on their wings and bodies.
These insects thrive in warm and humid environments, making them a common problem in tropical and subtropical regions. They are attracted to the warmth and moisture emitted by the wax, which they feed on to lay eggs. Female wax moths can lay up to 200 eggs at a time, which hatch into larvae after about two weeks.
The larvae of wax moths are voracious eaters, consuming the honeycomb cells from the inside out. This can lead to a collapse of the beehive, resulting in significant economic losses for beekeepers. If you suspect an infestation, it’s essential to act quickly to prevent further damage and ensure the health of your bees.
Beekeepers can take preventative measures by ensuring their hives are well-ventilated and stored away from direct sunlight. Regular inspections can also help detect early signs of infestation, allowing for prompt treatment.
Identifying Signs of an Infestation
When dealing with wax moths, it’s essential to be able to identify the signs of an infestation early on. This will allow you to take swift action and prevent further damage to your stored items.
One of the most noticeable signs of a wax moth infestation is damage to the stored items themselves. Wax moths are attracted to the waxy coatings found on some types of fabrics, such as wool, silk, and down-filled items. If you notice that these materials are becoming brittle or discolored, it may be a sign that the moths are feeding on them.
In addition to damage to stored items, wax moth infestations can also leave behind webbing and eggs. The female wax moth will spin silky threads around her eggs, creating a protective sac-like structure. These webs can often be found in dark areas or hidden corners where the moths prefer to nest.
To confirm an infestation, look for tiny white eggs that are usually about 1/8 inch long and have a slightly pinkish tint. If you suspect you have a wax moth infestation, inspect your stored items carefully and check for these signs before taking further action.
The Consequences of Ignoring a Wax Moth Infestation
Ignoring a wax moth infestation can have severe consequences for both your property and wallet. One of the most significant risks is further damage to your home or storage facility. Wax moths can burrow into even the sturdiest wooden structures, weakening their integrity and potentially causing catastrophic failures.
Beyond the immediate danger to your property, an untreated infestation can lead to significant financial losses. The cost of repairing or replacing damaged materials can be substantial, especially if the infestation is left unchecked for an extended period. According to a study by the National Pest Management Association, the average homeowner spends over $1,000 to repair damage caused by wax moths.
The longer you wait to address the issue, the more extensive and costly the damage becomes. It’s not uncommon for untreated infestations to result in entire sections of a storage facility or room being condemned due to structural instability. To avoid these consequences, it’s essential to act quickly and decisively when signs of an infestation become apparent. This typically involves consulting with a pest control professional who can assess the extent of the problem and recommend a course of action.
Causes and Contributing Factors
Wax moths can infest homes, studios, and workshops, causing significant damage to valuables. Let’s explore the common causes that lead to these unwanted guests.
Humidity and Temperature
When it comes to wax moths thriving in your attic or storage areas, humidity and temperature play significant roles. These pests are highly adaptable, but their survival largely depends on the environmental conditions they’re exposed to.
Wax moths can withstand a wide range of temperatures, from around 35°F (2°C) to over 100°F (38°C), but optimal breeding occurs between 65°F (18°C) and 85°F (29°C). However, their ability to thrive is severely impacted by humidity levels. They require a humid environment with a relative humidity of at least 60% to breed successfully.
If your attic or storage area experiences consistently high temperatures and low humidity, wax moths will struggle to survive. Conversely, if the environment is excessively humid but cooler, they may still be able to thrive. This delicate balance makes it crucial to maintain a stable temperature range and relative humidity level in these areas.
To prevent wax moth infestations, ensure your attic or storage area has proper ventilation to regulate humidity levels and avoid extreme temperatures. Regularly inspect these spaces for signs of pest activity, such as damaged insulation or debris accumulation.
Stored Items: The Perfect Food Source
Wax moths are attracted to a variety of stored items that provide them with food and shelter. One common culprit is wool blankets and clothing made from natural fibers like wool, silk, and cotton. These materials are high in protein, making them an ideal food source for wax moth larvae. Fabric scraps, particularly those containing animal-derived materials, can also attract wax moths.
When storing these items, it’s essential to keep them clean and dry. Mothballs or natural alternatives like lavender sachets can help deter wax moths. However, if the infestation is severe, it may be necessary to dispose of the affected item altogether. Regular inspections and monitoring can help prevent infestations from taking hold.
Some items are more susceptible than others. For example, wool sweaters and blankets that have been stored in a humid environment or exposed to moisture are more likely to attract wax moths. Similarly, fabric scraps with a high protein content will be more appealing to these pests. By understanding which types of stored items are at risk, you can take proactive steps to prevent infestations and protect your belongings.
Poor Storage Practices
When it comes to controlling wax moth infestations, one often-overlooked factor is poor storage practices. It’s essential to understand that these pests thrive in environments where their food sources are readily available and easily accessible.
Using airtight containers is a simple yet effective way to prevent wax moths from infiltrating your honey or beeswax supplies. These containers should be specifically designed for storing food-grade materials, with tight-fitting lids that seal out moisture and other contaminants. Label each container clearly, including the contents and date stored, so you can easily identify what’s inside.
Maintaining a clean workspace is also crucial in preventing wax moths from taking hold. Regularly sweep or vacuum floors to remove debris, dust, and other potential food sources for these pests. Avoid storing supplies near areas where food is prepared or consumed, as this can create an ideal environment for wax moths to multiply.
By adopting proper storage techniques, you can significantly reduce the risk of a wax moth infestation in your honey or beeswax supplies. Remember, prevention is key – be mindful of how and where you store these materials, and take action promptly if you notice any signs of pest activity.
Prevention and Control Methods
Now that you know what wax moths can do to your home, let’s focus on stopping them before it gets out of hand. We’ll cover effective methods for preventing and controlling wax moth infestations.
Inspecting Your Attic and Storage Areas
Regular inspections are crucial when it comes to detecting wax moth activity in your attic and storage areas. These pests can quickly infest your home if left unchecked, causing significant damage to stored items like woolens, furs, and other natural fibers.
Look for signs of webbing, which appears as fine white threads or a cottony material. This is often seen near the affected item, but it can also be hidden in crevices or behind walls. Be sure to inspect dark corners, closets, and areas with poor ventilation, where wax moths thrive.
Check for eggs, usually small and white, which are typically laid on the surface of the infested item. Moths themselves may be seen flying around light sources or landing on nearby surfaces. Keep an eye out for adult moths, especially during the spring and summer months when they’re most active.
Regularly vacuum and dust these areas to remove debris that might attract wax moths. Store items in sealed containers or bins, keeping them away from direct sunlight and moisture. By staying vigilant and conducting regular inspections, you can catch any wax moth infestations early on and prevent costly damage to your belongings.
Removing Food Sources and Traps
When it comes to preventing wax moths from infesting your beehives, removing attractants is crucial. Wax moths are drawn to food crumbs, dust, and other debris that can feed them. These unwanted visitors will happily munch on anything they can find, including honeycombs and bee brood.
To start, inspect your beehives regularly for any signs of debris or attractants. Check the frames, combs, and surrounding areas for crumbs, dust, or other potential food sources. Be thorough in your inspection, as even small amounts of debris can attract wax moths.
Remove any debris you find by gently brushing it off with a soft-bristled brush or by vacuuming it up with a gentle suction setting. Make sure to clean all surfaces thoroughly, including the tops and sides of frames and combs.
It’s also essential to keep your beehives in a clean and dry environment. Wax moths thrive in humid conditions, so ensure good ventilation around your hives. Regularly cleaning and inspecting your beehives will help prevent wax moth infestations and keep your bees healthy.
Natural Deterrents and Repellents
When it comes to preventing wax moths from infesting your beehives or stored honeycombs, you might want to consider exploring non-toxic alternatives for deterring these pesky insects. Essential oils are a popular choice among beekeepers and natural enthusiasts alike. Certain essential oils like peppermint, lemongrass, and tea tree oil have been shown to repel wax moths due to their strong scent properties.
You can incorporate essential oils into your moth-deterrent arsenal by adding a few drops to a cloth or sponge and placing it near the infested area. Some beekeepers swear by mixing equal parts water and peppermint essential oil in a spray bottle, spraying it directly on the honeycombs or beehive. However, always keep in mind that excessive use of essential oils can harm your bees.
In addition to essential oils, you can also try using natural herbs like lavender, chamomile, and mint to repel wax moths. These herbs can be placed near the infested area or incorporated into a homemade moth-repellent spray. Natural fibers like cotton, wool, or silk can also help deter wax moths by absorbing their pheromones. You can line your honeycombs with these materials or place them near the entrance of your beehive to create a barrier against these pests.
Managing a Wax Moth Infestation
If you’re dealing with a wax moth infestation, don’t worry – we’ll walk you through the steps to safely manage the problem and get your beehives back on track.
Assessing the Extent of the Problem
When assessing the extent of a wax moth infestation, it’s essential to take a methodical approach. Start by examining each frame or hive carefully for signs of damage, such as holes, frass (insect waste), or webbing. Take note of the severity of the damage and the number of affected frames.
Check for moths themselves, either flying around the hive or resting on the surface. A small infestation might have only a few moths present, but larger infestations can be overwhelming. Consider using a UV light to attract and spot the moths more easily.
Next, prioritize treatment areas based on the severity of damage and potential for further spread. Focus on frames with extensive webbing or frass production, as these are likely hotspots for breeding activity. Use a marker to label affected frames, making it easier to track progress during treatment.
Remember that assessing the extent of the infestation is an ongoing process. Be prepared to revisit your inspection regularly to monitor progress and adjust treatment strategies accordingly.
Treatment Options: Chemicals and Natural Methods
When it comes to managing a wax moth infestation, treatment options can be overwhelming. You’re faced with two primary choices: chemical treatments and non-toxic alternatives like heat, cold, or diatomaceous earth. While chemicals may offer quick results, they pose significant risks to both you and the environment.
On the other hand, natural methods are not only safer but also more sustainable in the long run. One effective approach is using diatomaceous earth, a powder made from fossilized algae that dehydrates and kills wax moths upon contact. Simply dust it evenly throughout your storage space or combs, allowing adequate time for it to take effect.
Heat can also be used as an eradication method by applying direct heat to the affected area using a hair dryer or other heat source. Cold temperatures can slow down wax moth activity but may not completely eliminate them, making this approach less effective.
When choosing between these options, consider your storage setup and infestation severity. It’s worth noting that some natural methods might require repeated applications for complete eradication.
Preventing Future Infestations
When you finally eradicate a wax moth infestation, it’s natural to breathe a sigh of relief. However, the work isn’t over yet. To prevent future infestations and ensure your honey bee colonies remain healthy, you must take proactive steps to maintain a wax moth-free environment.
Regular cleaning is essential in preventing re-infestation. This includes thoroughly inspecting all equipment, such as extractors and smokers, for debris and food sources that might attract moths. Clean and dry these items regularly, paying close attention to areas where wax buildup tends to occur. You should also keep your honey house or storage area clean and organized.
Storage best practices are another crucial aspect of preventing re-infestation. Store your wax products in airtight containers, keeping them away from heat sources and direct sunlight. This will help prevent moisture accumulation, which can attract moths. Regularly inspect your stored items for signs of infestation, such as holes or discoloration.
Monitoring for signs of re-infestation is also critical. Regularly inspect your colonies, equipment, and storage areas for signs of wax moths, including eggs, larvae, or adult moths. Be vigilant, as these pests can easily reintroduce themselves into your system if you’re not careful.
Frequently Asked Questions
What should I do if I suspect a wax moth infestation but can’t see any signs?
If you’re unsure whether you have a wax moth problem, start by thoroughly inspecting your storage areas and beehives for signs of damage or egg clusters. Look for tiny holes, shredded honeycomb, or cocoons on the walls and ceilings. Check for musty odors, which can indicate moisture buildup, an ideal environment for wax moths.
How long does it take to notice the effects of a wax moth infestation?
The impact of a wax moth infestation can be immediate if you store valuable items in your attic or storage containers with damaged honeycombs. However, in some cases, it may take weeks or even months before noticeable damage occurs. Regular inspections and monitoring are crucial for early detection.
Can I prevent wax moths from returning after treatment?
Yes, by maintaining a clean, dry, and well-ventilated storage area and following proper storage practices, you can minimize the risk of another infestation. Regularly inspect your storage containers and beehives to catch any signs of damage or egg clusters early.
What are some common mistakes people make when trying to prevent wax moths?
Common errors include inadequate ventilation in storage areas, storing items with food sources (like honeycombs) too close together, and using improper pest control methods. Be aware that using chemical treatments can harm humans and pets, so opt for natural deterrents whenever possible.
Can I remove wax moth damage from my stored items myself?
Yes, you can try to repair or replace damaged honeycombs and storage containers yourself. However, if the infestation is severe, it may be necessary to seek professional help from a pest control expert. Be cautious when handling potentially damaged items, as they may harbor pests or eggs.