Transplanting cabbage can be a challenging task for many gardeners, but with the right approach, you can successfully grow a bountiful harvest. Whether you’re a seasoned gardener or just starting out, choosing the right variety of cabbage is crucial to ensure optimal growth and flavor. Timing is also essential, as cabbage transplanting typically occurs 2-4 weeks before the last frost date in your area. But that’s not all – hardening off, soil preparation, and post-transplant care are equally important factors to consider for a successful outcome. In this comprehensive guide, we’ll walk you through every step of the process, from selecting the perfect variety to troubleshooting common issues and maximizing yields. By following our expert tips and advice, you’ll be well on your way to growing delicious, healthy cabbage in no time!
Choosing the Right Variety and Timing
When transplanting cabbage, selecting the right variety and timing is crucial for a successful harvest. Let’s dive into how to choose the best cabbage type for your climate and growing schedule.
Selecting the Perfect Cabbage Type for Your Climate
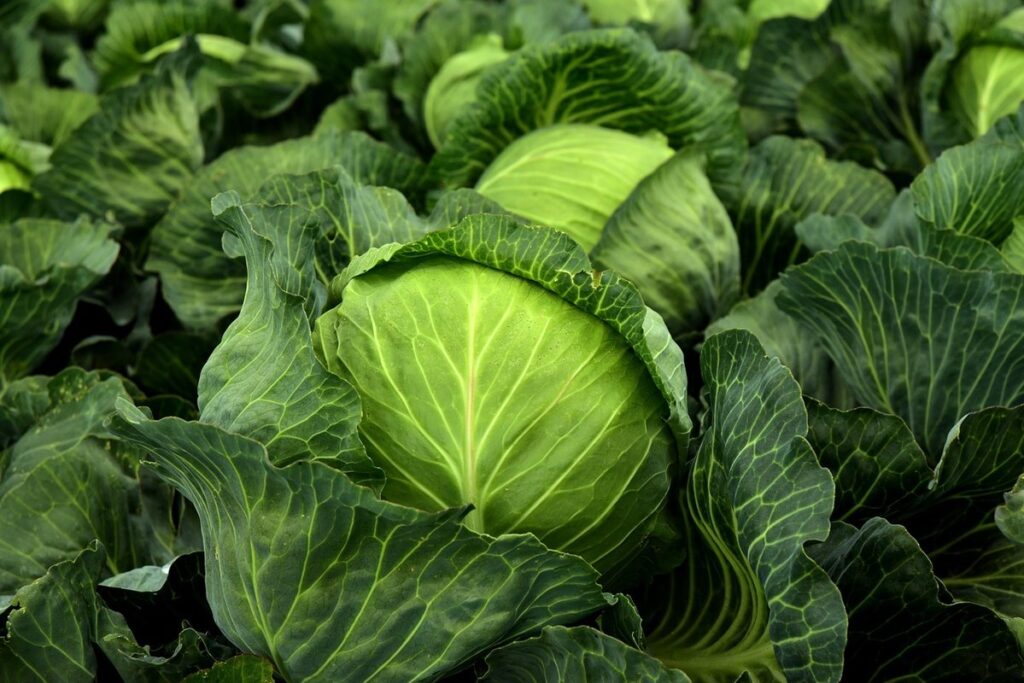
When selecting a cabbage variety for transplanting, it’s essential to choose one that thrives in your specific climate. There are three main types of cabbage: spring, summer, and winter. Spring cabbages are perfect for cooler temperatures and can be harvested before the heat sets in. They’re ideal for climates with mild winters and cool summers.
Summer cabbages, on the other hand, are more tolerant of heat and can handle warmer temperatures. However, they require consistent moisture to prevent bolting (premature flowering). If you live in a region with hot summers, summer cabbage might be the best choice.
Winter cabbages prefer cooler temperatures and can withstand frost. They’re perfect for climates with cold winters and are often used in soups and stews during the colder months.
To determine which type of cabbage is best for your climate, consider the average temperature range in your area. Check the specific growing conditions for each variety to ensure you’re giving them the right environment to thrive. For example, if you live in an area with a long growing season, a summer cabbage might be a good choice.
Understanding the Ideal Transplant Time for Cabbage
Transplanting cabbage seedlings at the right time is crucial to ensure healthy growth and prevent damage from extreme temperatures. To determine the ideal transplant time for your cabbage crop, consider the frost dates, soil temperature, and growth stages of the plants.
In most regions, it’s best to wait until the last frost date has passed before transplanting cabbage seedlings outdoors. This will give the young plants a head start on establishing themselves in their new environment before the risk of frosts returns. As a general rule, cabbage is ready to be transplanted when it has 2-3 sets of leaves and has grown to about 4-6 inches tall.
When transplanting, make sure the soil temperature is around 40°F (4°C) or above. This will help promote healthy root growth and prevent shock from cold temperatures. Keep in mind that cabbage seedlings are sensitive to heat stress, so be cautious of sudden temperature fluctuations during the summer months. A good rule of thumb is to transplant early morning or late afternoon when the sun’s rays are less intense.
To give your cabbage crop a strong start, wait until the soil has warmed up and is suitable for transplanting. This will typically occur 1-2 weeks after the last frost date in your area.
Preparing the Seedlings for Transplanting
Before transplanting your cabbage seedlings, it’s essential to prepare them for a successful transition from their current container to the garden. This process will help prevent shock and ensure healthy growth.
Hardening Off: Acclimating Cabbage Seedlings to Outdoors
Hardening off is an essential step in preparing cabbage seedlings for outdoor conditions. This process involves gradually exposing them to sunlight and outdoor elements, helping them adapt and develop resilience. Start by moving the seedlings to a shaded area outdoors for 1-2 hours a day, increasing the duration over the next 7-10 days.
Monitor your seedling’s growth closely during this period. If they appear stressed or show signs of wilting, it may be necessary to slow down the hardening-off process. Conversely, if they seem robust and healthy, you can accelerate the exposure to more direct sunlight. Keep an eye out for any damage caused by sudden changes in temperature or humidity.
A good rule of thumb is to start with 1-2 hours of direct sunlight per day and gradually increase it over a period of 7-10 days. This allows your seedlings to adjust to the outdoor environment without getting scorched or experiencing shock. By following this gradual approach, you’ll be able to successfully harden off your cabbage seedlings and set them up for success in their new home outside.
Preparing the Soil for Cabbage Transplants
When transplanting cabbage seedlings, it’s crucial to prepare the soil properly to ensure they thrive. Cabbage is a cool-season crop that prefers well-draining, fertile soil with a pH between 6.0 and 7.0. If your soil is too alkaline or acidic, it may hinder growth.
To determine if your soil needs amendments, test its pH level and nutrient content. You can purchase a soil testing kit or send a sample to a lab for analysis. Based on the results, you may need to add fertilizers or lime to adjust the pH.
Before planting cabbage seedlings, till the soil to a depth of 8-10 inches to loosen it and remove any debris. This will also help improve drainage and prevent waterlogged soil. If your soil is heavy clay or sandy, consider mixing in compost or well-rotted manure to improve its structure.
For fertilizing, apply a balanced fertilizer (e.g., 10-10-10 N-P-K) at planting time, following the manufacturer’s instructions for application rates. Avoid over-fertilizing, as this can lead to weak growth and increased susceptibility to pests and diseases.
Transplanting Techniques
When transplanting cabbage, it’s essential to handle the delicate roots carefully and choose the right timing for optimal growth. We’ll cover key techniques for a successful transfer in this section.
Digging and Handling Seedlings: Minimizing Shock and Stress
When transplanting cabbage seedlings, it’s essential to handle them gently to minimize shock and stress. This is especially crucial during the first few days after transplantation when they’re adjusting to their new environment.
Carefully dig around the seedling without damaging its roots by using a fork or a blunt tool, working your way gently under the soil. Avoid pulling the seedling out of the ground, as this can cause damage to the delicate root system. Instead, use the tool to loosen the soil and then lift the seedling out with your hands.
To reduce shock, handle the roots by their base, rather than grasping them near the crown. This helps prevent accidental damage or pinching off new growth. When transplanting, water the seedlings thoroughly before digging them up, making it easier to remove the entire root system in one piece. By taking these precautions, you’ll give your cabbage seedlings the best chance to thrive after transplantation.
Aftercare for Newly Transplanted Cabbage
After transplanting cabbage into its new home, it’s essential to provide proper care to ensure a healthy and thriving plant. Watering is crucial during this period, but be cautious not to overwater, which can lead to root rot and other issues. Check the soil daily, and water only when the top inch of soil feels dry to the touch.
Mulching around the plants will also help retain moisture and suppress weeds, reducing competition for nutrients. A layer of organic mulch, such as straw or wood chips, 2-3 inches thick is ideal. Make sure to keep it a few inches away from the plant’s base to prevent rot.
Sufficient spacing between plants is vital for air circulation, preventing diseases like powdery mildew and downy mildew. A minimum of 18-24 inches between plants is recommended, but this may vary depending on the specific variety. Avoid overcrowding, as it can lead to reduced growth and increased susceptibility to pests.
Some common mistakes to avoid during this period include underwatering, which can cause stress, or overfertilizing, which can burn the roots. Monitor your plants closely and adjust your care routine accordingly.
Post-Transplant Monitoring and Maintenance
Once you’ve successfully transplanted your cabbage seedlings, it’s essential to keep a close eye on their progress and provide the right care for optimal growth. This section will walk you through the key steps involved in monitoring and maintaining your newly transplanted cabbages.
Watch for Signs of Stress or Disease
As you watch your transplanted cabbage grow, it’s essential to keep an eye out for signs of stress or disease. Pests like aphids, slugs, and snails can quickly ravage a crop, while diseases such as club root, powdery mildew, and downy mildew can spread rapidly if not addressed promptly.
Look for physical symptoms like yellowing leaves, curled or distorted growth, or black spots on the leaves. These can be indicative of nutrient deficiencies, pests, or disease. For example, a lack of calcium can cause leaf curl or distortion, while overwatering can lead to root rot.
Identify problems early by inspecting your plants regularly and taking prompt action. Remove any infested or diseased areas, increase air circulation, or adjust watering schedules as needed. If you notice widespread issues, consider applying organic pest control methods like neem oil or row covers to prevent further damage.
Frequent monitoring will help you catch potential problems before they spiral out of control, ensuring your cabbage crop remains healthy and productive throughout the growing season.
Encouraging Healthy Growth and Yield
As you begin to monitor and maintain your transplanted cabbage crop, it’s essential to focus on encouraging healthy growth and yield. One key factor is maintaining soil fertility through regular fertilization. A balanced fertilizer with a mix of nitrogen, phosphorus, and potassium will promote vigorous growth, while also supporting the development of dense, flavorful heads.
To control weeds, mulch around your cabbage plants regularly, keeping it at least 2-3 inches thick. This will not only suppress weed growth but also retain moisture and regulate soil temperature. Be mindful of watering schedules – overwatering can lead to disease susceptibility and reduced yields, while underwatering may stunt plant growth.
Adjust your watering schedule based on weather conditions and the specific needs of your crop. Aim for about 1 inch of water per week, either from rainfall or irrigation. Monitor your plants’ responses and adjust as necessary. With proper care, your transplanted cabbage will thrive, producing healthy, delicious heads in no time.
Troubleshooting Common Transplanting Issues
Don’t worry if your cabbage transplant isn’t thriving – we’ve got you covered! This next part will walk you through common problems and their simple solutions.
Overcoming Common Obstacles for Successful Transplants
When transplanting cabbage seedlings, you may encounter common obstacles that can hinder their growth and success. One of the most frustrating issues is seedling failure, which can be caused by overwatering, underwatering, or inadequate light. To prevent this, make sure to harden off your seedlings before transplanting them outside. This involves gradually exposing them to outdoor conditions over the course of 7-10 days.
Fungal diseases such as powdery mildew and downy mildew can also wreak havoc on your cabbage crop. To combat these issues, use a fungicide spray at the first sign of infection, and make sure to provide good air circulation around the plants by spacing them correctly.
Inconsistent growth is another common problem that can be caused by inadequate nutrient uptake or pests like aphids and slugs. To address this issue, fertilize your cabbage crop regularly with a balanced fertilizer, and use organic pest control methods whenever possible. For example, you can use neem oil to repel aphids and other pests.
In the event of an emergency, such as a sudden attack by pests or diseases, don’t panic! Instead, quickly identify the problem and take action to contain it. This may involve removing infected plants, increasing air circulation, or using insecticidal soap to control pest populations.
Using Companion Planting Strategies for Improved Growth
When transplanting cabbage, incorporating companion planting strategies can significantly enhance plant health and yield. One effective technique is intercropping with nitrogen-fixers like beans, peas, or clover. These plants convert atmospheric nitrogen into a form that’s readily available to the cabbage, reducing the need for fertilizers.
Marigolds are another valuable addition to your cabbage transplant bed. Their strong scent repels nematodes and other pests that can harm the plant, while also attracting beneficial insects like ladybugs and lacewings. Plant marigold seeds around the perimeter of your cabbage patch or intersperse them among the plants.
Consider planting dill nearby as well – its tall stature allows it to shade out pests without competing with the cabbage for water and nutrients. Conversely, avoid planting members of the Brassica family (broccoli, cauliflower) alongside cabbage, as they’re susceptible to similar diseases. By thoughtfully selecting companion plants, you can create a balanced ecosystem that promotes healthy growth and robust yields in your cabbage transplants.
Advanced Techniques: Using Greenhouses or Cold Frames
If you’re growing cabbage from seed, taking it indoors when temperatures drop can be a game-changer. We’ll explore using greenhouses and cold frames to give your transplants a head start.
Extending the Growing Season with Greenhouses and Cold Frames
For cabbage enthusiasts looking to extend their growing season, utilizing greenhouses and cold frames can be a game-changer. These structures allow for precise temperature control, creating an optimal environment for cabbage growth even when outdoor temperatures are less than ideal.
When designing a greenhouse setup for cabbage, it’s essential to consider factors such as ventilation, humidity, and light. A south-facing orientation is ideal, with plenty of space between plants (about 18-24 inches) to prevent overcrowding. Greenhouses can be heated using fossil fuels or electric heaters, but this can increase costs and carbon footprints.
Cold frames are another excellent option for extending the growing season. These unheated structures allow natural light and warmth from the sun to penetrate while retaining heat at night. To create an optimal cold frame setup for cabbage, position it in a spot that receives direct sunlight (4-6 hours) and has good air circulation.
Both greenhouses and cold frames can be used in conjunction with each other to create a layered growing system. For example, you could use a cold frame as a nursery area for seedlings before moving them into the greenhouse for further growth. By utilizing these advanced techniques, cabbage enthusiasts can enjoy fresh harvests throughout the year, regardless of seasonal temperatures.
Maximizing Cabbage Production with Advanced Techniques
When it comes to maximizing cabbage production, incorporating advanced techniques can make all the difference. One such method is soil solarization, a technique that involves covering the soil with clear plastic sheets to harness the sun’s heat and kill pests, diseases, and weeds. This not only reduces the need for pesticides but also improves soil health by introducing beneficial microorganisms.
Another critical aspect of optimizing cabbage production is integrated pest management (IPM). IPM involves monitoring crop conditions regularly to identify potential threats early on and taking targeted action to prevent infestations. For example, you can use pheromone traps to capture adult pests before they lay eggs or apply insecticidal soap to control aphid populations.
To implement these methods effectively, start by conducting soil tests to determine your soil’s pH level and nutrient content. Based on the results, adjust your fertilization schedule accordingly to promote healthy plant growth. By combining soil solarization with IPM strategies, you can significantly reduce crop losses due to pests and diseases, ultimately increasing your cabbage yields.
Conclusion: Putting it All Together for Successful Transplanting
Now that you’ve learned the ins and outs of transplanting cabbage, let’s review what we’ve covered to ensure a successful outcome in your garden.
Recap of Key Takeaways from this Guide
To successfully transplant cabbage, it’s essential to keep the following key points in mind. When preparing the soil for transplantation, ensure it has a pH between 6.0 and 7.0 and is well-draining. This will help prevent root rot and promote healthy growth.
When selecting suitable seedlings, look for those with at least two sets of leaves and a sturdy stem. Avoid transplanting cabbage in extreme weather conditions, such as during intense heat or cold snaps.
Remember to harden off your seedlings before transplanting them outdoors. Start by acclimating them to outdoor conditions over the course of 7-10 days. This involves gradually increasing their exposure to direct sunlight and cooler temperatures.
Keep in mind that cabbage has a relatively shallow root system, so it’s essential to avoid compacting the soil around the plants when transplanting. This can be achieved by gently firming the soil with your hands or using a rake with soft tines.
By following these guidelines, you’ll be well on your way to successfully transplanting your cabbage and enjoying a bountiful harvest.
Final Tips and Recommendations for Experienced Gardeners
As an experienced gardener, you’ve likely mastered the basics of transplanting cabbage. Now it’s time to take your skills to the next level by experimenting with new varieties and refining your technique based on past experiences.
Consider trying out heirloom or specialty cabbages that offer unique flavors and textures. For example, ‘Red Drumhead’ produces a beautiful deep red color, while ‘January King’ is known for its sweet, nutty flavor. By introducing new varieties to your garden, you’ll not only add diversity but also challenge yourself to adapt to different growth habits and requirements.
Reflect on past transplanting experiences and identify areas for improvement. Have you noticed any issues with root disturbance or water stress? Consider adjusting your transplant timing or soil preparation to mitigate these problems. Additionally, experiment with different spacing and pruning techniques to optimize yields and reduce pests and diseases. By continuously refining your technique, you’ll become an even more skilled gardener.
Frequently Asked Questions
Can I transplant cabbage seedlings during the hottest part of the summer?
Yes, you can transplant cabbage seedlings during the hottest part of the summer, but be aware that this may lead to bolting (premature flowering) or other issues. To minimize risks, choose heat-tolerant varieties and ensure proper hardening off before transplanting.
How do I know if my soil is suitable for growing cabbage?
To determine if your soil is suitable for growing cabbage, test its pH level and nutrient content. Cabbage prefers well-draining, fertile soil with a slightly acidic to neutral pH (around 6.0-7.0). If necessary, amend the soil with organic matter or fertilizers to create an optimal environment.
Can I use a cold frame instead of a greenhouse for extending the growing season?
Yes, you can use a cold frame instead of a greenhouse for extending the growing season. Cold frames provide excellent protection from frost and wind, allowing you to start cabbage seedlings earlier in the spring or extend the harvest period into the fall.
What are some common pests that target cabbage plants during transplanting, and how can I control them?
Some common pests that target cabbage plants during transplanting include aphids, slugs, and caterpillars. To control these pests, use a combination of physical barriers (e.g., fine mesh or row covers), organic pesticides (e.g., neem oil or insecticidal soap), and integrated pest management techniques.
Can I grow multiple types of cabbage together in the same bed?
Yes, you can grow multiple types of cabbage together in the same bed, but be aware that different varieties may have varying growth rates, space requirements, and pest susceptibility. Choose complementary varieties and maintain proper spacing (around 12-18 inches) to minimize competition for resources.