Growing your own pigeon peas can be a highly rewarding experience, especially for gardeners in tropical regions. Not only do they provide an excellent source of protein-rich beans, but they’re also relatively easy to care for and can thrive in poor soil conditions. However, growing healthy pigeon pea seedlings requires attention to detail from the very beginning.
In this article, we’ll walk you through the essential steps involved in planting and caring for your pigeon pea seedlings, including preparing the perfect soil mix and identifying common issues that may arise during their development. By following our comprehensive guide, you’ll be well-equipped to overcome any obstacles and cultivate a bountiful harvest of these nutritious legumes. Whether you’re an experienced gardener or just starting out, this article will provide you with the knowledge and confidence needed to succeed in growing pigeon pea seedlings.
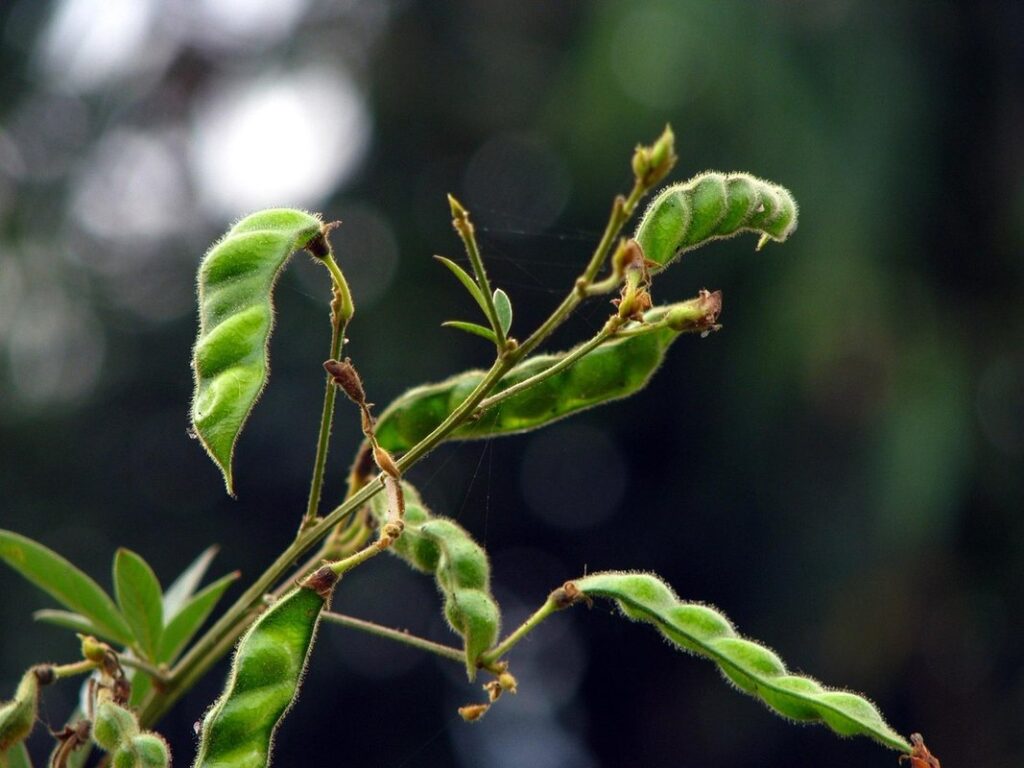
What are Pigeon Pea Seedlings?
If you’re growing pigeon peas for the first time, understanding what seedlings look like is crucial to identifying potential issues and taking timely action. This section will walk you through the distinctive characteristics of young pigeon pea plants.
Introduction to Pigeon Peas
Pigeon peas have been a staple crop for thousands of years, originating from the Indian subcontinent and spreading to various parts of Africa and Asia. These versatile legumes are not only an essential source of protein but also play a vital role in improving soil fertility. As a nitrogen-fixing crop, pigeon peas can enrich the soil with this essential nutrient, making them an attractive option for small-scale farmers.
In many tropical regions, pigeon peas are grown as a summer crop and harvested when mature. They have a unique ability to tolerate drought conditions and can thrive in poor soil quality. This hardiness has made pigeon peas a vital component of local food systems, especially in areas where other crops may struggle to grow.
With over 1,000 varieties available globally, pigeon peas come in different shapes, sizes, and colors. They are not only consumed as a pulse but also used as animal feed and even biofuel. Their adaptability to diverse environments has made them a sought-after crop for both small-scale farmers and large commercial producers alike.
Benefits of Growing Pigeon Peas
Growing pigeon peas can be an incredibly rewarding experience for gardeners and farmers alike. One of the primary benefits of growing these versatile legumes is their exceptionally high protein content. Pigeon pea seeds contain up to 22% protein, making them a valuable source of nutrition for both humans and animals.
Another significant advantage of growing pigeon peas is their remarkable drought tolerance. These hardy plants can thrive in areas with limited water availability, making them an ideal choice for regions prone to water scarcity. According to the Food and Agriculture Organization (FAO), pigeon pea is one of the most drought-tolerant legumes, capable of producing yields even under extreme dry conditions.
Pigeon peas are also incredibly adaptable to different climates. They can be grown in a wide range of temperature zones, from tropical to subtropical regions. This adaptability makes them an excellent choice for small-scale farmers or gardeners who may not have access to large areas of land or extensive resources.
Preparing the Soil for Pigeon Pea Seedlings
Before planting your pigeon pea seedlings, it’s essential to prepare the soil properly. This includes loosening the soil and adding organic matter to create a healthy environment for them to thrive in.
Choosing the Right Location
When it comes to planting pigeon pea seedlings, choosing the right location is crucial for their optimal growth and development. As a gardener, you want to ensure that your pigeonea receive adequate sunlight, suitable soil conditions, and proper drainage.
First, consider the amount of sunlight your area receives. Pigeon peas require full sun to partial shade, so select a location that gets at least 6 hours of direct sunlight per day. East- or west-facing plots are ideal as they provide gentle, indirect light during peak summer months. Avoid areas with dense tree cover or shaded spots, which can stunt seedling growth.
Next, assess the soil type and drainage in your chosen area. Pigeon peas prefer well-draining soils that are rich in organic matter. If you have heavy clay or sandy soils, consider creating a raised bed to improve water retention and aeration. Ensure proper drainage by sloping the land slightly (about 1-2%) to prevent waterlogged conditions.
Consider your local climate as well. Pigeon peas thrive in tropical and subtropical regions with warm temperatures and moderate rainfall. If you live in an area with extreme temperature fluctuations, provide protection for your seedlings during harsh winter months or intense summer heatwaves.
Lastly, keep in mind the accessibility of your planting site. Ensure that it is close to a water source and has adequate space for cultivation and maintenance. A well-planned location will significantly contribute to your pigeon pea seedlings’ overall health and productivity.
Soil Testing and Preparation
Before planting pigeon pea seedlings, it’s essential to test and prepare the soil to ensure optimal growth. Soil testing is a crucial step that helps you understand the pH levels and nutrient requirements of your soil. You can purchase a DIY soil testing kit or send a sample to a laboratory for analysis.
The ideal pH range for pigeon peas is between 6.0 and 7.0, slightly acidic to neutral. If your soil’s pH level falls outside this range, it may affect the seedling’s growth. To adjust the pH levels, you can add lime to raise the pH or sulfur to lower it.
In addition to pH levels, the nutrient requirements for pigeon pea seedlings are also crucial. They require a balanced mix of nitrogen (N), phosphorus (P), and potassium (K). A general fertilizer with a 10-10-10 NPK ratio can be applied as a starting point. However, it’s essential to analyze your soil test results to determine the specific nutrient requirements.
When preparing the soil, make sure to remove any debris, rocks, or weeds that may interfere with seedling growth. Till the soil to a depth of about 8-10 inches to loosen and aerate it. This will help improve water penetration and root growth.
Planting Pigeon Pea Seedlings
When planting pigeon pea seedlings, it’s essential to handle them carefully and plant at the right depth to ensure proper growth. Follow these steps for a healthy start.
Sowing Seeds vs. Seedlings
When deciding whether to sow seeds directly into the ground or start with seedlings, it’s essential to consider the advantages and disadvantages of each approach. Sowing seeds directly into the ground can be a cost-effective method that allows you to plant multiple seeds at once. However, this method requires precise soil conditions and proper timing to ensure successful germination.
On the other hand, starting with seedlings provides an opportunity to control environmental factors such as temperature, light, and moisture levels. Seedlings are also less prone to pests and diseases, reducing the risk of crop loss. Additionally, seedlings allow for transplanting into larger containers or directly into the garden at a later stage.
One key consideration is the amount of space available in your garden. If you have limited space, starting with seedlings can help ensure that each plant has enough room to grow without overcrowding. However, if you’re growing pigeon peas on a large scale, sowing seeds directly into the ground may be more practical.
Transplanting Seedlings
When transplanting pigeon pea seedlings from containers to the field, it’s essential to take steps that minimize shock and promote healthy growth. Start by hardening off your seedlings a week before transplanting to acclimate them to outdoor conditions. Begin by moving them outdoors for 2-3 hours a day, gradually increasing their exposure over the next few days.
Choose a cloudy or overcast day for transplanting to prevent excessive moisture loss through transpiration. Dig shallow holes and gently remove the seedlings from their containers, taking care not to disturb the roots. Place the seedlings in the holes, firming the soil around them to ensure good contact between the roots and soil.
Water thoroughly after transplanting to settle the soil and provide enough moisture for establishment. Space seedlings 12-15 inches apart, depending on the variety, to allow for proper growth and air circulation. By following these steps, you’ll be able to minimize transplant shock and give your pigeon pea seedlings a strong start in the field. With proper care and attention, they should thrive and produce an abundant harvest.
Caring for Pigeon Pea Seedlings
To ensure your pigeon pea seedlings thrive, follow these essential care tips that will help them grow into healthy and robust plants. Provide optimal conditions for their growth, from watering to sunlight exposure.
Watering Requirements
Watering is one of the most critical aspects of caring for pigeon pea seedlings. Pigeon peas require consistent moisture levels to establish a strong root system and prevent transplant shock. As a general rule, water your seedlings when the top 1-2 inches of soil feels dry to the touch.
You should water your seedlings every 2-3 days during hot weather or in well-draining soils, but allow the soil to dry slightly between waterings. Overwatering can be detrimental to pigeon pea seedlings, leading to root rot and other diseases. On the other hand, underwatering can cause stunted growth and reduced yields.
To ensure consistent moisture levels, consider using a drip irrigation system or soaker hose, which delivers water directly to the roots without wasting it on surrounding areas. Aim for about 1-2 gallons of water per plant, depending on the size of your seedlings and the soil type. By providing adequate water and maintaining consistent moisture levels, you’ll give your pigeon pea seedlings the best chance at a healthy start. Monitor your seedlings’ response to watering and adjust your schedule accordingly.
Fertilization and Pruning
As you care for your pigeon pea seedlings, it’s essential to provide them with the right nutrients and pruning techniques to promote optimal growth. Fertilization is a crucial aspect of this process, as pigeon peas require a balanced diet to develop strong roots, stems, and leaves.
To begin with, use a well-balanced fertilizer that contains nitrogen (N), phosphorus (P), and potassium (K). Aim for a mix with an N-P-K ratio of 10-10-10. For example, you can apply a 5-5-5 fertilizer once a month, followed by a 15-15-15 fertilizer two weeks later. This will provide your seedlings with the necessary nutrients without overloading them.
When it comes to pruning, remove any weak or damaged growth to direct the plant’s energy towards healthy areas. Cut back legume seedlings to about 6-8 inches above the soil surface after they have reached about 6-8 inches in height. This will encourage bushy growth and prevent lodging. Prune your pigeon pea plants regularly to maintain a balanced shape and promote fruiting.
Regular fertilization and pruning will help you achieve healthy, productive pigeon pea plants that yield an abundance of nutritious beans.
Common Problems and Pests Affecting Pigeon Pea Seedlings
One of the biggest challenges you’ll face when growing pigeon pea seedlings is dealing with pests and diseases that can quickly spread and harm your plants. We’ll cover common issues to look out for.
Diseases and Their Control Measures
Pigeon pea seedlings are susceptible to various diseases that can significantly impact their growth and yield. One of the most common diseases affecting pigeon pea seedlings is powdery mildew, caused by fungal pathogens such as Oidium geniculatum and Erysiphe polygoni. This disease manifests as a white, powdery coating on the leaves and stems, leading to reduced photosynthesis and eventual plant death.
Another significant disease affecting pigeon pea seedlings is fusarium wilt, caused by Fusarium oxysporum. This fungal pathogen clogs the xylem tissues of the seedling, preventing water and nutrients from reaching the roots. To control powdery mildew, growers can use fungicides such as sulfur or copper oxychloride, while adopting crop rotation practices to reduce soil-borne pathogens.
Fusarium wilt can be managed through proper irrigation practices, ensuring that the soil is not too wet or waterlogged, which exacerbates the disease. Additionally, introducing beneficial microorganisms like Trichoderma harzianum into the soil can help control fusarium wilt. Regular monitoring of seedlings for early signs of disease and adopting integrated pest management strategies are crucial to minimizing losses due to these diseases.
Pests and How to Manage Them
As a pigeon pea farmer, you’re likely no stranger to dealing with pests that can damage your seedlings. Common culprits include insects like aphids, whiteflies, and spider mites, which can weaken the plants and spread diseases. Rodents like rats and mice can also chew through stems and eat seeds, while birds like sparrows and doves may feed on leaves and young pods.
To prevent infestations, start by maintaining a clean and healthy growing environment. Ensure good air circulation around your seedlings to reduce humidity and fungal growth. Regularly inspect your plants for signs of pests and take action promptly if you spot any issues. For example, use neem oil or insecticidal soap to control aphids and whiteflies.
To manage infestations, consider using physical barriers like fine mesh or fine netting to keep birds away from your seedlings. You can also try introducing beneficial insects like ladybugs or lacewings to prey on pests. For rodents, use repellents like peppermint oil or hot pepper sprays around the perimeter of your growing area.
When controlling infestations, always read and follow the instructions on any pesticides you use carefully to avoid harming your plants or the environment.
Harvesting and Processing Pigeon Pea Seedlings
Now that your pigeon pea seedlings have been nurtured, it’s time to harvest them. This section will guide you through the process of carefully collecting and processing your matured seedlings.
Identifying Maturity
As you tend to your pigeon pea seedlings, it’s essential to know when they’re ready for harvest. This can be a bit tricky, as the process of determining maturity involves both visual cues and careful evaluation. One way to assess readiness is by checking the color and texture of the leaves. As the plant matures, the leaves will turn from a vibrant green to a more muted yellowish-green hue.
Another key indicator is the growth stage itself. Pigeon pea seedlings typically reach their maximum height between 60-90 days after sowing. Look for plants that have reached this critical threshold and are displaying signs of flowering or pod formation. This usually indicates that the plant has matured to its fullest potential.
It’s also crucial to inspect the pods themselves, as they should be plump and firm to the touch. Avoid harvesting when the pods are still soft or pale – these will likely produce low-quality seeds. Instead, wait until you see a significant increase in pod size and coloration, which typically occurs 10-15 days after flowering begins.
Post-Harvest Handling and Storage
Proper post-harvest handling and storage of pigeon pea seedlings are crucial to maintaining their quality and shelf life. After harvesting, the seedlings are highly susceptible to damage from physical stress, moisture loss, and temperature fluctuations. To minimize these risks, it’s essential to handle the seedlings gently and store them in a cool, dry place.
When handling the seedlings, make sure to avoid bruising or crushing them, as this can cause damage to their delicate roots and shoots. It’s also important to maintain a consistent moisture level by covering the seedlings with a breathable material, such as burlap or paper bags, to prevent excessive drying out.
For longer-term storage, consider storing the seedlings in airtight containers or plastic bags filled with a moisture-retentive medium like sawdust or peat moss. Store them in a cool, dark place with a consistent temperature between 40°F and 50°F (4°C and 10°C). Regular monitoring of temperature, humidity, and moisture levels is crucial to ensure optimal storage conditions.
Remember to check on the seedlings regularly for any signs of spoilage or damage. By following these simple guidelines, you can help maintain the quality and shelf life of your pigeon pea seedlings.
Frequently Asked Questions
Can I grow pigeon pea seedlings indoors, or do they require direct sunlight?
Yes, while pigeon peas prefer full sun to partial shade, you can grow them indoors under grow lights. However, ensure the light source provides at least 12 hours of intense lighting per day, and maintain a consistent temperature between 65°F to 75°F (18°C to 24°C). Indoor growth may require more frequent watering, so monitor your seedlings closely.
What’s the ideal spacing for pigeon pea seedlings in a tropical climate?
In warm climates with high humidity, it’s essential to provide adequate space for air circulation. Plant seedlings 12-15 inches apart in rows that are 3-4 feet wide. This will help prevent fungal diseases and promote healthy growth.
How do I identify if my pigeon pea seedlings are receiving enough water?
Pigeon pea seedlings need consistent moisture, especially during their first few weeks of growth. Check the soil daily by inserting your finger into the soil up to the knuckle. If the soil feels dry, it’s time to water. Aim for about 1 inch of water per week, either from rain or irrigation.
Can I use regular garden fertilizer for my pigeon pea seedlings, or do they require specific nutrients?
While regular garden fertilizers can be used as a starting point, pigeon peas benefit from a balanced diet that includes nitrogen, phosphorus, and potassium. Consider using a high-phosphorus fertilizer (10-20-10 NPK) during the seedling stage to promote healthy root development.
What’s the best way to handle common pests like aphids and whiteflies on my pigeon pea seedlings?
For minor infestations, use neem oil or insecticidal soap to control aphids and whiteflies. For more severe infestations, consider introducing beneficial insects like ladybugs or lacewings, which feed on these pests. Regularly inspect your plants and take action promptly to prevent the problem from spreading.