Are you a Monstera Standleyana enthusiast struggling to multiply your prized plant? You’re not alone! Propagating this stunning species can be a challenge, but with the right techniques and knowledge, you can increase your chances of success. In this article, we’ll delve into expert methods for successfully propagating Monstera Standleyana using various techniques such as stem cuttings, leaf cuttings, division, and even advanced methods involving grow mediums and hormones. We’ll also share valuable tips on how to overcome common challenges and achieve high propagation rates. By the end of this article, you’ll be equipped with the knowledge and confidence to multiply your Monstera Standleyana plants and enjoy a thriving collection. So, let’s get started on this exciting journey into the world of Monstera Standleyana propagation!
Understanding Monstera Standleyana
Before you can successfully propagate your Monstera standleyana, it’s essential to understand its unique characteristics and growth habits. Getting familiar with these factors will help you create an ideal environment for successful propagation.
What is Monstera Standleyana?
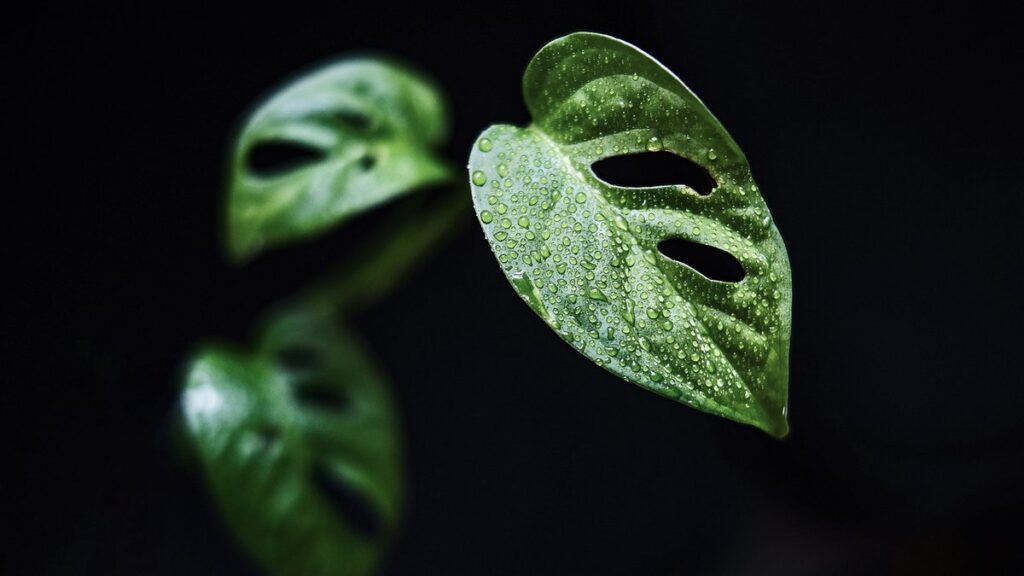
Monstera Standleyana is a unique and captivating plant that has gained popularity among plant enthusiasts for its striking appearance and adaptability. Also known as the “Swiss Cheese Vine” due to its distinctive holes, this epiphyte thrives in warm, humid environments with minimal direct sunlight. Its heart-shaped leaves feature prominent fenestrations, which not only add an element of visual interest but also allow for optimal gas exchange.
If you’re new to plant parenthood or struggling to propagate Monstera Standleyana successfully, don’t worry – you’re not alone! This challenging step can be the most daunting part of caring for your beloved plants. When propagating Monstera Standleyana, it’s essential to choose healthy stem cuttings with a few nodes, as these are more likely to produce roots and grow into new plants.
Make sure to maintain humidity levels around 50-60% during propagation to encourage rooting. With the right environment and care, you should start seeing signs of new growth within 2-4 weeks.
Identifying Suitable Plants for Propagation
When it comes to propagating Monstera Standleyana, choosing healthy plants is crucial for successful results. As you browse through nurseries or online marketplaces, take a closer look at the leaves and stems of potential candidates. A good starting point is to select plants with large, firm leaves that are free from damage, blemishes, or diseases.
A stem thickness of about 1-2 cm (0.4-0.8 in) is also essential for propagation. Thicker stems have a higher chance of producing new roots and shoots. Avoid plants with weak or spindly stems, as they may not be able to support the weight of new growth.
Root development is another critical factor to consider. Look for plants with well-developed root systems, which can be indicated by a slightly swollen base on the stem. This shows that the plant has already started to develop roots, making it more likely to thrive after propagation.
When selecting plants, remember that healthy starts will always yield better results than struggling ones. By choosing the right candidates, you’ll set yourself up for success and increase your chances of growing robust, happy Monstera Standleyana plants.
Method 1: Stem Cuttings
To propagate Monstera Standleyana using stem cuttings, you’ll need to gather healthy stems and follow a simple process of preparation and planting. Let’s dive into the steps involved in this method.
Preparing the Cutting Site
To prepare the cutting site for stem cuttings, it’s essential to create a clean and sterile environment. Choose a dedicated workspace that’s free from distractions and potential sources of contamination. This might be a separate area of your propagation station or even a small tray on a table. Remove any unnecessary items, such as pens or papers, to minimize the risk of cross-contamination.
Next, gather the necessary tools, including a sharp, sterile knife or pruning tool specifically designed for plant propagation. A good quality knife will make a clean cut and reduce the risk of damaging the stem. Make sure your hands are clean before handling the plant material, as this will prevent any bacteria from being transferred to the cutting site.
Disinfect the area where you’ll be working with a solution of 70% ethanol or bleach diluted in water. This will help eliminate any microorganisms that might interfere with the propagation process. Finally, put on your gloves to maintain the sterility of the environment and prevent the transfer of bacteria from your skin.
Taking Stem Cuttings
When taking stem cuttings from your Monstera Standleyana, it’s essential to choose healthy stems with at least two nodes. These nodes are the small, swollen areas on the stem where leaves meet. Selecting stems with multiple nodes will increase the chances of successful propagation.
To begin, gently twist or cut a 4-6 inch section from the mother plant using a clean pair of scissors or pruning shears. Make sure to take the cutting just above a node, as this is where new roots are most likely to develop. Be cautious not to damage any of the nodes during this process.
When handling the plant, be careful not to bruise or puncture the stem, which can lead to infection and reduce the chances of successful propagation. It’s also crucial to handle the cutting by the leaves rather than the stem, as the stem can be delicate and prone to breakage. By following these steps and taking the time to select healthy stems, you’ll be well on your way to successfully propagating your Monstera Standleyana using stem cuttings.
Root Development and Transplantation
When you’re working with stem cuttings from Monstera standleyana, encouraging root development is crucial for successful propagation. To achieve this, it’s essential to create a conducive environment that mimics the plant’s natural conditions.
Begin by preparing a well-draining potting mix specifically designed for tropical plants like Monstera standleyana. A mix with a higher proportion of perlite or vermiculite will help prevent waterlogged soil and encourage healthy root growth. Water your cuttings sparingly, allowing the top inch of soil to dry out between waterings. Overwatering can lead to rot and kill your cutting.
Maintain temperatures between 65°F to 75°F (18°C to 24°C) during the propagation period. Avoid placing your cuttings near drafts or extreme temperature fluctuations. Once roots have developed, you’ll know it’s time for transplanting. Gently remove the plant from its pot, taking care not to damage the delicate roots. Choose a slightly larger container with adequate drainage and repot the Monstera standleyana in fresh, well-draining mix.
Method 2: Leaf Cuttings
To propagate Monstera Standleyana using leaf cuttings, you’ll need to prepare a few simple tools and follow some easy steps to increase your chances of success. This method is relatively fast and requires minimal equipment.
Preparing the Leaf Site
To successfully propagate Monstera Standleyana through leaf cuttings, you’ll need to start by preparing the leaves. Begin by selecting healthy leaves with a long petiole (stem) attached. This is crucial as it will provide the cutting with the necessary nutrients and support for successful propagation.
Choose leaves that are at least 6-8 inches long, as they will have more stem tissue to work with. Avoid taking cuttings from weak or spindly growth, as this can lead to reduced chances of success.
Next, gather your tools – a sharp, sterile knife or pruning tool and a clean pot or propagation tray filled with well-draining potting mix. It’s essential to use clean equipment to prevent the risk of contamination.
When cutting the leaf, make sure to cut just above a node (the joint where the petiole meets the stem). This will increase the chances of roots developing from the node. Use a gentle sawing motion to avoid crushing the tissue and causing damage.
Taking Leaf Cuttings
To take leaf cuttings from your Monstera standleyana, you’ll want to select healthy leaves with no signs of damage or pests. Gently grasp the stem just above a node, making sure not to squeeze the leaf too tightly, which can cause bruising.
Cut a 2-3 inch section from the stem using a clean pair of scissors or pruning shears. Cut just below a node, as this will give you the best chance of success with your cutting. You should now have a small piece of stem with a single leaf attached.
To promote rooting and prevent moisture loss, remove any lower leaves that might be touching the soil, leaving only the top two sets of leaves. Handle the cut end of the stem carefully to avoid damaging the node where roots will develop.
Keep your cuttings in a warm, humid environment until they start producing new growth or roots are visible. This can take anywhere from 2-6 weeks depending on factors like temperature and light exposure. Make sure not to expose them to direct sunlight during this period.
Root Development in Leaf Cuttings
When rooting leaf cuttings of Monstera standleyana, it’s essential to focus on creating an optimal environment for root development. Start by preparing a well-draining soil mixture specifically designed for propagation. A blend of peat moss, perlite, and vermiculite will provide the necessary moisture retention and aeration.
For successful root development, keep the soil consistently moist but not waterlogged. Water gently to avoid washing away delicate roots. Monitor temperature fluctuations, aiming for temperatures between 65°F to 75°F (18°C to 24°C). This range allows for healthy growth without promoting fungal diseases associated with warmer environments.
As cuttings begin to develop roots, provide a slightly acidic environment. Use a pH meter to ensure the soil’s acidity falls within the optimal range of 5.5-6.5. Successful propagation requires patience and attention to detail. Avoid over-handling or exposing the delicate tissue to extreme temperatures, which can lead to failure.
Once roots have developed, transplant the successfully propagated plants into a larger pot with a well-draining soil mixture. Handle them gently, taking care not to damage the newly formed roots.
Method 3: Division
When it comes to propagating Monstera standleyana, division is a fantastic method that works particularly well for established plants with multiple stems. You’ll learn how to successfully divide your plant and encourage new growth.
Preparing the Plant for Division
When preparing your Monstera Standleyana plant for division, it’s essential to choose a mature specimen with well-established roots. A healthy, established root system will increase the chances of successful propagation and reduce stress on the new divisions.
Timing is also crucial when preparing your plant for division. The ideal time to divide is during the spring or summer months when the plant is actively growing. This allows you to work with a more robust root system, making it easier to separate the divisions without causing damage.
To prepare your plant, select a sharp, sterile tool such as a garden fork or a specialized propagation tool. Gently remove the plant from its pot and inspect the roots. If the roots have become pot-bound, gently tease them apart with your fingers or a blunt instrument to encourage new growth.
Next, identify the natural divisions within the plant, taking care not to damage any of the delicate aerial roots. Make clean cuts just above a node using a sharp, sterile tool, and carefully separate the sections.
Dividing the Roots
When dividing the roots of your Monstera standleyana cutting, it’s essential to handle them with care. Start by gently loosening the soil around the roots using a blunt instrument like a chopstick or pencil. This will help you visualize the root structure without causing damage.
Next, carefully remove the plant from its pot, taking note of any tangles or knots in the roots. Use your fingers or a blunt tool to separate these areas, working from the base of the plant upwards. Be cautious not to tear the delicate roots during this process.
It’s crucial to handle the roots as minimally as possible to avoid causing unnecessary stress to the plant. If you encounter any stubbornly tangled roots, don’t force them apart – instead, gently tease them apart with your fingers or a blunt instrument.
Remember to work slowly and patiently when dividing the roots, taking regular breaks to inspect your progress. This will help prevent fatigue-induced mistakes that can harm the plant. By following these steps carefully, you’ll be able to successfully divide the roots of your Monstera standleyana cutting and increase its chances of thriving in its new environment.
Replanting after Division
When replanting the divided sections of Monstera standleyana, it’s essential to provide them with a well-draining soil mixture that mimics their natural habitat. A mix of peat moss, perlite, and vermiculite will help prevent waterlogged soil and root rot. Water the newly planted divisions thoroughly after repotting, but make sure not to overwater.
Keep in mind that Monstera standleyana prefers high humidity, so ensure you’re providing a humid environment around 50-60% relative humidity. Place the plant on a tray filled with water and pebbles or use a humidifier nearby. Maintain a consistent temperature between 65°F to 75°F (18°C to 24°C) for optimal growth.
After replanting, it’s crucial to provide proper care for the newly divided plants. Monitor their watering needs closely, as they may require more frequent watering than the original plant due to increased root activity. Also, keep an eye out for pests like mealybugs or spider mites that can take advantage of the new roots.
Advanced Techniques: Using Grow Mediums and Hormones
When it comes to propagating Monstera standleyana, using grow mediums and hormones can greatly enhance your success rates. Let’s dive into some advanced techniques for achieving healthier cuttings.
Using Root Stimulators and Hormone Solutions
When it comes to increasing root development and propagation success rates for Monstera Standleyana, many growers turn to the use of root stimulators and hormone solutions. These products work by stimulating cell growth and division, which can lead to a faster and healthier rooting process.
Root stimulators, such as Superthrive or Rootone, typically contain high concentrations of vitamins and plant growth regulators that promote cellular activity. By applying these products to your cutting or seedling, you can enhance the production of new roots, increasing the chances of successful propagation. For example, a study on Monstera deliciosa found that using a root stimulator increased rooting rates by 25% compared to untreated controls.
Hormone solutions like Clonex and Dip ‘n Grow work similarly by releasing hormones that stimulate cell division and growth. These products can be applied directly to the wound site of your cutting or seedling, promoting faster healing and a stronger callus formation. When using hormone solutions, it’s essential to follow the manufacturer’s instructions carefully to avoid over-application, which can lead to tissue damage.
To get the most out of these products, apply them according to the label instructions and monitor your plant’s response closely. Some growers find that combining root stimulators with hormone solutions provides even better results. Experimenting with different products and application methods can help you develop a strategy that works best for your specific propagation needs.
Utilizing Alternative Grow Mediums
When it comes to propagating Monstera Standleyana, you may be wondering if traditional soil mixtures are the only option. The good news is that there are alternative grow mediums available that can offer unique benefits and advantages.
Rockwool, for example, is a popular choice among growers due to its high water retention capacity and ability to maintain optimal humidity levels. This can be particularly beneficial when propagating sensitive species like Monstera Standleyana. However, it’s worth noting that rockwool can also cause root bound issues if not properly managed.
Coco coir is another alternative grow medium that’s gaining traction among growers. It’s a sustainable and eco-friendly option made from coconut husks, which helps to improve soil structure and drainage. Coco coir can be used as a standalone medium or blended with traditional potting mixes for added benefits.
When transitioning to alternative mediums, it’s essential to research specific growing requirements and adjust your care routine accordingly. For instance, rockwool may require more frequent watering due to its high water retention capacity. By experimenting with different mediums and adjusting your care routine, you can unlock new possibilities in Monstera Standleyana propagation.
Troubleshooting Common Issues
Don’t worry if things aren’t going as planned, we’ve all been there with Monstera Standleyana propagation! This section is here to help you troubleshoot common problems and get your plants thriving.
Recognizing Signs of Failure
When it comes to propagating Monstera standleyana, there are several signs that can indicate failure. One of the most common indicators is a lack of root development. If you’re not seeing new roots emerge from the node after 4-6 weeks, it may be a sign that your cutting wasn’t healthy enough or was exposed to inadequate moisture levels.
Another sign of propagation failure is weak growth. If your Monstera standleyana cutting isn’t showing any signs of vigorous growth or if it’s struggling to stay upright, it could be due to insufficient light, water, or nutrients. Make sure you’re providing your cuttings with a well-draining mix and maintaining a consistent watering schedule.
Additionally, pest infestations can also cause propagation failure. Check for common pests like spider mites, mealybugs, or scale, which can weaken the plant’s immune system and prevent root development. To avoid this, ensure you’re using clean tools when handling your cuttings and keeping the propagation area free from debris.
Regular monitoring of your cutting is crucial to identifying potential issues early on. By recognizing these signs of failure, you’ll be able to take corrective action and increase the chances of successful propagation.
Addressing Root Rot and Overwatering
Recognizing root rot is often challenging until it’s too late, as it can start developing within the soil. However, there are a few signs to look out for: soft and mushy stems, yellowing leaves that eventually drop off, or if you gently remove the plant from its pot and find that the roots have begun to break down.
One of the most common causes of root rot is overwatering – Monstera Standleyana needs well-draining soil to thrive. If the water doesn’t drain quickly enough, it can lead to a buildup of moisture in the soil, creating an ideal environment for root rot to develop.
To address this issue, start by repotting your plant into a new pot with fresh, well-draining soil. Trim away any affected roots and consider pruning some of the stems back to encourage new growth. Then, reassess your watering schedule: instead of watering once or twice a week, try to keep the top layer of soil slightly dry between waterings.
Water only when the top 1-2 inches of soil feels dry to the touch, which may be every 7-10 days depending on the environment and time of year.
Conclusion
Now that you’ve learned the ins and outs of Monstera standleyana propagation, it’s time to put your new skills into action. Remember, practice makes perfect, so don’t be discouraged if your first attempts at propagation aren’t entirely successful. Keep experimenting with different methods until you find what works best for you and your plant.
As you continue on your propagation journey, be sure to keep an eye out for any signs of root rot or fungal infections in your cuttings. These issues can quickly spread and cause more harm than good. Make it a habit to inspect your cuttings regularly and take prompt action if you notice anything amiss.
With the right care and attention, your Monstera standleyana will thrive and multiply. You’ll be rewarded with new plants that are eager to take their place in your home or garden.
Frequently Asked Questions
Can I propagate Monstera Standleyana from seeds?
No, propagating Monstera Standleyana from seeds is not recommended due to the plant’s complex genetic makeup and limited availability of high-quality seeds. Focus on vegetative propagation methods for better success rates.
How often should I water newly propagated plants?
Water your newly propagated Monstera Standleyana plants sparingly, allowing the soil to dry slightly between waterings. Overwatering is a common pitfall in propagation, so monitor your plants closely and adjust your watering schedule as needed.
Can I use rooting hormones for all types of cuttings?
While rooting hormones can be beneficial for increasing success rates, they’re not necessary for all types of cuttings. For example, leaf cuttings often don’t require additional hormones due to their natural auxin production. Use hormones judiciously and follow product instructions carefully.
What if my propagated plant develops root rot?
If you notice signs of root rot in your propagated Monstera Standleyana plant, immediately adjust its environment by reducing watering frequency or repotting it in fresh, well-draining media. Remove any affected roots, and consider applying a fungicide to prevent the spread of disease.
How long does it take for propagated plants to reach maturity?
Monstera Standleyana propagated plants typically require 6-12 months to reach maturity, depending on growing conditions and individual plant characteristics. Focus on providing optimal care during this period, and be patient as your newly propagated plants establish themselves.