As a gardener or horticulturist, you know that healthy plants are essential for a thriving garden. However, disease transmission can quickly spread through contaminated pruning shears, compromising your hard work and ruining your yields. Disinfecting pruning shears is not just a good practice; it’s crucial to prevent the spread of fungal diseases, bacterial infections, and other pests. But did you know that improper disinfection methods can actually spread these problems further? In this article, we’ll explore effective methods for disinfecting pruning shears, including common mistakes to avoid and best practices for maintaining clean equipment. We’ll also cover essential safety precautions to take when using disinfectants around plants. By the end of this post, you’ll be equipped with the knowledge to keep your gardening tools spotless and prevent disease transmission in your garden.
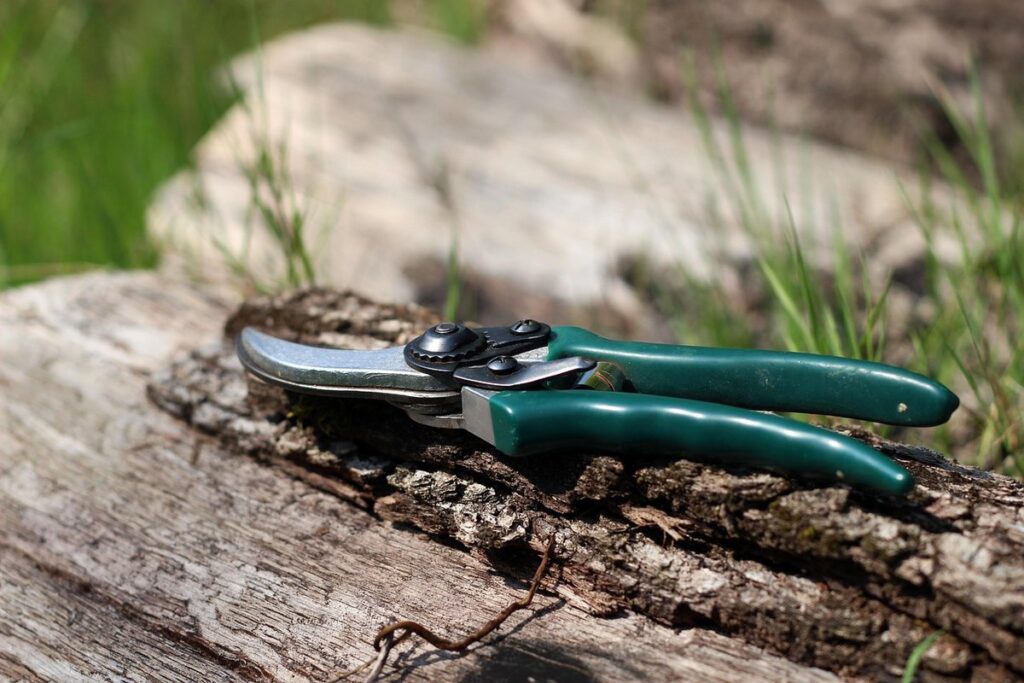
The Importance of Disinfecting Pruning Shears
When pruning shears are not properly cleaned and disinfected, you risk spreading diseases between plants, which is a major concern for gardeners who want to keep their gardens healthy and thriving. This section will walk you through essential disinfecting methods to prevent this from happening.
Reducing the Risk of Disease Transmission
Pruning shears are one of the most common tools used in gardening and landscaping, but they can also be a significant source of disease transmission if not properly disinfected. When you prune diseased plants with contaminated pruning shears, you inadvertently spread the pathogens to healthy plants, which can lead to widespread infections. This is especially concerning for gardeners who cultivate high-value crops or tend to sensitive plant species.
Diseased plants can be a major source of disease transmission through pruning, and this can have significant economic and environmental impacts. For instance, a single infected cutting from an orchard can spread diseases like fire blight to the entire crop, resulting in substantial losses for farmers. Similarly, diseased plants can also lead to the introduction of invasive species, which can alter ecosystems and harm native plant populations.
To mitigate this risk, it’s essential to disinfect pruning shears regularly, ideally between cuts on different plants. You can use a mixture of one part bleach to nine parts water or a commercial disinfectant specifically designed for pruning tools. Always make sure to let the disinfectant sit on the blades for at least 10 minutes before rinsing and wiping them clean with a lint-free cloth.
Understanding the Risks of Pruning Shear Borne Diseases
When you prune plants using contaminated shears, you inadvertently spread diseases from one plant to another. Some common pruning shear-borne diseases are fire blight, crown gall, and scion rot. Fire blight is a bacterial disease that affects trees and shrubs, causing blackened leaves and shoots. It’s often carried by insects like bees and wasps, but contaminated shears can also spread the bacteria.
Crown gall, on the other hand, is caused by a bacterium that infects plant stems, leading to swollen growths called galls. These galls can reduce plant productivity and even kill it if left unchecked. Scion rot, a fungal disease, causes wilting and discoloration of grafted plants. It thrives in moist environments, making it easier for the fungus to spread through contaminated pruning shears.
To avoid spreading these diseases, it’s essential to disinfect your pruning shears regularly. Use a solution of 9 parts water to one part bleach or an alternative disinfectant. Dip your shears into the solution for at least 30 seconds before rinsing them thoroughly with clean water.
Preparing Pruning Shears for Disinfection
Before disinfecting your pruning shears, it’s essential to properly prepare them for cleaning. Remove any debris and clean off loose dirt from the blades and handles.
Removing Debris and Residue
Removing any debris, sap, and plant material from pruning shears is an essential step in preparing them for disinfection. This process may seem tedious, but it’s crucial to remove all contaminants to prevent recontamination of the blades during or after disinfection.
Start by gently tapping the shears against a trash can or other disposable container to dislodge any loose debris. Next, use a soft-bristled brush to sweep away any remaining plant material or sap from the blades and handles. For tougher residue, apply a small amount of isopropyl alcohol to the affected area and let it sit for a few minutes before wiping clean with a lint-free cloth.
Be thorough in your cleaning process, as any missed debris can lead to recontamination. It’s also essential to remove any visible sap or plant material from the handles, as these areas can harbor bacteria and other microorganisms that can spread disease. By taking the time to properly clean your pruning shears, you’ll set yourself up for a successful disinfection process that will leave your tools ready for the next use.
Choosing the Right Disinfectant
When it comes to choosing the right disinfectant for your pruning shears, there are several options available. One popular choice is bleach, which is effective against a wide range of diseases, including bacterial and fungal infections. However, bleach can be harsh on metal surfaces and may require rinsing after application.
Another option is quaternary ammonium compounds (quats), which are often used in commercial disinfectants. Quats are broad-spectrum disinfectants that can kill a variety of microorganisms, including bacteria, viruses, and fungi. They are also gentler on metal surfaces than bleach and do not require rinsing.
When selecting a disinfectant for your pruning shears, consider the type of pathogens you’re trying to prevent. For example, if you’re concerned about fungal infections, look for a product that contains an antifungal agent like tea tree oil or essential oils. Always follow the manufacturer’s instructions and take necessary precautions when handling disinfectants to ensure safe use.
Methods for Disinfecting Pruning Shears
Now that you know why disinfecting pruning shears is crucial, let’s dive into the most effective methods to keep your pruning tools clean and germ-free. We’ll cover the best practices for daily use and regular maintenance.
Immersion Method
The immersion method is one of the most effective ways to disinfect pruning shears. This process involves submerging the pruning shears in a disinfectant solution for a specified period, usually between 10-30 minutes. To immerse pruning shears in a disinfectant solution, start by filling a container with a recommended disinfectant mixture and ensuring the shears are fully submerged.
It’s essential to use a high-quality disinfectant specifically designed for gardening tools to ensure effectiveness against pathogens. Some popular options include bleach-based solutions or quaternary ammonium compounds (quats). Once the pruning shears are immersed, let them soak for the recommended time to allow the solution to penetrate all areas of the tool.
After soaking, carefully rinse the pruning shears under running water to remove any remaining disinfectant residue. A thorough rinse is crucial to prevent damage to the tool’s components and ensure the shears remain in good condition for future use. Always inspect the shears before returning them to work, checking for any signs of residue or discoloration.
Spray or Mist Method
The spray or mist method is an excellent alternative to immersion for disinfecting pruning shears. This approach is particularly useful when you need to disinfect a large number of tools quickly and efficiently. To apply a disinfectant solution using a spray bottle, fill the bottle with the recommended amount of dilution ratio and shake well before each use.
When using a mister or misting system, make sure to adjust the nozzle setting to achieve a fine mist that can reach all areas of the shears. Spray the solution onto the blades and other exposed surfaces of the pruning shears, paying particular attention to any crevices or corners where bacteria may accumulate.
Allow the solution to air dry completely before handling the shears again. The spray or mist method is a great option for disinfecting pruning shears because it allows for quick application and minimal waste of solution. It’s also an excellent choice when you need to disinfect tools with intricate designs that may be difficult to submerge in a bath.
To achieve optimal results, always follow the manufacturer’s instructions for dilution ratios and recommended contact times.
Safety Precautions When Disinfecting Pruning Shears
Before you start disinfecting your pruning shears, make sure to follow some essential safety precautions to avoid any injuries and damage to your tools. We’ll walk you through these crucial steps in this section.
Personal Protective Equipment (PPE)
When handling disinfectants for pruning shears, it’s essential to prioritize your safety and that of others around you. This is where personal protective equipment (PPE) comes into play. Wearing the right PPE can prevent exposure to harsh chemicals, minimize the risk of accidents, and ensure a safe working environment.
Start by donning a pair of rubber or nitrile gloves to protect your hands from skin irritation, chemical burns, and infection. These gloves will also prevent oils from your skin from interfering with the disinfectant’s effectiveness. Next, wear safety glasses or goggles to shield your eyes from splashes or spills. This is especially crucial when working with concentrated disinfectants or handling sharp pruning shears.
Finally, consider wearing a face mask to prevent inhalation of fumes and particles. Opt for a mask that fits snugly over your nose and mouth, and replace it regularly as recommended by the manufacturer. By taking these simple precautions, you’ll be well-equipped to handle disinfecting pruning shears safely and effectively. Remember, PPE is not just about protecting yourself – it’s also about maintaining a clean and healthy workspace for others.
Handling Chemicals Safely
When handling chemicals to disinfect pruning shears, it’s essential to follow safe practices to prevent accidents and exposure. Always read the label carefully before using a chemical disinfectant, taking note of the concentration, recommended usage rate, and any necessary safety precautions.
Proper storage is also crucial to avoid accidental exposure or spills. Store chemicals in their original containers, away from pruning shears and other equipment, in a well-ventilated area that’s inaccessible to children and pets. Keep the chemicals out of direct sunlight and extreme temperatures, as this can affect their potency.
In case of accidental exposure, have a plan in place. Wear protective gear such as gloves and safety glasses when handling chemicals, and wash your hands thoroughly after use. If you accidentally ingest or inhale a chemical, contact emergency services immediately. Dispose of any leftover chemicals responsibly by following the manufacturer’s instructions for proper disposal.
Best Practices for Maintaining Clean Pruning Shears
To keep your pruning shears in top condition, follow these essential best practices for regular maintenance, including cleaning and storing. Regular upkeep prevents damage and contamination.
Regular Cleaning and Disinfection Schedules
Regular cleaning and disinfection schedules are crucial to maintaining clean pruning shears. When you don’t regularly disinfect your pruning shears, they can become breeding grounds for bacteria, fungi, and other microorganisms that can cause disease transmission to plants.
As a general rule of thumb, disinfect your pruning shears after every use, especially when working with diseased or infected plants. This frequency helps prevent the spread of diseases and maintains the overall health of your plants.
However, there are situations where you need to disinfect your pruning shears more frequently:
* After cutting into an infected plant: Disinfect your pruning shears immediately after cutting into a plant showing signs of disease.
* When working with multiple plants: If you’re pruning multiple plants in one session, make sure to disinfect your shears between each plant to prevent cross-contamination.
In addition to frequent disinfection, consider implementing an annual deep clean for your pruning shears. This involves soaking them in a solution of equal parts water and bleach for 10-15 minutes to remove any built-up debris and bacteria.
Storage and Handling
When you’re not actively using your pruning shears, it’s essential to store them properly to prevent cross-contamination and maintain their effectiveness. To avoid transferring pathogens from one task or area to another, follow these guidelines for proper storage and handling.
First, designate a specific place for storing your pruning shears when not in use. This could be a designated tool shed, a hanging hook on the wall, or even a dedicated drawer in your workshop. Ensure that this storage area is clean and dry to prevent any potential moisture buildup that might damage your tools.
When handling your pruning shears, always wash your hands before touching them to avoid transferring dirt, grime, or other contaminants. If you’re working on multiple tasks with different plants, change gloves between each task to minimize the risk of cross-contamination. Clean and disinfect your pruning shears regularly, as mentioned in our previous sections, to maintain their hygiene and effectiveness.
Additionally, consider using a tool mat or tray when storing your pruning shears to catch any potential drips or spills from cleaning products. This will help keep your storage area clean and make maintenance easier in the long run.
Advanced Techniques for Disinfecting Pruning Shears
Now that you’ve mastered the basics of disinfecting pruning shears, it’s time to take your skills to the next level with advanced techniques that ensure optimal cleanliness and sterility. These methods involve specialized tools and a bit more elbow grease.
Ultrasonic Cleaning Devices
Ultrasonic cleaning devices have revolutionized the process of disinfecting pruning shears by making it easier to remove tough-to-remove debris and bacteria. These devices use high-frequency sound waves to create a massive amount of tiny bubbles that implode on the surface being cleaned, lifting dirt and grime off the tool.
One of the significant advantages of ultrasonic cleaning devices is their ability to reach areas that are difficult to clean with traditional methods. For instance, the small crevices and grooves on pruning shears can harbor bacteria, which can be challenging to eliminate using other methods. Ultrasonic cleaners are particularly effective in removing stubborn sap, resin, or plant material from the blades and handles of pruning shears.
To use an ultrasonic cleaning device for disinfecting pruning shears, simply fill the tank with a suitable cleaning solution, place the shears inside, and let the device do its magic. The entire process usually takes around 10-15 minutes, depending on the level of soiling. It’s essential to follow the manufacturer’s guidelines and use the recommended cleaning solution to ensure optimal results.
When choosing an ultrasonic cleaner, consider the size of your pruning shears collection, as well as any additional features you may need, such as a drying cycle or built-in sanitizer. Some devices also come with preset programs for specific types of equipment, including gardening tools like pruning shears.
Alternative Disinfection Methods
Steam sterilization is another alternative method for disinfecting pruning shears. It uses high-temperature steam to kill bacteria and other microorganisms on the tool’s surface. This process can be done using a steam cleaner, which can be purchased at most hardware stores or home improvement centers.
To use a steam cleaner, simply fill it with water, plug it in, and adjust the steam output to a setting that won’t damage your pruning shears. Hold the cleaner about six inches away from the tool and move it slowly back and forth, making sure to cover all surfaces evenly. This method is particularly effective for disinfecting hard-to-reach areas like the crevices between blades.
Ozone treatment is another alternative disinfection method that’s worth considering. Ozone generators produce ozone gas, which has strong antimicrobial properties. When applied to pruning shears, it can help eliminate bacteria and fungi. However, be cautious when using ozone treatment, as excessive exposure can damage certain materials like rubber and some types of plastic.
When choosing between steam sterilization and ozone treatment, consider the type of pruning shears you’re working with. Steam is generally safer for most tools, but ozone may be more effective against particularly stubborn stains or bacterial growths.
Conclusion
Now that you’ve learned how to properly disinfect and care for your pruning shears, let’s summarize key takeaways from our comprehensive guide.
Recapitulating Key Points
In conclusion, it’s essential to reiterate the significance of disinfecting pruning shears in preventing disease transmission. By now, you should have a solid understanding of the risks associated with using contaminated pruning tools and the steps to take for effective disinfection.
Let’s recapitulate the main points covered in this comprehensive guide: First, we discussed how pruning shears can harbor plant pathogens, such as bacteria, fungi, and viruses, which can be transmitted to healthy plants. This emphasizes why disinfecting pruning shears is not just a good practice but an essential one for gardeners and arborists.
We then explored the various methods of disinfection, including sanitizing with soap and water, using plant-specific disinfectants, and employing physical means like heat treatment. It’s crucial to note that these methods should be applied regularly, ideally after each use or at least once a week, depending on usage frequency.
To reinforce good hygiene practices, make it a habit to clean your pruning shears immediately after use. This includes rinsing the blades under running water and wiping them dry with a lint-free cloth. Additionally, inspect your tools for any visible signs of damage or wear and tear, as these can compromise their effectiveness in preventing disease transmission.
By incorporating these habits into your routine, you’ll be able to maintain healthy plants and prevent the spread of diseases that can have devastating effects on plant populations. Remember, disinfecting pruning shears is a critical step towards achieving optimal results in gardening and arboriculture. By following the guidance outlined in this article, you’ll be well-equipped to protect your garden from disease transmission.
Frequently Asked Questions
Can I reuse disinfectant solution after it’s been used once?
No, it’s best to discard any leftover disinfectant solution and prepare a fresh mixture for each disinfection session. This ensures the solution remains effective against diseases and doesn’t become contaminated itself.
How often should I disinfect my pruning shears if I’m working with multiple plants daily?
Disinfect your pruning shears at least twice during each gardening session, once after cutting into diseased or damaged plant material and again before moving on to a different plant. This prevents cross-contamination between healthy plants.
What’s the best way to store my disinfectant solution when not in use?
Store disinfectant solutions in their original containers, tightly sealed, and out of reach of children and pets. Label each container with its contents and date of preparation for easy identification. Keep them in a cool, dry area away from direct sunlight.
Can I use household bleach as an alternative to commercial disinfectants?
Yes, household bleach (sodium hypochlorite) can be used as a disinfectant for pruning shears. However, always dilute it according to the manufacturer’s instructions (usually 1 part bleach to 10 parts water), and take necessary safety precautions when handling strong chemicals.
How do I know if my pruning shears are properly disinfected?
Check for the recommended level of disinfection by performing a simple test: wipe your pruning shears with a clean cloth, then touch a healthy plant leaf or stem. If no visible signs of disease transmission occur within 24-48 hours, your shears have been effectively disinfected.