Starting seeds indoors can be a game-changer for gardeners, but did you know that using contaminated seed starting mix can be detrimental to your plant’s health? Fungal diseases and pests like damping off can quickly spread through unsterilized mixes, causing frustration and disappointment. To avoid these issues, it’s essential to learn how to sterilize seed starting mix properly. In this article, we’ll explore the most effective methods for heat treatment, chemical sterilization, and even using solar power to ensure your seeds have a clean slate to grow. We’ll cover everything from basic safety precautions to more advanced techniques, so you can confidently start healthy seedlings every time. Whether you’re a seasoned gardener or just starting out, this comprehensive guide will walk you through the process of sterilizing seed starting mix like a pro.
Understanding the Importance of Sterilization
Now that you’ve chosen your seed starting mix, let’s dive into why sterilizing it is crucial for healthy seedling growth and preventing common diseases. This section explains the importance of this step in more detail.
The Risks of Unsterilized Seed Starting Mix
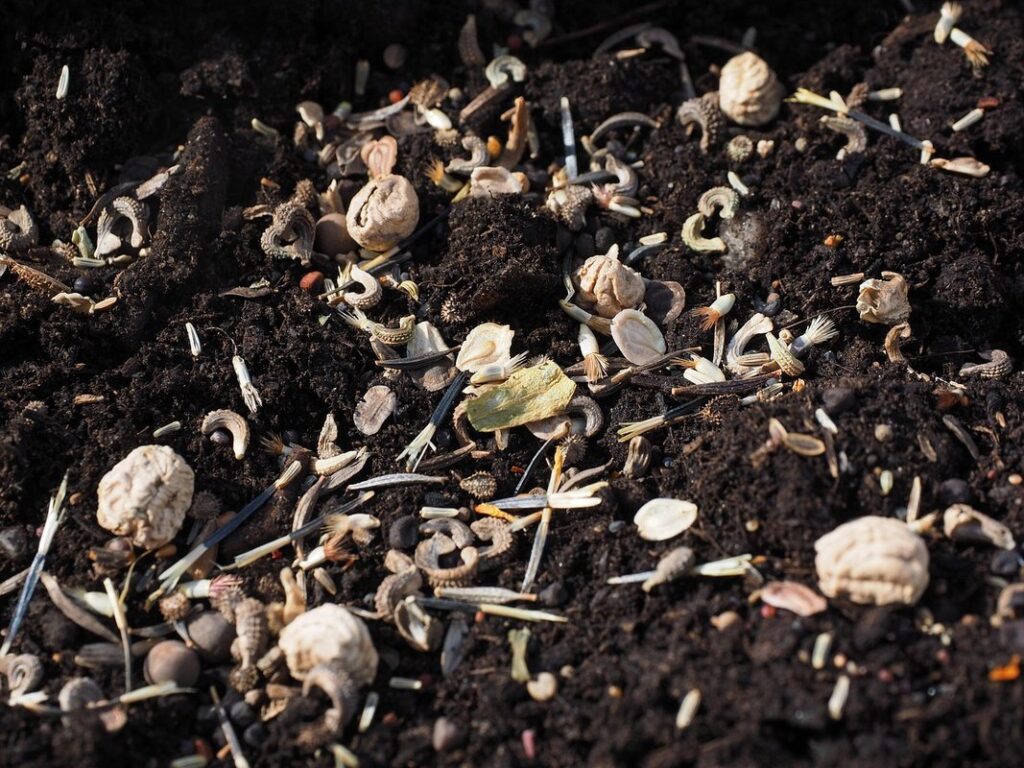
Using unsterilized seed starting mix can be a recipe for disaster in your garden. One of the most significant risks is the transmission of plant diseases. When you use unsterilized mix, you’re essentially introducing a contaminated environment that can harbor pathogens like fungal spores, bacteria, and viruses. These microorganisms can then infect your delicate seedlings, causing a range of problems from mild discoloration to complete crop failure.
Pests are another concern when it comes to unsterilized seed starting mix. Eggs, larvae, or adult insects can be present in the soil, feeding on plant tissues and causing damage. Common pests that can infest your seedlings include fungus gnats, aphids, and whiteflies. Furthermore, if you’re using a potting mix with high organic matter content, it may harbor weed seeds or other invasive species.
If left unchecked, these issues can quickly spread throughout your garden, compromising the health of all your plants. To avoid this, it’s crucial to sterilize your seed starting mix before use.
The Benefits of Sterilization for Seedlings
When you sterilize seed starting mix, you’re not just killing off unwanted pathogens – you’re creating an environment that fosters healthy growth from day one. Healthy seedlings are better equipped to withstand the stresses of transplanting and more likely to thrive in their final destination.
One of the most significant benefits of sterilizing seed starting mix is reduced risk of disease. When a batch of seeds is contaminated, it’s not just the individual seed that suffers – the entire tray can be affected. By eliminating pathogens from your seed starting mix, you’re protecting all those delicate little roots and leaves from getting ravaged by disease.
Germination rates also improve significantly when seed starting mix is sterilized. With fewer competing organisms vying for resources, seeds have a better chance of sprouting and growing strong. Plus, with reduced risk of fungal diseases like damping off, you’ll be less likely to lose precious space in your grow area due to crop losses.
By incorporating sterilization into your seed starting routine, you’ll be setting yourself up for success from the very beginning – fewer sickly seedlings means more robust and resilient plants that can handle whatever challenges come their way.
Preparing Seed Starting Mix for Sterilization
To ensure effective sterilization, it’s crucial that your seed starting mix is properly prepared and free of contaminants. This involves mixing ingredients to create a uniform blend.
Choosing the Right Sterilization Method
When it comes to choosing the right sterilization method for seed starting mix, you have several options to consider. Heat treatment is a popular choice, involving using heat to kill off pathogens and pests. This can be done through autoclaving or steaming, both of which are effective methods that involve heating the mix to a high temperature (usually around 121°C/250°F) for a set period. The advantage of heat treatment is its ability to eliminate all forms of life, including weed seeds.
Chemical sterilization, on the other hand, involves using chemicals like bleach or hydrogen peroxide to kill off pathogens. While effective, this method can be less precise and may leave residues in the mix that could harm seedlings later on. Solar sterilization is another option, which utilizes direct sunlight to heat the mix to high temperatures over several days. This method requires careful planning but offers a more natural approach with fewer chemicals involved.
Consider your specific needs when deciding between these methods: are you working on a small scale or large-scale operation? Do you have access to specialized equipment or resources? Each option has its advantages and limitations, so choose the one that best suits your circumstances.
Setting Up Your Sterilization Equipment
To set up your sterilization equipment, you’ll need to familiarize yourself with the specific requirements of your chosen method. If using an autoclave, ensure it’s calibrated and ready for use. Check the temperature and pressure gauges, as well as the steam release valve, before starting the cycle.
For oven sterilization, preheat your unit to 270-300°F (130-150°C), depending on the specific guidelines for your equipment. Line the shelves with foil or a heat-resistant tray to prevent damage from moisture.
Specialized tools like pressure cookers or microwave-safe containers can also be used for sterilizing small batches of seed starting mix. When using these methods, follow the manufacturer’s instructions and take necessary safety precautions to avoid burns or other accidents.
Before starting the sterilization process, ensure all equipment is clean and free of debris. This will prevent contamination of your seed starting mix during the sterilization cycle. Once set up, monitor the equipment closely throughout the process to guarantee effective sterilization and maintain optimal conditions for seed germination.
Heat Treatment: A Popular Method for Sterilizing Seed Starting Mix
One of the most effective and widely used methods for sterilizing seed starting mix is heat treatment, which involves using high temperatures to kill off pathogens. In this section, we’ll explore how to do it safely and effectively at home.
The Process of Heat Treatment
To effectively sterilize seed starting mix using heat treatment, it’s essential to understand the process and its various components. The temperature settings play a crucial role in killing pathogens and weed seeds. A common approach is to use a steam pasteurization method, where the mix is heated to 180°F (82°C) for at least 30 minutes. This high-temperature exposure is sufficient to kill most fungal and bacterial spores.
Alternatively, some gardeners opt for dry heat treatment, which involves placing the mix in an oven set at 300°F (149°C) for a shorter duration of around 10-15 minutes. It’s vital to monitor the temperature closely to avoid overheating or underheating, both of which can compromise the mix’s sterility.
Regular monitoring is also necessary to ensure that the heat treatment process doesn’t damage the seed starting mix. You should keep an eye on the mix’s color, texture, and consistency to avoid any potential issues. For instance, if the mix starts to turn gray or develop a peculiar odor, it may be a sign of overheating.
To achieve optimal results, maintain accurate temperature readings and follow recommended exposure times. It’s also worth noting that heat treatment is not a substitute for proper sterilization techniques. Always combine heat treatment with other methods, such as autoclaving or solarization, to guarantee the seed starting mix is completely sterile.
Safety Precautions When Using Heat Treatment
When using heat treatment to sterilize seed starting mix, it’s essential to exercise caution and follow proper safety guidelines. One of the primary hazards associated with heat treatment is burns from hot equipment, liquids, or direct exposure to high temperatures. To minimize this risk, make sure to wear protective gear such as gloves, safety glasses, and a long-sleeved shirt when working around heated equipment.
Another potential hazard is equipment malfunction, which can result in uncontrolled heat release or electrical shock. Regularly inspect your equipment for signs of wear or damage, and follow the manufacturer’s instructions carefully. Ensure that you’re using the correct temperature settings for your specific equipment to avoid overheating or underheating the seed starting mix.
To operate heat treatment equipment safely, start by following a gentle warming cycle before increasing temperatures. Keep children and pets away from the work area, and consider investing in a heat-resistant surface or tray to contain spills and prevent accidents. By taking these precautions, you can ensure a safe and effective sterilization process for your seed starting mix. Regular maintenance of equipment is also crucial to avoid any potential hazards.
Chemical Sterilization: A Convenient Alternative
For those short on time, chemical sterilization is a convenient alternative that uses a simple solution to eliminate pests and diseases from seed starting mix. Let’s dive into how it works.
Choosing the Right Disinfectant
When selecting an appropriate disinfectant for chemical sterilization of seed starting mix, several factors come into play. Efficacy is a top priority – the disinfectant should effectively eliminate fungal and bacterial pathogens that can cause disease in young seedlings. Look for products that have been tested against common plant pathogens, such as Pythium and Fusarium.
Safety is also essential to consider. Choose disinfectants that are specifically labeled for use on potting mixes and are non-toxic to plants. Some popular options include hydrogen peroxide and sodium bisulfite. However, always follow the recommended dilution rates and application times to avoid damaging the seed starting mix.
Environmental impact is another crucial factor in selecting a disinfectant. Opt for products that are biodegradable and free of harsh chemicals like bleach or quaternary ammonium compounds (quats). These can persist in soil and contaminate waterways, posing risks to wildlife and human health. Be sure to read the label carefully and choose a product that aligns with your values as a gardener.
Precautions When Handling Chemical Disinfectants
When handling chemical disinfectants for sterilizing seed starting mix, it’s essential to take necessary precautions to avoid exposure and ensure effective use. Wear protective gear such as gloves, safety glasses, and a face mask to prevent skin contact and inhalation of fumes. Ensure good ventilation in the area by opening windows or using a fan to remove airborne chemicals.
Follow the manufacturer’s instructions for dilution ratios and application times to prevent over-exposure. Mix disinfectants in a well-ventilated area, away from heat sources and open flames. Dispose of unused chemical disinfectants according to local regulations and guidelines.
For example, if you’re using bleach as a disinfectant, make sure to wear gloves and work in a well-ventilated area, as it can release toxic fumes when mixed with other chemicals or under high temperatures. Regularly cleaning your equipment and workspace will also prevent the buildup of chemical residues, ensuring a safer working environment.
Solar Sterilization: A Natural and Environmentally Friendly Option
One of the most eco-friendly methods for sterilizing seed starting mix is through solar sterilization, a simple yet effective technique that harnesses the power of UV light to kill off pathogens. In this section, we’ll explore its benefits and how to use it.
Harnessing the Power of Sunlight
Harnessing the power of sunlight is a natural and effective way to sterilize seed starting mix without exposing it to heat or harsh chemicals. This method, known as solar sterilization, uses direct sunlight to kill pathogens and other microorganisms that can harm seeds.
The process works by placing the seed starting mix in a clear plastic bag or container, allowing the sun’s UV rays to penetrate and destroy the pathogens. The length of time required for effective sterilization depends on several factors, including the intensity of the sunlight, the type of pathogens present, and the moisture level of the mix.
As a general rule, it’s recommended to leave the seed starting mix in direct sunlight for at least 4-6 hours, or overnight during peak sun exposure. You can also use a clear plastic tray or dish to spread out the mix, allowing for maximum UV radiation penetration. Remember to rotate the tray periodically to ensure even sterilization.
Design Considerations for Solar Sterilation Systems
When designing solar sterilization systems for seed starting mix, several key considerations come into play to ensure effective and efficient sterilization. One crucial aspect is collector size, which directly impacts the system’s ability to reach the desired temperatures. A general rule of thumb is to use collectors that are at least 10-15% larger than the seed starting trays to accommodate for any variations in temperature distribution.
Insulation is also vital in maintaining heat within the sterilization unit, especially when operating during cooler months or with smaller systems. Consider using materials like fiberglass or reflective insulation to minimize heat loss and maximize energy retention. Temperature control is another critical factor; aim to maintain temperatures between 180°F and 190°F for optimal sterilization. This can be achieved through a combination of collector size, insulation, and strategic placement of the unit in direct sunlight.
To give you an idea of what works well in practice, consider this example: a 4′ x 8′ solar collector can reach temperatures of up to 200°F with proper insulation, making it suitable for sterilizing large quantities of seed starting mix. By paying attention to these design considerations and tailoring your system accordingly, you’ll be able to create an efficient and effective solar sterilization setup for your needs.
Testing and Verification
Now that you’ve sterilized your seed starting mix, it’s time to verify its effectiveness by conducting a series of tests to ensure pathogen-free soil. These steps will help you achieve optimal results.
Methods for Verifying Sterilization Success
To ensure that your seed starting mix has been successfully sterilized, it’s essential to verify its sterility through various methods. Microbiological assays are a common approach, where you take samples of the treated mix and inoculate them with a high concentration of microorganisms. If the mix is sterile, these microbes should not be able to grow.
Alternatively, chemical analysis can also be used to detect residual levels of sterilizing agents, such as ethylene oxide or hydrogen peroxide. This method involves sending samples to a laboratory for testing.
Another practical approach is the “heat test,” where you mix a small sample with a non-sterile seed starting mix and observe it for signs of microbial growth over several days. If the treated mix inhibits the growth of microbes, it’s likely been effectively sterilized.
It’s also worth noting that some suppliers offer pre-tested seed starting mixes that have already undergone sterility verification. Consider sourcing from reputable providers to save time and effort in verifying sterility.
Ensuring Consistency Across Multiple Batches
Maintaining consistency across multiple batches of sterilized seed starting mix is crucial to ensure uniform quality and optimal plant growth. One way to achieve this is by using a standardized protocol for sterilization, which includes factors such as temperature, time, and moisture levels.
To maintain consistency, it’s essential to calibrate your sterilization equipment regularly. This involves checking the temperature gauges, ensuring the autoclave is functioning correctly, and maintaining proper calibration records. Additionally, consider investing in a data logger to monitor temperature and humidity levels during each sterilization cycle. This will provide valuable insights into any variations that may occur.
Another critical factor is documenting your process. Keep a record of every batch, noting variables such as the seed starting mix recipe, sterilization time, and temperature. This will enable you to track patterns and make adjustments as needed. By following these steps, you’ll be able to ensure consistency across multiple batches and achieve optimal results in your seed starting endeavors.
Frequently Asked Questions
How do I ensure my seed starting mix is completely sterilized after using heat treatment?
To confirm successful sterilization, you can perform a simple water test: fill a container with the treated mix, add a few drops of food coloring and 1-2 mL of Tween 20. If the mixture remains clear and no dye particles are visible after 24 hours, it’s likely that the mix is free from fungal spores and other contaminants.
Can I reuse seed starting mix after sterilization, or do I need to use a fresh batch each time?
While sterilization effectively eliminates most pathogens, repeated use can lead to reduced soil quality over time. To maintain optimal growth conditions, it’s recommended to use fresh seed starting mix for each new crop cycle.
What’s the ideal temperature range for heat treatment, and how long should I expose my seed starting mix to these temperatures?
A temperature range of 140°F (60°C) to 160°F (71°C) is commonly used for heat treatment. Expose your seed starting mix for at least 30 minutes to an hour to ensure effective sterilization.
Can I use solar sterilization during periods of low sunlight or in cold climates?
Solar sterilization relies on direct sunlight, which can be challenging to achieve during periods of low sun exposure. Consider alternative methods like heat treatment or chemical sterilization when the sun isn’t cooperating.
How often should I test my seed starting mix for sterility using methods like the water test mentioned earlier?
To maintain quality control, it’s a good idea to perform regular sterility tests on your seed starting mix every 2-3 months, especially if you’re reusing the same batch over multiple crop cycles. This ensures that your mix remains free from contaminants and pathogens.