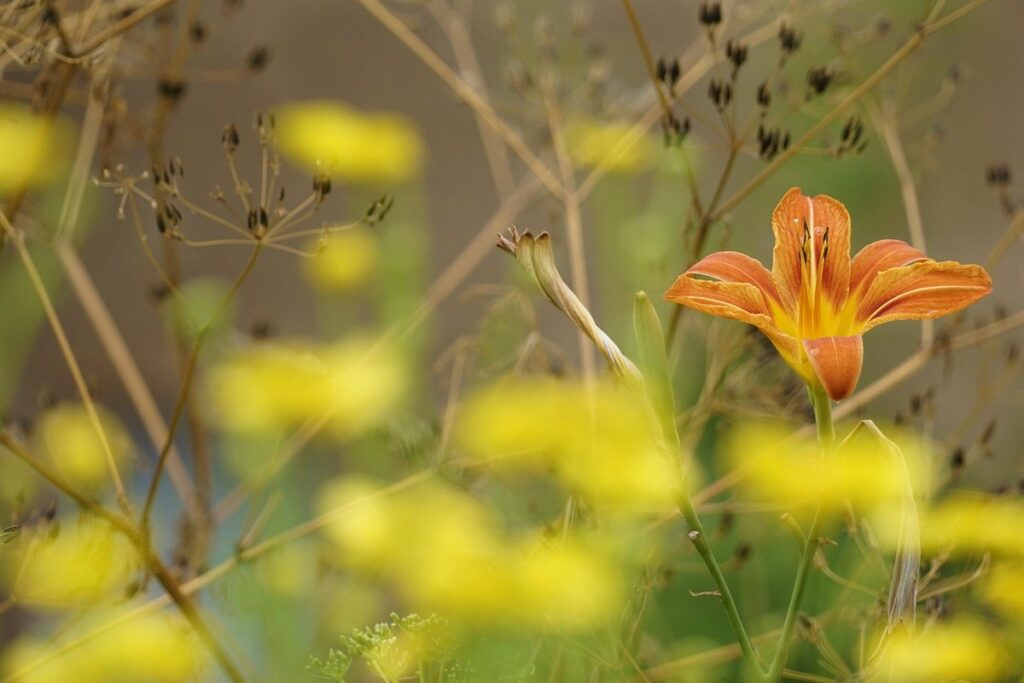
Are you tired of overcrowded daylily gardens or struggling with deadheading your prized plants? It may be time to divide them. Daylilies are known for their ability to multiply quickly, but this can sometimes lead to overcrowding and a decrease in bloom quality. By dividing your daylilies at the right time, you’ll not only improve their overall health but also encourage more blooms.
In our comprehensive step-by-step guide, we’ll walk you through the benefits of dividing daylilies, how to prepare for division, and what steps to take after splitting up your plants. From preparation to post-division care, we’ve got you covered with expert tips and tricks to ensure a smooth process and healthy blooms in no time. Whether you’re a seasoned gardener or just starting out, this guide will help you learn how to divide daylilies like a pro and keep them thriving year after year.
Understanding Why Daylilies Need to be Divided
As a daylily enthusiast, you’re probably wondering why these beautiful plants need regular division to stay healthy and thriving. In this next step, we’ll explore the reasons behind this necessary process.
Benefits of Division
Dividing daylilies may seem like an unnecessary task, but it’s essential for maintaining their health and vibrancy. By doing so, you’ll not only improve the overall appearance of your plants but also ensure they continue to thrive for years to come.
One significant benefit of dividing daylilies is that it leads to increased blooms. As these plants grow older, their centers often become congested with old growth, which can cause blooming to decrease. By dividing the plant, you’ll remove this congestion and provide more room for new growth to emerge. This simple process can result in a substantial increase in the number of flowers produced by your daylily.
Dividing also has a profound impact on the health of your plants. It prevents the spread of diseases that thrive in overcrowded conditions. For instance, crown rot is a common issue that arises when there’s not enough air circulation around the base of the plant. By dividing and replanting individual sections, you’ll reduce the risk of disease significantly.
Additionally, dividing daylilies allows for better watering and fertilization practices. With fewer plants competing for resources in each section, they’ll be able to absorb nutrients more effectively, resulting in healthier roots, stems, and flowers. This is especially important during hot summer months when water conservation becomes crucial.
Recognizing When to Divide
As you tend to your daylily garden, it’s essential to recognize when these beautiful plants need to be divided. Daylilies are known for their vibrant blooms and low maintenance requirements, but they still require some TLC from time to time. So, how do you know when it’s time to divide? Look out for the following signs:
* Overcrowding: As daylily clumps grow, they can become congested, causing the plants to compete for resources like water and nutrients. If you notice that your daylilies are growing too close together, it’s likely time to divide.
* Dying centers: Daylily flowers typically bloom from the outer edges of the plant, while the center remains dormant. If you notice that the center of your plant is dying or becoming woody, it may be a sign that the plant needs dividing.
* Lack of blooms: If your daylilies are no longer producing as many blooms as they used to, it could be due to overcrowding or poor soil conditions. Dividing the plant can help redistribute the resources and promote healthy growth.
By paying attention to these signs, you’ll know exactly when it’s time to divide your daylilies and give them the TLC they need to thrive.
Preparing for Division
Before you start dividing, it’s essential to gather all necessary tools and supplies, including a garden fork, shovel, and potting mix. Having everything ready will make the process smoother and less overwhelming for you.
Choosing the Right Time
When it comes to dividing daylilies, timing is everything. You want to divide them at the right moment to give them the best chance of thriving. The two main seasons for dividing daylilies are spring and fall.
Spring division takes place around late March or early April, when new growth begins to emerge from the ground. This is an excellent time to divide daylilies in regions with mild winters, as the plants tend to grow vigorously during this period. In areas with harsher winters, however, it’s often better to wait until fall.
To determine which season is best for your specific climate, observe your daylily’s growth pattern and response to weather conditions. If your area experiences frequent rainfall or high humidity in spring, it might be better to divide in fall when the plants are dormant. On the other hand, if your region has a dry spell during the summer months, spring division can help give your daylilies an extra boost.
It’s essential to note that dividing daylilies during periods of active growth or when they’re under stress can cause unnecessary harm. By choosing the right time and considering your local climate, you’ll be well on your way to successful division and a healthy, thriving plant.
Gathering Essential Tools
To successfully divide daylilies, you’ll need to gather some essential tools. These may seem basic, but trust us – they make all the difference when it comes to handling these beautiful plants. First and foremost, grab a good pair of gardening gloves to protect your hands from the thorny stems and any dirt or debris that might be lurking beneath.
A fork is also crucial for gently loosening the roots without causing damage. Look for one with sturdy tines that can dig into the soil without breaking off easily. Next up is a trowel, which you’ll use to scoop out the divided clumps and pot them up afterwards. Make sure it’s large enough to hold a decent amount of soil, but not so big that it becomes unwieldy.
You may also want to consider a few other tools like a garden kneeler or knee pads to protect your knees from the strain of crouching over long periods. If you’re dividing a particularly large or heavy clump, a garden fork with a curved shaft can be especially helpful for lifting and maneuvering the plant.
Removing Old Growth
Now that you’ve lifted and washed your daylily clumps, it’s time to remove any old, damaged, or dead growth to promote healthy division. Cut back any weak or spindly stems at ground level.
Carefully Digging Up the Plant
Dig carefully around the plant with a garden fork, working your way down to the crown (where the stem meets the roots). Avoid piercing the crowns as it can cause damage to the new growth. Use a gentle sawing motion to loosen the soil and lift the entire clump out of the ground.
Continue digging in the same manner until you’ve managed to lift most of the old growth out of the soil, taking care not to disturb any new shoots that may be emerging from the base of the plant. Gently rock the plant back and forth a few times to loosen it further.
If you encounter any resistance or if parts of the plant begin to break off, stop digging immediately and reposition your fork accordingly. Once the entire clump is free, brush away excess soil, taking care not to damage the roots. This will make the division process much easier.
Separating the Crown
When it comes to dividing daylilies, one of the most crucial steps is separating the old growth from the new. This may seem like a daunting task, but with the right guidance, you’ll be able to identify the crown and know when to cut it.
The crown of your daylily is the base of the plant where the leaves meet the roots. It’s usually a compact mass of white or light-colored tissue that resembles a miniature version of the entire plant. To identify the crown, gently dig around the plant with your hands or a fork until you expose a section of the crown.
When to cut the old growth depends on the age and health of the daylily. For younger plants (usually 2-3 years old), it’s best to wait until they have at least two sets of leaves before cutting the old growth. This will give the plant enough energy to produce new growth without stressing it.
When you’re ready to cut, use a sharp, sterile knife or pruning tool to carefully slice through the old growth about an inch above the crown. Make sure not to damage any of the surrounding foliage or roots.
Replanting New Divisions
Now that you’ve divided and replanted your daylilies, it’s time to get them settled into their new homes and watch them thrive in their freshly prepared spaces. Let’s dive into how to care for your newly replanted divisions.
Preparing the Soil
When replanting new divisions of daylilies, it’s essential to prepare the soil properly to ensure healthy growth and optimal performance. Before digging up your newly divided plants, take some time to loosen the surrounding soil to a depth of about 12 inches. This will help you avoid compacting the soil further, which can impede root growth.
Next, inspect the soil and identify any areas that may need additional amendments. Daylilies prefer well-draining soil with a pH between 6.0 and 7.0. If your soil is heavy clay or sandy, consider adding organic matter like compost or well-rotted manure to improve its structure. You can also test the pH level of your soil and adjust it accordingly.
To add nutrients to the soil, you can mix in a balanced fertilizer according to the manufacturer’s instructions. Be sure to follow the recommended application rates to avoid over-fertilizing, which can damage your plants. By loosening the soil and adding necessary amendments, you’ll create an ideal environment for your newly divided daylilies to thrive.
Planting the New Division
When you’ve completed dividing your daylily, it’s time to replant the new divisions. This is a crucial step, as improper planting can lead to weak growth and poor flowering. To plant your newly divided daylily, start by choosing a location with well-draining soil and full sun to partial shade.
Dig a hole that’s about twice as wide and just as deep as the division itself. Gently place the division in the center of the hole, making sure the crown (where the stem meets the roots) is level with or slightly above the surrounding soil. This will help prevent rot from developing.
Space your divisions 12-18 inches apart, depending on the variety’s growth habits and mature size. If you’re planting multiple divisions, create a pattern that allows for good air circulation and easy access for maintenance. Water thoroughly after planting, then mulch around the base to retain moisture and suppress weeds. With proper care, your replanted daylily divisions should thrive and provide years of beautiful blooms.
Post-Division Care
Now that you’ve divided your daylilies, it’s time to focus on their post-division care. This crucial step ensures a healthy and thriving plant that will continue to bloom beautifully for years to come.
Watering the Newly Planted Division
Watering the newly planted division is crucial for establishing a strong root system and promoting healthy growth. A daylily division typically needs consistent moisture during its first growing season, but overwatering can be detrimental to its survival. Aim to provide about 1-2 inches of water per week, either from rainfall or irrigation.
To determine if your newly planted division is receiving enough water, check the soil by inserting a finger into the soil up to the knuckle. If the soil feels dry, it’s time to water. However, if it’s already moist, wait another day before watering again. This will prevent overwatering and give the roots time to establish themselves.
A good rule of thumb is to water deeply once or twice a week during hot weather, as this encourages deep root growth and makes the plant more drought-tolerant in the long run. Within two weeks after planting, reduce watering frequency by about half, allowing the soil to dry slightly between waterings. This will help prevent waterlogged roots and promote healthy growth.
Mulching Around the Plant
Mulch plays a crucial role in retaining moisture and suppressing weeds around newly divided daylilies. As you’ve just finished dividing your plants, it’s essential to protect the soil from drying out and weed growth. Mulch helps retain moisture by reducing evaporation, allowing the plants to absorb water more efficiently. It also suppresses weeds, preventing them from competing with your daylily for resources.
To effectively use mulch around your newly divided daylilies, apply a 2-3 inch layer of organic material such as wood chips or bark. Avoid piling it too high, as this can cause the mulch to become waterlogged and potentially harm the plants. Instead, gently spread it evenly around the plants, keeping it several inches away from the crown.
By using mulch correctly, you’ll not only retain moisture but also create a weed-free environment that promotes healthy growth and blooming.
Common Challenges and Solutions
As you divide your daylilies, you’ll inevitably encounter some bumps in the road. Let’s tackle those common challenges together and explore simple solutions to get your garden back on track.
Dealing with Dead or Dying Centers
Dead or dying centers can be a frustrating issue for daylily enthusiasts, especially after dividing and replanting their precious plants. What causes this problem? It’s often due to factors like disease, pests, mechanical damage during division, or inadequate care.
When dividing daylilies, it’s essential to inspect the centers carefully for any signs of decay or rot. To prevent dead or dying centers from happening again in the future:
* Inspect your plants regularly and remove any diseased or damaged tissue
* Improve drainage around the base of the plant by adding organic matter like compost or well-rotted manure
* Avoid overwatering, which can lead to root rot
* Provide sufficient sunlight, but not direct scorching sun that can cause centers to become scorched and die
Keep in mind that some daylily varieties are naturally more prone to dead or dying centers. If you’re experiencing this issue with a specific variety, research its specific needs and adjust your care accordingly.
To prevent mechanical damage during division, always use a sterile tool and handle the plant carefully to avoid bruising the tissue.
Managing Overcrowding
Managing overcrowding is one of the most common challenges daylily gardeners face. As your plants mature and spread out, they can become too dense, leading to reduced air circulation, increased disease susceptibility, and lower yields. To combat this issue, you’ll need to thin out your daylilies periodically.
Start by identifying the healthiest, strongest stems in each clump and removing weaker growths at the base of the plant. This will allow more sunlight and nutrients to reach the remaining foliage, promoting healthier growth. You can also divide overcrowded sections more frequently than usual – every 2-3 years instead of 5-7.
To determine if your daylilies are ready for division, gently dig around the crown and inspect the roots. If they’re circling or growing out of the container, it’s time to separate them. Divide the plant into smaller sections, making sure each section has at least one “eye” (the small buds from which new growth emerges). Plant the new divisions immediately, following our earlier guidelines for proper spacing and care.
By thinning and dividing your daylilies regularly, you’ll maintain their health, vigor, and beauty.
Tips for Success and Maintenance
Now that you’ve successfully divided your daylilies, it’s time to keep them thriving. Here are some expert tips for success and maintenance to ensure they continue to bloom beautifully year after year.
Fertilizing the Plant
After dividing your daylilies, it’s essential to fertilize them properly to promote healthy growth and maximize blooms. Fertilizing at this stage is crucial because the newly divided plants have a high demand for nutrients as they establish their root systems.
Choose a balanced fertilizer with an N-P-K ratio of 10-10-10 or 20-20-20, which provides equal amounts of nitrogen (N), phosphorus (P), and potassium (K). You can also use a slow-release fertilizer that contains these essential nutrients. Apply the fertilizer according to the product’s instructions, usually within a few days after division.
To further boost your daylilies’ growth, consider using compost tea or well-rotted manure as a natural alternative to synthetic fertilizers. These options provide beneficial microorganisms that will help your plants develop strong root systems and resist diseases.
Remember to follow the specific fertilizer instructions to avoid over-fertilizing your daylilies, which can cause more harm than good.
Pruning Dead Blooms
Pruning dead blooms is an essential step in maintaining healthy daylily plants. Deadheading, as it’s commonly known, serves two primary purposes: aesthetics and plant health. By removing spent flowers, you’ll maintain your daylily’s appearance and encourage new blooms to form. This process also helps direct the plant’s energy towards producing more flowers rather than seed production.
To prune dead blooms effectively, remove the entire flower scape, including the stem and any remaining foliage. Cut back the stem to about an inch above the ground, using clean pruning tools to prevent the spread of disease. Be sure to make a clean cut just above a leaf node, as this will help promote new growth from that point.
Timing is also crucial when it comes to deadheading. The ideal time to prune dead blooms depends on your region and climate, but generally, it’s best done after the initial blooming period has ended. Prune again in late summer or early fall, removing any remaining flower scapes before the first frost. By following these simple steps, you’ll keep your daylilies looking their best while promoting healthy growth and encouraging repeat blooms.
Frequently Asked Questions
What’s the best time to divide daylilies in my region?
The ideal division time varies by climate, but generally, spring or fall is considered optimal for most regions. Spring allows new growth to emerge before heat sets in, while fall gives plants a head start on next year’s bloom season. Observe your local weather patterns and adjust accordingly.
How often should I water the newly divided daylilies?
After replanting, keep the soil consistently moist but not waterlogged for the first few weeks. Then, gradually reduce watering to about 1-2 inches per week during hot summer months. Monitor soil moisture by inserting a finger into the soil up to the knuckle; if dry, it’s time to water.
Can I divide daylilies in containers or must they be in-ground?
Yes, you can divide and replant daylilies in containers, but ensure the container is at least 12-18 inches deep to accommodate the plant’s roots. Choose a well-draining potting mix and a container with sufficient drainage holes to prevent waterlogged soil.
How do I identify and separate the crown from the old growth?
The crown is typically located near the base of the plant, about an inch below the soil surface. Gently dig around the plant, being careful not to damage the roots or crown. Use a fork or knife to gently pry apart the old growth, leaving 2-3 inches of stem attached to each new division.
What are some common mistakes to avoid when dividing daylilies?
Avoid cutting back too much foliage at once, as this can shock the plant. Also, be cautious not to damage the roots or crown during division. Make clean cuts using a sharp tool and handle the divisions gently to prevent injury.