As a chive enthusiast, you know how quickly these versatile herbs can take over your garden. Before you know it, they’re overflowing with new growth, but that’s not necessarily a bad thing! With their ease of growth comes the need for regular division to keep them healthy and thriving. Dividing your chives at the right time is crucial to maintaining their potency and preventing overcrowding. In this article, we’ll walk you through the art of dividing chives, including when to do it, how to replant, and expert care tips to keep your plants in top shape. From timing to propagation, we’ve got you covered with a comprehensive guide on how to divide and care for chives like a pro.
Understanding Chives
To grow and harvest chives, it’s essential to understand their life cycle and how they propagate, which is a key part of successful division. Let’s dive into the details.
What Are Chives?
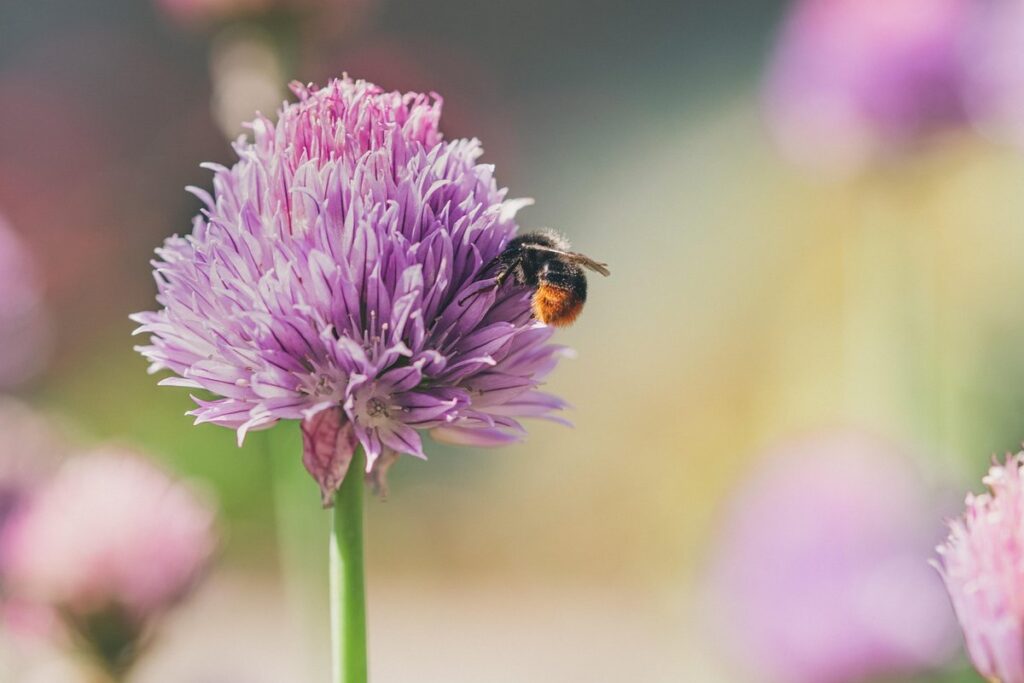
Chives are a popular herb that have been used for centuries in cooking and as a garnish. From a botanical standpoint, chives belong to the Allium family, which also includes garlic, onions, and leeks. They are characterized by their long, thin stems with purple flowers on top. Chives are actually the leaves of a perennial plant called Allium schoenoprasum, and they have a mild onion flavor that is often used to add depth and complexity to dishes.
In cooking, chives are commonly used as a garnish or added towards the end of cooking to preserve their delicate flavor and texture. They pair well with eggs, cheese, soups, and salads, and can be used in place of onions or garlic in many recipes. Chives are also a good source of vitamins A and K, and contain antioxidants that have been shown to have anti-inflammatory properties.
When it comes to dividing chives, it’s essential to understand their growth habits and how they propagate. Chives multiply by sending out underground stems called rhizomes, which produce new plants at the tips. This means that dividing chives is a relatively simple process, but it requires some knowledge of their unique characteristics to do it correctly.
Benefits of Growing Chives
Growing chives is an excellent choice for any gardener, whether you’re a seasoned pro or just starting out. Not only are they incredibly easy to grow, but they also require very little maintenance, making them perfect for busy gardeners. In fact, chives can thrive in even the most neglected corners of your garden, as long as they receive some sunlight and water.
One of the biggest benefits of growing chives is their incredible hardiness. They’re one of the first herbs to sprout in the spring and continue to produce new growth right up until the first frost. This means you can enjoy a continuous harvest from your chive plants throughout the growing season. Chives are also packed with nutrients, including vitamins A and K, as well as minerals like potassium and manganese. Not only do they add fresh flavor to a variety of dishes, but they’re also said to have numerous health benefits, including reducing inflammation and improving digestion.
Incorporating chives into your garden is easier than you think – simply plant them in well-draining soil with full sun and keep the soil consistently moist. With minimal care and attention, you’ll be enjoying a bountiful harvest of delicious, nutritious chives in no time.
Choosing the Right Variety
When it comes to growing chives, one of the most important decisions you’ll make is choosing the right variety for your needs and climate. With over 20 different types of chives available, selecting the perfect one can be overwhelming.
First, consider the flavor profile you’re looking for in your chives. Garlic chives, for example, have a mild garlic flavor that’s perfect for adding depth to soups and sauces. Onion chives, on the other hand, have a sweeter, more oniony flavor that’s great for topping baked potatoes or salads.
Another factor to consider is your climate. If you live in an area with hot summers, look for chive varieties that are heat-tolerant, such as ‘Fernleaf’ or ‘White Lilies’. In cooler climates, varieties like ‘Garlic Chives’ or ‘Onion Chives’ will thrive.
When selecting a variety, also consider the space you have available. Some chives, like ‘Walker’s Low’, can spread quite aggressively and may need to be contained. Others, like ‘Paprika’, are more compact and won’t take over your garden.
Ultimately, choosing the right type of chive will depend on your personal preferences and growing conditions. Take some time to research different varieties and read reviews from other growers to find the perfect fit for you.
Preparing Chives for Division
Before dividing your chives, you’ll need to prepare them by gently digging up the entire clump and separating the individual plants. This process is essential for healthy division.
Timing for Division
When to divide chives is just as important as how to divide them. The ideal time for division depends on several factors, including your climate, the season, and the health of your plants.
In general, it’s best to divide chives in the spring or fall when they’re actively growing. This allows the new divisions to establish themselves before winter or summer heat sets in. In areas with mild winters, you can also divide chives after a hard frost in late winter or early spring.
Avoid dividing chives during the hottest part of the summer when the plants are stressed and more susceptible to disease. If you must divide in the middle of summer, make sure to water your new divisions well and provide them with plenty of shade to help them establish themselves quickly.
In areas with cold winters, it’s a good idea to wait until spring growth begins before dividing chives. This ensures that the new divisions have enough time to mature before winter sets in. By considering these factors and choosing the right time for division, you can promote healthy growth and encourage your chive plants to thrive.
Tools Needed for Division
To divide chives successfully, you’ll need to gather the right tools for the job. Start by putting on a pair of gardening gloves to protect your hands from thorny stems and any potential soil-borne irritants.
Next, reach for either scissors or pruning shears to trim the chive foliage down to about an inch above the base of the plant. For thicker clumps, consider using pruning shears with long handles to make the process easier and less strenuous on your back. If you’re dealing with a particularly stubborn clump, you may also want to use a garden fork to gently loosen the soil around it.
Remember to handle your tools carefully, as you don’t want to damage any of the roots or disturb the surrounding plants. Once you’ve trimmed the foliage and loosened the soil, you’ll be ready to separate the individual chive crowns and replant them in their new locations. This will help ensure a smooth transition for your chives and give them the best chance at thriving in their newly divided spaces.
Pre-Division Care
Before you begin dividing your chives, it’s essential to ensure they’re healthy and thriving. This pre-division care will not only improve their chances of survival but also promote a robust harvest. Start by watering your chives generously, allowing the soil to become moist but not waterlogged.
Next, inspect the plant for any signs of pests or diseases. Check for aphids, slugs, or snails on the leaves and stems, and treat promptly if necessary. Fertilize your chives with a balanced, slow-release fertilizer to provide them with essential nutrients.
As you prepare your chives for division, take a closer look at their root system. Healthy roots are white or light-colored, while diseased ones may appear brown or black. Gently loosen the soil around the roots to encourage new growth and prevent any damage during the division process.
Regular pre-division care will set the stage for successful propagation and a bountiful harvest of your divided chives.
Dividing Chives: A Step-by-Step Guide
To divide your chive plants, you’ll want to carefully separate them into sections, ensuring each new plant gets a good balance of roots and growth. Let’s walk through the process step by step.
Removing Old Growth
To prepare your chives for division, it’s essential to remove the old growth from the center of the clump. This will allow you to separate the new, healthy stems and promote even growth. To do this, use a sharp knife or gardening tool to carefully cut away any dead or damaged leaves from the center of the plant.
Next, identify the oldest, thickest stems in the middle of the clump – these are usually the ones that have stopped producing new growth. Gently twist and pull these stems out, taking care not to damage the surrounding foliage. You can also use a gentle sawing motion with your knife if necessary.
As you remove the old growth, make sure to examine each stem for any signs of disease or pests. Discard any damaged material and set it aside for composting. This will help prevent the spread of disease and keep your new divisions healthy. By removing the old growth, you’ll be able to see the individual stems more clearly and separate them at the correct point – usually where they start to grow from a smaller rhizome or crown.
Cutting Back New Growth
When new growth emerges from the chives, it’s essential to cut it back regularly to encourage a strong, bushy shape and promote healthy division. This process is called “cutting back,” and it helps prevent the plant from becoming leggy and weak.
To cut back new growth, simply snip off the tips of the stems with scissors or pinch them off with your fingers. Cut just above a node (the joint where a leaf meets the stem), as this will help the plant direct its energy towards producing more leaves and roots.
By cutting back new growth regularly, you’ll encourage the chives to focus on developing a robust root system and producing healthy new shoots. This will also make it easier to divide the plants when they become too crowded. For example, if your chives are showing signs of becoming leggy or sparse, cut them back by about one-third every few weeks to maintain their shape.
Remember, this process is not just about aesthetics; it’s also crucial for promoting healthy division and preventing the spread of disease. By keeping your chives well-maintained through regular cutting back, you’ll be rewarded with a lush, vibrant crop that will continue to thrive for years to come.
Separating Chive Clumps
To separate individual chive clumps, you’ll want to be gentle and deliberate. Start by carefully loosening the soil around each cluster with a fork or your fingers, working from the outside inwards. This will help prevent accidentally breaking off fragile roots.
Once the soil is loose, use your fingers or a blunt tool like a chopstick to gently tease apart the individual chives. Be patient and take your time, as this can be a bit fiddly. It’s better to separate them slowly than risk damaging the delicate roots.
If you encounter any stubborn clumps, try soaking the soil in water for about 30 minutes before attempting to separate them again. This will help loosen the dirt and make it easier to gently pry the chives apart.
Remember that chive stems can be brittle, so handle them with care. If you do accidentally snap a stem, simply trim it off at the base of the plant and new growth should emerge soon. By separating your chives carefully and patiently, you’ll be able to enjoy healthy, thriving plants for years to come.
Post-Division Care and Maintenance
After dividing your chives, it’s essential to provide them with proper care and maintenance to ensure they thrive and continue to produce new growth. In this next step, we’ll cover the key considerations for post-division care.
Replanting Divided Chives
When replanting divided chives in their new location, it’s essential to provide them with the right conditions to thrive. Start by preparing the soil, making sure it’s well-draining and rich in organic matter. Chives prefer a slightly acidic to neutral pH, between 6.0 and 7.0. You can test your soil pH using a DIY kit or consult a local nursery for recommendations.
Once you’ve prepared the soil, gently remove any dead or damaged leaves from the divided chives, taking care not to damage the roots. Plant them in their new location at the same depth as they were before division, with the crown (where the stem meets the roots) just above the soil surface. Water thoroughly after planting, and keep the soil consistently moist during the first few weeks.
Watering tips are crucial when replanting divided chives. Aim to provide about 1-2 inches of water per week, either through rainfall or irrigation. Avoid overwatering, which can lead to root rot and other problems. With proper care, your newly replanted chives should establish themselves quickly and begin producing delicious leaves in no time.
Aftercare for Newly Planted Chives
After dividing your chives, it’s essential to provide them with proper aftercare to ensure they establish themselves well and thrive. Monitoring for pests is crucial during this period as newly divided chives can be more susceptible to attacks from aphids, spider mites, and other common garden pests.
Regularly inspect your chives for signs of infestation, such as yellowing leaves or white powdery patches on the stems. If you notice any issues, treat your chives with a gentle pesticide specifically designed for edible plants. For example, neem oil can be an effective natural remedy against aphids and other pests.
In addition to pest control, keep an eye out for nutrient deficiencies and diseases. Chives require well-draining soil and full sun to partial shade, so ensure they’re receiving the right conditions to grow. Also, maintain a regular watering schedule, but avoid overwatering which can lead to root rot and other problems.
Keep your chives healthy by providing them with essential nutrients through compost tea or a balanced fertilizer. This will also promote root development and help establish a strong foundation for future growth. By paying attention to these details, you’ll set your newly divided chives up for success and enjoy a bountiful harvest in the coming months.
Chive Care Tips
To keep your chives healthy and thriving after division, it’s essential to maintain good care habits. Regular watering is crucial, especially during hot summer months when chives tend to dry out quickly. Aim for about 1 inch of water per week, either through rainfall or irrigation.
Prune your chives regularly to encourage bushy growth and prevent them from flowering too soon. Pinch off flower buds as they form to redirect energy towards foliage production. This will also help you enjoy the fresh flavor of chives throughout their growing season.
Another key aspect of post-division care is providing the right conditions for your chives. Make sure they’re planted in well-draining soil with a pH between 6.0 and 7.0, which is slightly acidic to neutral. Most gardeners also recommend providing partial shade, especially during extreme heatwaves.
To ensure healthy growth, rotate your chive bed every few months to avoid nutrient depletion in the soil. You can also repurpose kitchen scraps like onion peels or fish heads as fertilizer.
Common Issues and Solutions
As you start growing chives, you may encounter some problems that can be frustrating. In this section, we’ll address common issues and provide practical solutions to keep your chive garden thriving.
Pests and Diseases
When dividing chives, it’s essential to be aware of common pests and diseases that can affect these fragrant herbs. Aphids, tiny sap-sucking insects, are notorious for infesting chive plants, causing curled or distorted leaves. To control aphid populations, use neem oil or insecticidal soap sprays on affected areas. Another pest to watch out for is slugs and snails, which can chew holes in leaves and stems at night. Use copper tape or crushed eggshells around plant beds to deter these pests.
Diseases like powdery mildew and root rot are also common chive afflictions. Powdery mildew appears as a white, powdery coating on leaves, while root rot causes plants to wilt and eventually die. To prevent these diseases, ensure good air circulation around your chives by spacing them 6-8 inches apart. Regularly inspect plants for signs of disease and remove any affected areas. Water chives in the morning to allow excess water to evaporate before nightfall, reducing the risk of root rot.
Chive Growth Problems
When it comes to growing chives, you may encounter some common growth problems that can be frustrating and affect the overall health of your plants. Stunted growth, leaf loss, and yellowing leaves are just a few issues that chive growers often face.
One potential cause of stunted growth is over-watering or under-watering. Chives need consistent moisture, but they don’t like to sit in waterlogged soil. Check the soil regularly and adjust your watering schedule accordingly. Make sure not to let the top inch of soil dry out completely between waterings.
Another common issue is pest infestations, such as aphids, spider mites, or thrips. These tiny pests can cause significant damage to your chives by sucking sap from the leaves or transmitting diseases. Inspect your plants regularly and use organic pest control methods whenever possible.
Environmental factors like temperature fluctuations, lack of light, or poor air circulation can also impact chive growth. Keep your plants in a spot with bright indirect light, maintain a consistent temperature between 65-75°F (18-24°C), and ensure good air circulation around the plants. By addressing these potential causes and adjusting your care routine accordingly, you should be able to resolve common growth problems and keep your chives healthy and thriving.
Harvesting Chives After Division
Now that you’ve divided and replanted your chive clumps, it’s time to harvest those delicious, fragrant leaves and enjoy the fruits of your labor. Here’s how to do it successfully.
Optimal Harvest Time
When it comes to harvesting chives after division, timing is everything. The optimal harvest time will depend on your personal preferences for flavor, texture, and nutritional content. Generally, you can start harvesting chives within 60-90 days of division. However, if you prefer a stronger onion-like flavor, wait until the leaves reach about 6 inches in height.
As chives grow, their flavor profile changes. The younger leaves tend to be milder and more delicate, while older leaves develop a pungent flavor similar to onions. If you want to retain the delicate flavor, harvest individual stalks as needed or cut off the tips of the stems to encourage bushy growth. This will help maintain the plant’s overall appearance and prevent it from flowering.
For maximum nutritional benefits, aim to harvest chives when they’re at their peak. Chive leaves are rich in vitamins A and K, potassium, and fiber. Harvesting them regularly will also promote continued growth and prevent the plant from seed production, which can divert energy away from leaf production.
Tips for Long-Term Harvests
To promote long-term harvests from your divided chives, it’s essential to adopt a few simple strategies. First, prune your chive plants regularly to encourage bushy growth and prevent flowering. This will direct the plant’s energy towards producing more leaves rather than seeds. Prune off any flower stalks as soon as they appear, leaving about an inch of stem intact.
Another key factor is fertilizing. Feed your chives with a balanced fertilizer during the growing season, ideally once a month. You can also side-dress with compost or well-rotted manure for added nutrients. This will help sustain their growth and promote healthy foliage.
Companion planting is another effective way to boost harvests. Chives pair well with many vegetables, such as tomatoes, carrots, and potatoes. Plant them alongside each other in your garden beds to create a mutually beneficial environment. For example, chives repel aphids that target tomato plants, while their onion-like flavor improves the taste of nearby vegetables.
By implementing these simple techniques, you can enjoy an extended harvest season from your divided chives. With proper care and attention, they’ll continue to produce fresh, fragrant leaves for months to come.
Frequently Asked Questions
How Often Should I Divide Chives to Maintain Their Potency?
Divide chives every 3-4 years to maintain their potency and prevent overcrowding. This will also encourage new growth and promote healthy root development.
Can I Divide Chives in the Winter or Spring, or Is Summer Best?
The best time for division is in early spring or summer when the plant is actively growing. Avoid dividing during winter months when the plant is dormant, as this can cause stress to the roots.
What Happens If I Don’t Remove Old Growth When Dividing Chives?
If you don’t remove old growth when dividing chives, it can lead to overcrowding and reduced potency. Regularly removing old growth will encourage new shoots to develop and maintain a healthy balance between old and new growth.
Can I Use the Same Potting Mix for Both Young and Mature Chive Plants?
Yes, you can use the same potting mix for both young and mature chive plants. However, it’s essential to ensure the soil has good drainage and is rich in organic matter to promote healthy root development and prevent waterlogged conditions.
How Do I Propagate New Chives from Divided Clumps?
To propagate new chives from divided clumps, gently separate individual shoots or roots, making sure each section has at least one growing tip. Plant them immediately in well-draining soil with a mix of compost or fertilizer to promote healthy growth and establish a robust root system.